web.conf
<VirtualHost *:80>
WSGIScriptAlias / /var/www/datacn/datacn/wsgi.py
Alias /static/ /var/www/datacn/static/

ServerName 192.168.1.49
#ServerName example.com
#ServerAlias www.example.com

<Directory /var/www/datacn/static>
    Options Indexes  FollowSymLinks
    AllowOverride None
    Require all granted
</Directory>

<Directory /var/www/datacn/>
    Require all granted
</Directory>
ErrorLog   /etc/httpd/logs/datacn.error.log
LogLevel warn
</VirtualHost>
升级pip
因为python3.5自带pip,setuptools
/usr/python3.5/bin/pip3 install --upgrade pip

ln -s /usr/python3.5/bin/pip3 /usr/bin/pip3
参考:http://www.cnblogs.com/edward2013/p/5289056.html
参考:http://www.cnblogs.com/starof/p/4685132.html
centos下安装pip时失败:
[root@wfm ~]# yum -y install pip
Loaded plugins: fastestmirror, refresh-packagekit, security
Loading mirror speeds from cached hostfile
* base: mirrors.tuna.tsinghua.edu.cn
* extras: mirrors.tuna.tsinghua.edu.cn
* updates: mirrors.tuna.tsinghua.edu.cn
Setting up Install Process
No package pip available.
Error: Nothing to do
解决方法:
需要先安装扩展源EPEL。
EPEL(http://fedoraproject.org/wiki/EPEL) 是由 Fedora 社区打造,为 RHEL 及衍生发行版如 CentOS、Scientific Linux 等提供高质量软件包的项目。
首先安装epel扩展源:
sudo yum -y install epel-release

然后再安装pip
~]# sudo yum -y install python-pip
Loaded plugins: fastestmirror, refresh-packagekit, security
Loading mirror speeds from cached hostfile
epel/metalink | 4.9 kB 00:00
* base: mirrors.tuna.tsinghua.edu.cn
* epel: mirrors.neusoft.edu.cn
* extras: mirrors.tuna.tsinghua.edu.cn
* updates: mirrors.tuna.tsinghua.edu.cn
epel | 4.3 kB 00:00
epel/primary_db | 5.8 MB 00:07
Setting up Install Process
Resolving Dependencies
--> Running transaction check
---> Package python-pip.noarch 0:7.1.0-1.el6 will be installed
--> Processing Dependency: python-setuptools for package: python-pip-7.1.0-1.el6.noarch
--> Running transaction check
---> Package python-setuptools.noarch 0:0.6.10-3.el6 will be installed
--> Finished Dependency Resolution
Dependencies Resolved
================================================================
Package Arch Version Repository
Size
================================================================
Installing:
python-pip noarch 7.1.0-1.el6 epel 1.5 M
Installing for dependencies:
python-setuptools noarch 0.6.10-3.el6 base 336 k
Transaction Summary
================================================================
Install 2 Package(s)
Total download size: 1.9 M
Installed size: 8.1 M
Downloading Packages:
(1/2): python-pip-7.1.0-1.el6.noarch.rpm | 1.5 MB 00:01
(2/2): python-setuptools-0.6.10-3.el6.no | 336 kB 00:00
----------------------------------------------------------------
Total 755 kB/s | 1.9 MB 00:02
warning: rpmts_HdrFromFdno: Header V3 RSA/SHA256 Signature, key ID 0608b895: NOKEY
Retrieving key from file:///etc/pki/rpm-gpg/RPM-GPG-KEY-EPEL-6
Importing GPG key 0x0608B895:
Userid : EPEL (6) <epel@fedoraproject.org>
Package: epel-release-6-8.noarch (@extras)
From : /etc/pki/rpm-gpg/RPM-GPG-KEY-EPEL-6
Running rpm_check_debug
Running Transaction Test
Transaction Test Succeeded
Running Transaction
Installing : python-setuptools-0.6.10-3.el6.noarch 1/2
Installing : python-pip-7.1.0-1.el6.noarch 2/2
Verifying : python-pip-7.1.0-1.el6.noarch 1/2
Verifying : python-setuptools-0.6.10-3.el6.noarch 2/2
Installed:
python-pip.noarch 0:7.1.0-1.el6
Dependency Installed:
python-setuptools.noarch 0:0.6.10-3.el6
Complete!
OK 成功!
pip install --upgrade pip
[root@bogon httpd]# pip install django
Collecting django
  Downloading Django-1.11.1-py2.py3-none-any.whl (6.9MB)
    100% |████████████████████████████████| 7.0MB 116kB/s
Collecting pytz (from django)
  Downloading pytz-2017.2-py2.py3-none-any.whl (484kB)
    100% |████████████████████████████████| 491kB 191kB/s
Installing collected packages: pytz, django
Successfully installed django-1.11.1 pytz-2017.2
You are using pip version 8.1.2, however version 9.0.1 is available.
You should consider upgrading via the 'pip install --upgrade pip' command.
[root@bogon httpd]# pip install --upgrade pip
Collecting pip
  Downloading pip-9.0.1-py2.py3-none-any.whl (1.3MB)
    100% |████████████████████████████████| 1.3MB 462kB/s
Installing collected packages: pip
  Found existing installation: pip 8.1.2
    Uninstalling pip-8.1.2:
      Successfully uninstalled pip-8.1.2
Successfully installed pip-9.0.1
一、安装httpd服务
apache在centos7中是Apache HTTP server。如下对httpd的解释就是Apache HTTP Server。所以想安装apache其实是要安装httpd。
httpd.x86_64 : Apache HTTP Server
安装:
# yum install httpd
设置httpd服务开机启动
[root@yl-web httpd]# /sbin/chkconfig httpd on
Note: Forwarding request to 'systemctl enable httpd.service'.
ln -s '/usr/lib/systemd/system/httpd.service' '/etc/systemd/system/multi-user.target.wants/httpd.service'
启动httpd服务
[root@yl-web httpd]# /sbin/service httpd start
Redirecting to /bin/systemctl start  httpd.service
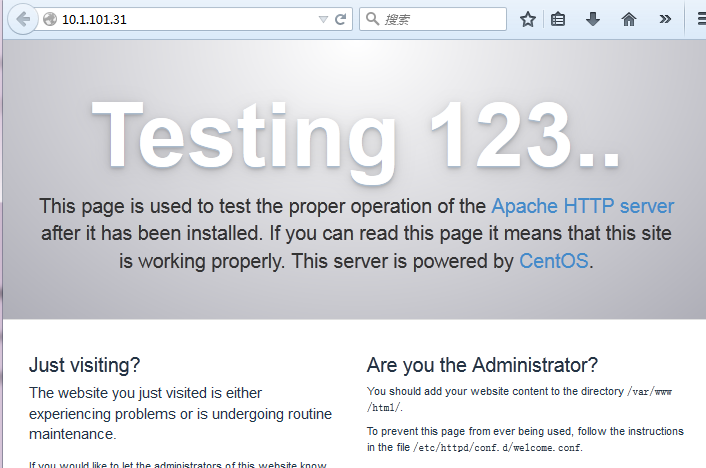
访问ip验证一下,成功!
二、配置
httpd默认的配置文件目录为
[root@yl-web httpd]# cd /etc/httpd/
[root@yl-web httpd]# ls
conf  conf.d  conf.modules.d  logs  modules  run
主配置文件是/etc/httpd/conf/httpd.conf。
配置存储在的/etc/httpd/conf.d/目录。
1、主配置文件
看一下主配置文件httpd.conf里有用的配置项

#服务器根目录
ServerRoot "/etc/httpd"

#端口
#Listen 12.34.56.78:80
Listen 80

#域名+端口来标识服务器,没有域名用ip也可以
#ServerName www.example.com:80

#不许访问根目录
<Directory />
    AllowOverride none
    Require all denied
</Directory>

# 文档目录
DocumentRoot "/var/www/html"

# 对 /var/www目录访问限制
<Directory "/var/www">
    AllowOverride None
    # Allow open access:
    Require all granted
</Directory>

# 对/var/www/html目录访问限制
<Directory "/var/www/html">
   Options Indexes FollowSymLinks
   AllowOverride None
   Require all granted
</Directory>

# 默认编码
AddDefaultCharset UTF-8

#EnableMMAP off
EnableSendfile on

# include进来其它配置文件

IncludeOptional conf.d/*.conf
2、下载配置mod_wsgi
安装mod_wsgi前先进行apache的apxs扩展
http-devel 是为了apxs,yum后你可以whereis apxs去寻找他,然后后边编译使用。
# yum install -y httpd-devel
下载
[root@yl-web collectedstatic]# yum install mod_wsgi
在httpd.conf中增加下面配置:
LoadModule wsgi_module modules/mod_wsgi.so
该配置用来连接django.wsgi,使工程被apache加载。
配置django wsgi
在项目目录下新建wsgi,里面新建django.wsgi,内容如下
import os
import sys
import django.core.handlers.wsgi
from django.conf import settings

# Add this file path to sys.path in order to import settings
sys.path.insert(0, os.path.join(os.path.dirname(os.path.realpath(__file__)), '..'))

os.environ['DJANGO_SETTINGS_MODULE'] = 'lxyproject.settings'

sys.stdout = sys.stderr

DEBUG = True

application = django.core.handlers.wsgi.WSGIHandler()
配置wsgi时,
- 必须配置项目路径到系统路径中,因为要通过项目路径找到settings.py配置文件。也就是sys.path.insert(0, os.path.join(os.path.dirname(os.path.realpath(__file__)), '..'))。
- DJANGO_SETTINGS_MODULE必须指向项目的settings.py文件。
修改了wsgi的配置后必须重启httpd服务。
3、配置django项目虚拟主机
在/etc/httpd/conf.d中添加配置文件lxyproject.conf,内容如下
<VirtualHost *:80>

WSGIScriptAlias / /srv/lxyproject/wsgi/django.wsgi
Alias /static/ /srv/lxyproject/collectedstatic/

ServerName 10.1.101.31
#ServerName example.com
#ServerAlias www.example.com

<Directory /srv/lxyproject/collectedstatic>
    Options Indexes  FollowSymLinks
    AllowOverride None
    Require all granted
</Directory>

<Directory /srv/lxyproject/wsgi/>
    Require all granted
</Directory>
ErrorLog   /etc/httpd/logs/lxyproject.error.log
LogLevel warn
</VirtualHost>
其中
-
WSGIScriptAlias 直接告诉apache,这个虚拟主机中,请求/就交给WSGI处理,也就是项目中配置的django.wsgi会指明。
-
Alias 说明访问/static/直接从DocumentRoot中获取,而无需经过WSGI处理。
现在就可以通过apache服务器配置的IP访问django项目了。
django安装mysqlclient组件遇到的问题:
centos7 解决 Python.h:没有那个文件或目录 错误的方法
sudo yum install python-devel
/usr/python3.5/bin/pip3 install --upgrade pip

ln -s /usr/python3.5/bin/pip3 /usr/bin/pip3

/usr/python3.5/lib/python3.5/site-packages

ln -s /usr/python3.5/lib/python3.5/site-packages/django/bin/django-admin.py    /usr/bin/django-admin.py


ln -s /usr/python3.5/bin/python3.5 /usr/bin/python


ln -s /usr/python3.5/bin/pip3 /usr/bin/pip3
安装mysqlclient报错:
Command "python setup.py egg_info" failed with error code 1 in /tmp/pip-build-ue65k1mc/mysqlclient/
yum install mysql-devel