阅读目录
- 在Asp.Net Core 中使用外部登陆(google、微博...)
- 中间件管道
- The Authentication Middleware
- The Challenge
- 与认证中间件进行交互
- 中间件交互示例
- 使用外部登陆提供器中间件
- 使用额外的Cookie中间件来启用中间认证步骤
- OAuth2简述
- ASP.NET Identity 是怎么做的?
在Asp.Net Core 中使用外部登陆(google、微博...)
为了能够使用google、facebook、twitter、微博等外部登陆提供程序,从而避免创建本地账户以及电子邮件验证等繁琐步骤,我们一般会引用到外部登陆服务,将验证用户身份的任务委托给他们。外部验证最为流行的协议就是OAuth2和OpenId Connect。
在Asp.Net中使用外部登陆提供商的文档非常少,更糟糕的是当地使用“File -> New Project”创建项目所生成的模板代码也很复杂,并不容易看得懂然后照着做。而且如果你不了解身份认证中间件在Asp.Net中是如何工作的,那么基本上是不可能弄懂那些模板代码的。
为了真正了解如何在Asp.Net中使用外部登陆,那么必须先理解中间件管道以及特定的身份认证中间件是如何工作的,以及一点OAuth协议。
本博客文章解释了所有这些部分是如何组合在一起的,并提供了有关如何利用身份验证中间件和外部登录提供程序本身和结合ASP.NET Core Identity的示例。
当一个请求进入Asp.Net Core程序,请求会通过由中间件组成的中间件管道。管道中的每个中间件都“有机会(译者注:如果一个中间件短路了那么后续的中间件就没机会了)”检查、处理请求,传递到下一个中间件,然后在后面的中间件都执行之后再做些额外的操作。
管道在Startup类中的Config方法中定义,下面是一个添加到管道中的中间件的例子:
public void Configure(IApplicationBuilder app, IHostingEnvironment env, ILoggerFactory loggerFactory)
{
    app.Use(async (HttpContext context, Func<Task> next) =>
    {
        // 在执行下一个中间件之前做些事
        await next.Invoke(); // 下一个中间件做的事
        // 在执行下一个中间件之后做些事
    });
}
需要注意的一件重要的事情是所有的中间件都可以访问HttpContext的实例。
通过这个HttpContext实例,他们可以向其它的中间件“发送”信息。例如,如果管道末端的中间件通过执行类似HttpContext.Items[“LoginProvider”] =“Google”的方式来更改HttpContext,则所有位于其之前的中间件都将能够访问该值。
另一个重要的事情是,任何中间件都可以停止管道(短路),即它可以选择不调用下一个中间件。这对外部登录提供程序(external login provider)尤其重要。
例如,如果你用Google作为你的外部登录提供程序,则用户将在成功验证后重定向到http://YourAppDomain.com/signin-google。如果你已经尝试了(使用默认的Visual Studio模板生成的代码)使用外部登录提供程序(本例子使用的是Google),那么你可能已经注意到没有Controller 或者Action,或者看起来没有其他任何响应上述URL的内容。
发生了什么呢?其实 GoogleAuthentication 中间件查找该URL,并且当它发现它时 GoogleAuthentication 中间件将“接管”请求,然后也不会调用管道中的任何其他中间件,即MVC中间件。
作为这种行为的结果,中间件运行的顺序非常重要。
想象一下,你的程序支持多个外部登录提供程序(例如Facebook和Google)的情况。当他们运行时,需要有一个中间件,即 CookieAuthentication 中间件,它能够将他们放入HttpContext中的信息转换成代表登录用户的cookie(本文后面给出了示例)。
使中间件成为认证中间件的原因是它继承了一个名为AuthenticationMiddleware的类,这个类只是创建一个AuthenticationHandler。大部分身份认证功能都在AuthenticationHandler里面。
尽管我们不打算描述如何创建自己的身份验证中间件,我们将描述身份验证中间件如何进行交互,以及当你有多个认证中间件在管道中时,他们如何相互交互。
在添加AuthenticationMiddleware时,你最少要指定三个值
- AuthenticationScheme
- AutomaticAuthenticate 标志
- AutomaticChallenge 标志
你可以将 AuthenticationScheme 视为身份验证中间件的名称。 在以前的ASP.NET版本中,这被称为authentication type。
AutomaticAuthenticate 标志指定管道中的中间件应该在它拿到请求时就立即“认证”用户。例如,如果使用 AutomaticAuthenticate = true 将cookie 中间件添加到管道,则会在请求中查找 authentication cookie,并使用它创建 ClaimsPrincipal 并将其添加到 HttpContext 。顺便说一句,这就是让用户“登录”的原因(在ASP.NET Core 2.X中,用户登录,其实就是调用HttpContext.SignInAsync,来登录设置为DefaultAuthenticateScheme的cookie中间件,这会使得HttpContext.User.Identity.IsAuthenticated变为true,详情可参考这里)。
如果你要使用 AutomaticAuthenticate = false 设置 cookie 中间件,并且在该cookie中间件的请求中有一个 authentication cookie,则用户不会自动“登录”(也就是说在ASP.NET Core 2.X中,调用HttpContext.SignInAsync,来登录不为DefaultAuthenticateScheme的cookie中间件,不会使用户登录)。
在以前的ASP.NET版本中,具有 AutomaticAuthenticate = true 的认证中间件被称为active认证中间件,而 AutomaticAuthenticate = false 被称为passive认证中间件。
你可以“Challenge”一个身份验证中间件。这是一个在ASP.NET Core之前不存在的新术语。我不知道把它称为Challenge的原因,所以我不会试图描述为什么这样叫。相反,我会给你一些中间件被“Challenged”时会发生什么事情的例子。
译者注: challenge 有 挑战的意思,也有 质疑,质询,对...质询的意思,记住它的其他意思,会对你理解下文有帮助
例如,Cookie中间件在“Challenged”时会将用户重定向到登录页面。Google身份验证中间件返回302响应,将用户重定向到Google的OAuth登录页面。通常challenge 认证中间件,你需要给它命名(通过它的AuthenticationScheme属性)。例如,要challenge 一个带有 AuthenticationScheme =“Google” 身份验证中间件,你可以在controller action 中执行此操作:
public IActionResult DoAChallenge()
{
    return Challenge("Google");
}
但是,你可以发出一个"naked"的challenge(即不给challenge方法传任何参数Challenge()),然后具有AutomaticChallenge = true的认证中间件将是被选中的认证中间件,用户将被定向到该认证中间件设置的登录页面。
在ASP.NET Core 2.X中还可以通过HttpContext来调用HttpContext.ChallengeAsync方法来发起一个challenge,这样HttpResponse会被自动设置为302状态,然后客户端浏览器收到Http响应后会做相应的重定向跳转,如果你在ASP.NET Core的中间件管道中想发起一个challenge,就可以采用这种方法。
注意
请不要去challenge一个不存在的scheme,如果调用HttpContext.ChallengeAsync方法时(或在Controller的Action中return Challenge、return new ChallengeResult时)传入的scheme名字,在ASP.NET Core项目Startup类的ConfigureServices方法中都没注册,也就是说该scheme压根就不存在,那么HttpContext.ChallengeAsync方法(return Challenge、return new ChallengeResult)会抛出异常,所以不要尝试去challenge一个不存在的scheme。
例如如果代码HttpContext.ChallengeAsync("ApplicationCookie")、return Challenge("ApplicationCookie")或return new ChallengeResult("ApplicationCookie")中的"ApplicationCookie"这个scheme不存在,那么就会引发异常
Challenge只是可以在认证中间件上“执行(performed)”的操作之一。The others are Authenticate, SignIn and SignOut.
例如,如果你向身份验证中间件“发起(issue)” 身份验证(Authenticate )操作(假设此示例在controller action中):
ASP.NET Core 1.X
var claimsPrincipal = await context.Authentication.AuthenticateAsync("ApplicationCookie");
ASP.NET Core 2.X
AuthenticateResult authenticateResult = await HttpContext.AuthenticateAsync("ApplicationCookie");
var claimsPrincipal = authenticateResult.Principal;
译者注:context.Authentication.AuthenticateAsync在2.0中已经过时,只需将其修改为context.AuthenticateAsync即可,不过返回值类型已经由 ClaimsPrincipal 变为 AuthenticateResult ,不过AuthenticateResult中含有 ClaimsPrincipal, 参考信息
注意
在上面 ASP.NET Core 2.X 的代码中,如果HttpContext.AuthenticateAsync("ApplicationCookie")验证scheme "ApplicationCookie"失败,那么其返回的AuthenticateResult对象authenticateResult的Succeeded属性(该属性是bool类型)会为false,且authenticateResult的Principal属性会为null。相反如果HttpContext.AuthenticateAsync("ApplicationCookie")验证scheme "ApplicationCookie"成功,那么其返回的AuthenticateResult对象authenticateResult的Succeeded属性(该属性是bool类型)会为true
但是这里所述的HttpContext.AuthenticateAsync("ApplicationCookie")验证scheme "ApplicationCookie"成功或失败,是基于"ApplicationCookie"这个scheme存在的情况下得到的结果。如果HttpContext.AuthenticateAsync方法传入的scheme名字,在ASP.NET Core项目Startup类的ConfigureServices方法中都没注册,也就是说该scheme压根就不存在,那么HttpContext.AuthenticateAsync方法会抛出异常,所以不要尝试用HttpContext.AuthenticateAsync去验证一个不存在的scheme。
例如如果上面代码HttpContext.AuthenticateAsync("ApplicationCookie")中的"ApplicationCookie"这个scheme不存在,那么就会引发异常
这将导致中间件尝试认证并返回一个ClaimsPrincipal。例如,cookie中间件会在请求中查找cookie,并使用cookie中包含的信息构建 ClaimsPrincipal 和 ClaimsIdentity 。
一般来讲,如果给认证中间件配置了AutomaticAuthenticate = false ,那么你需要手动发起认证。
也可以发起(issue)SignIn:
ASP.NET Core 1.X
await context.Authentication.SignInAsync("ApplicationCookie", claimsPrincipal);
ASP.NET Core 2.X
await HttpContext.SignInAsync("ApplicationCookie", claimsPrincipal);
译者注:这个也过时了,参考上一个
注意
在上面 ASP.NET Core 2.X 的代码中,如果HttpContext.SignInAsync方法传入的scheme名字,在ASP.NET Core项目Startup类的ConfigureServices方法中都没注册,也就是说该scheme压根就不存在,那么HttpContext.SignInAsync方法会抛出异常,所以不要尝试去HttpContext.SignInAsync一个不存在的scheme。
例如如果上面代码HttpContext.SignInAsync("ApplicationCookie", claimsPrincipal)中的"ApplicationCookie"这个scheme不存在,那么就会引发异常
如果“ApplicationCookie”是一个cookie中间件,它将修改响应,以便在客户端创建一个cookie。该cookie将包含重新创建作为参数传递的 ClaimsPrincipal 所需的所有信息。
最后,SignOut,例如,cookie中间件将删除标识用户的cookie。下面这段代码展示了如何在名为“ApplicationCookie”的身份验证中间件上调用注销(sign out)的示例:
ASP.NET Core 1.X
await context.Authentication.SignOutAsync("ApplicationCookie"/*这里是中间件的AuthenticationScheme*/);
ASP.NET Core 2.X
await HttpContext.SignOutAsync("ApplicationCookie"/*这里是中间件的AuthenticationScheme*/);
译者注:这个也过时了,参考上一个
注意
在上面 ASP.NET Core 2.X 的代码中,如果HttpContext.SignOutAsync方法传入的scheme名字,在ASP.NET Core项目Startup类的ConfigureServices方法中都没注册,也就是说该scheme压根就不存在,那么HttpContext.SignOutAsync方法会抛出异常,所以不要尝试去HttpContext.SignOutAsync一个不存在的scheme。
例如如果上面代码HttpContext.SignOutAsync("ApplicationCookie")中的"ApplicationCookie"这个scheme不存在,那么就会引发异常。但是如果"ApplicationCookie"这个scheme存在,只是现在"ApplicationCookie"并没有被认证和登录,那么调用HttpContext.SignOutAsync("ApplicationCookie")是不会抛出异常的,只是什么都不会发生而已。
如果没有示例,那么很难想象这些东西是如何组合在一起的,接下来将展示一个使用cookie身份验证中间件的简单示例。
使用 cookie 认证中间件登陆用户
以下是Cookie身份验证和MVC中间件的设置:
ASP.NET Core 1.X
public void Configure(IApplicationBuilder app, IHostingEnvironment env, ILoggerFactory loggerFactory)
{
    app.UseCookieAuthentication(new CookieAuthenticationOptions{
        AuthenticationScheme = "MyCookie",
        AutomaticAuthenticate = true,
        AutomaticChallenge = true,
        LoginPath = new PathString("/account/login")
    });

    app.UseMvcWithDefaultRoute();
}
ASP.NET Core 2.X
public void ConfigureServices(IServiceCollection services)
{
    services.AddAuthentication(o =>
    {
        o.DefaultScheme = "MyCookie";
        o.DefaultChallengeScheme = "MyCookie";
    })
    .AddCookie("MyCookie", o =>
    {
        o.LoginPath = new PathString("/account/login");
    });

    services.AddMvc();
}

public void Configure(IApplicationBuilder app, IHostingEnvironment env)
{
    app.UseAuthentication();

    app.UseMvc(routes =>
    {
        routes.MapRoute(
            name: "default",
            template: "{controller=Home}/{action=Index}/{id?}");
    });
}
当一个请求到达配置了这个管道的ASP.NET Core应用程序时,会发生什么情况呢?cookie身份验证中间件将检查请求并查找cookie。这是因为认证中间件配置了AutomaticAuthenticate = true。如果cookie位于请求中,则将其解密并转换为ClaimsPrincipal并在将其设置到HttpContext.User上。之后,cookie中间件将调用管道中的下一个中间件,本例中是MVC。如果cookie不在请求中,cookie中间件将直接调用MVC中间件。
如果用户执行了带有[Authorize]属性注释的controller action 请求,且用户未登录(即未设置HttpContext.User),例如:
[Authorize]
public IActionResult ActionThatRequiresAnAuthenticatedUser()
{
    //...
}
一个 challenge 会被发起(issue),并且含有 AutomaticChallenge = true的认证中间件会处理它。cookie中间件通过将用户重定向到LoginPath(将状态码设为302,和Location 头设为/account/login)来响应challenge。
或者,如果你的身份验证中间件未设置为AutomaticChallenge = true,并且你想“challenge”它,则可以指定AuthenticationScheme:
ASP.NET Core 1.X
[Authorize(ActiveAuthenticationSchemes="MyCookie")]
public IActionResult ActionThatRequiresAnAuthenticatedUser()
{
    //...
}
ASP.NET Core 2.X
[Authorize(AuthenticationSchemes = "MyCookie")]
public IActionResult ActionThatRequiresAnAuthenticatedUser()
{
    //...
}
译者注:ActiveAuthenticationSchemes已经过时,使用AuthenticationSchemes替换
为了涵盖所有可能的方式来发出challenge,你也可以使用控制器中的Challenge方法:
public IActionResult TriggerChallenge()
{
    return Challenge("MyCookie");
}
用这种方法手动发起challenge时需要注意一件重要事。如果你对身份验证中间件(例如“MyCookie”)发出了一个challenge,然后身份验证中间件“将用户登入”(在这种情况下,请求中有一个对应这个中间件的cookie),那么中间件会将challenge作为响应未经授权的访问,并将用户重定向到/Account/AccessDenied。你可以通过在项目Startup类的ConfigureServices方法中,用CookieAuthenticationOptions的AccessDeniedPath属性来更改该路径,如下所示:
ASP.NET Core 2.X
services.AddAuthentication(o =>
{
    o.DefaultScheme = "MyCookie";
    o.DefaultChallengeScheme = "MyCookie";
})
.AddCookie("MyCookie", o =>
{
    o.LoginPath = new PathString("/account/login");
    o.AccessDeniedPath = new PathString("/Account/AccessDenied");
});
这背后的原因是,如果用户已经登录,并且向签入该用户的中间件发出challenge,则这意味着用户没有足够的权限(例如,不具有所需的角色)。
以前版本的ASP.NET中的行为是将用户重定向回登录页面。但是,如果使用外部登录提供程序,则会造成问题。
外部登录提供程序会“记住”你已经登录。这就是为什么如果你已经登录到Facebook,并且你使用了一个允许你登录Facebook的网络应用,你将被重定向到Facebook,然后立即返回到网络应用(假设你已经授权在Facebook的网络应用程序)。如果你没有足够的权限,可能会导致重定向循环。因此,在这些情况下,为了避免导致重定向循环,ASP.NET Core中的身份验证中间件会将用户重定向到拒绝访问页面。
依赖外部登录提供程序时,最简单的设置是配置一个cookie身份验证中间件,负责对用户进行登陆。然后再配置一个我们要使用的特定外部登录提供程序的中间件。
如果我们想要使用Google登陆,我们可以像这样配置我们的管道:
ASP.NET Core 1.X
public void Configure(IApplicationBuilder app, IHostingEnvironment env, ILoggerFactory loggerFactory)
{
    app.UseCookieAuthentication(new CookieAuthenticationOptions{
        AuthenticationScheme = "MainCookie",
        AutomaticAuthenticate = true,
        AutomaticChallenge = false
    });

    app.UseGoogleAuthentication(new GoogleOptions{
        AuthenticationScheme = "Google",
        ClientId = "YOUR_CLIENT_ID",
        ClientSecret = "YOUR_CLIENT_SECRET",
        CallbackPath = new PathString("/signin-google"),
        SignInScheme = "MainCookie"
    });

    app.UseMvcWithDefaultRoute();
}
ASP.NET Core 2.X
public void ConfigureServices(IServiceCollection services)
{
    services.AddAuthentication("MainCookie")
        .AddCookie("MainCookie", o =>
        {
            o.LoginPath = new PathString("/login");
        })
        .AddGoogle("Google", o =>
        {
            o.ClientId = "YOUR_CLIENT_ID";
            o.ClientSecret = "YOUR_CLIENT_SECRET";
            o.CallbackPath = new PathString("/signin-google");
            o.SignInScheme = "MainCookie";
        });

    services.AddMvc();
}

public void Configure(IApplicationBuilder app, IHostingEnvironment env)
{
    app.UseAuthentication();

    app.UseMvc(routes =>
    {
        routes.MapRoute(
            name: "default",
            template: "{controller=Home}/{action=Index}/{id?}");
    });
}
译者注:UseXyzAuthentication系列扩展方法已经过时,取而代之的是在ConfigService中的AddXyz()系列
每当有这个配置的请求进来,它将“通过”cookie中间件,cookie 中间件将检查它寻找一个属于他的cookie。cookie的名字决定了cookie是否属于特定的中间件。默认的是将AuthenticationScheme加上.AspNetCore.。所以对于MainCookie 这个cookie的名字就是.AspNetCore.MainCookie。

如果请求中没有cookie,cookie身份验证中间件只是调用管道中的下一个中间件。在这个例子中是Google身份验证中间件。我们在这个例子中将Google身份验证中间件命名为“Google”。当我们使用外部登录提供者时,提供者必须知道我们的Web应用程序。总会有一个步骤,外部登陆提供者让你注册你的应用程序,你会得到一个ID和一个Secret (我们稍后将会详细说明为什么需要这些东西)。在示例是ClientId和ClientSecret属性。
接下来我们定义了一个CallbackPath。当用户使用外部登录提供程序成功登录时,外部登录提供程序会发出重定向,以便将用户重定向回 发起登录进程的Web应用程序。CallbackPath 必须与外部登录提供程序将用户重定向到的位置 相匹配(稍后你会明白)。
最后,SignInScheme指定在认证成功后,Google认证中间件将使用哪一个AuthenticationScheme发起SignIn。
关于SignInScheme
我们在上面的代码中指定了Google认证中间件的SignInScheme为"MainCookie",它表示当用户从Google的OAuth2登录页成功登录并重定向回CallbackPath的URL地址后,Google认证中间件"Google"会使用Cookie认证中间件"MainCookie"作为载体,所以在随后的所有Http请求中,如果我们使用方法HttpContext.AuthenticateAsync("MainCookie")和HttpContext.AuthenticateAsync("Google"),去验证"MainCookie"和"Google"这两个AuthenticationScheme,它们都会返回验证成功处于登录状态。
然后我们使用方法HttpContext.SignOutAsync("MainCookie"),注销"MainCookie"这个AuthenticationScheme后,我们再用方法HttpContext.AuthenticateAsync("MainCookie")和HttpContext.AuthenticateAsync("Google"),去验证"MainCookie"和"Google"这两个AuthenticationScheme,这时它们都会返回验证失败处于非登录状态了,这就是因为"MainCookie"这个AuthenticationScheme现在被注销了,用户浏览器中的Cookie被清除了,所以"Google"这个AuthenticationScheme现在也随之被注销了。
但是我们如果使用方法HttpContext.SignOutAsync("Google"),试图只注销"Google"这个AuthenticationScheme是没有意义的,因为注销后我们会发现用方法HttpContext.AuthenticateAsync("MainCookie")和HttpContext.AuthenticateAsync("Google"),去验证"MainCookie"和"Google"这两个AuthenticationScheme,它们还是会返回验证成功都处于登录状态。这是因为此时Cookie认证中间件"MainCookie"并没有被注销,用户浏览器中的Cookie还是存在的,而我们指定了Google认证中间件的SignInScheme为"MainCookie",所以相当于Google认证中间件"Google"是随着Cookie认证中间件"MainCookie"的存在而存在,随着Cookie认证中间件"MainCookie"的注销而注销。
外部登录提供商中间件将“干预”请求的唯一情况是中间件被“challenged”或请求与CallbackPath匹配。
我们先来看看这个challenge。想象一下你有一个像这样的controller action:
public IActionResult SignInWithGoogle()
{
    var authenticationProperties = new AuthenticationProperties{
        RedirectUri = Url.Action("Index", "Home")
    };

    return Challenge(authenticationProperties, "Google");
}
当你发起challenge时,你可以指定AuthenticationProperties的一个实例。AuthenticationProperties类允许你指定用户在成功验证的情况下应该重定向到的其他选项(AuthenticationProperties类的RedirectUri属性,既可以是以"/"开头的绝对URI地址,例如:"/Home/Index",也可以是带主机域名的完全URI地址,例如:"https://www.abc.com/Home/Index")。当发出这个challenge时,Google Authentication 中间件会将响应状态代码更改为302然后重定向到Google的OAuth2登录URL。它看起来像这样:
https://accounts.google.com/o/oauth2/auth?response_type=code&client_id=YOUR_CLIENT_ID&redirect_uri=http%3A%2F%www.yourdomain.com%2Fsignin-google&scope=openid%20profile%20email&state=....
然后用户登录/授权Web应用程序,然后Google将其重定向回Web应用程序。例如,如果你在Google注册你的网络应用程序时将重定向URI定义为http://www.yourdomain.com/signin-google,那么在用户成功通过Google身份验证之后,他将被重定向到http://www.yourdomain.com/signin-google。
当请求到来时,如果配置正确,它将匹配 CallbackPath(/signin-google),然后Google Authentication 中间件将接管该请求。
这个请求看起来可能是这样:
http://www.yourdomain.com/signin-google?state=…&code=4/j5FtSwx5qyQwwl8XQgi4L6LPZcxxeqgMl0Lr7bG8SKA&authuser=0&session_state=…&prompt=none
查询字符串中的code值将用于向Google发出请求并获取有关用户的信息(这是OAuth2协议的一部分,将在下一部分中进行更详细的说明)。请注意,这是由Web应用程序向Google发送的请求。这对用户是透明的。通过对该请求(使用代码的那个)的响应,GoogleAuthentication中间件创建一个ClaimsPrincipal并调用配置中间件时提供的SignInScheme“登录”。最后,响应被更改为302重定向到challenge中的AuthenticationProperties中指定的重定向URL(在本例中是Home控制器中的Index aciton)。
注意
AuthenticationProperties中指定的重定向URL地址(在本例中是Home控制器中的Index aciton)在最初应该也是通过URL参数传递到Google的OAuth2登录页的,这样用户从Google登录后,重定向回http://www.yourdomain.com/signin-google时,AuthenticationProperties中指定的重定向URL地址(在本例中是Home控制器中的Index aciton)又会作为URL参数一起传回http://www.yourdomain.com/signin-google,然后GoogleAuthentication中间件才知道要再给客户端浏览器发一个302重定向跳转,才能最后跳转到AuthenticationProperties中指定的重定向URL地址(在本例中是Home控制器中的Index aciton)。
在上面Action方法SignInWithGoogle中调用Challenge方法时,如果调用的是没有AuthenticationProperties参数的重载return Challenge("Google"),那么其效果相当于是将当前执行Challenge方法时的Http请求URL,作为了AuthenticationProperties的RedirectUri属性,然后将该AuthenticationProperties传入了Challenge方法,那么当用户从Google登录后,重定向回http://www.yourdomain.com/signin-google时,GoogleAuthentication中间件会再将客户端浏览器重定向到执行return Challenge("Google")时的URL。这个行为可能看起来会很奇怪,但是仔细想想,大部分调用Challenge方法的原因都是ASP.NET Core中的Authorize拦截器拦截了某个URL,认为用户没有登录或权限不足,从而调用了Challenge方法,那么当用户从Google成功登录后,ASP.NET Core会让用户再次尝试访问前面由Authorize拦截器拦截的URL。
如果你曾尝试将默认Visual Studio模板与外部登录提供程序一起使用,那么你可能已经注意到,如果使用外部登录提供程序进行身份验证,则会将你带到要求你创建本地用户帐户的页面。
用户在登录之前必须经过这个中间步骤。
这是通过使用两个cookie身份验证中间件来实现的。
一个主动查找请求中的cookie,并登录用户(AutomaticAuthenticate = true)。这个通常被称为ApplicationCookie,或者在我们的例子中叫做MainCookie。而另一个是被动的(AutomaticAuthenticate = false,即它不会自动设置HttpContext.User与各个Cookie中的ClaimsIdentity用户)。这个通常被称为ExternalCookie,因为它是外部登录提供者发起“登录”的地方。
外部登录提供程序的SignInScheme设置为external cookie中间件(使用AutomaticAuthenticate = false配置的中间件),并设置RedirectUri到指定的controller action,由这个action“手动”调用该SignInScheme中的“Authentication”来发起challenge。
下面是示例:
ASP.NET Core 1.X
public void Configure(IApplicationBuilder app, IHostingEnvironment env, ILoggerFactory loggerFactory)
{
    app.UseCookieAuthentication(new CookieAuthenticationOptions{
        AuthenticationScheme = "MainCookie",
        AutomaticAuthenticate = true,
        AutomaticChallenge = false
    });

    app.UseCookieAuthentication(new CookieAuthenticationOptions{
        AuthenticationScheme = "ExternalCookie",
        AutomaticAuthenticate = false,
        AutomaticChallenge = false
    });

    app.UseGoogleAuthentication(new GoogleOptions{
        AuthenticationScheme = "Google",
        SignInScheme = "ExternalCookie",
        CallbackPath = new PathString("/signin-google"),
        ClientId = "YOUR_CLIENT_ID",
        ClientSecret = "YOUR_CLIENT_SECRET"
    });

    app.UseMvcWithDefaultRoute();
}
ASP.NET Core 2.X
public void ConfigureServices(IServiceCollection services)
{
    services.AddAuthentication("MainCookie")
        .AddCookie("MainCookie", o =>
        {
            o.LoginPath = new PathString("/login");
        })
        .AddCookie("ExternalCookie", o =>
        {

        })
        .AddGoogle("Google", o =>
        {
            o.ClientId = "YOUR_CLIENT_ID";
            o.ClientSecret = "YOUR_CLIENT_SECRET";
            o.CallbackPath = new PathString("/signin-google");
            o.SignInScheme = "ExternalCookie";
        });

    services.AddMvc();
}

public void Configure(IApplicationBuilder app, IHostingEnvironment env)
{
    app.UseAuthentication();

    app.UseMvc(routes =>
    {
        routes.MapRoute(
            name: "default",
            template: "{controller=Home}/{action=Index}/{id?}");
    });
}
译者注:上述方法已经过时,参考1 参考2,
主要变化在于AutomaticAuthenticate和AutomaticChallenge被替代,因为这两属性的意图其实只能用在一个中间件上,即只能让一个认证中间件,自动触发Authenticate 或者Challenge,所以他们移除了由 AddAuthentication(option) 指定,你可以先看这篇博客,因为不影响流程理解。AutomaticAuthenticate和AutomaticChallenge这两个属性在ASP.NET Core 2.X中,改到了在Startup类的ConfigureServices方法中用services.AddAuthentication方法的重载进行设置,如下所示:
public void ConfigureServices(IServiceCollection services)
{
    services.AddAuthentication(options =>
    {
        options.DefaultScheme = CookieAuthenticationDefaults.AuthenticationScheme;//相当于在设置AutomaticAuthenticate
        options.DefaultChallengeScheme = OpenIdConnectDefaults.AuthenticationScheme;//相当于在设置AutomaticChallenge
    });

    services.AddMvc();
}
在ASP.NET Core 2.X中AuthenticationOptions的相关属性说明如下:
- DefaultScheme: if specified, all the other defaults will fallback to this value(也就是说当下面的这些Default...Scheme没有被赋值时,就会采用DefaultScheme的值作为它们的默认值)
- DefaultAuthenticateScheme: if specified, AuthenticateAsync() will use this scheme, and also the AuthenticationMiddleware added by UseAuthentication() will use this scheme to set context.User automatically. (Corresponds to AutomaticAuthentication)
- DefaultChallengeScheme if specified, ChallengeAsync() will use this scheme, [Authorize] with policies that don't specify schemes will also use this
- DefaultSignInScheme is used by SignInAsync() and also by all of the remote auth schemes like Google/Facebook/OIDC/OAuth, typically this would be set to a cookie.
- DefaultSignOutScheme is used by SignOutAsync() falls back to DefaultSignInScheme
- DefaultForbidScheme is used by ForbidAsync(), falls back to DefaultChallengeScheme
这和以前的情况唯一的区别是,现在有一个额外的身份验证中间件(ExternalCookie),外部登录提供程序中的SignInScheme也被设置到了这个中间件。
当我们在这种情况下进行挑战时,我们必须将用户重定向到一个controller action,该action在ExternalCookie中“手动”触发Authenticate。代码看起来如下:
public IActionResult Google()
{
    var authenticationProperties = new AuthenticationProperties
    {
        RedirectUri = Url.Action("HandleExternalLogin", "Account")
    };

    return Challenge(authenticationProperties, "Google");
}
Account controller中的 HandleExternalLogin 方法 :
ASP.NET Core 1.X
public async Task<IActionResult> HandleExternalLogin()
{
    var claimsPrincipal = await HttpContext.Authentication.AuthenticateAsync("ExternalCookie");

    //do something the the claimsPrincipal, possibly create a new one with additional information
    //create a local user, etc

    await HttpContext.Authentication.SignInAsync("MainCookie", claimsPrincipal);
    await HttpContext.Authentication.SignOutAsync("ExternalCookie");
    return Redirect("~/");
}
ASP.NET Core 2.X
public async Task<IActionResult> HandleExternalLogin()
{
    AuthenticateResult authenticateResult = await HttpContext.AuthenticateAsync("ExternalCookie");
    var claimsPrincipal = authenticateResult.Principal;

    //do something the the claimsPrincipal, possibly create a new one with additional information
    //create a local user, etc

    await HttpContext.SignInAsync("MainCookie", claimsPrincipal);
    await HttpContext.SignOutAsync("ExternalCookie");
    return Redirect("~/");
}
译者注:这里的代码到了2.0时略有变化,参见之前的内容
注意
在上面Account controller中的 HandleExternalLogin 方法中,我们还应该首先加入代码逻辑判断ExternalCookie这个scheme是否已经被成功验证(例如在上面ASP.NET Core 2.X代码中判断authenticateResult的Succeeded属性是否为true,或者给HandleExternalLogin方法加上一个自定义逻辑的IAuthorizationFilter拦截器),因为只有当ExternalCookie这个scheme被成功验证时,我们才允许执行Account controller中的 HandleExternalLogin 方法,否则应该将用户重定向到登录页面,要求用户先到Google的OAuth登录页面进行登录。
我们在这个控制器动作中所做的是在ExternalCookie中间件中“手动”触发一个Authenticate动作。这将返回从请求中的 cookie 重建的ClaimsPrincipal。由于我们已经设置了SignInScheme = ExternalCookie,所以在验证成功之后,该cookie由 Google Authentication 中间件设置。GoogleAuthentication中间件在内部将执行类似以下的操作:
ASP.NET Core 1.X
HttpContext.Authentication.SignInAsync("ExternalCookie", claimsPrincipalWithInformationFromGoogle);
ASP.NET Core 2.X
HttpContext.SignInAsync("ExternalCookie", claimsPrincipalWithInformationFromGoogle);
这就是为什么ExternalCookie中间件创建cookie的原因。
接下来我们可以使用ClaimsPrincipal中包含的信息做一些额外的操作,例如检查用户(通过ClaimsPrincipal.Claims中包含的电子邮件)是否已经有本地帐户,如果没有将用户重定向到提供创建本地帐户选项的页面(这是默认的Visual Studio模板所做的)。
在这个例子中,我们简单地向MainCookie中间件发出SignIn操作,这将导致该Cookie中间件更改发送给用户的响应,以便创建encoded 的ClaimsPrincipal的cookie(即,响应将具有编码ClaimsPrincipal的名为.AspNetCore.MainCookie的cookie)。
请记住,这个中间件是一个具有AutomaticAuthenticate = true的中间件,这意味着在每个请求中它将检查它寻找一个cookie(名为.AspNetCore.MainCookie),如果它存在,它将被解码成ClaimsPrincipal并设置在HttpContext.User上,然后使用户登录。最后,我们只需发起一个SignOut到ExternalCookie中间件。这会导致中间件删除相应的cookie。
我们从用户的视角来回顾一下:
- 用户请求了一个action ,这个action向Google认证中间件发起challenge,例如, /Account/SignInWithGoogle。challenge action定义了RedirectUrl,例如/Account/HandleExternalLogin
- 响应将用户浏览器重定向到Google的OAuth登录页面
- 成功验证和授权Web应用程序后,Google会将用户重定向回Web应用程序。例如/signin-google?code=…
- Google身份验证中间件将接管请求(CallBackPath匹配/signin-google),并将使用一次性使用的code来获取有关用户的信息。最后,它将发起SignIn到ExternalCookie,并发起重定向到第1步中定义的RedirectUrl。
- 在RedirectUrl的controller action中,手动运行了ExternalCookie的Authenticaticate。这返回了一个包含谷歌的用户信息的ClaimsPrincipal,最后,向MainCookie发起一个SignIn并将ClaimsPrincipal传递给它(如果需要的话,创建一个含有额外信息的新的ClaimsPrincipal)。向ExternalCookie 发起SignOut,以便其Cookie被删除。
在上面的例子中,我们使用了一个client Id,一个client secret,一个 callback URL,我们简单地提到Google的回应包含了一个“code”,但是我们并没有用到所有这些信息。
这些都是OAuth2协议的术语,具体来说就是“授权码工作流程”(你可以在这里找到更全面的OAuth2说明)。
使用OAuth的第一步是注册客户端。在本文的例子中,客户端是你的Web应用程序,你必须注册,以便外部登录提供程序具有关于它的信息。这些信息是必需的,以便在向用户提交授权表单时,提供商以显示应用程序的名称,以及在用户接受或拒绝应用程序的“要求”后知道将用户重定向到哪里。
在OAuth中,这些“requirements”被称为“scopes”。 Google的两个scopes“item”的示例是“profile”和“email”。
当你的应用程序将用户重定向到Google并包含这些范围时,系统会询问用户是否可以访问profile和email信息。
总之,当你向外部登录提供者注册你的应用程序时,你必须为你的应用程序提供(至少)一个名字,并且提供一个回调url(e.g. www.mydomain.com/signin-google)。
然后你将得到一个客户端ID和一个客户端密钥。客户端ID和client密码是你的Web应用程序开始使用外部登录提供程序所需的全部东西。以下是用户浏览器,Web应用程序和外部登录提供程序之间的交互图。这里的术语我用的很随意,实际的术语应该是授权服务器,而实际上包含用户帐户的服务器就是资源服务器。他们可能是一样的。如果你需要对这些术语进行更加严格的描述,你应该阅读关于OAuth的 digitial ocean article about OAuth。
图表:

这是授权码授权。还有其他的工作流程,但是对于一个Web应用程序,这是你要使用的。这里需要注意的重要的事情是,code只能被使用一次,client secret永远不会发送到用户的浏览器。这样就很难让人冒充你的Web应用程序。如果有人想冒充你的应用程序,那么他们要拿到你的client secret ,为此,他们要能进入你的服务器才行。
当你使用Visual Studio创建一个新项目并选择带有成员资格和授权的Web应用程序,并为外部登录提供程序添加一个身份验证中间件时,你将得到类似于以下的启动配置:
public void Configure(IApplicationBuilder app, IHostingEnvironment env, ILoggerFactory loggerFactory)
{

    //...

    app.UseIdentity();

    app.UseGoogleAuthentication(new GoogleOptions
    {
        ClientId = "YOUR_CLIENT_ID",
        ClientSecret = "CLIENT_SECRET"
    });

    app.UseMvc(routes =>
    {
        routes.MapRoute(
            name: "default",
            template: "{controller=Home}/{action=Index}/{id?}");
    });
}
如果你看看UseIdentity扩展方法的源代码,你会发现类似这样的东西:
app.UseCookieAuthentication(identityOptions.Cookies.ExternalCookie);
app.UseCookieAuthentication(identityOptions.Cookies.TwoFactorRememberMeCookie);
app.UseCookieAuthentication(identityOptions.Cookies.TwoFactorUserIdCookie);
app.UseCookieAuthentication(identityOptions.Cookies.ApplicationCookie);
译者注:在2.0中,由于Use系列方法被Add系列方法取代,所以这些代码会发生变化。
这与我们之前描述的很相似。不同的是,有两个新的外部认证中间件(TwoFactorRememberMeCookie和TwoFactorUserIdCookie 它们不在本文的讨论范围之内)以及“主要”认证中间件(具有AutomaticAuthenticate = true的中间件)和我们使用的存储外部登录提供程序认证结果(ExternalCookie)被交换(然而他们的执行顺序不会受到影响)。
另外,GoogleAuthentication中间件配置了所有的默认选项。CallbackPath的默认值是 new PathString(“/ signin-google”),还做了一些事情来指定你使用的特定的外部登陆提供器中间件。
手动发起外部登陆提供器中间件的challenge被放在了 AccountController 的ExternalLogin 方法中
public IActionResult ExternalLogin(string provider, string returnUrl = null)
{
    var redirectUrl = Url.Action(nameof(ExternalLoginCallback), "Account", new { ReturnUrl = returnUrl });
    var properties = _signInManager.ConfigureExternalAuthenticationProperties(provider, redirectUrl);
    return Challenge(properties, provider);
}
如果你要查看SignInManager中ConfigureExternalAuthenticationProperties的源代码,你会发现它只是像我们前面的示例中那样创建一个AuthenticationProperties实例:
public virtual AuthenticationProperties ConfigureExternalAuthenticationProperties(string provider, string redirectUrl, string userId = null)
{
  AuthenticationProperties authenticationProperties = new AuthenticationProperties()
  {
    RedirectUri = redirectUrl
  };
  authenticationProperties.Items["LoginProvider"] = provider;
  return authenticationProperties;
}
稍后使用带有“LoginProvider”的“item”。我会在适当的时候突出显示它。
从AccountController的ExternalLogin action中可以看出,RedirectUri在AccountController上也被设置为ExternalLoginCallback action。让我们看看这个action(我删除了不相关的部分):
public async Task<IActionResult> ExternalLoginCallback(string returnUrl = null, string remoteError = null)
{
    var info = await _signInManager.GetExternalLoginInfoAsync();

    var result = await _signInManager.ExternalLoginSignInAsync(info.LoginProvider, info.ProviderKey, isPersistent: false);
    if (result.Succeeded)
    {
        return RedirectToLocal(returnUrl);
    }
    else
    {
        // If the user does not have an account, then ask the user to create an account.
        ViewData["ReturnUrl"] = returnUrl;
        ViewData["LoginProvider"] = info.LoginProvider;
        var email = info.Principal.FindFirstValue(ClaimTypes.Email);
        return View("ExternalLoginConfirmation", new ExternalLoginConfirmationViewModel { Email = email });
    }
}
第一行,var info = await _signInManager.GetExternalLoginInfoAsync();在external cookie中间件中触发一个Authentication 。但是返回的不是ClaimsPrincipal的实例,它将返回包含以下属性的ExternalLoginInfo类的实例:
- Principal (ClaimsPrincipal)
- LoginProvider
- --- 这是从AuthenticationProperties的Items中读取的。在描述challenge的时候,我曾经提到带有“LoginProvider”键的item将会在以后被使用。这是使用它的地方。
- ProviderKey
- --- 这是ClaimsPrincipal中的声明http://schemas.xmlsoap.org/ws/2005/05/identity/claims/nameidentifier的值,你可以将其视为来自外部登录提供程序的UserId
下一行var result = await _signInManager.ExternalLoginSignInAsync(info.LoginProvider, info.ProviderKey, isPersistent: false);
这将检查AspNetUserLogins表中是否有记录。此表将外部登录提供程序和“provider key”(这是外部登录提供程序的用户标识)链接到AspNetUsers表中的用户(该表的主键是LoginProvider和ProviderKey的组合键) 。
下面是该表中记录的示例:

因此,如果你使用Google登录,并且你的Google“用户ID”为123123123123123123,并且你之前已将你的本地用户(稍后会详细介绍)与此外部登录关联,则ExternalLoginSignInAsync将向 主 Cookie中间件发出signIn并向外部cookie中间件发出SignOut。
当用户第一次访问时,AspNetUserLogins表中将不会有任何本地用户或记录,并且方法将简单地返回SignInResult.Failed。然后将用户重定向到ExternalLoginConfirmation页面:
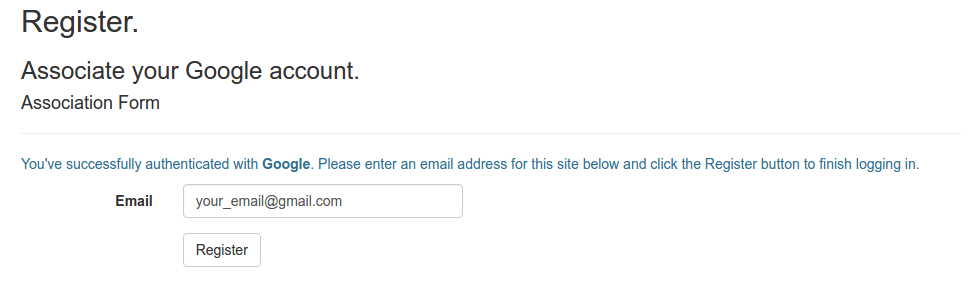
在这个页面中,用户会被要求确认他想用来创建本地帐户的电子邮件(即AspNetUsers表中的记录)。
当你单击注册按钮时,你将被带到AccountController中的ExternalLoginConfirmation action,这是它的简化版本
public async Task<IActionResult> ExternalLoginConfirmation(ExternalLoginConfirmationViewModel model, string returnUrl = null)
{
    var info = await _signInManager.GetExternalLoginInfoAsync();

    var user = new ApplicationUser { UserName = model.Email, Email = model.Email };

    await _userManager.CreateAsync(user);

    await _userManager.AddLoginAsync(user, info);

    await _signInManager.SignInAsync(user, isPersistent: false);

    return RedirectToLocal(returnUrl);
}
第一行:var info = await _signInManager.GetExternalLoginInfoAsync;
该行将获取存储在external Cookie中的信息并返回ExternalLoginInfo的实例。这与ExternalLoginCallback中完成的事完全相同。
第二行:var user = new ApplicationUser {UserName = model.Email,Email = model.Email};该行使用在用户单击Register的页面中输入的电子邮件创建ASP.NET Identity用户的新实例。
第三行:在AspNetUsers表中创建一个新用户: await _userManager.CreateAsync(user);
第四行: await _userManager.AddLoginAsync(user,info);
该行将新创建的用户与我们刚才使用的外部登录提供程序相关联。这意味着在AspNetUserLogins中创建一条新记录。
此表中的记录有四列,LoginProvider(info.LoginProvider,例如“Google”),ProviderKey(info.ProviderKey,例如123123123123,你可以认为它是刚刚登录的用户的Google用户标识),ProviderDisplayName (至少在2017/04/29的ASP.NET Identity的这个版本中是这样的),最后是UserId,它是第三行中新创建的用户的用户标识。
最后 await _signInManager.SignInAsync(user, isPersistent: false);
译者注:最终的SignInAsync源码是:
public virtual async Task SignInAsync(TUser user, AuthenticationProperties authenticationProperties, string authenticationMethod = null)
{
    var userPrincipal = await CreateUserPrincipalAsync(user);
    // Review: should we guard against CreateUserPrincipal returning null?
    if (authenticationMethod != null)
    {
        userPrincipal.Identities.First().AddClaim(new Claim(ClaimTypes.AuthenticationMethod, authenticationMethod));
    }
    await Context.SignInAsync(IdentityConstants.ApplicationScheme,
        userPrincipal,
        authenticationProperties ?? new AuthenticationProperties());
}
为用户创建一个ClaimsPrincipal并向application Cookie发出一个SignIn。这个application Cookie是AutomaticAuthenticate = true的cookie,这意味着在下一个请求中,该中间件将设置HttpContext.User与cookie中编码的用户,有使用户“登录”。请注意,外部cookie从未在此流程中被删除。这不是一个大问题,因为当用户最终退出时,SignInManager.SignOutAsync被调用,并且在内部向所有认证中间件发起SignOut。
总结全文就是:如何在Asp.NetCore中使用外部登陆提供程序,包含只使用authentication中间件和与Identity共同使用。
使用ASP.NET Core Identity和外部登录提供程序还有一些事情。你可以将其中多个外部登陆提供程序关联到本地用户帐户。而且你可以将他们全部移除,如果你确定不会“shoot yourself on the foot”,例如移除所有用户登录的方式,不过这可能成为另一篇博文的话题。