一、系统及软件版本
Linux:Centos 6.5
Nginx:nginx-1.6.2
Mysql:mysql-5.5.32-linux2.6-x86_64.tar
PHP :php-5.3.27
二、Nginx安装
①安装准备pcre ,openssl
yum install pcre pcre-devel -y
yum install openssl openssl-devel -y
②编译安装nginx
./configure --user=nginx --group=nginx --prefix=/application/nginx-1.6.2 --with-http_stub_status_module --with-http_ssl_module
make
echo $?
make install
echo $?
ln -s /application/nginx-1.6.2/ /application/nginx
③启动Nginx
#添加nginx用户
useradd nginx -s /sbin/nologin -M
#检测语法
/application/nginx/sbin/nginx -t

#启动nginx
/application/nginx/sbin/nginx
#查80端口检测服务
netstat -lntup |grep nginx|grep -v grep
④配置站点目录
cd /application/nginx/conf
备份配置文件,清除注释及空行
cp nginx.conf nginx.conf.bak
egrep -v "#|^$" nginx.conf.bak > nginx.conf
vim nginx.conf
worker_processes  1;
events {
    worker_connections  1024;
}
http {
    include       mime.types;
    default_type  application/octet-stream;
    sendfile        on;
    keepalive_timeout  65;
### 日志格式
    log_format  main  '$remote_addr - $remote_user [$time_local] "$request" '
                      '$status $body_bytes_sent "$http_referer" '
                      '"$http_user_agent" "$http_x_forwarded_for"';
### 防止恶意域名绑定
    server {
       listen       80;
          location / {
              deny all;
             }
          }
### 301跳转
    server {
        listen       80;
        server_name  panda.org;
        rewrite ^/(.*) http://www.panda.org/$1 permanent;
    }
### www主机
    server {
        listen       80;
        server_name  www.panda.org;
            root   html/www;
            index  index.html index.htm;
            access_log logs/www_access.log;
    }
### bbs主机
    server {
        listen       80;
        server_name  bbs.panda.org;
            root   html/bbs;
            index  index.html index.htm;
            access_log logs/bbs_access.log;
     }
### blog主机
    server {
        listen       80;
        server_name  blog.panda.org;
            root   html/blog;
            index  index.html index.htm;
            access_log logs/blog_access.log;
    }

}
创建html文件
for n in www bbs blog;do echo "$n.panda.org" > /application/nginx/html/$n/index.html;done
for n in www bbs blog;do cat /application/nginx/html/$n/index.html ;done

检查语法,重启服务
/application/nginx/sbin/nginx -t
/application/nginx/sbin/nginx -s reload
本地解析,关闭防火墙,检测站点
echo "192.168.174.20 www.panda.org bbs.panda.org blog.panda.org" >> /etc/hosts
/etc/init.d/iptables stop
for n in www bbs blog;do curl $n.panda.org;done

至此Nginx搭建完成!
二、Mysql 5.5安装(二进制包安装)
①解压及初始化数据库
tar xf mysql-5.5.32-linux2.6-x86_64.tar.gz
mv mysql-5.5.32-linux2.6-x86_64 /application/mysql
useradd mysql -s /sbin/nologin -M
chown -R mysql.mysql /application/mysql/data
cd /application/mysql/
./scripts/mysql_install_db --user=mysql --basedir=/application/mysql/ --datadir=/application/mysql/data/

②生成启动文件及配置文件
启动文件
cp support-files/mysql.server /etc/init.d/mysqld
sed -i 's#/usr/local/mysql#/application/mysql#g' /application/mysql/bin/mysqld_safe
vim /etc/init.d/mysqld
修改:
basedir=/application/mysql
datadir=/application/mysql/data/
sed -i 's#/usr/local/mysql#/application/mysql#g' /etc/init.d/mysqld
生成配置文件,并启动服务
cp support-files/my-small.cnf /etc/my.cnf
/etc/init.d/mysqld start
/etc/init.d/mysqld status

③配置环境变量,进入MySQL
配置环境变量
法一:
echo 'export PATH=$PATH:/application/mysql/bin' >> /etc/profile
source /etc/profile
法二:
cp /application/mysql/bin/* /usr/local/sbin/
法三:
vi /etc/profile
PATH=/application/mysql/bin:$PATH
配置MySQL账户密码并登陆
mysqladmin -uroot password "123456"
mysql -uroot -p
三、PHP安装配置
①依赖包、编译安装PHP
yum install zlib-devel libxml2-devel libjpeg-devel freetype-devel libpng-devel gd-devel curl-devel -y
tar xf libiconv-1.14.tar.gz
cd libiconv-1.14
./configure --prefix=/usr/local/libiconv
make && make install
安装libmcrypt库(更换epel源,简易安装方法)
wget -O /etc/yum.repos.d/epel.repo http://mirrors.aliyun.com/repo/epel-6.repo
yum install libmcrypt-devel -y
安装mhash库(epel源)
yum install mhash mhash-devel -y
安装mcrypt库(epel源)
yum install mcrypt -y
yum install libxslt libxslt-devel -y
编译安装php
tar xf php-5.3.27.tar.gz
cd php-5.3.27
./configure --prefix=/application/php5.3.27 --with-mysql=/application/mysql --with-iconv-dir=/usr/local/libiconv --with-freetype-dir --with-jpeg-dir --with-png-dir --with-zlib --with-libxml-dir=/usr --enable-xml --disable-rpath --enable-safe-mode --enable-bcmath --enable-shmop --enable-sysvsem --enable-inline-optimization --with-curl --with-curlwrappers --enable-mbregex --enable-fpm --enable-mbstring --with-mcrypt --with-gd --enable-gd-native-ttf --with-openssl --with-mhash --enable-sockets --with-xmlrpc --enable-zip --enable-soap --enable-short-tags --enable-zend-multibyte --enable-static --with-xsl --with-fpm-user=nginx --with-fpm-group=nginx --enable-ftp

ln -s /application/mysql/lib/libmysqlclient.so.18 /usr/lib64/
touch ext/phar/phar.phar
make
make install
ln -s /application/php5.3.27/ /application/php
②配置php.ini及php-fpm.conf
cp php.ini-production /application/php/lib/php.ini
cd /application/php/etc/
cp php-fpm.conf.default php-fpm.conf
mkdir -p /app/logs
启动php服务
/application/php/sbin/php-fpm
③nginx结合php
vim /application/nginx/conf/nginx.conf
### blog主机
    server {
        listen       80;
        server_name  blog.panda.org;
        location /{
            root   html/blog;
            index  index.html index.htm;
            }
        location ~.*\.(php|php5)?$ {
            root   html/blog;
            fastcgi_pass 127.0.0.1:9000;
            fastcgi_index index.php;
            include fastcgi.conf;
            }
        access_log logs/blog_access.log main;
    }
/application/nginx/sbin/nginx -s reload
④测试nginx+php
cd /application/nginx/html/www/
vim phpinfo.php
<?php
phpinfo();
?>
打开网页http://www.panda.org/phpinfo.php验证(注意本机host解析)

⑤测试连接Mysql数据库
cd /application/nginx/html/www/
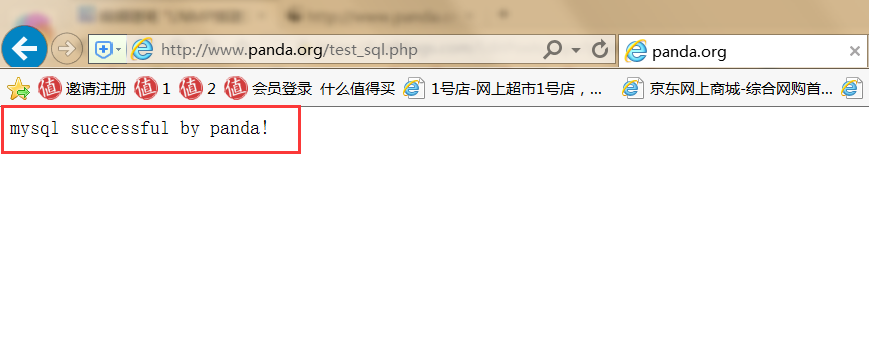
vim test_sql.php
<?php
$link_id=mysql_connect('localhost','root','123456') or mysql_error();
if($link_id){
       echo"mysql successful by panda!";
        }else{
           echo mysql_error();
           }
?>
网页测试 http://www.panda.org/test_sql.php
至此基本的LNMP环境搭建完成!