在写这篇博客前,先感谢两篇博客
【如何自定义的思路】:https://www.cnblogs.com/apprendre-10-28/p/10507794.html
【如何绑定Xib并且使用】:https://www.hangge.com/blog/cache/detail_1394.html
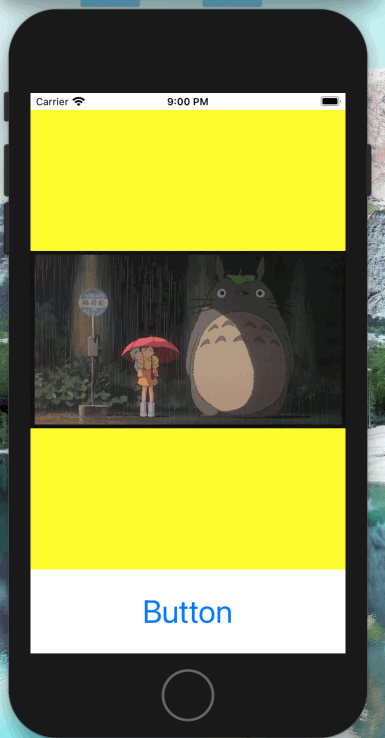
下面开始正题,首先放上运行效果
在主页(背景颜色有黄色的)点击button,跳出Alert(背景颜色为红色的)
Alert内有一个ImageView,一个Button,点击Button,关闭Alert
如何实现这个效果,我想分两个步骤,【思路】和【实现】
一、思路
先看看下方这张图片
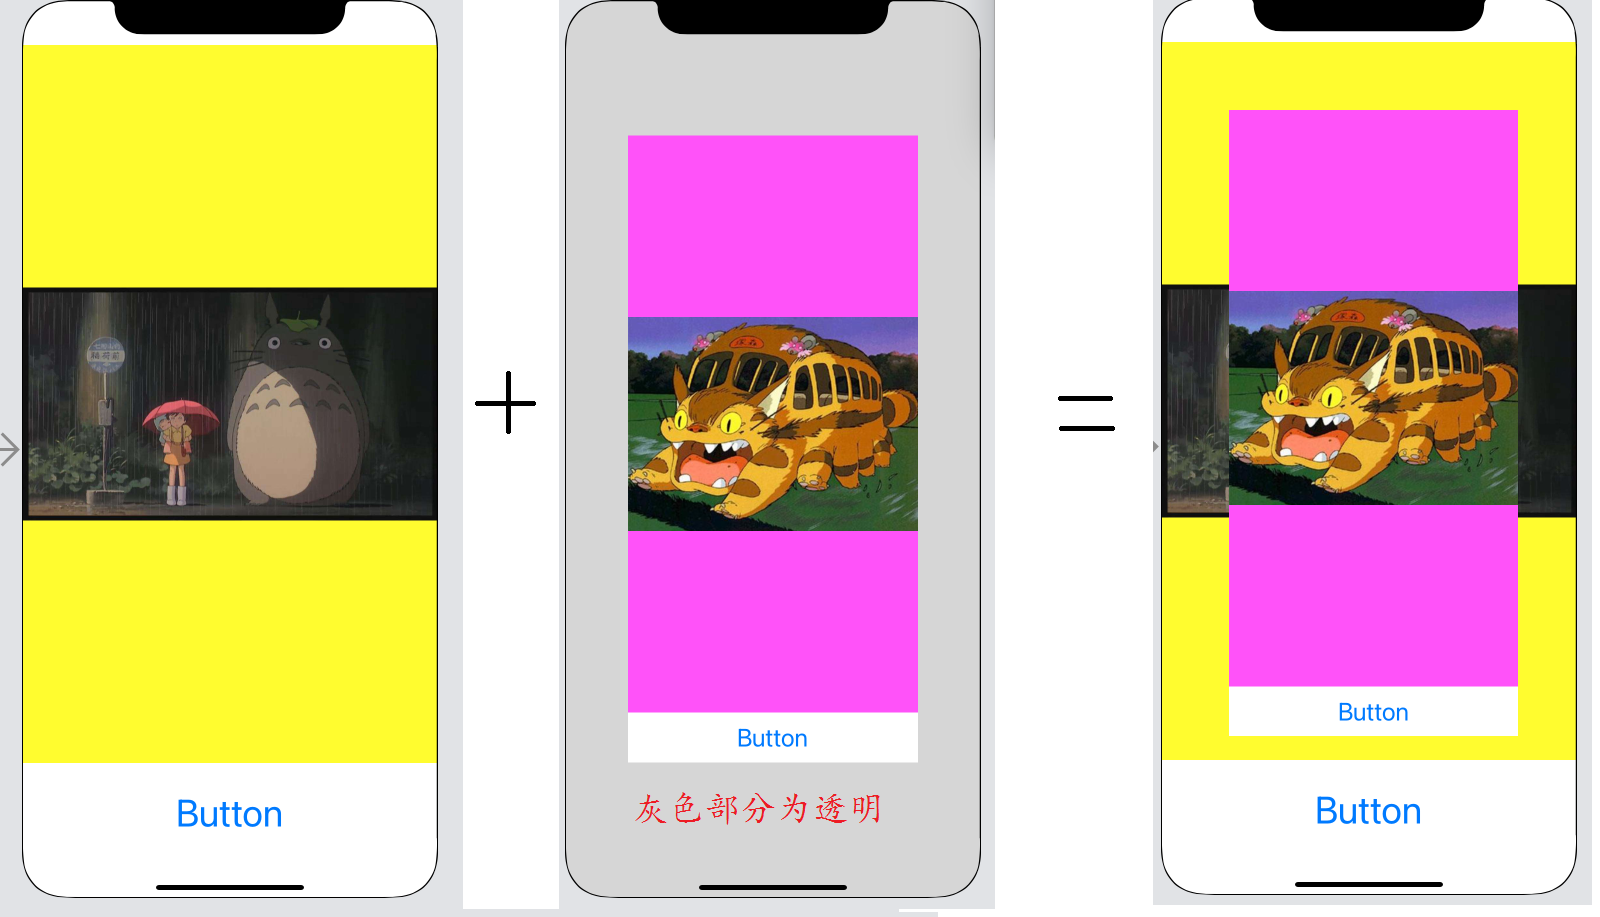
只要把Alert叠在主页上,那么就实现自定义Alert了
但有几个设计思路要注意一下
1.这个Alert,本质上为两个UIView(暂命名为A和B)
2.先说A这个UIView,它的大小,我把它设计但和主页一样大,就好比两张A4纸,叠在一起,它们能完全契合,不是吗?
3.再说B这个UIView,它实际上就是用户看到的Alert,然后规定好它的大小,以及坐标(如图所示,粉色底+白底button的面积)
4.最后,把A设置成透明,这样才能露出主页的一部分
二、实现
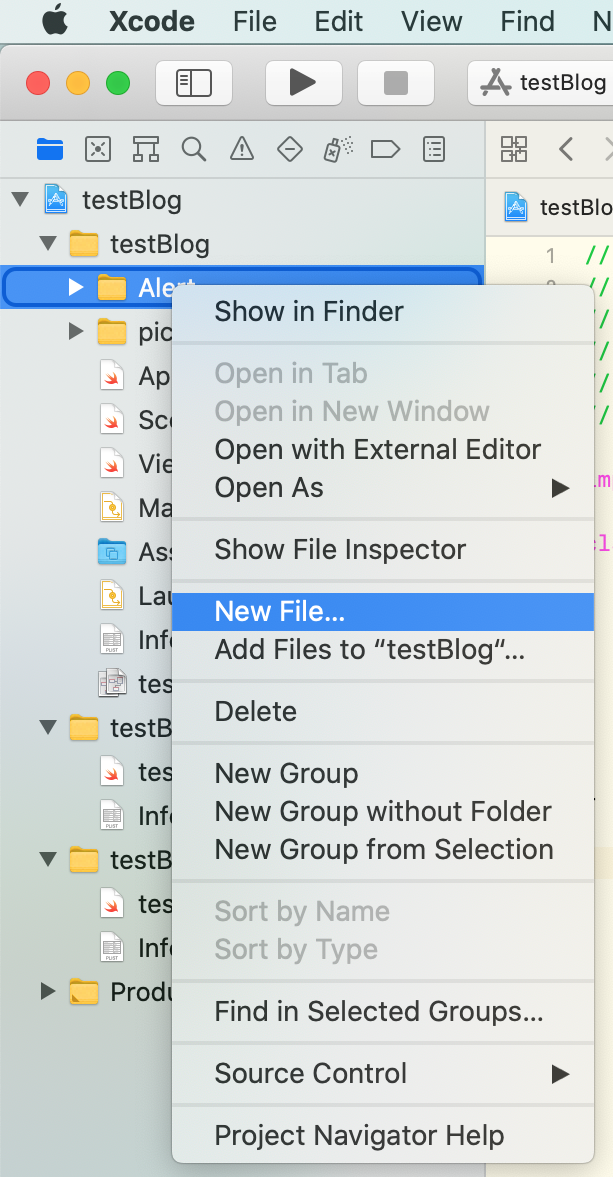
有了上述的思路,我们就开始新建【.swift】和【.xib】
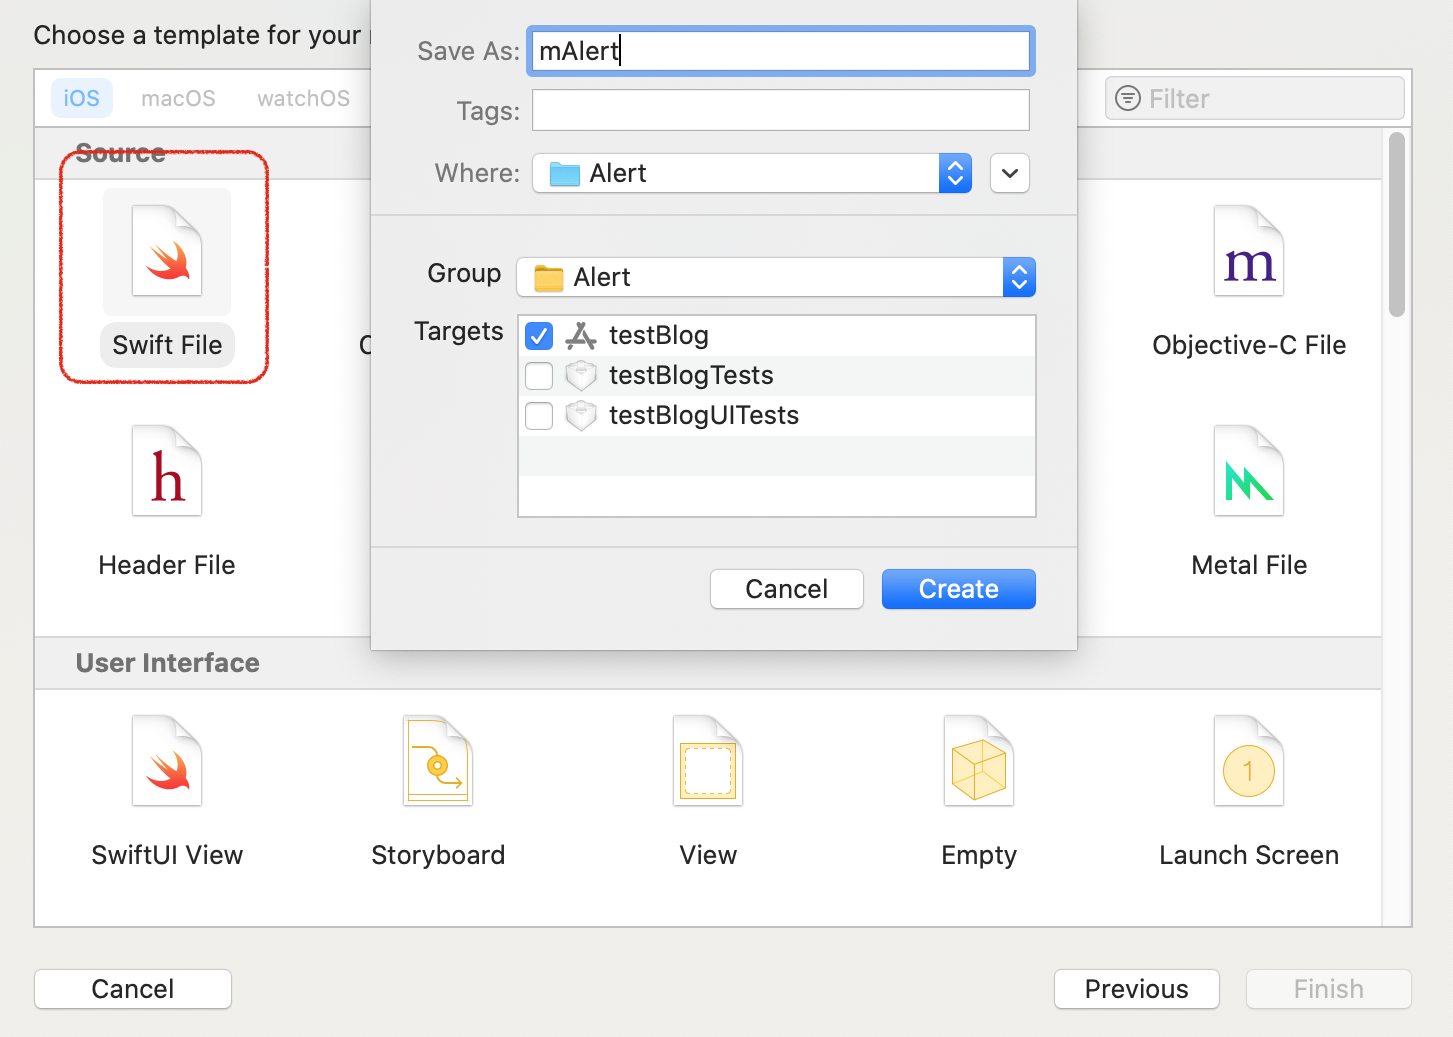
先新建【.swift】,我命名为mAlert
然后打上代码

接下来,先新建xib,这个xib的名字,必须和刚刚的类名相同
然后为这个xib绑定刚刚的类名

下面开始设计这个xib,完成Alert大小和位置的设计

然后是坐标的设计
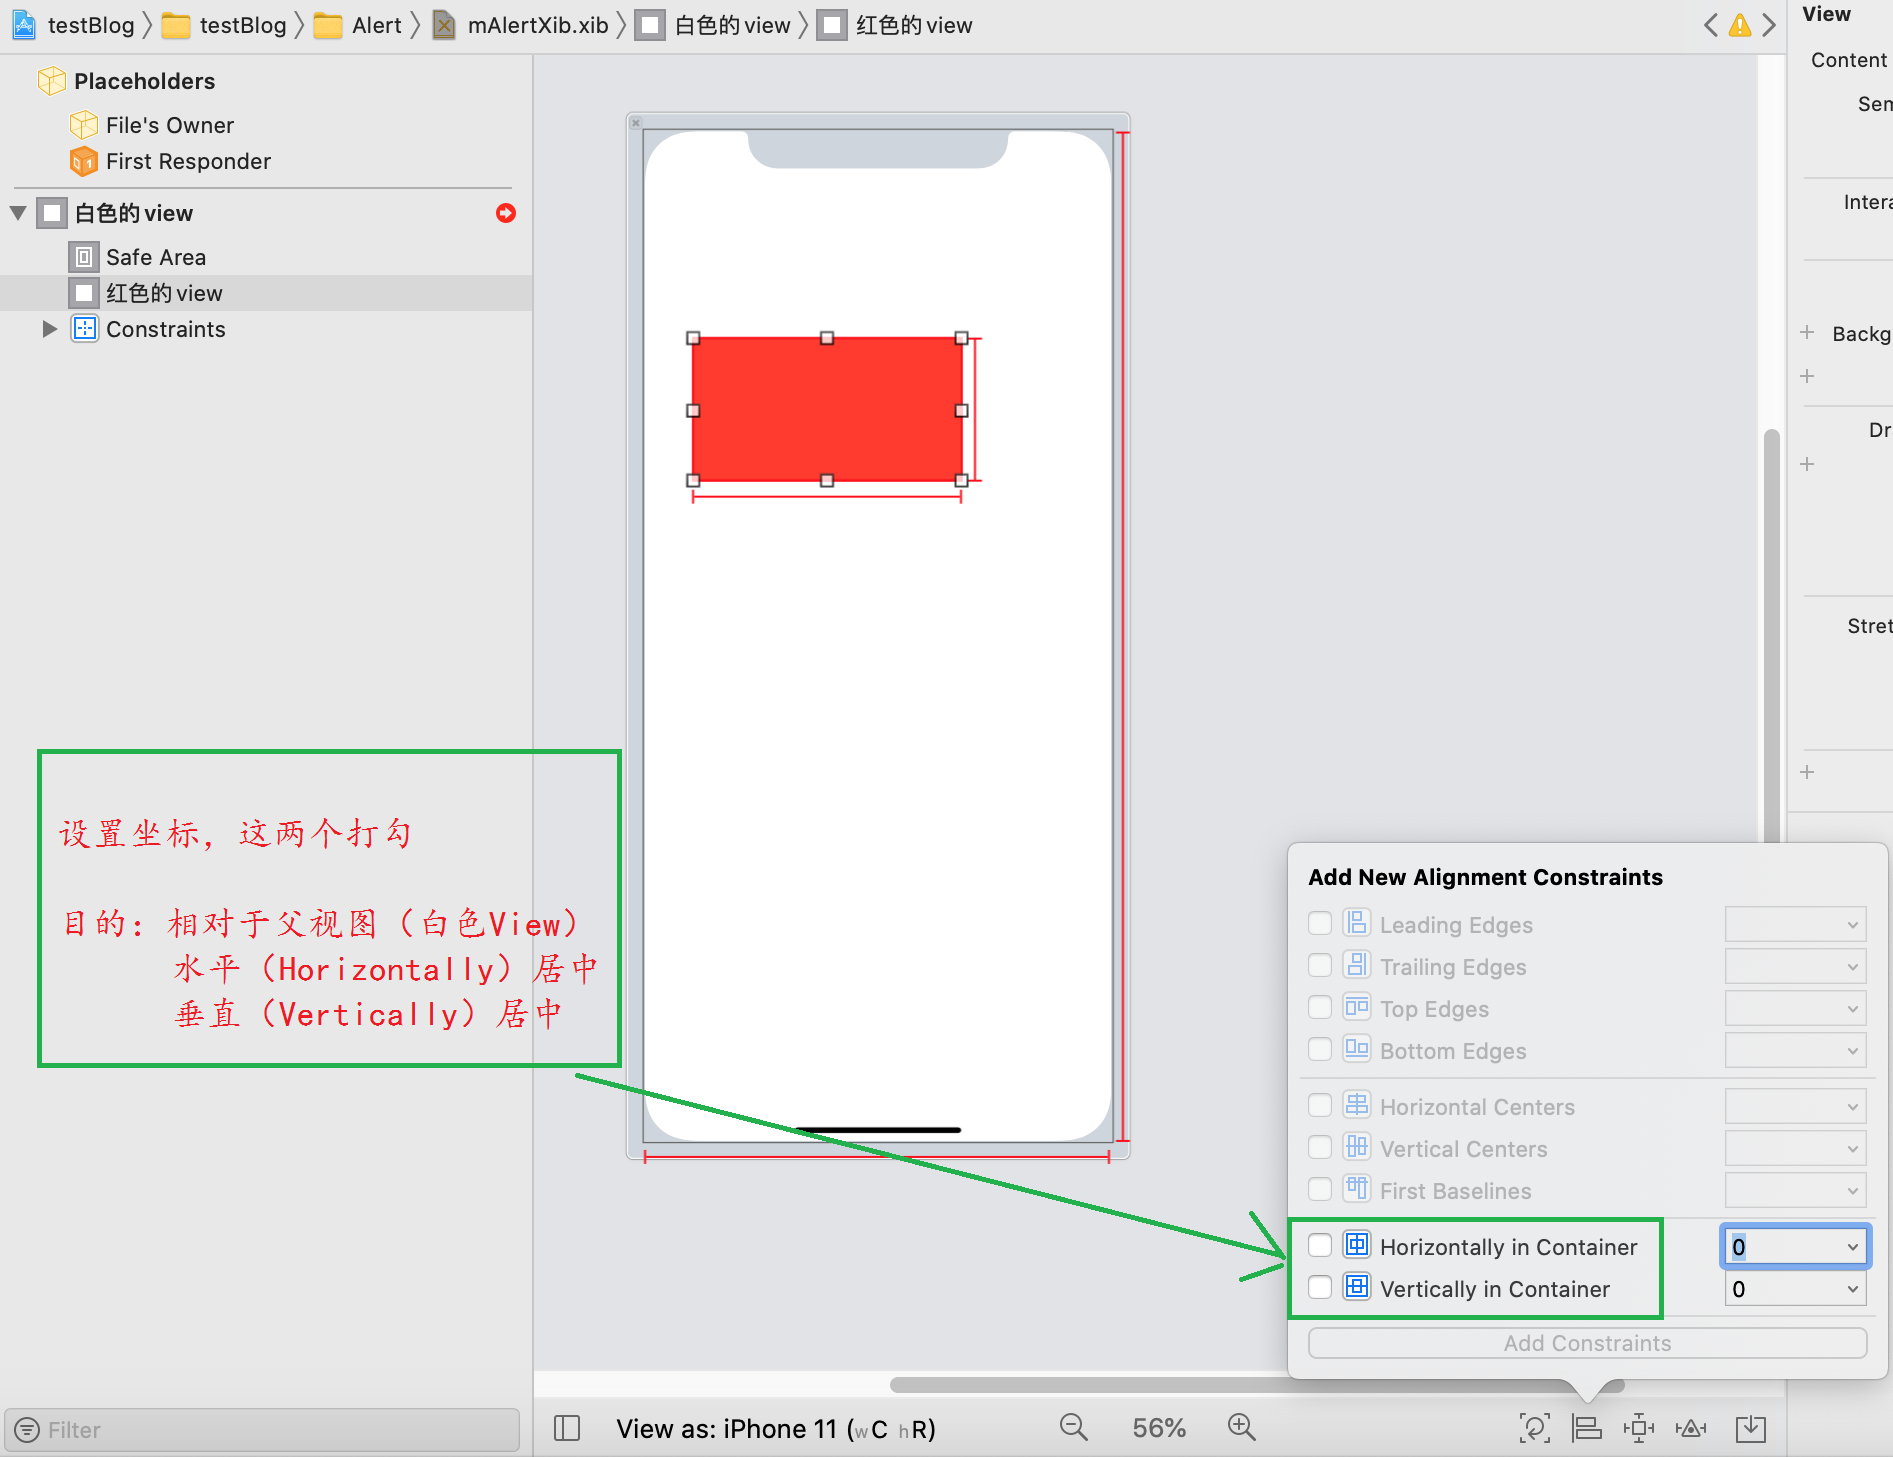

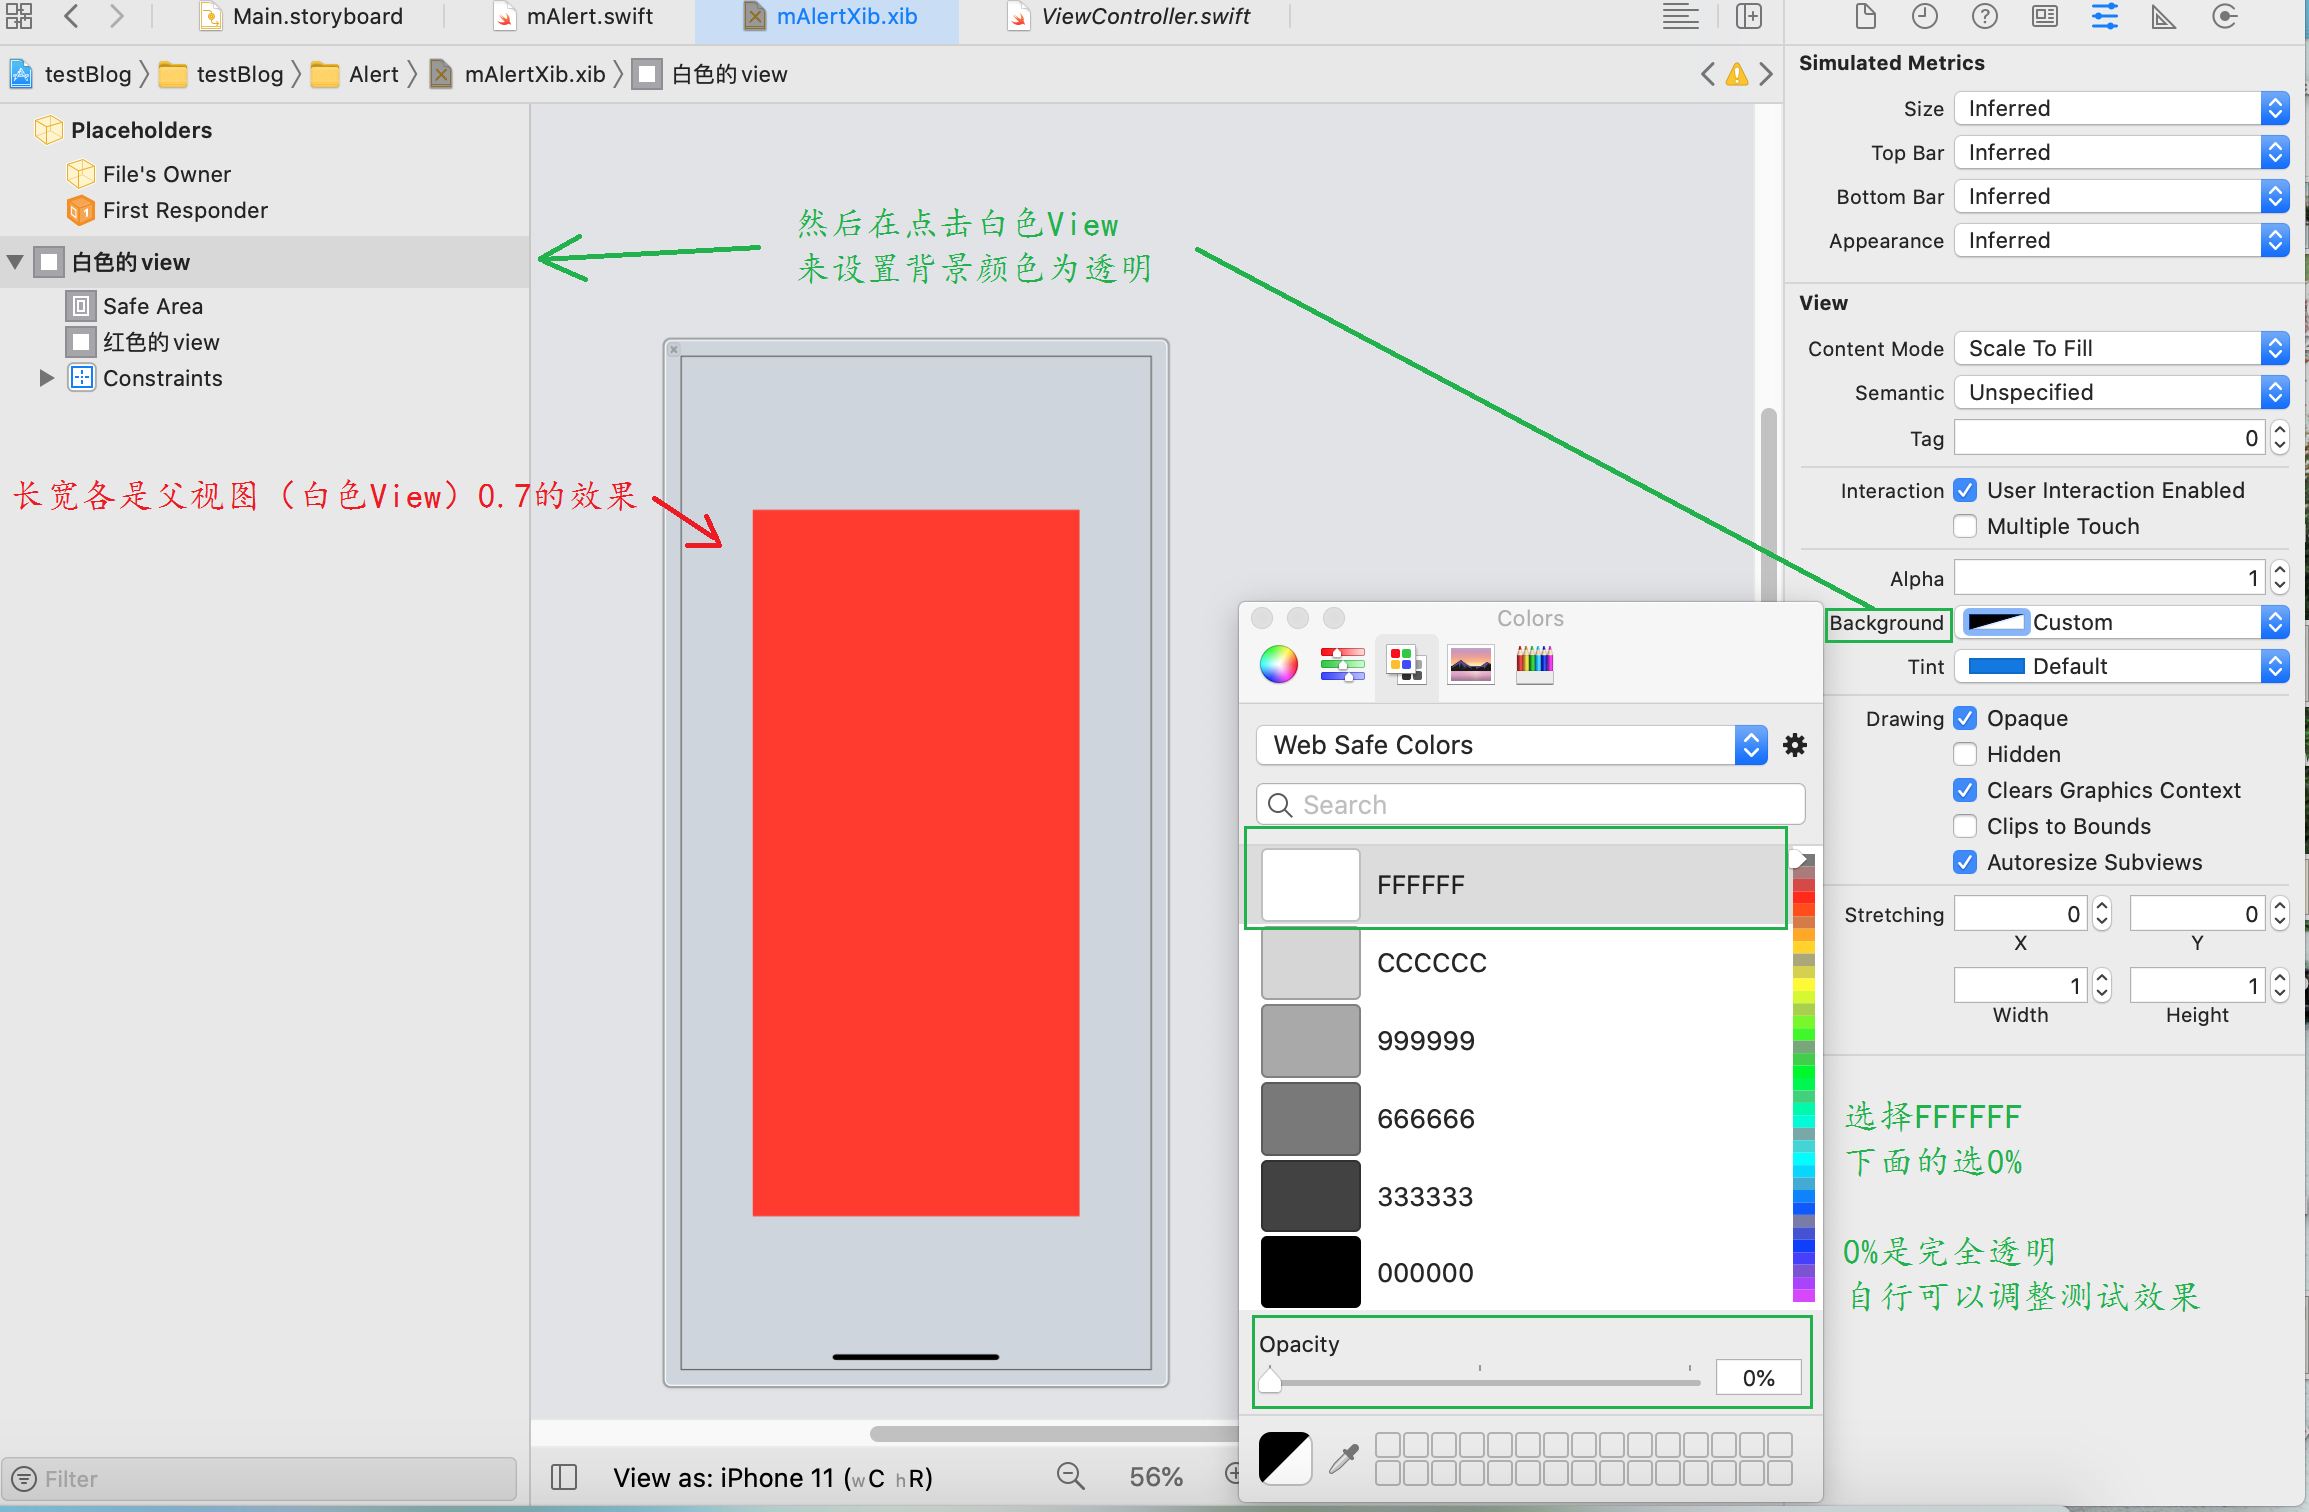
下面开始调整比例

把Alert以外的地方,设置成透明
为这个Alert,添加imageView和button

添加后的效果

接下来就要和代码进行操作了
声明一个button常量,imageView就不用了
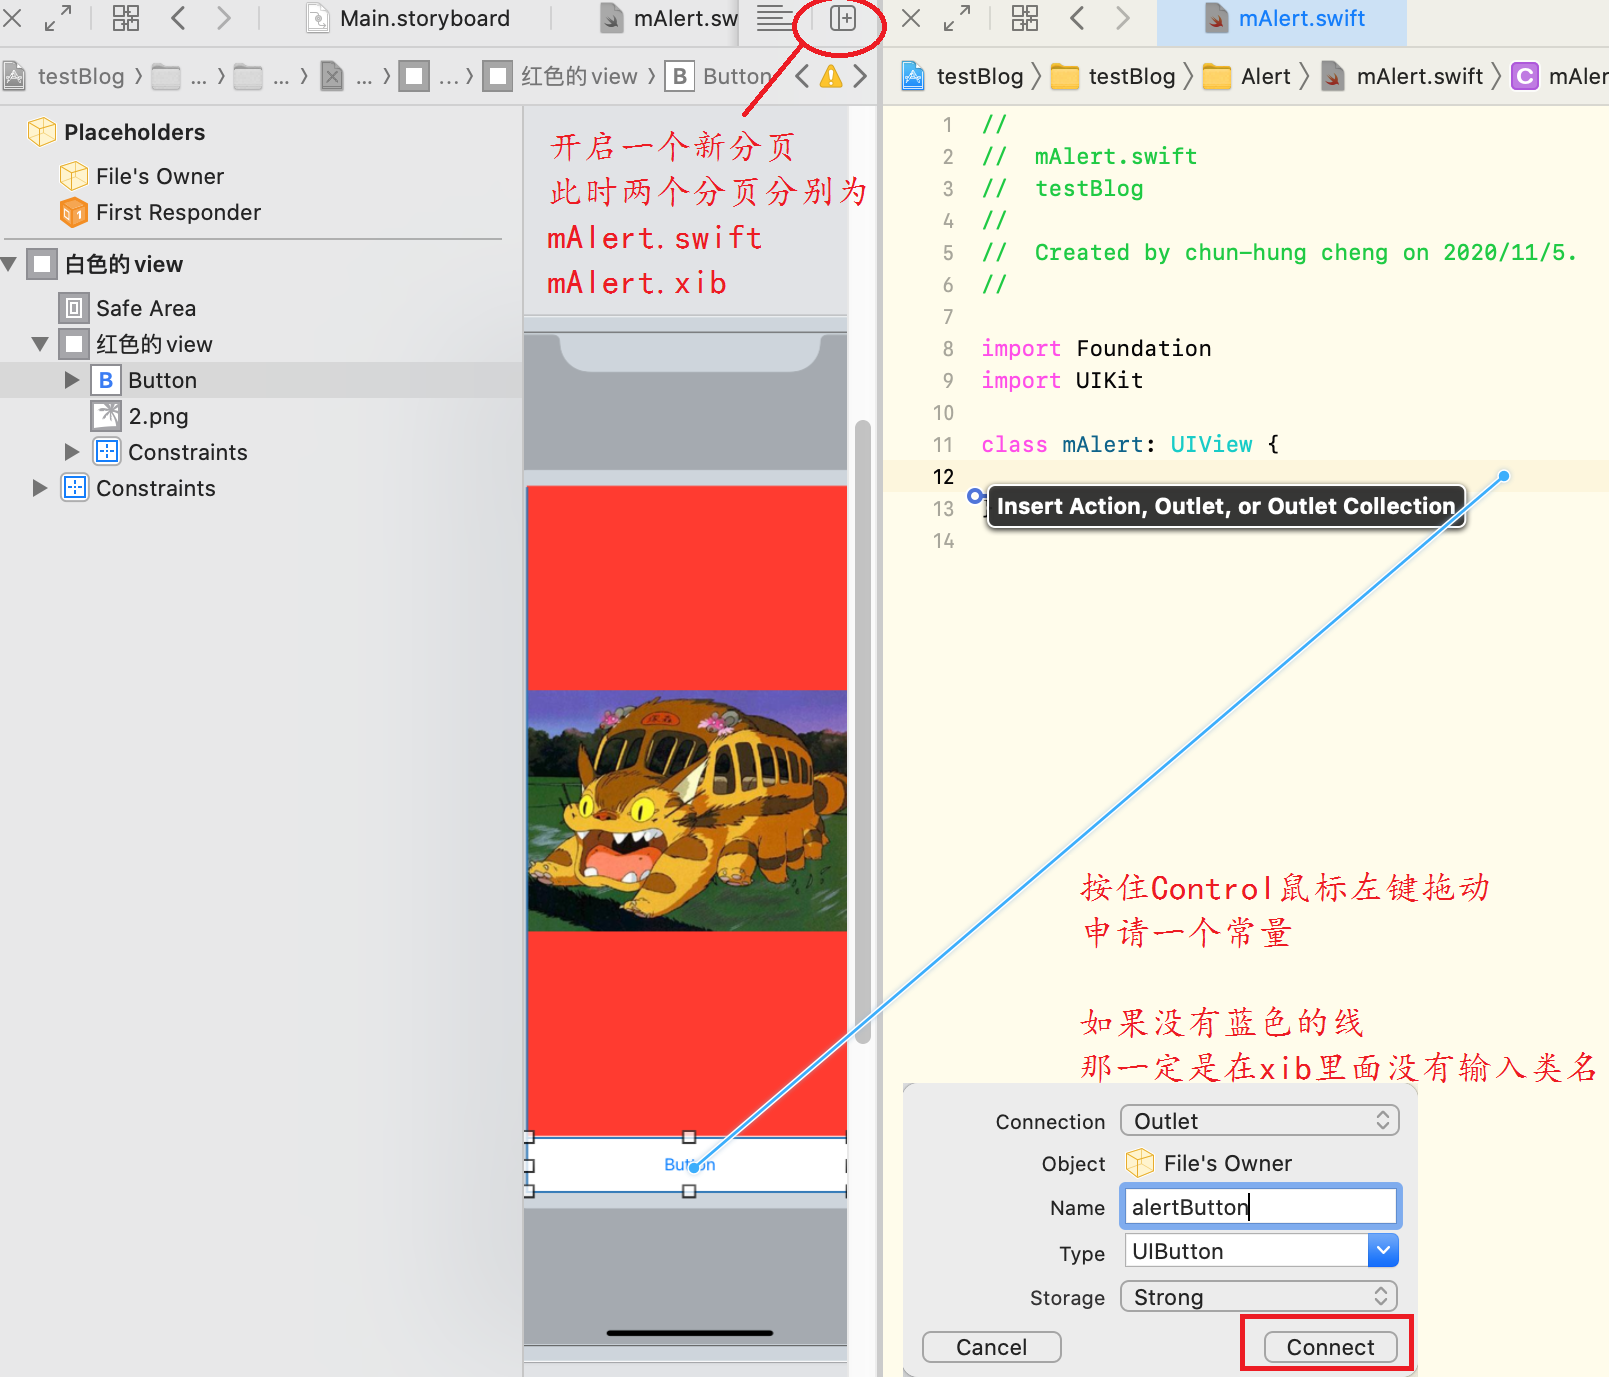
打开mAlert.swift,添加如下代码
从【开始复制】到【结束】,这段代码添加进mAlert.swift
import Foundation
import UIKit

class mAlert: UIView {

    @IBOutlet var alertButton: UIButton!

    /* 开始复制 */

    /*** 下面的几个方法都是为了让这个自定义类能将xib里的view加载进来。这个是通用的,我们不需修改。 ****/
    var contentView:UIView!

    //初始化时将xib中的view添加进来
    override init(frame: CGRect) {
        super.init(frame: frame)
        contentView = loadViewFromNib()
        addSubview(contentView)
        addConstraints()
        //初始化属性配置
        //initialSetup()
    }

     //初始化时将xib中的view添加进来
    required init?(coder aDecoder: NSCoder) {
        super.init(coder: aDecoder)
        contentView = loadViewFromNib()
        addSubview(contentView)
        addConstraints()
        //初始化属性配置
        //initialSetup()
    }
    //加载xib
    func loadViewFromNib() -> UIView {
        let className = type(of: self)
        let bundle = Bundle(for: className)
        let name = NSStringFromClass(className).components(separatedBy: ".").last
        let nib = UINib(nibName: name!, bundle: bundle)
        let view = nib.instantiate(withOwner: self, options: nil).first as! UIView
        return view
    }
    //设置好xib视图约束
    func addConstraints() {
        contentView.translatesAutoresizingMaskIntoConstraints = false
        var constraint = NSLayoutConstraint(item: contentView, attribute: .leading,
                                    relatedBy: .equal, toItem: self, attribute: .leading,
                                    multiplier: 1, constant: 0)
        addConstraint(constraint)
        constraint = NSLayoutConstraint(item: contentView, attribute: .trailing,
                                        relatedBy: .equal, toItem: self, attribute: .trailing,
                                        multiplier: 1, constant: 0)
        addConstraint(constraint)
        constraint = NSLayoutConstraint(item: contentView, attribute: .top, relatedBy: .equal,
                                        toItem: self, attribute: .top, multiplier: 1, constant: 0)
        addConstraint(constraint)
        constraint = NSLayoutConstraint(item: contentView, attribute: .bottom,
                                    relatedBy: .equal, toItem: self, attribute: .bottom,
                                    multiplier: 1, constant: 0)
        addConstraint(constraint)
    }

  /* 结束 */

}
至此,xib的设置都已完成
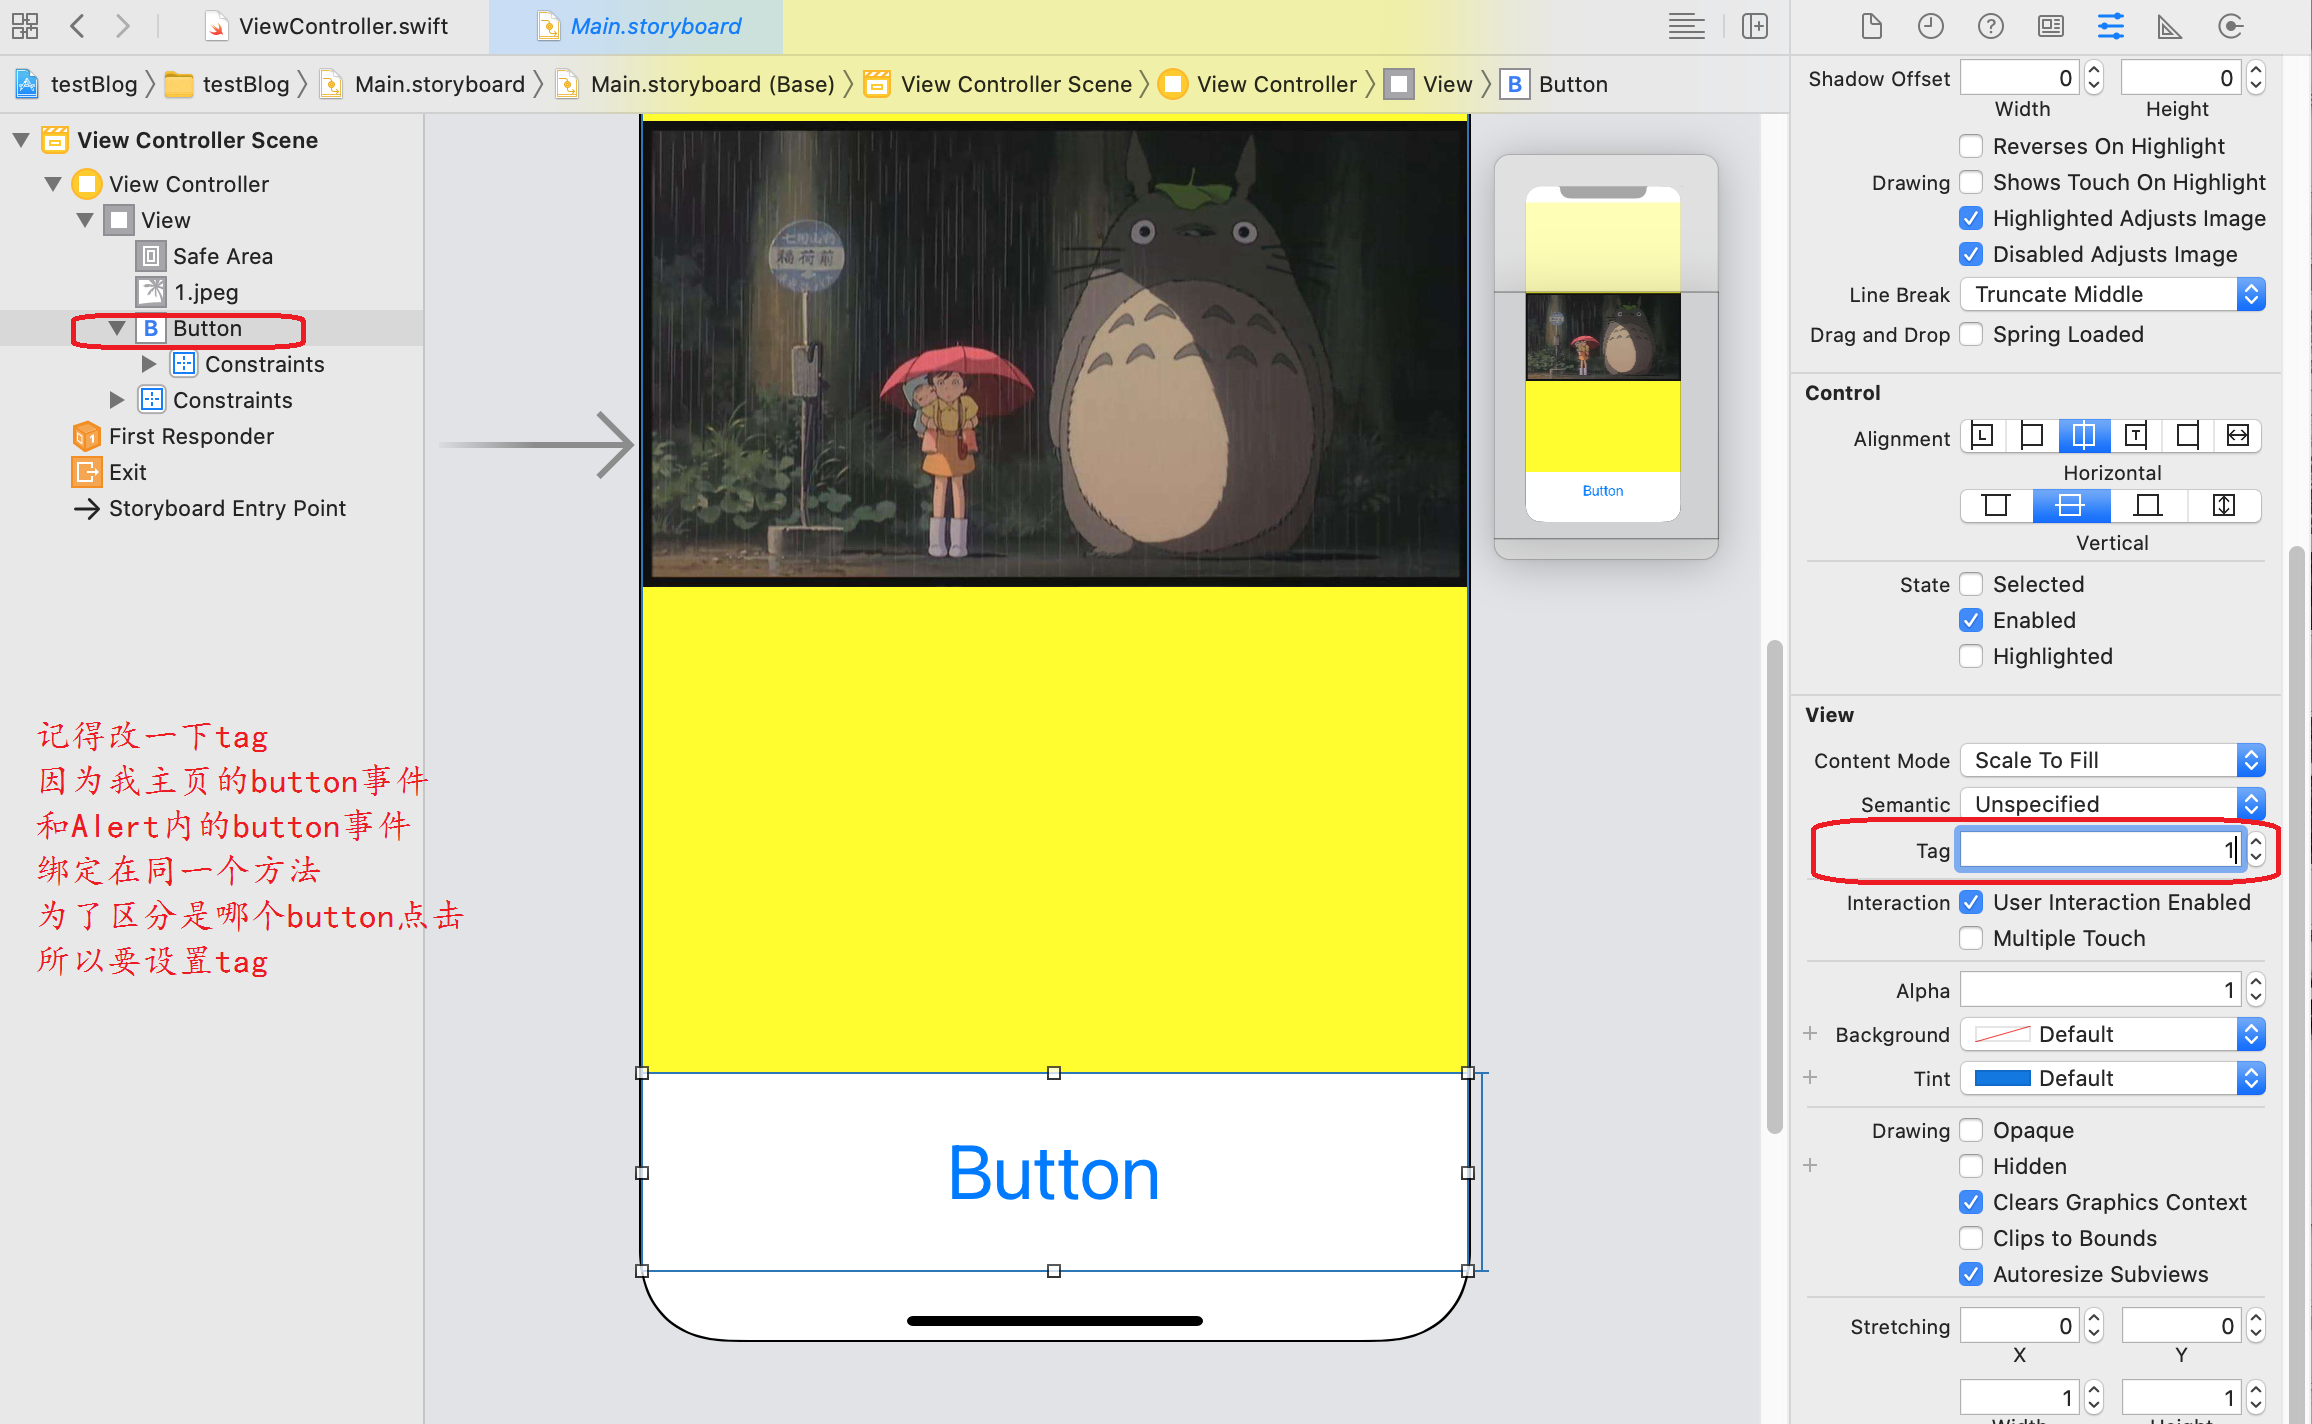
来到主页,实现button点击事件(目的:点击后,新建Alert)

顺便把主页的button,tag设置成1
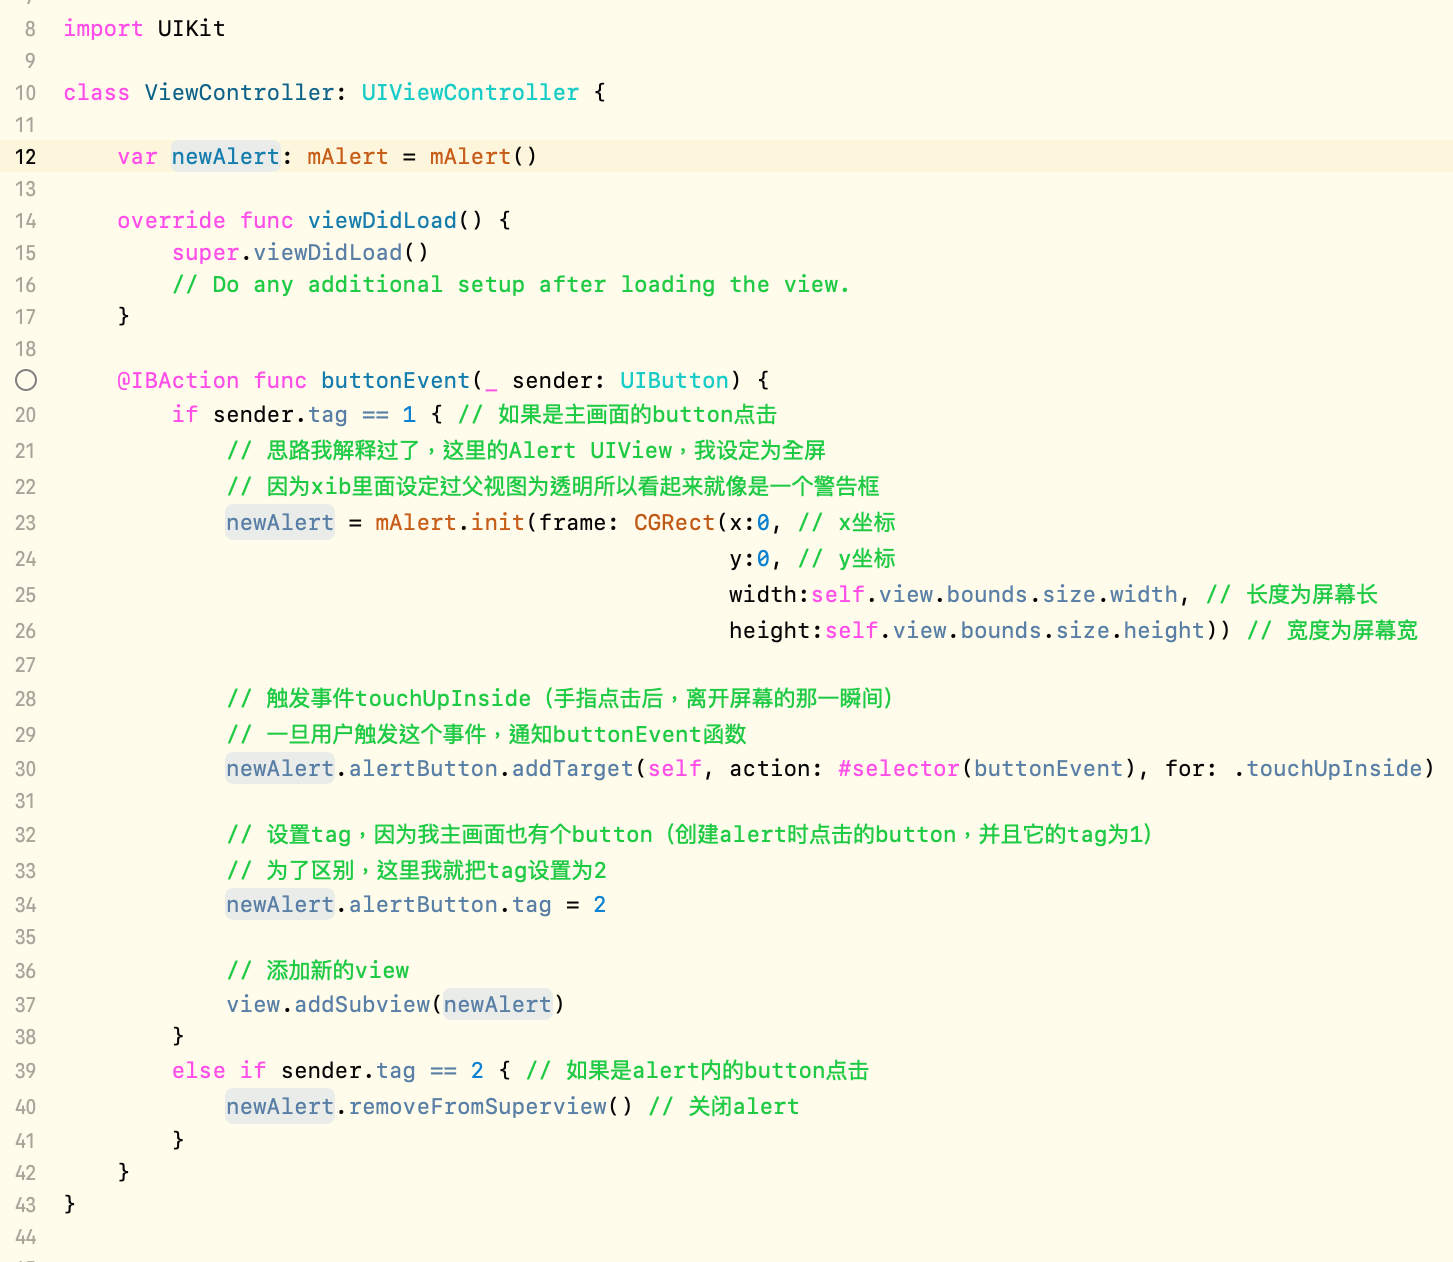
最后,我们在需要弹出Alert的地方,添加如下代码即可
import UIKit

class ViewController: UIViewController {

    var newAlert: mAlert = mAlert()

    override func viewDidLoad() {
        super.viewDidLoad()
        // Do any additional setup after loading the view.
    }

    @IBAction func buttonEvent(_ sender: UIButton) {
        if sender.tag == 1 { // 如果是主画面的button点击
            // 思路我解释过了,这里的Alert UIView,我设定为全屏
            // 因为xib里面设定过视图为透明 所以看起来就像是一个警告框
            newAlert = mAlert.init(frame: CGRect(x:0, // x坐标
                                                 y:0, // y坐标
                                                 self.view.bounds.size.width, // 长度为屏幕长
                                                 height:self.view.bounds.size.height)) // 宽度为屏幕宽

            // 触发事件touchUpInside(手指点击后,离开屏幕的那一瞬间)
            // 一旦用户触发这个事件,通知buttonEvent函数
            newAlert.alertButton.addTarget(self, action: #selector(buttonEvent), for: .touchUpInside)

            // 设置tag,因为我主画面也有个button(创建alert时点击的button,并且它的tag为1)
            // 为了区别,这里我就把tag设置为2
            newAlert.alertButton.tag = 2

            // 添加新的view
            view.addSubview(newAlert)
        }
        else if sender.tag == 2 { // 如果是alert内的button点击
            newAlert.removeFromSuperview() // 关闭alert
        }
    }
}
这代码块的配色好少...我再配一张原图,这样比较清晰
再最后,提一些额外的东西
如果你自定义的是TableView、PickerView之类的,它们需要两个东西
一、数据源dataSource(显示的内容由谁提供?)
二、代理delegate(事件触发后,要通知谁?)
那么,在创建alert的button里面,可以这么写(以PickerView为例)
func ShowDialog() {
        mAlert = AlertShow.init(frame: CGRect(x:0,
                                              y:0,
                                              self.view.bounds.size.width,
                                              height:self.view.bounds.size.height))

        mAlert.mPickerView.dataSource = self    // 数据源由本类提供
        mAlert.mPickerView.delegate = self      // 事件触发后,通知本类
        mAlert.mPickerView.tag = 12 // tag数字你自己决定吧

        view.addSubview(mAlert)
    }
最终,去实现协议里面的一些"必要"方法
看应用需求,可能会再实现一些"选用"方法
基本上就没问题了
谢谢观看
最后再补充一点,如果你想要点击Alert以外的地方,能实现Alert关闭,大概有几种方法(这里继续沿用思路里面的A、B两个UIView)
1、想办法让A绑定touch事件
2、建1个Button(或是4个)
建1个的前提是,这个Button要和A一样大,并且B能叠在这个Button之上,最终Button绑定方法,方法内写入关闭Alert代码即可(关闭代码上面已经有写了)(如下图)
建4个的意思是,在Alert以外的地方,区分4个区域,4个Button完美合作的填满透明部分(如下图)
