实现环境:
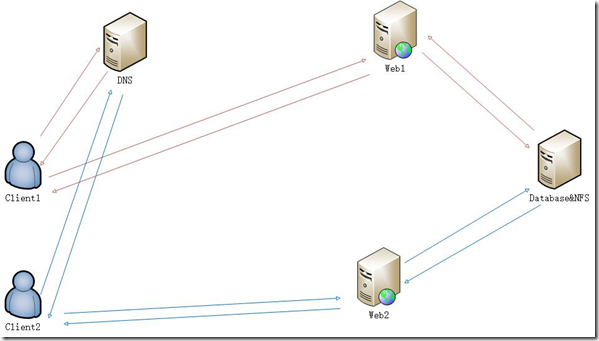
实现原理:
共四台服务器 A,B,C,D
服务器A (CentOS 6.7):
IP地址:
192.168.3.67
角色:
DNS服务
说明:
为两台web服务器做域名轮询
服务器B,C (CentOS 7.2):
IP地址:
B:192.168.3.70
C:192.168.3.77
角色:
web服务器
说明:
httpd+php模式.共享使用由服务器D通过NFS服务共享的Discuz文档.
服务器D (CentOS 6.7):
IP地址:
192.168.3.60
角色:
MySQL服务器,NFS服务器
说明:
MySQL允许服务器B,C远程连接
NFS服务为服务器B,C共享Discuz所有文档
服务器D
Mysql服务
安装Mysql:
# yum install -y mysql-server mysql mysql-devel
启动mysql
# service mysqld start
检查3306端口是否被mysql监听
# netstat -anp | grep 3306
检查是否开机自启动
# chkconfig --list | grep mysqld
[root@localhost ~]# chkconfig --list | grep mysqld
mysqld 0:off 1:off 2:off 3:off 4:off 5:off 6:off
设置为开机自启
# chkconfig mysqld on
[root@localhost ~]# chkconfig mysqld on
[root@localhost ~]# chkconfig --list | grep mysqld
mysqld 0:off 1:off 2:on 3:on 4:on 5:on 6:off
给mysql的root帐户设定密码为"root"
# /usr/bin/mysqladmin -u root password 'root'
登陆mysql
# mysql -u root -p
[root@localhost ~]# mysql -u root -p
Enter password:
Welcome to the MySQL monitor. Commands end with ; or g.
Your MySQL connection id is 3
Server version: 5.1.73 Source distribution
Copyright (c) 2000, 2013, Oracle and/or its affiliates. All rights reserved.
Oracle is a registered trademark of Oracle Corporation and/or its
affiliates. Other names may be trademarks of their respective
owners.
Type 'help;' or 'h' for help. Type 'c' to clear the current input statement.
mysql>
创建一个数据库dzdb
mysql> create database dzdb;
给这个数据库创建并绑定一个数据库用户dzuser,可以通过所有192.168.3网段访问,并指定密码为dzuser
mysql> grant all privileges on dzdb.* to 'dzuser'@'192.168.3.%' identified by 'dzuser';
测试中发现远程主机无法连接
[root @qt1 /web/vhosts/pma]# mysql -udzuser1 -h192.168.3.60 -p
Enter password:
ERROR 1045 (28000): Access denied for user 'dzuser'@'192.168.3.77' (using password: YES)
排除防火墙原因后,发现导致无法登陆的原因是user表中有空用户所致.
删除掉空用户即可:
mysql> delete from user where user='';
NFS服务设定
安装NFS:
# yum install nfs-utils
创建共享文件夹
# mkdir /var/www/nfs
设置权限
# setfacl -m u:apache:rwx /var/www/nfs
设定,允许服务器B和C读写
# vim /etc/exports
/var/www/nfs 192.168.3.70(rw,no_root_squash) 192.168.3.77(rw,no_root_squash)
启动服务,首先保证rpcbind服务已开启
# service rpcbind start
# service nfs start
设置开机自启
# chkconfig rpcbind on
# chkconfig nfs on
# chkconfig nfslock on
查看本机共享
# showmount -e
服务器B
创建挂载点
# mkdir /web/nfsdz
将这个目录设定主目录
# vim /etc/httpd/conf/httpd.conf
DocumentRoot "/web/nfsdz"
DirectoryIndex index.php index.html
# systemctl reload httpd
安装nfs
# yum install nfs-utils
# systemctl start rpcbind
# systemctl start nfs
挂载
# mount -t nfs -o nosuid,noexec,nodev,rw,bg,soft,rsize=32768,wsize=32768 192.168.3.60:/var/www/nfs /web/nfsdz
加入开机启动
# vim /etc/fstab
192.168.3.60:/var/www/nfs /web/nfsdz nfs defaults,_netdev 0 0
Discuz文档
将Discuz网站文档放进/web/nfsdz文件夹,步骤略.
添加权限
# cd /web/nfsdz
# chmod -R 777 *
服务器C
设置部分同服务器B
安装Discuz
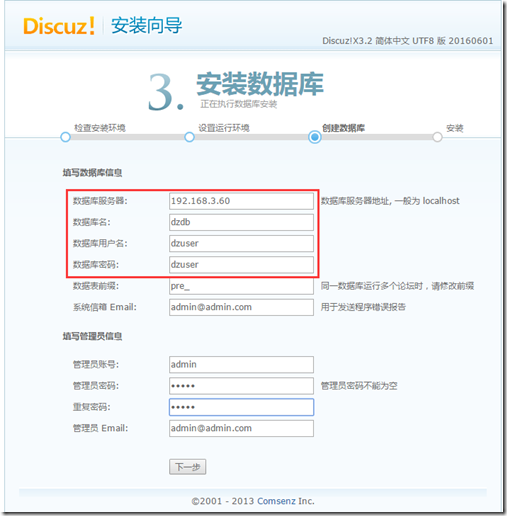
浏览器输入http://192.168.3.70/install 开始安装Discuz,数据库配置填写上面刚做的配置,如图
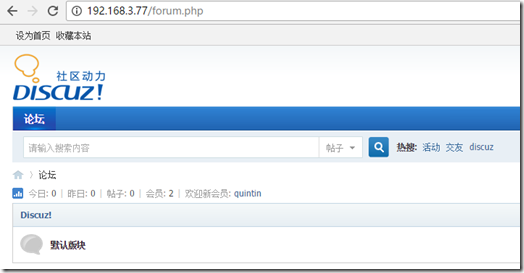
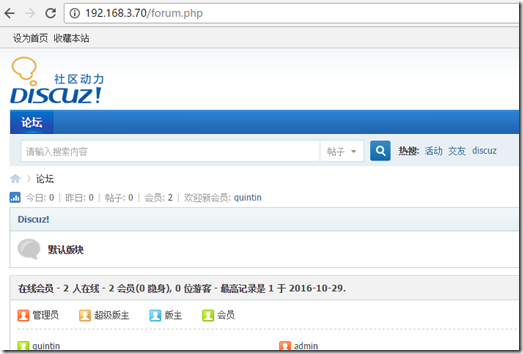
安装完毕,分别测试访问192.168.3.70和192.168.3.77
服务器A(DNS服务器)
BIND安装步骤略
关键配置部分:
由于是本地测试,所以我自定义一个域名www.testdz.com.
# vim /etc/named.rfc1912.zones
添加以下设置
zone "testdz.com" IN{
type master;
file "testdz.com.zone";
};
保存退出
# vim /var/named/testdz.com.zone
$TTL 600
@ IN SOA ns1.testdz.com. admin.testdz.com. (
2016051808
3H
15M
1W
1D
)
IN NS ns1.testdz.com.
IN NS ns2.testdz.com.
www IN A 192.168.3.77
www IN A 192.168.3.70
testdz.com. IN A 192.168.3.77
ns2 IN A 192.168.3.70
ns1 IN A 192.168.3.67
关键为黑体加粗部分,使用DNS轮询.
保存退出
重载配置
# service named reload
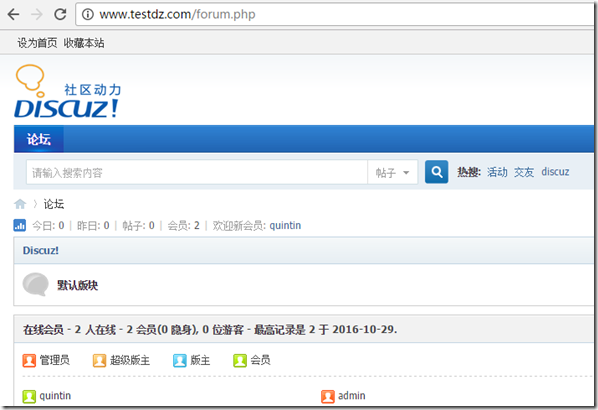
之后便可以通过域名www.testdz.com访问了,不同计算机第一次访问会被DNS分配到不同的主机上.
![clip_image001[6] clip_image001[6]](https://images2015.cnblogs.com/blog/861687/201701/861687-20170117171303067-1292977166.png)

