如需自取,完整项目源码:https://gitee.com/vxsoft/online-h
若对你有帮助,烦请star一个

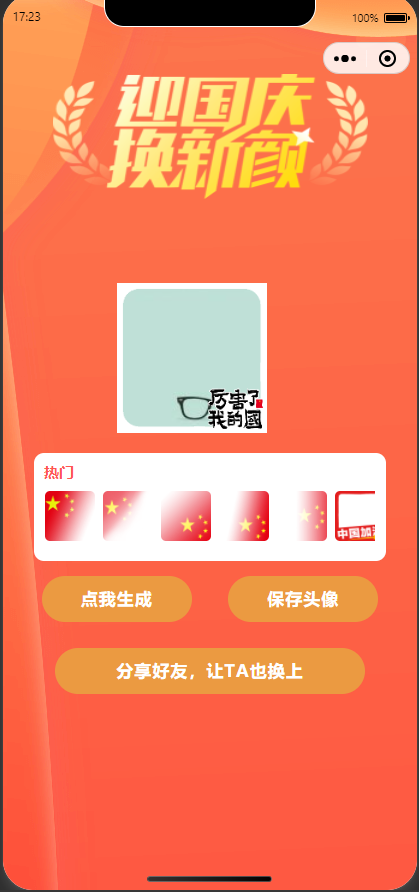
请给我一面国旗@微信官方,先上生成的头像效果图
小程序的制作国庆头像的页面
利用 canvas 绘制头像:
核心代码:
       wx.canvasToTempFilePath({
          x: 0,
          y: 0,
           num,
          height: num,
          destWidth: num,
          destHeight: num,
          canvasId: 'shareImg',
          success: function(res) {
            that.setData({
              prurl: res.tempFilePath
            })
            wx.hideLoading()
          },
          fail: function(res) {
            wx.hideLoading()
          }
       })
wx.canvasToTempFilePath的使用及各个属性介绍可到官方文档了解
https://developers.weixin.qq.com/miniprogram/dev/api/canvas/wx.canvasToTempFilePath.html
1,index.wxml
<!-- 画布大小按需定制 这里我按照背景图的尺寸定的  -->
<view style="margin-top:88px;margin: 80px auto;">
  <image src="../../images/20190906-logo2.png" height="50px" class="header"></image>
</view>

<view style=" 80%; margin: 0 auto;">
  <canvas canvas-id="shareImg" style="margin-left: 73px;margin-bottom:20px;"></canvas>
</view>


<view class="hot-biz" style=" 85%;margin: 0 auto;border-radius: 10px;margin-bottom:15px;">
  <view class="hot-top">
    <view class="tx">
      热门
    </view>
  </view>

  <view class="hot-item-list">
    <scroll-view scroll-x>
      <view class="hot-biz-list" >
        <view class="item" wx:for="{{list}}" wx:key="id">
          <image bindtap='selectImg' data-id='{{item}}' data-src='../../images/hat{{item}}.png' src="../../images/hat{{item}}.png" mode='aspectFill'></image>
        </view>
      </view>
    </scroll-view>
  </view>
</view>

<!-- 预览区域  -->
<view class='preview'>
  <view style="display: flex;flex-wrap: wrap; 90%; margin: 0 auto;">
    <button size='primary' lang="zh_CN" bindtap="getUserProfile" class="btn1">点我生成</button>
    <button size='primary' lang="zh_CN" bindtap="save" class="btn1">保存头像</button>
  </view>

  <button type='primary' open-type="share" bindtap='handleShare' class="btn2">分享好友,让TA也换上</button>
</view>
2,index.wxss
/* 设置整个页面的背景图 */
page{
  background-image: url('https://7778-wx-cloud-vyavv-1255811323.tcb.qcloud.la/20190829-bg.png?sign=482d59e33f6df0dd658b48cfabf69a4b&t=1632849707');
}

.header{
  width: 315px!important;
  height: 125px!important;
}

.btn1{
  background-color:#EB9A41;
  margin:0 auto;
  border-radius: 50px;
  color:#ffffff;
  margin-bottom:26px;
  letter-spacing: 1px;
  font-weight: 700;

  width: 150px!important;
  height: 46px!important;
  line-height: 29px;


  display: flex;
  flex-direction: column;
}

.btn2{
  background-color:#EB9A41!important;

  margin:0 auto;
  border-radius: 50px;
  letter-spacing: 1px;
  font-weight: 700;

  width: 310px!important;
  height: 46px!important;
  line-height: 29px;
}

/* list公共 */
.hot-biz{
  margin-top: 10px;
  background: #fff;
}
.hot-biz .tx{
  font-size: 15px;
  margin-left: 10px;
  padding: 9px 0;
  font-weight: 700;
  color: #FF5651;
}
.hot-top{
  display: flex;
}

/* 热门壁纸 */
.hot-item-list{
  margin: 0 auto;
  width: 94%;
  margin-bottom: 20px;
}
.hot-biz-list {
  display: flex;
  justify-content: space-between;
  /* flex-wrap: wrap; */
}
.hot-biz-list .item {
  width: 50px;
  flex-direction: column;
  align-items: center;
  height: 50px;
  padding-right: 8px;
}
.hot-biz-list image {
  width: 50px;
  height: 50px;
  border-radius:5px;
  margin: 0 auto;
  display: block;
}
/* end */
3,index.js的核心代码
drawImg(avatarUrl){
    let that = this;
    console.log("-- drawImg --");
    // `${that.data.userInfo.avatarUrl}`
    let promise1 = new Promise(function(resolve, reject) {
      wx.getImageInfo({
        src: avatarUrl,
        success: function(res) {
          console.log("promise1", res)
          resolve(res);
        }
      })
    });
    var index = that.data.defaultImg;
    // ../../images/head${index}.png
    // hat0.png  avg.jpg
    let promise2 = new Promise(function(resolve, reject) {
      wx.getImageInfo({
        src: `../../images/hat${index}.png`,
        success: function(res) {
          console.log(res)
          resolve(res);
        }
      })
    });
    Promise.all([
      promise1, promise2
    ]).then(res => {
      console.log("Promise.all", res)
      //主要就是计算好各个图文的位置
      let num = 150;
      ctx.drawImage(res[0].path, 0, 0, num, num)
      ctx.drawImage('../../' + res[1].path, 0, 0, num, num)
      ctx.stroke()
      ctx.draw(false, () => {
        wx.canvasToTempFilePath({
          x: 0,
          y: 0,
           num,
          height: num,
          destWidth: 960,
          destHeight: 960,
          canvasId: 'shareImg',
          success: function(res) {
            that.setData({
              prurl: res.tempFilePath
            })
            // wx.hideLoading()
          },
          fail: function(res) {
            wx.hideLoading()
          }
        })
      })
    })

  },
end:有兴趣可到以下小程序体验效果~
