先前博客有介绍pytest测试框架的安装及使用,现在来聊聊pytest可以生成哪些测试报告
1.allure测试报告
关于allure报告参见先前的一篇博文:https://www.cnblogs.com/feng0815/p/13792188.html ,这里不再赘述
2.生成resultlog文件
#!/usr/bin/python
# -*- coding: UTF-8 -*-
"""
@author:chenshifeng
@file:test_report.py
@time:2021/01/27
"""
class TestReport:
<span class="hljs-function"><span class="hljs-keyword">def</span> <span class="hljs-title">test_one</span>(<span class="hljs-params">self</span>):</span>
    x = <span class="hljs-string">"shifeng"</span>
    <span class="hljs-keyword">assert</span> <span class="hljs-string">"feng"</span> <span class="hljs-keyword">in</span> x

<span class="hljs-function"><span class="hljs-keyword">def</span> <span class="hljs-title">test_two</span>(<span class="hljs-params">self</span>):</span>
    x = <span class="hljs-string">"hello"</span>
    <span class="hljs-keyword">assert</span> x == <span class="hljs-string">"hi"</span>
执行命令:
pytest test_report.py --resultlog=./resultlog.txt
指定当前路径下生成resultlog.txt文件,打开文件,内容如下:
. reportdemo/test_report.py::TestReport::test_one F reportdemo/test_report.py::TestReport::test_two self = <test_report.TestReport object at 0x7fd9c0a3eac0>def test_two(self): x = "hello"> assert x == "hi"
E AssertionError: assert 'hello' == 'hi'
E - hi
E + hello
test_report.py:16: AssertionError
3.生成JunitXML文件
执行命令:
pytest test_report.py --junitxml=./resultlog.xml
同样指定在当前目录下生成resultlog.xml文件,打开文件内容如下:
<?xml version="1.0" encoding="utf-8"?>
<testsuites>
<testsuite errors="0" failures="1" hostname="chenshifengdeMacBook-Pro.local" name="pytest" skipped="0" tests="2"
time="0.072" timestamp="2021-01-27T23:56:58.204464">
<testcase classname="reportdemo.test_report.TestReport" file="reportdemo/test_report.py" line="9"
name="test_one" time="0.001"></testcase>
<testcase classname="reportdemo.test_report.TestReport" file="reportdemo/test_report.py" line="13"
name="test_two" time="0.002">
<failure message="AssertionError: assert 'hello' == 'hi'
- hi
+ hello">self = <test_report.TestReport object at 0x7fa152b97790>
def test_two(self):
x = <span class="hljs-symbol">&quot;</span>hello<span class="hljs-symbol">&quot;</span>
<span class="hljs-symbol">&gt;</span> assert x == <span class="hljs-symbol">&quot;</span>hi<span class="hljs-symbol">&quot;</span>
E AssertionError: assert <span class="hljs-symbol">&apos;</span>hello<span class="hljs-symbol">&apos;</span> == <span class="hljs-symbol">&apos;</span>hi<span class="hljs-symbol">&apos;</span>
E - hi
E + hello
test_report.py:16: AssertionError
<span class="hljs-tag"></<span class="hljs-name">failure</span>></span>
<span class="hljs-tag"></<span class="hljs-name">testcase</span>></span>
<span class="hljs-tag"></<span class="hljs-name">testsuite</span>></span>
</testsuites>
创建这样的XML文件有有什么用? 主要是为了方便Jenkin或其它的持续集成工具读取。
4.生成测试用例的URL
执行命令:
pytest test_report.py --pastebin=all
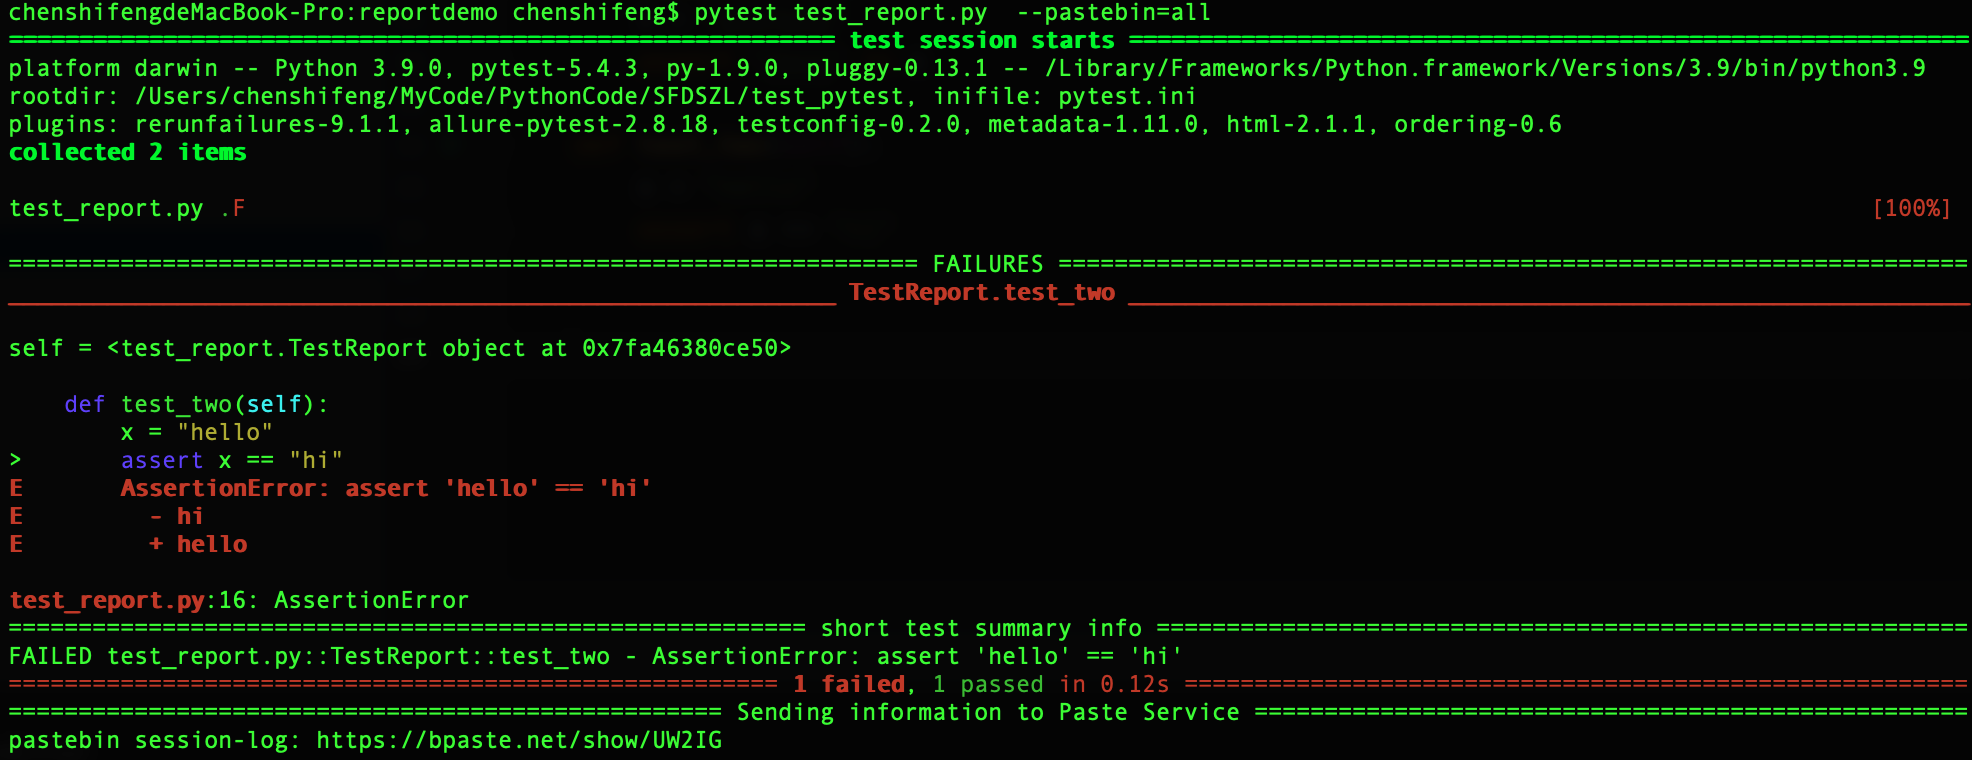
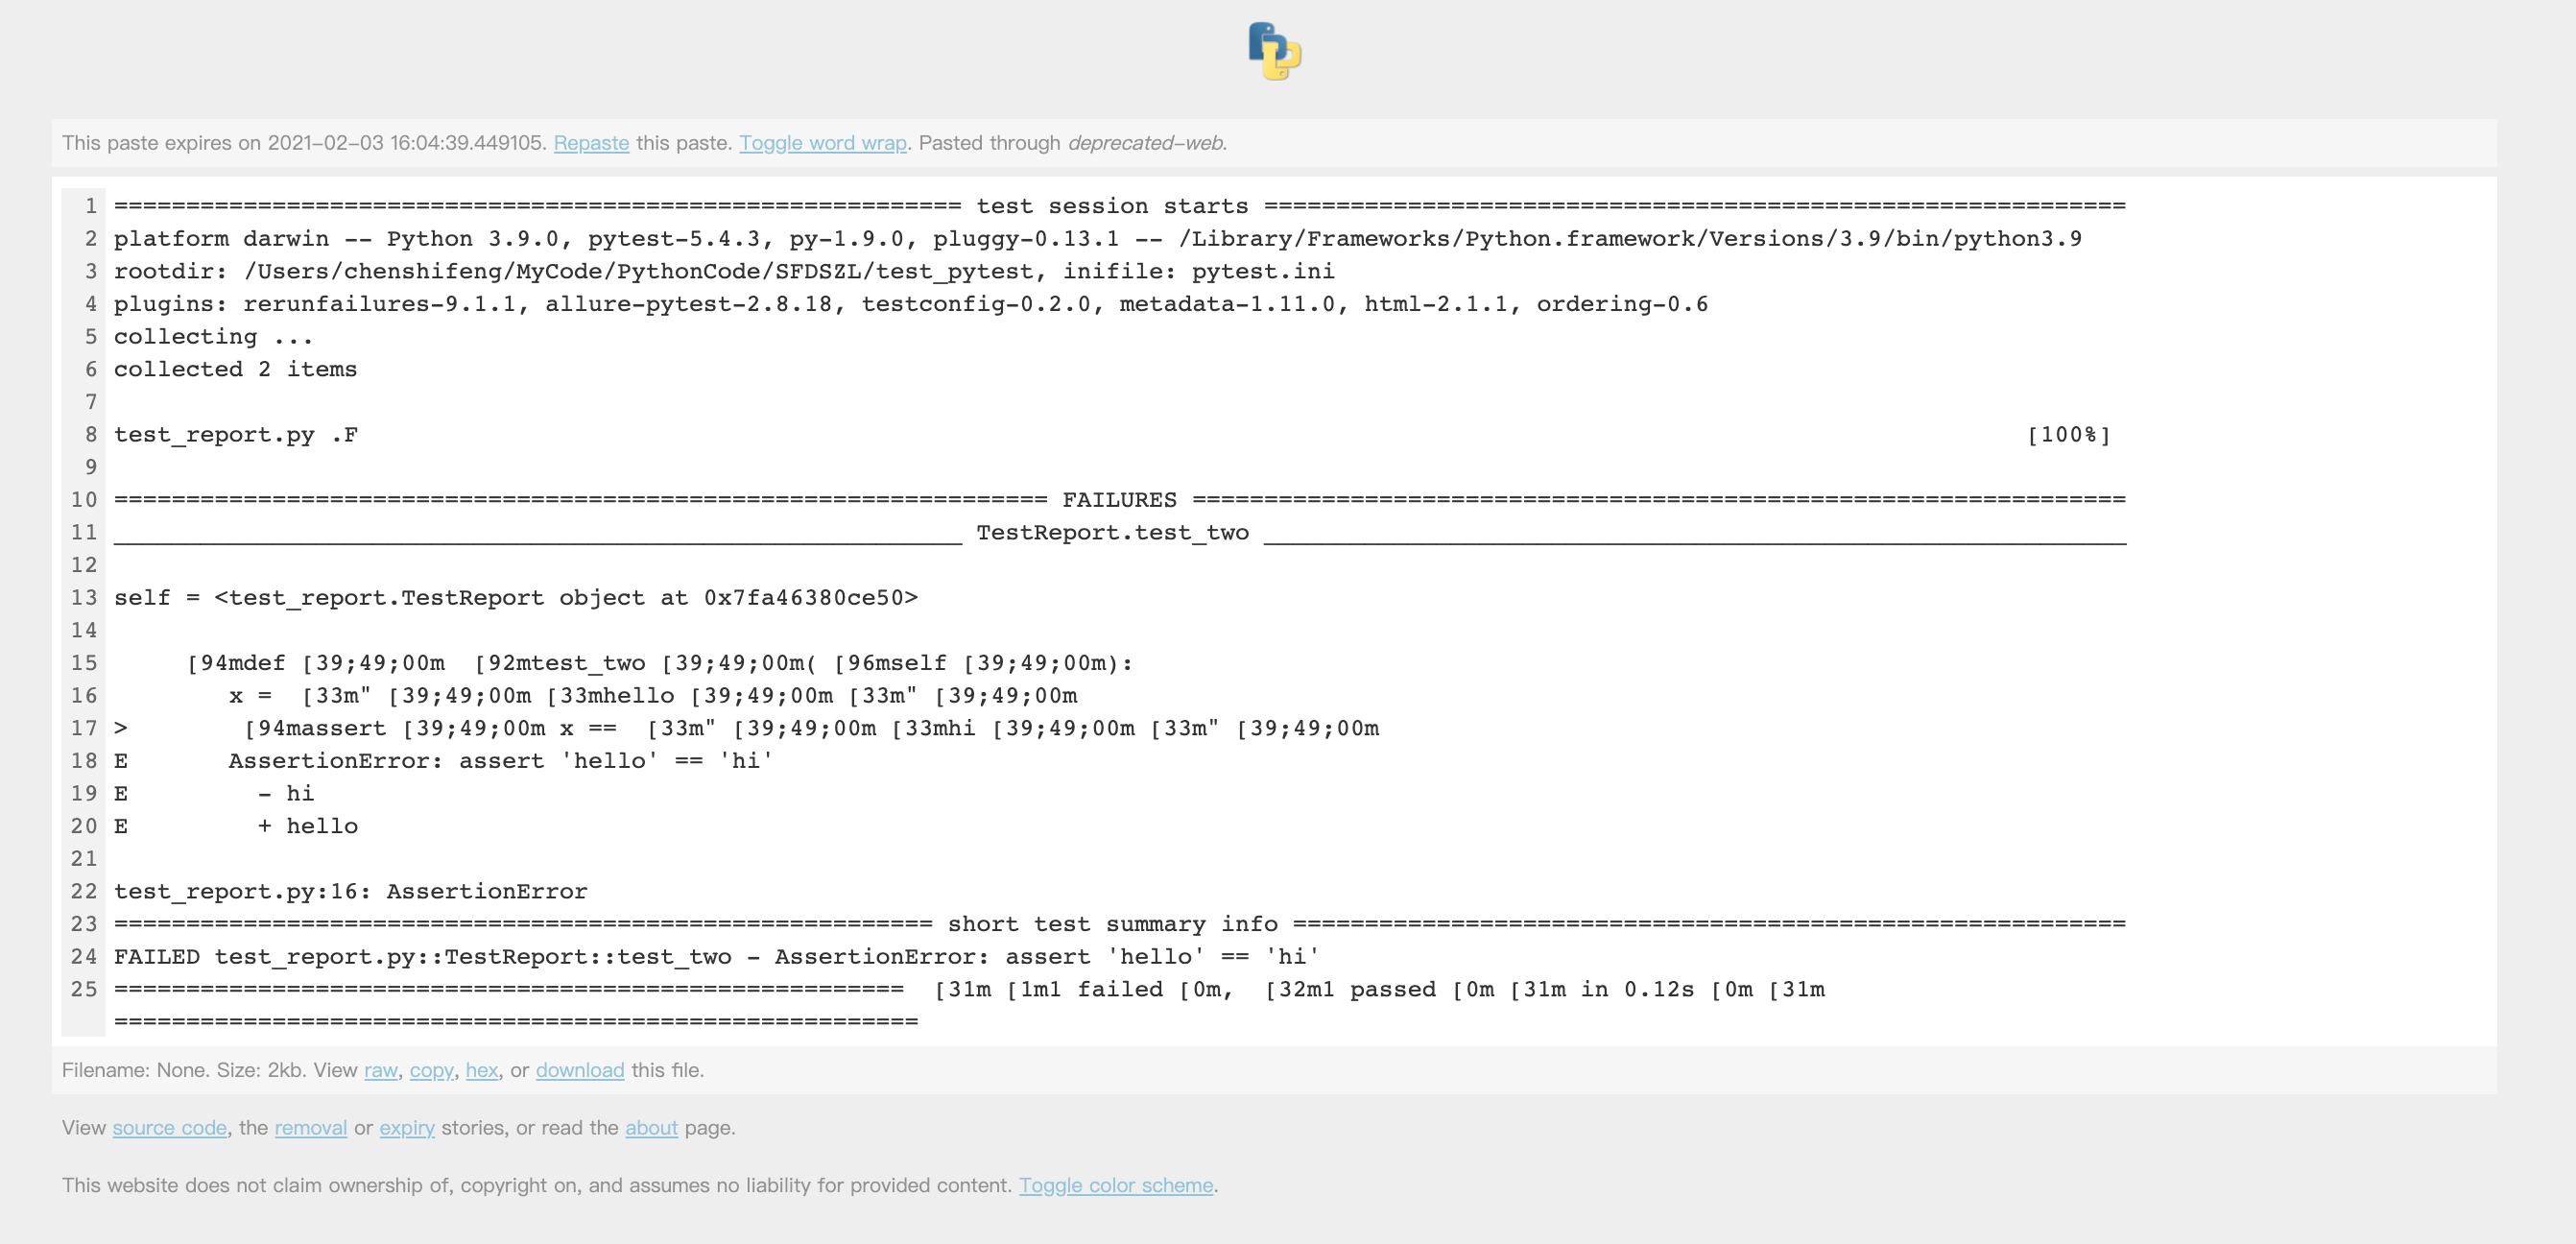
复制打印结果最后生成的session-log测试报告链接到浏览器:https://bpa.st/UW2IG
当然,你也可以只选择展示faile的测试用例
pytest test_class.py --pastebin=failed
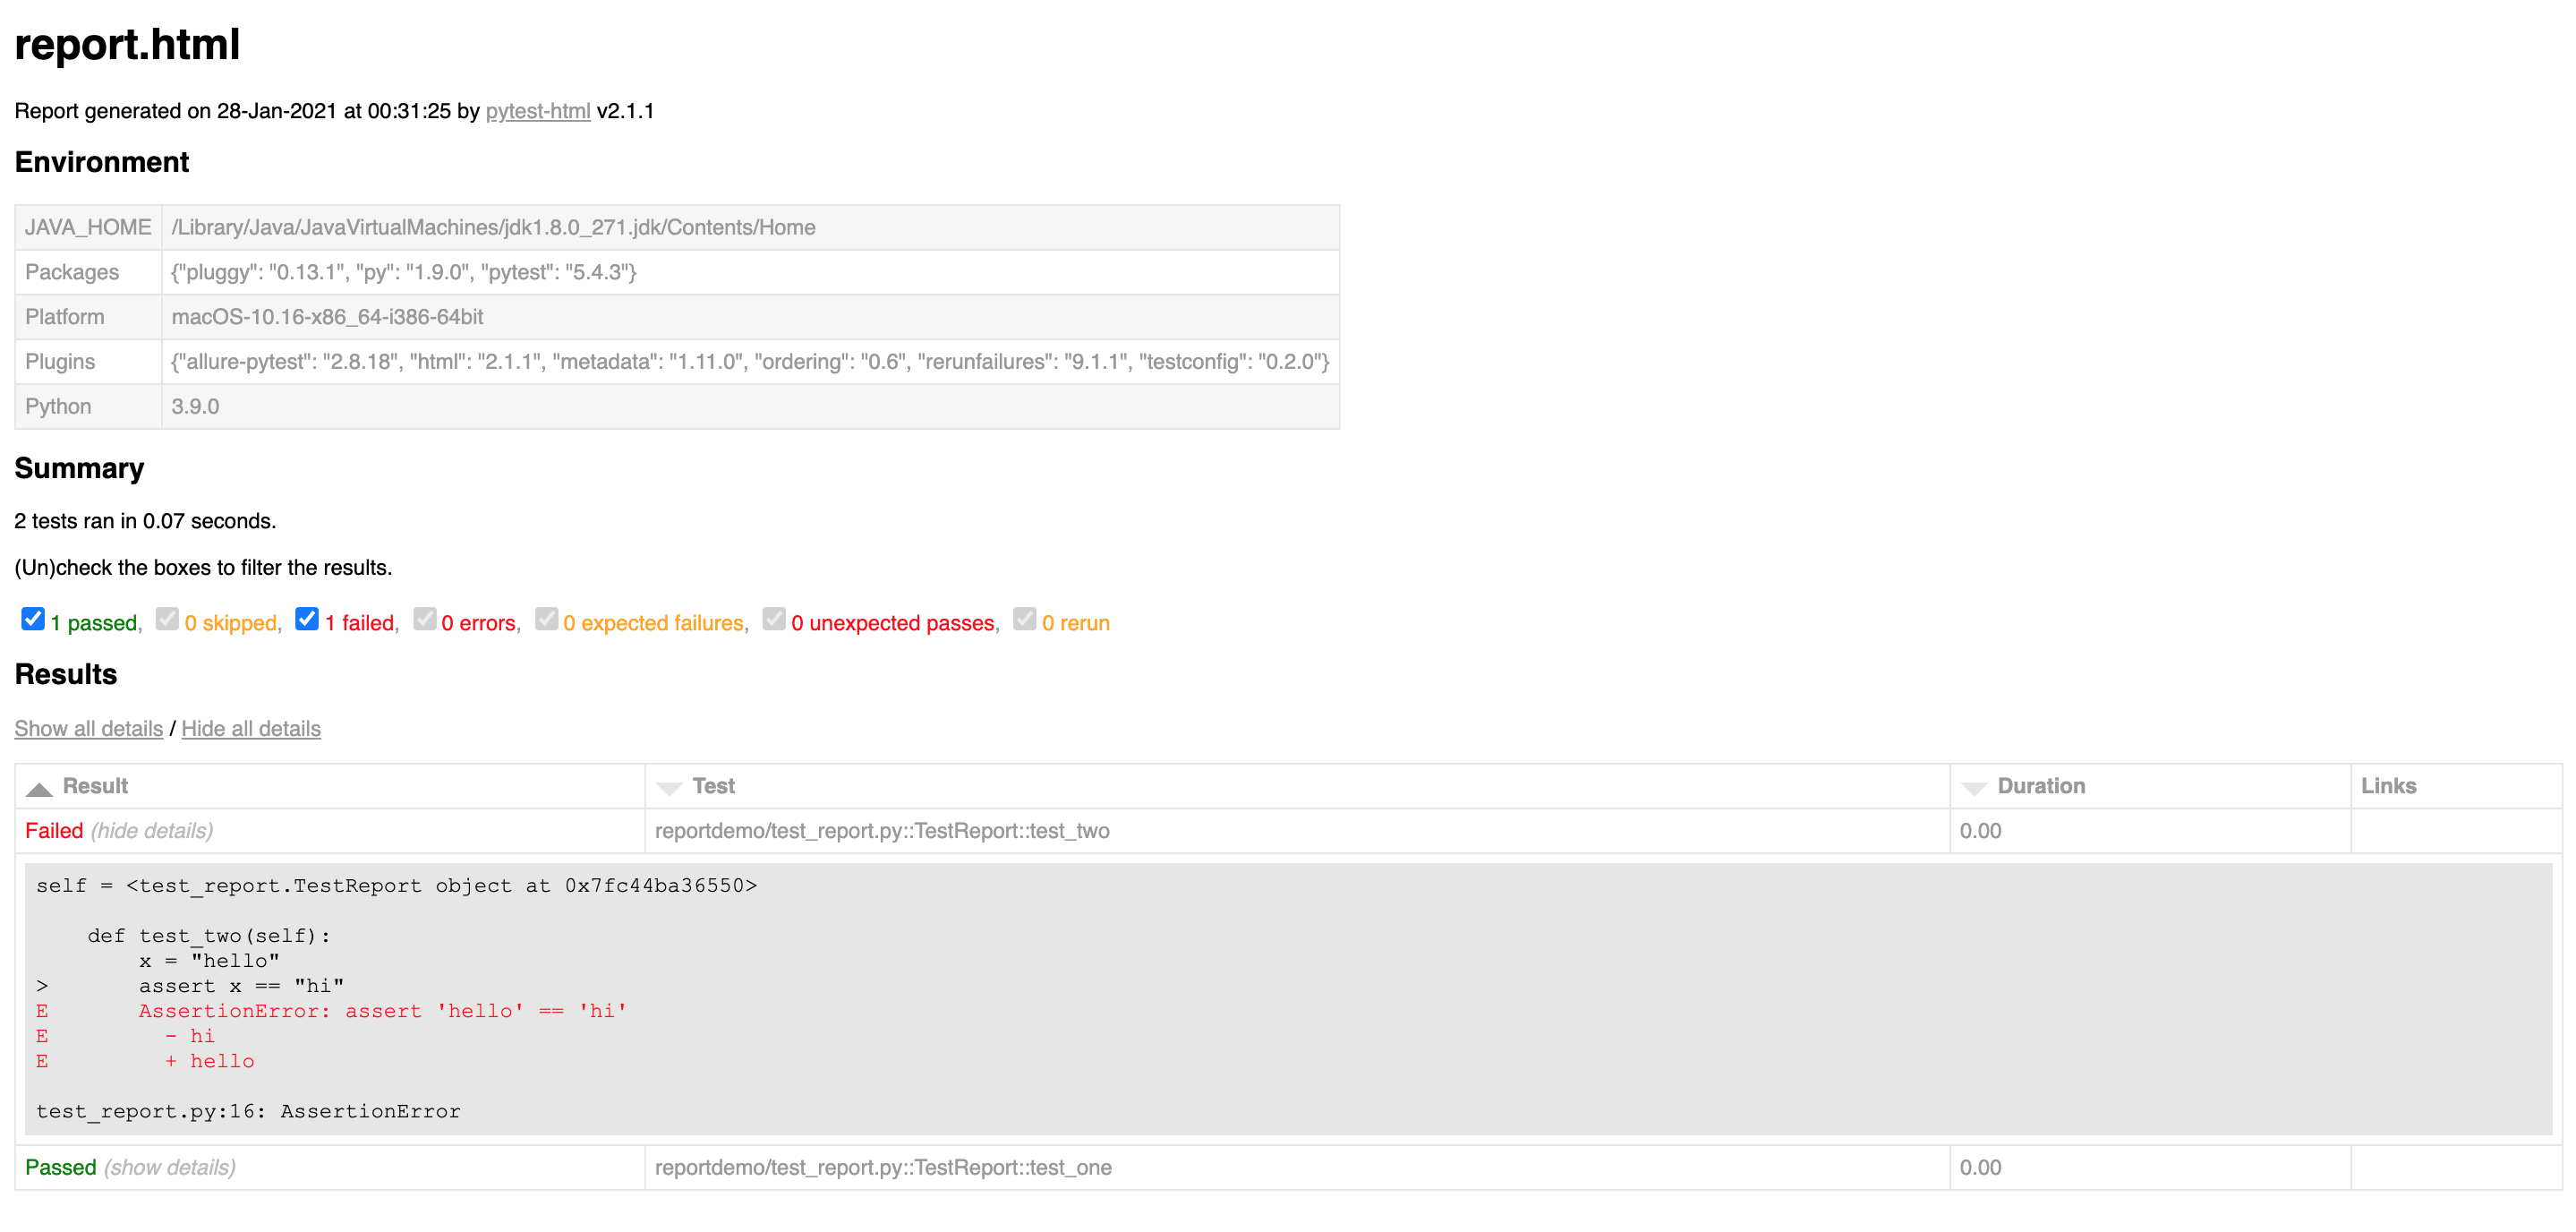
5.生成html测试报告
通过pip安装pytest-html
pip install pytest-html
在代码文件的当前目录下执行命令
pytest test_report.py --html=./report.html

指定在当前目录下生成report.html文件,打开测试文件: