开场白:首先,我先帮大家整理一下思路
准备:
数据库,表,数据
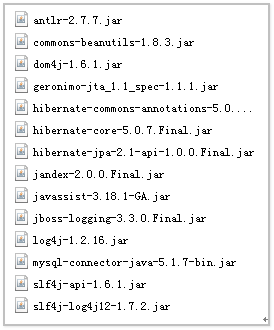
jar 包准备
Hibernate 基本jar 包
C3p0 数据库连接池
Spring AOP 基本包
Spring Ioc 基本包
Spring 事务控制
Spring 整合 junit 用户方便测试
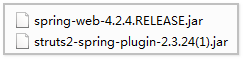
Spring 整合Struts 包
Spring-annotation 包
Spring的json插件包
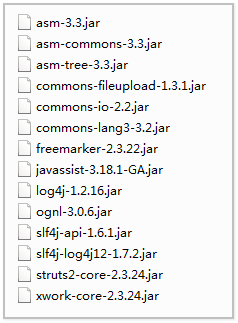
Struts基本jar包
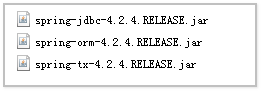
Spring 整合Hibernate
创建实体类
书写Service 层和Dao层
编写Spring的配置
配置IOC注解
配置Hibernate模板和事务控制
测试Spring和Hibernate是否成功
Spring 整合Struts2
配置前端控制器
书写action
测试
OK,思路屡一下后,下面开始书写详细的步骤,(注意:常用的方法和数据库的创建省略 。。。代码省略,自己写测试)
创建数据库 。。。
创建表 。。。
插入测试数据。。。
前端UI界面 。。。
----------------------------------------------------------------------------------------------------------------------------------
Spring 整合Hibernate
导入Hibernate 和 Spring 以及相关 jar 包


一、创建实体类和映射配置,使用注解 。。。
@Entity //实体类
@Table(name = "数据库表名")
public class Customer{
@Id //主键
@Column(name = "对应数据库中的字段名")
@GeneratedValue(strategy=GenerationType.IDETITY)//主键自增策略,IDETITY = MySql的自增,AUTO = 自适应<<<注意:
如需使用UUID 需要另外一个注解配合使用并且主键类型需要时String类型的:
      @GenericGenerator(name = "Myuuid",strategy = "uuid")
      @GeneratedValue(generator = "Myuuid")>>>
    private Integer 变量名,最好与数据库字段名对应


    @Column(name = "对应数据库中的字段名")
    private Integer 变量名,最好与数据库字段名对应

    。。。
}
二、书写Service 和Dao层 。。。
三、编写Spring的配置文件(applicationContext.xml)本次使用的配置我会加入步数,没有加入步数的本步骤不使用
 1 <?xml version="1.0" encoding="UTF-8"?>
 2 <beans xmlns:xsi="http://www.w3.org/2001/XMLSchema-instance"
 3        xmlns="http://www.springframework.org/schema/beans"
 4        xmlns:context="http://www.springframework.org/schema/context"
 5        xmlns:tx="http://www.springframework.org/schema/tx"
 6        xmlns:aop="http://www.springframework.org/schema/aop"
 7         xsi:schemaLocation="
 8         http://www.springframework.org/schema/beans
 9         http://www.springframework.org/schema/beans/spring-beans-4.2.xsd
10         http://www.springframework.org/schema/context
11         http://www.springframework.org/schema/context/spring-context-4.2.xsd
12         http://www.springframework.org/schema/tx
13         http://www.springframework.org/schema/tx/spring-tx-4.2.xsd
14         http://www.springframework.org/schema/aop
15         http://www.springframework.org/schema/aop/spring-aop-4.2.xsd
16        ">
17
18     <!-- 第一步:指定spring在创建容器时要扫描的包 -->
19     <context:component-scan base-package="cn.ibbidream"></context:component-scan>
20
21     <!-- 第二步:管理hibernateTemplate -->
22     <bean id="hibernateTemplate" class="org.springframework.orm.hibernate5.HibernateTemplate">
23         <property name="sessionFactory" ref="sessionFactory"></property>
24     </bean>
25
26     <!-- 配置事务 -->
27     <bean id="transactionManager" class="org.springframework.orm.hibernate5.HibernateTransactionManager">
28         <property name="sessionFactory" ref="sessionFactory"></property>
29     </bean>
30
31     <!-- 配置通知 -->
32     <tx:advice id="txAdvice" transaction-manager="transactionManager">
33         <tx:attributes>
34             <tx:method name="*"/>
35             <tx:method name="query*" propagation="SUPPORTS" read-only="true"></tx:method>
36         </tx:attributes>
37     </tx:advice>
38
39     <!-- 配置AOP -->
40     <aop:config>
41         <aop:pointcut id="pt1" expression="execution(* cn.ibbidream.service.impl.*.*(..))"></aop:pointcut>
42         <aop:advisor advice-ref="txAdvice" pointcut-ref="pt1"></aop:advisor>
43     </aop:config>
44
45     <!-- 第三步:管理SessionFactory -->
46     <bean id="sessionFactory" class="org.springframework.orm.hibernate5.LocalSessionFactoryBean">
47         <!-- 第四步:配置管理数据库连接池 -->
48         <property name="dataSource" ref="dataSource"></property>
49
50         <!-- 第六步:配置数据库其他信息 -->
51         <property name="hibernateProperties">
52             <props>
53                 <!-- 配置数据库方言 -->
54                 <prop key="hibernate.dialect">org.hibernate.dialect.MySQLDialect</prop>
55                 <!-- 配置是否在控制台打印sql语句 -->
56                 <prop key="hibernate.show_sql">true</prop>
57                 <!-- 配置是否格式化输出sql语句 -->
58                 <prop key="hibernate.format_sql">true</prop>
59                 <!-- 配置生成ddl语句的方式 -->
60                 <prop key="hibernate.hbm2ddl.auto">update</prop>
61             </props>
62         </property>
63
64         <!-- 第七步:配置hibernate的映射文件的注解扫描 -->
65         <property name="packagesToScan">
66             <array>
67                 <value>cn.ibbidream.entity</value>
68             </array>
69         </property>
70     </bean>
71
72     <!-- 第五步:管理dataSource -->
73     <bean id="dataSource" class="com.mchange.v2.c3p0.ComboPooledDataSource">
74         <property name="driverClass" value="com.mysql.jdbc.Driver"></property>
75         <property name="jdbcUrl" value="jdbc:mysql://localhost:3306/crm"></property>
76         <property name="user" value="root"></property>
77         <property name="password" value="jiajia771"></property>
78     </bean>
79
80 </beans>
四、在Service和Dao层中配置AOP注解(Aspect Oriented Programming 面向切面编程。解耦是程序员编码开发过程中一直追求的。AOP也是为了解耦所诞生。) AOP 主要是利用代理模式的技术来实现的。
  @Service("customerService")//声明这是一个Service 层的装配Bean//看不懂的 自行百度

  @Controller//控制层  视图层
@Repository//持久层
@Autowired //自动对象 注入
  @Qualifier("对象注解名称")//如果对象名和属性名一样 可以省略此写法

五、配置Hibernate模板和事务控制(applicationContext.xml)本次使用的配置我会加入步数,没有加入步数的本步骤不使用(其他在上面的配置已经配置完成)
 1 <?xml version="1.0" encoding="UTF-8"?>
 2 <beans xmlns:xsi="http://www.w3.org/2001/XMLSchema-instance"
 3        xmlns="http://www.springframework.org/schema/beans"
 4        xmlns:context="http://www.springframework.org/schema/context"
 5        xmlns:tx="http://www.springframework.org/schema/tx"
 6        xmlns:aop="http://www.springframework.org/schema/aop"
 7         xsi:schemaLocation="
 8         http://www.springframework.org/schema/beans
 9         http://www.springframework.org/schema/beans/spring-beans-4.2.xsd
10         http://www.springframework.org/schema/context
11         http://www.springframework.org/schema/context/spring-context-4.2.xsd
12         http://www.springframework.org/schema/tx
13         http://www.springframework.org/schema/tx/spring-tx-4.2.xsd
14         http://www.springframework.org/schema/aop
15         http://www.springframework.org/schema/aop/spring-aop-4.2.xsd
16        ">
17
18     <!-- 指定spring在创建容器时要扫描的包 -->
19     <context:component-scan base-package="cn.ibbidream"></context:component-scan>
20
21     <!-- 管理hibernateTemplate -->
22     <bean id="hibernateTemplate" class="org.springframework.orm.hibernate5.HibernateTemplate">
23         <property name="sessionFactory" ref="sessionFactory"></property>
24     </bean>
25
26     <!-- 第一步:配置事务 -->
27     <bean id="transactionManager" class="org.springframework.orm.hibernate5.HibernateTransactionManager">
28         <property name="sessionFactory" ref="sessionFactory"></property>
29     </bean>
30
31     <!-- 第二步:配置通知 -->
32     <tx:advice id="txAdvice" transaction-manager="transactionManager">
33         <tx:attributes>
34             <tx:method name="*"/>
35             <tx:method name="query*" propagation="SUPPORTS" read-only="true"></tx:method>
36         </tx:attributes>
37     </tx:advice>
38
39     <!-- 第三步:配置AOP -->
40     <aop:config>
41         <aop:pointcut id="pt1" expression="execution(* cn.ibbidream.service.impl.*.*(..))"></aop:pointcut>
42         <aop:advisor advice-ref="txAdvice" pointcut-ref="pt1"></aop:advisor>
43     </aop:config>
44
45     <!-- 管理SessionFactory -->
46     <bean id="sessionFactory" class="org.springframework.orm.hibernate5.LocalSessionFactoryBean">
47         <!-- 配置管理数据库连接池 -->
48         <property name="dataSource" ref="dataSource"></property>
49
50         <!-- 配置数据库其他信息 -->
51         <property name="hibernateProperties">
52             <props>
53                 <!-- 配置数据库方言 -->
54                 <prop key="hibernate.dialect">org.hibernate.dialect.MySQLDialect</prop>
55                 <!-- 配置是否在控制台打印sql语句 -->
56                 <prop key="hibernate.show_sql">true</prop>
57                 <!-- 配置是否格式化输出sql语句 -->
58                 <prop key="hibernate.format_sql">true</prop>
59                 <!-- 配置生成ddl语句的方式 -->
60                 <prop key="hibernate.hbm2ddl.auto">update</prop>
61             </props>
62         </property>
63
64         <!-- 配置hibernate的映射文件的注解扫描 -->
65         <property name="packagesToScan">
66             <array>
67                 <value>cn.ibbidream.entity</value>
68             </array>
69         </property>
70     </bean>
71
72     <!-- 管理dataSource -->
73     <bean id="dataSource" class="com.mchange.v2.c3p0.ComboPooledDataSource">
74         <property name="driverClass" value="com.mysql.jdbc.Driver"></property>
75         <property name="jdbcUrl" value="jdbc:mysql://localhost:3306/crm"></property>
76         <property name="user" value="root"></property>
77         <property name="password" value="jiajia771"></property>
78     </bean>
79
80 </beans>
六、测试,书写main 方法测试
----------------------------------------------------------------------------------------------------------------------------------------------------------
Spring 整合Struts2
导包

一、配置前端控制器(web.xml)
 1 <?xml version="1.0" encoding="UTF-8"?>
 2 <web-app xmlns="http://java.sun.com/xml/ns/javaee"
 3            xmlns:xsi="http://www.w3.org/2001/XMLSchema-instance"
 4            xsi:schemaLocation="http://java.sun.com/xml/ns/javaee
 5           http://java.sun.com/xml/ns/javaee/web-app_3_1.xsd"
 6            version="2.5">
 7
 8     <!-- 配置前端控制器整合 -->
 9     <listener>
10         <listener-class>org.springframework.web.context.ContextLoaderListener</listener-class>
11     </listener>
12
13     <context-param>
14         <param-name>contextConfigLocation</param-name>
15         <param-value>classpath:applicationContext.xml</param-value>
16     </context-param>
17
18     <!-- 配置Struts 前端控制器 -->
19     <filter>
20         <filter-name>Struts2</filter-name>
21         <filter-class>org.apache.struts2.dispatcher.ng.filter.StrutsPrepareAndExecuteFilter</filter-class>
22         <init-param>
23             <param-name>struts.devMode</param-name>
24             <param-value>true</param-value>
25         </init-param>
26     </filter>
27
28     <filter-mapping>
29         <filter-name>Struts2</filter-name>
30         <url-pattern>/*</url-pattern>
31     </filter-mapping>
32 </web-app>
二、发送请求获取数据
127.0.0.1:8080/customer/queryCustomer
三、编写action(动作类必须以action、actions、struts、struts2为结尾的包下)
@Controller//上面解释过了
@Scope("prototype")//配置为多例模式
@ParentPackage("struts-default")//继承父类
@Namespace(“/customer”)//配置名称空间
@Autowired//自动类型注入
 1 package cn.ibbidream.web.action;
 2
 3 import cn.ibbidream.entity.Customer;
 4 import cn.ibbidream.service.CustomerService;
 5 import com.opensymphony.xwork2.ActionContext;
 6 import com.opensymphony.xwork2.ActionSupport;
 7 import org.apache.struts2.convention.annotation.*;
 8 import org.hibernate.criterion.DetachedCriteria;
 9 import org.hibernate.criterion.Projections;
10 import org.springframework.beans.factory.annotation.Autowired;
11 import org.springframework.beans.factory.annotation.Qualifier;
12 import org.springframework.context.annotation.Scope;
13 import org.springframework.stereotype.Controller;
14
15 import java.util.HashMap;
16 import java.util.List;
17 import java.util.Map;
18
19 @Namespace("/customer")
20 @Controller
21 @ParentPackage(value = "json-default")
22 @Scope(value = "prototype")
23 public class CustomerAction extends ActionSupport{
24
25     @Autowired
26     @Qualifier(value = "customerService")
27     private CustomerService customerService;
28
29     @Action(value = "CustomerlistCustomer",results = {@Result(name = "customerlistCustomer",type = "json")})
30     public String CustomerlistCustomer(){
31
32         DetachedCriteria dc = DetachedCriteria.forClass(Customer.class);
33
34         //业务流程
35         /*
36          * 将数据转换成datagrid所需的格式需要两个key:
37          *     1、total:数据的总记录数
38          *     2、rows:所有客户的集合
39          */
40         //查询所有客户的总记录数
41         //统计查询是一种特殊的投影查询
42         dc.setProjection(Projections.rowCount());
43         Long count = customerService.queryCountCustomer(dc);
44
45
46         List<Customer> customers = customerService.queryListCustomer(dc);
47
48         Map<String, Object> map = new HashMap<>();
49         map.put("total",count);
50         map.put("rows",customers);
51
52         System.out.println(map.toString());
53
54         ActionContext.getContext().getValueStack().push(map);
55         return "customerlistCustomer";
56     }
57
58 }
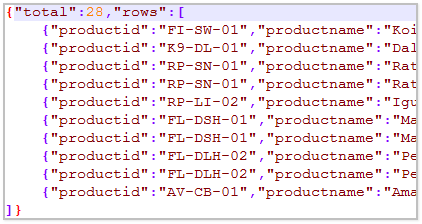
四、因为我的前端用的esayUi 写的,所以需要返回json 格式的数据(3.5. 将数据转换成json格式)
1、导入json的插件包
2、修改继承的包
3、将数据封装成所需要的格式(即封装到一个map中)
4、将map压入栈顶
5、返回的结果集类型如图
将ParentPackage 继承json-default、json-default继承struts-default ,我上边已经改好了
将返回集类型改为json,三种也做好了
书写一个方法可以查询返回数据的个数的
测试,至此案例完成(注意,本篇文章仅仅帮助初学者理思路的,如果完全按照此文章书如果是小白级别可能写不出来)
如有大神看出错误所在,请在评论区指正