CSS3疑难问题---4、父子元素相邻的垂直外边距重叠的问题
一、总结
一句话总结:
可以通过给父元素设置伪元素:before来增加一个空的table元素来解决
.box1:before{
    content: "";
    display: table;
}
二、父子元素相邻的垂直外边距重叠的问题
博客对应课程的视频位置:4、父子元素相邻的垂直外边距重叠的问题
https://www.fanrenyi.com/video/13/63
问题:
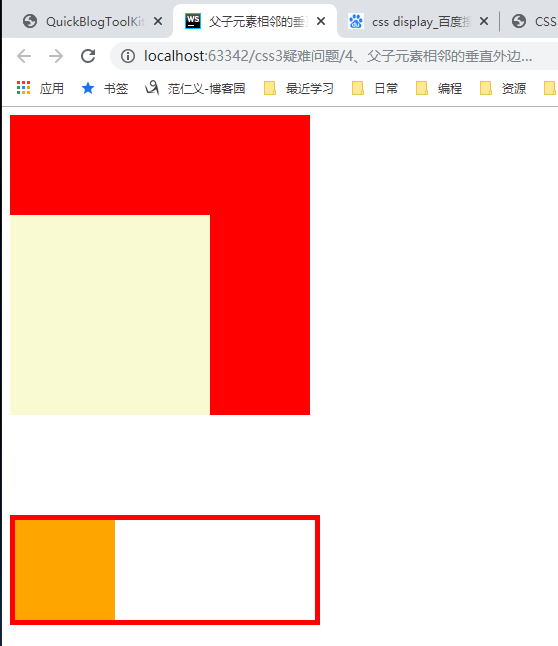
子元素和父元素相邻的垂直外边距会发生重叠,子元素的外边距会传递给父元素
解决
要么不用外边距,要么不让他们两相邻
解决一:
父元素用一个内边距可以解决这个问题,但是会改变盒子的可见区域的高,不推荐
解决二:
可以通过给父元素设置伪元素:before来增加一个空的table元素来解决
.box1:before{
    content: "";
    display: table;
}
修改的clearfix
经过修改后的clearfix是一个多功能的
既可以解决高度塌陷,又可以确保相邻的父元素和子元素的垂直外边距不会重叠
.clearfix:before,
.clearfix:after{
    content: "";
    display: table;
    clear: both;
}

.clearfix{
    zoom: 1;
}
三、课程代码

 1 <!DOCTYPE html>
 2 <html lang="en">
 3 <head>
 4     <meta charset="UTF-8">
 5     <title>父子元素相邻的垂直外边距重叠的问题</title>
 6     <style>
 7         .parent{
 8             width: 300px;
 9             height: 300px;
10             background-color: red;
11             /*padding-top: 1px;*/
12         }
13         .child{
14             width: 200px;
15             height: 200px;
16             background-color: lightgoldenrodyellow;
17             margin-top: 100px;
18         }
19         /*.parent:before{*/
20         /*    content: '';*/
21         /*    display: table;*/
22         /*}*/
23         .box1{
24             border: 5px solid red;
25             width: 300px;
26             margin-top: 100px;
27         }
28         .box2{
29             width: 100px;
30             height: 100px;
31             background-color: orange;
32             float: left;
33         }
34         .clearfix:after{
35             content: '';
36             display: table;
37             clear: both;
38         }
39
40         .clearfix1:before,
41         .clearfix1:after{
42             content: '';
43             display: table;
44         }
45         .clearfix1:after{
46             clear: both;
47         }
48     </style>
49 </head>
50 <body>
51 <!--
52 现象:父子元素相邻的垂直外边距重叠
53 原因:子元素和父元素相邻的垂直外边距会发生重叠,子元素的外边距会传递给父元素
54 思路:1、要么不用外边距   2、要么不让他们相邻
55 解决:
56 1、给父元素加一个内边距(padding-top: 1px;),这样改变了父元素可见区域的高,不推荐
57 2、
58
59 修改后的clearfix有两个作用
60 1、解决父子元素相邻的垂直外边距重叠
61 2、解决浮动高度坍塌
62
63 -->
64 <div class="parent clearfix1">
65 <!--    <table></table>-->
66     <div class="child"></div>
67 </div>
68
69 <!--浮动导致的高度坍塌-->
70 <div class="box1 clearfix1">
71     <div class="box2"></div>
72 </div>
73 </body>
74 </html>
四、HTML-完美解决父子元素的外边距重叠和高度塌陷问题
转自或参考:HTML-完美解决父子元素的外边距重叠和高度塌陷问题
https://www.cnblogs.com/hack-ing/p/11738316.html
<!DOCTYPE html>
<html>
    <head>
        <meta charset="UTF-8">
        <title></title>
        <style type="text/css">
            *{margin:0px; padding:0px;}
            .box1{
                 300px;
                height: 300px;
                background-color: red
            }
            .box2{
                 200px;
                height: 200px;
                background-color: yellow;
                margin-top: 100px;
            }

        </style>
    </head>
    <body>


        <div class="box1 ">

            <div class="box2"></div>
        </div>

    </body>
</html>
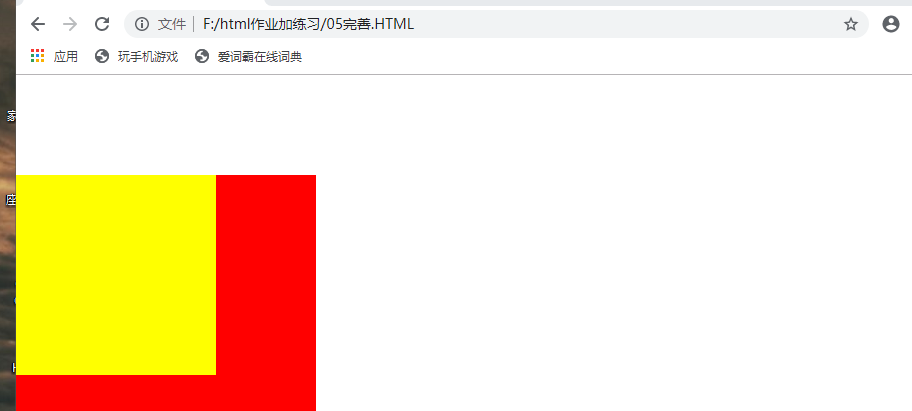
当把子元素margin-top:100 时,其父元素会跟着一样改变

解决方法
用css解决
.clearfix:before,
            .clearfix:after{
                content: "";
                display: table;
                clear: both;
            }

            .clearfix{
                zoom: 1;
            }
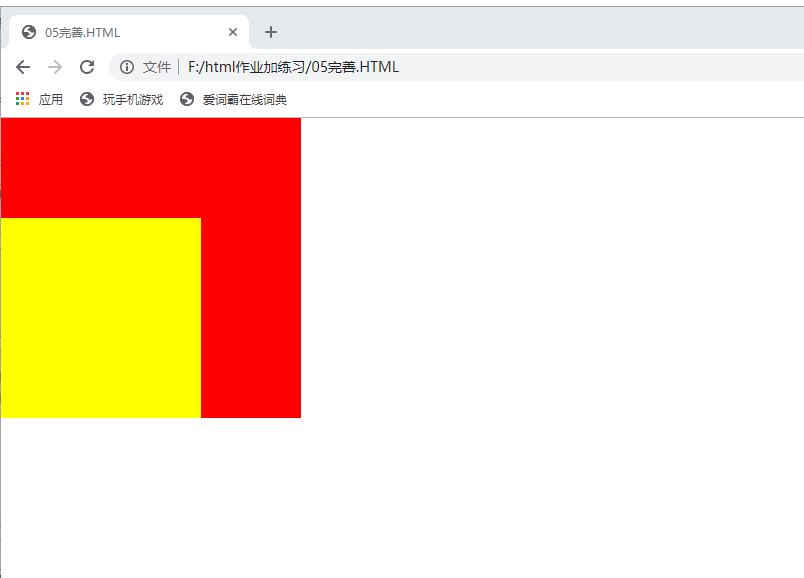
形成以下完全代码
<!DOCTYPE html>
<html>
    <head>
        <meta charset="UTF-8">
        <title></title>
        <style type="text/css">
            *{margin:0px; padding:0px;}
            .box1{
                 300px;
                height: 300px;
                background-color: red
            }
            .box2{
                 200px;
                height: 200px;
                background-color: yellow;
                margin-top: 100px;
            }
            .clearfix:before,
            .clearfix:after{
                content: "";
                display: table;
                clear: both;
            }

            .clearfix{
                zoom: 1;
            }

        </style>
    </head>
    <body>


        <div class="box1  clearfix">

            <div class="box2"></div>
        </div>

    </body>
</html>
运行后变成
