最近研究了一下ui-view多层嵌套,整理了一下
1.最简单的ui-view用法
html部分:
<ul class="nav navbar-nav">
    <li ui-sref-active="active"><a ui-sref="home">首页</a></li>
    <li ui-sref-active="active"><a ui-sref="news">新闻</a></li>
    <li ui-sref-active="active"><a ui-sref="center">个人中心</a></li>
</ul>
<div class="wrap" ui-view></div>
路由配置:
var app = angular.module('myApp',["ui.router"]);
app.config(["$stateProvider","$urlRouterProvider",  function ($stateProvider,$urlRouterProvider) {
    $stateProvider
        .state("home", {
            url: '/home',
            templateUrl:'template/home.html',
            controller:'homeCtrl'
        })
        .state("news", {
            url: '/news',
            templateUrl:'template/news.html',
            controller:'newsCtrl'
        })
        .state("details",{
            url:'/news/details',
            templateUrl:'template/newsDetails.html',
            controller:'detailsCtrl'
        })
        .state("center", {
            url: '/center',
            templateUrl:'template/setCenter.html',
            controller:'centerCtrl'
        });
    $urlRouterProvider.otherwise('/home');
}]);
2.多视口
html部分:
<ul class="nav navbar-nav">
    <li ui-sref-active="active"><a ui-sref="home">首页</a></li>
    <li ui-sref-active="active"><a ui-sref="home.news">新闻</a></li>
    <li ui-sref-active="active"><a ui-sref="home.center">个人中心</a></li>
</ul>
<div class="warp">
    <div class="main" ui-view="home"></div>
    <div class="left" ui-view="left"></div>
    <div class="right" ui-view="right"></div>
</div>
路由配置:
var app = angular.module('myApp',["ui.router","ui.bootstrap"]);
app.config(["$stateProvider","$urlRouterProvider",  function ($stateProvider,$urlRouterProvider) {
    $stateProvider
        .state("home", {
            url: '/home',
            views:{
                'home':{template:"<div class='body' ui-view='body'></div><div class='footer' ui-view='footer'></div>"},
                'left':{template:"<span>left</span>"},
                'right':{template:"<span>right</span>"},
                'body@home':{templateUrl:'template_views/home.html'},
                'footer@home':{template:"<span>首页底部</span>"}
            }
        })
        .state('home.news',{
            url:'/news',
            views:{
                'body@home':{templateUrl:'template_views/news.html'},
                'footer@home':{template:"<span>新闻底部</span>"}
            }
        })
        .state('home.newsDetails',{
            url:"/news/details/:id",
            views:{
                'body@home':{
                    template:"<span>新闻详情</span>",
                    controller:function ($stateParams) {
                        alert('id:'+ $stateParams.id);
                    }
                },
                'footer@home':{template:"<span>新闻详情底部</span>"}
            }
        })
        .state('home.center',{
            url:'/center',
            views:{
               'body@home':{templateUrl:'template_views/setCenter.html'},
                'footer@home':{template:"<span>个人中心底部</span>"}
            }

        });

    $urlRouterProvider.otherwise('/home');
}]);
这里需要注意的是路由传参,这里把news.html内容贴出来
<uib-tabset active="activeJustified" justified="true">
    <uib-tab index="0" heading="推荐">
        <div style=" 100%;height: 500px;background-color:pink;">
            <span class="mouseHand btn" ui-sref="home.newsDetails({id:1})">Justified content</span>
        </div>
    </uib-tab>
    <uib-tab index="1" heading="热点">
        <div style=" 100%;height: 500px;background-color:#b9def0;" ui-sref="home.newsDetails({id:2})">Short Labeled Justified content</div>
    </uib-tab>
    <uib-tab index="2" heading="股票">
        <div style=" 100%;height: 500px;background-color:darkcyan;" ui-sref="home.newsDetails({id:3})">Long Labeled Justified content</div>
    </uib-tab>
</uib-tabset>
ui-sref="home.newsDetails({id:1})"这样跳转的时候就把id传给了新闻详情;在新闻详情的控制器里就可以通过$stateParams.id得到传过来的id

3.多层ui-view嵌套
写了一个小demo,首先看一下结构
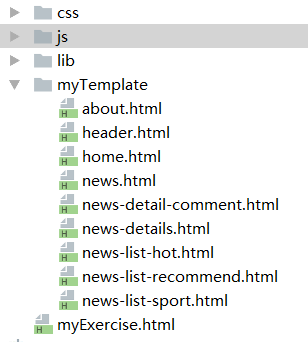
myExercise.html代码:
<!DOCTYPE html>
<html lang="en" ng-app="myApp">
<head>
    <meta charset="UTF-8">
    <script src="lib/angular.js"></script>
    <script src="lib/angular-ui-router.js"></script>
    <script src="lib/jquery-1.12.3.js"></script>
    <script src="lib/bootstrap.js"></script>
    <script src="lib/ocLazyLoad-master/dist/ocLazyLoad.js"></script>
    <script src="js/myConfig.js"></script>
    <script src="js/contentCtrl.js"></script>
    <link rel="stylesheet" href="lib/bootstrap.css">
    <link rel="stylesheet" href="css/base.css">
    <title>ui-view三层嵌套</title>
</head>
<body>
<div ui-view class="wrap"></div>
</body>
</html>
ocLazyLoad.js是用来分步加载js,css等文件的,后面可以再路由配置里看到具体用法,有了这个对于项目初次加载的速度有很大提升,但是不需要的这里也可以不必引入;

js文件夹结构

前两个控制器都是空的,没写什么逻辑就不展示了,先看一下myConfig.js,路由配置(多层嵌套精髓都在这里啦):
var app = angular.module('myApp',["ui.router","oc.lazyLoad"]);
app.config(function ($stateProvider,$locationProvider, $urlRouterProvider,$ocLazyLoadProvider) {
    $stateProvider
        .state('content',{
            url: '/',
            views:{
                "":{
                    template: '<div ui-view="header"></div><div ui-view="body"></div>',
                    controller:'contentCtrl'
                },
                "header@content":{templateUrl: 'myTemplate/header.html'}
            }
        })
        .state('content.home',{
            url:'home',
            views:{
                "body@content":{
                    templateUrl:'myTemplate/home.html',
                    controller:'homeCtrl'
                }
            },
            resolve:{
                deps: ['$ocLazyLoad', function($ocLazyLoad) {
                    // you can lazy load files for an existing module
                    return $ocLazyLoad.load([
                        'js/homeCtrl.js',
                        'css/home.css'
                    ]);
                }]
            }
        })
        .state('content.news',{
            url:'news',
            views:{
                "body@content":{template:'<div ui-view></div>'}
            }
        })
        .state('content.news.list',{
            url:'/list',
            templateUrl:'myTemplate/news.html'
        })
        .state('content.news.list.recommend',{
            url:'/recommend',
            templateUrl:'myTemplate/news-list-recommend.html'
        })
        .state('content.news.list.hot',{
            url:'/hot',
            templateUrl:'myTemplate/news-list-hot.html'
        })
        .state('content.news.list.sport',{
            url:'/sport',
            templateUrl:'myTemplate/news-list-sport.html'
        })
        .state('content.news.details',{
            url:'/details/:type/:id',
            templateUrl:'myTemplate/news-details.html',
            controller:'newsDetailCtrl',
            resolve:{
                deps: ['$ocLazyLoad', function($ocLazyLoad) {
                    // you can lazy load files for an existing module
                    return $ocLazyLoad.load([
                        'js/newsDetailCtrl.js',
                        'css/newsDetail.css'
                    ]);
                }]
            }
        })
        .state('content.news.details.comment',{
            url:'/details/comment',
            templateUrl:'myTemplate/news-detail-comment.html'
        })
        .state('content.about',{
            url:'about',
            views:{
                "body@content":{templateUrl:'myTemplate/about.html'}
            }
        });

    $urlRouterProvider.otherwise('home');

});
结合路由配置,看一下template模板代码:
首先是header.html
<ul class="nav nav-tabs">
    <li role="presentation" class="active" ui-sref-active="active"><a ui-sref="content.home">Home</a></li>
    <li role="presentation" ui-sref-active="active"><a  ui-sref="content.news.list.recommend">News</a></li>
    <li role="presentation" ui-sref-active="active"><a  ui-sref="content.about">About</a></li>
</ul>
news.html
<ul class="nav nav-tabs">
    <li role="presentation" class="active" ui-sref-active="active"><a ui-sref="content.news.list.recommend">推荐</a></li>
    <li role="presentation" ui-sref-active="active"><a  ui-sref="content.news.list.hot">热门</a></li>
    <li role="presentation" ui-sref-active="active"><a  ui-sref="content.news.list.sport">体育</a></li>
</ul>
<div ui-view></div>
news-details.html
<span>{{type}}:新闻详情</span>
<a ui-sref=".comment">查看评论</a>
<div ui-view></div>
<!--news-list-recommend.html-->
<div>
    推荐列表
    <a  ui-sref="^.^.details({type:'recommend',id:2})">点击查看新闻详情,通过相对路径跳转</a>
</div>

<!--news-list-hot.html-->
<div>
    热门列表
    <a  ui-sref="content.news.details({type:'hot',id:5})">点击查看新闻详情,通过绝对路径跳转</a>
</div>


<!--news-list-sport.html-->
<div>
    体育列表
    <a  ui-sref="content.news.details({type:'sport',id:7})">点击查看新闻详情</a>
</div>
模板就展示这几个了,其它的都是随便写的text文字了,随便写点东西就行,到这里就差不多完成了.
接下来展示一下newsDeatilCtrl.js
angular.module('myApp').controller('newsDetailCtrl',['$scope','$stateParams',function ($scope,$stateParams) {
    $scope.type = $stateParams.type;
}]);
这里通过$stateParams来接收路由跳转传过来的参数。
好啦,到这里就大功告成了。