下的插件从http://www.hehaibao.com/jquery-css3-plugin/网址上下的。
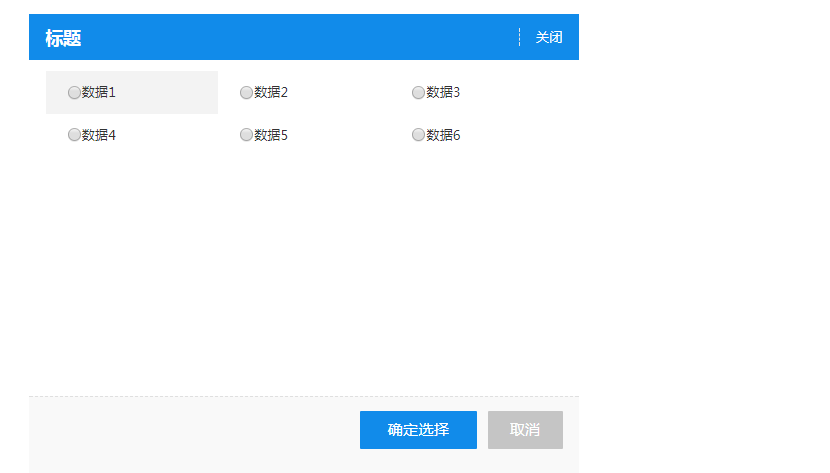
在测试插件之前,看看自定义的普通的弹出框。
样式:
        /* MASK --------------- */
        * {
            margin: 0px;
            padding: 0px;
            border: none;
            color: #333;
            font-size: 12px;
            font-family: "Microsoft YaHei";
            list-style-type: none;
        }

        h1 {
            display: block;
            font-size: 2em;
            font-weight: bold;
        }

        a {
            text-decoration: none;
        }

        .mask {
             100%;
            height: 100%;
            overflow: hidden;
            overflow-y: auto;
            position: fixed;
            top: 0px;
            left: 0px;
            z-index: 9;
            background: url(black-66.png);
        }

            .mask .title {
                 100%;
                height: 42px;
                float: left;
                background: #118BEA;
            }

                .mask .title h1 {
                    height: 42px;
                    float: left;
                    line-height: 42px;
                    color: #FFF;
                    padding: 0 0 0 15px;
                    font-size: 16px;
                }

                .mask .title a {
                    height: 16px;
                    float: right;
                    line-height: 16px;
                    color: #FFF;
                    padding: 0 15px;
                    margin: 13px 0;
                    border-left: 1px dashed #E3E3E3;
                }


        /* 任课信息设置 -------------------- */
        .teach {
             500px;
            height: 418px;
            float: left;
            position: absolute;
            left: 50%;
            top: 50%;
            margin: -209px 0 0 -250px;
            background: #FFF;
        }

        /* 选择备课老师 --------------- */
        .teacher {
             500px;
            height: 305px;
            float: left;
            overflow: hidden;
            overflow-y: auto;
        }

            .teacher input {
                 13px;
                height: 13px;
                float: left;
                margin: 3px 0 3px 10px;
            }

            .teacher label {
                height: 19px;
                float: left;
                line-height: 19px;
                padding: 0 0 0 10px;
            }

            .teacher ul {
                 470px;
                float: left;
                padding: 10px 15px;
            }

                .teacher ul li {
                     33.333%;
                    height: 19px;
                    float: left;
                    padding: 10px 0; /*border-bottom:1px dashed #E7E7E7;*/
                }

                    .teacher ul li:hover {
                        background: #F3F3F3;
                    }

        .mask .submit {
             100%;
            height: 70px;
            float: left;
            background: #F9F9F9;
            border-top: 1px dashed #DFDFDF;
        }

        .mask .submit-main {
            height: 36px;
            float: right;
            padding: 13px 15px 0 0;
        }

            .mask .submit-main a {
                height: 34px;
                float: left;
                font-size: 14px;
                color: #FFF;
                border-radius: 1px;
                line-height: 34px;
                padding: 0 20px;
                margin: 0 0 0 10px;
            }

                .mask .submit-main a.reset {
                    background: #00BAAB;
                }

                .mask .submit-main a.cancel {
                    background: #C5C5C5;
                }

                .mask .submit-main a.search {
                    background: #118BEA;
                    padding: 0 25px;
                }

                .mask .submit-main a:hover {
                    background: #488ABC;
                    text-decoration: none;
                }
<div>
<a class="push color03" href="javascript:showDiv('public01');"><i class="iconfont"></i><em>添加老师</em></a>
</div>
<!-- 选择集体备课老师 -->
<div id="public01" class="mask" style="display: none;">
<div class="teach">
<div class="title">
<h1>标题</h1>
<a onclick="closeDiv();" href="javascript:void(0);">关闭</a>
</div>
<div class="teacher">
<ul>
<li>
<label>
<input type="radio" />数据1</label></li>
<li>
<label>
<input type="radio" />数据2</label></li>
<li>
<label>
<input type="radio" />数据3</label></li>
<li>
<label>
<input type="radio" />数据4</label></li>
<li>
<label>
<input type="radio" />数据5</label></li>
<li>
<label>
<input type="radio" />数据6</label></li>
</ul>
</div>
<div class="submit">
<div class="submit-main">
<a class="search" href="">确定选择</a>
<a class="cancel" href="javascript:void(0);" onclick="closeDiv();">取消</a>
</div>
</div>
</div>
</div>
<script src="../js/jquery-1.11.0.min.js"></script>
<script type="text/javascript">
function closeDiv() {
//可以清空数据
document.getElementById('public01').style.display = "none";
}
function showDiv(divid) {
//可以根据传递的值去获取数据,然后填充数据
document.getElementById('public01').style.display = "none";
document.getElementById(divid).style.display = "block";
}
</script>
原理很简单:只需要在弹出框的最外层加一个div,把背景设置成接近透明,宽和高都是100%,你在根据自己的要求可以设置样式,很容易生成了弹出框。
上面的列子就是那样做的,设置好了样式就OK了。
接着介绍这个插件,你可以下载列子去看,还很多的。这边主要记录一下弹出加载数据,消失就把数据清空。原理懂了,对于同样子的就很容易了。
先需要引入CSS,和JS


弹出框样式
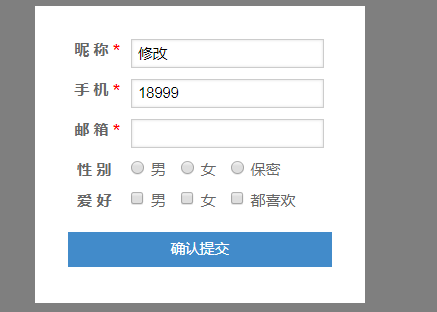
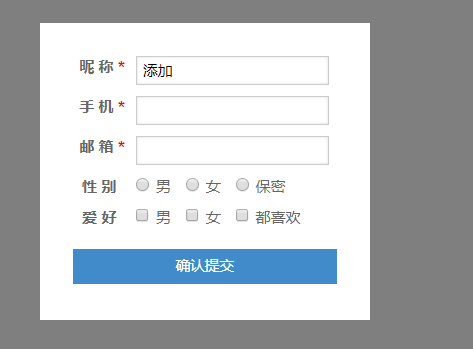
<!-- 注意:请将要放入弹框的内容放在比如id="HBox"的容器中,然后将box的值换成该ID即可,比如:$(element).hDialog({'box':'#HBox'}); --> <div id="HBox" data-type="0"> <ul class="list"> <li> <strong>昵 称 <font color="#ff0000">*</font></strong> <div class="fl"><input type="text" name="nickname" value="" required class="ipt nickname" /></div> </li> <li> <strong>手 机 <font color="#ff0000">*</font></strong> <div class="fl"><input type="text" name="phone" value="18999" required class="ipt phone" /></div> </li> <li> <strong>邮 箱 <font color="#ff0000">*</font></strong> <div class="fl"><input type="text" name="email" value="" required class="ipt email" /></div> </li> <li> <strong>性 别 <font color="#ff0000"> </font></strong> <div class="fl"> <label class="mr10"><input type="radio" name="sex" value="1"/>男</label> <label class="mr10"><input type="radio" name="sex" value="2"/>女</label> <label><input type="radio" name="sex" value="3"/>保密</label> </div> </li> <li> <strong>爱 好 <font color="#ff0000"> </font></strong> <div class="fl"> <label class="mr10"><input type="checkbox" name="like" value="男" />男</label> <label class="mr10"><input type="checkbox" name="like" value="女"/>女</label> <label><input type="checkbox" name="like" value="都喜欢"/>都喜欢</label> </div> </li> <li><input type="submit" value="确认提交" class="submitBtn" /></li> </ul> </div><!-- HBox end -->
测试按钮
 <div class="test" data-one="1" style="100px;height:100px;margin-bottom:20px">
            修改
    </div>
   <div class="test"  style="100px;height:100px;margin-bottom:20px">
            添加
    </div>
         <div id="clo"  style="100px;height:100px;margin-bottom:500px;">
            关闭
    </div>
   //点击获取数据然后显示
            $(".test").click(function () {
                var dd = $(this).attr("data-one");
                console.log(dd);
                if (dd!="undefined") {
                    $("#HBox").attr("data-type",dd);
                }
                $.ajax({
                    type: "Post",
                    url: "Test.ashx",
                    data: "type=" +    $("#HBox").attr("data-type"),
                    dataType: "Json",
                    async: false,
                    success: function (data) {
                        console.log(data + "," + typeof (data));
                        //可以在这里赋值  也可以在弹出框之前的回调函数里面写都行
                        $(".nickname").val(data);
                        $("#HBox").hDialog({
                             afterHide: testAfter, autoShow: true
                        });
                    },
                    error: function (e) {
                        alert("失败");
                    }
                })
            });
   //弹出框消失之后的事件
            function testAfter() {
                //清空数据
                $(".nickname").val("");
                $(".phone").val("");
                $("#HBox").attr("data-type", "0");
            };
   //保存数据
            $(".submitBtn").click(function () {
                var test = $("#HBox").attr("data-type");
                //还是可以调用一般处理程序,把需要的数据生成对象,转成Json传过去,然后在进行处理
              //是修改还是添加,这里是需要判断的,
                if (test==="0") {
                    alert("添加");
                } else {
                    alert("修改");
                }
            });
 //手动关闭
            $("#clo").click(function () {
                $("#HBox").hDialog({ hideTime:0})
            })
逻辑处理的地方就是一般处理程序了
 public void ProcessRequest(HttpContext context)
        {
            context.Response.ContentType = "text/plain";
            string id = context.Request.Form["type"]==null?"":context.Request.Form["type"].ToString();
            if (id!="0")
            {
               // Random ran = new Random();
                context.Response.Write(""修改"");     //可以传主键ID,获取数据
            }
            else
            {
                //Random ran = new Random();
                context.Response.Write(""添加"");       //添加就不获取数据了
            }

        }
使用说明:
/*
	 * 以下是单独的调用示例,你只需要自定义弹框的样式即可。
	 *          - $(element).hDialog(); //默认调用弹框;
	 *          - $(element).hDialog({box: '#demo'}); //自定义弹框容器ID/Class;
	 *          - $(element).hDialog({boxBg: '#eeeeee'}); //自定义弹框容器背景;
	 *          - $(element).hDialog({modalBg: '#eeeeee'}); //自定义遮罩背景颜色;
	 *          - $(element).hDialog({ 500}); //自定义弹框宽度;
	 *          - $(element).hDialog({height: 400}); //自定义弹框高度;
	 *          - $(element).hDialog({position: 'top'}); //弹框位置(默认center:居中,top:顶部居中,left:顶部居左,bottom:底部居右)
	 *          - $(element).hDialog({effect: 'fadeOut'}); //弹框关闭效果(结合animate.css里的动画,默认:zoomOut);
	 *          - $(element).hDialog({hideTime: 2000}); //弹框定时关闭(默认0:不自动关闭, 以毫秒为单位)
	 *          - $(element).hDialog({modalHide: false}); //false:点击遮罩背景不关闭弹框,反之关闭;
	 *          - $(element).hDialog({isOverlay: false}); //是否显示遮罩背景(默认true:显示,false:不显示)
	 *          - $(element).hDialog({escHide: false}); //false:按ESC不关闭弹框,反之关闭;
	 *          - $(element).hDialog({autoShow: false}); //是否页面加载完成后自动弹出(默认false点击弹出,true:自动弹出)
	 *          - $(element).hDialog({types:2,iframeSrc:'http://css.doyoe.com/',iframeId:'iframeHBox',960,height:600}); //调用框架
	 *
	 * 也可以整个覆盖(tips: 默认的无需写):
	 *          - $(element).hDialog({
	 *                box: '#demo',
	 *                boxBg: '#eeeeee',
	 *                modalBg: '#eeeeee',
	 *                 500,
	 *                height: 400,
	 *                positions: 'top',
	 *                effect: 'fadeOut',
	 *                hideTime: 3000,
	 *                isOverlay: false,
	 *                modalHide: false,
	 *                escHide: false,
	 *                autoShow: false,
	 *                types: 1,
	 *                iframeSrc: '',
	 *                iframeId: 'iframeHBox',
	 *                beforeShow: function(){ alert('执行回调'); },
	 *                afterHide: function(){ alert('执行回调'); }
	 *            });
	 *
	 * 下面是简单的扩展方法(以后再慢慢补充吧):
	 *          - $.tooltip('错误提示文字'); 或者  $.tooltip('正确提示文字',4000,true,callback);  //内置2种提示风格(参数1为提示文字,参数2为自动关闭时间,参数3:true为正确,false为错误,参数4: 回调函数)
	 *          - $.showLoading('正在加载...',90,30); 或者  $.hideLoading(); //显示/移除加载(参数1为说明文字,参数2为宽度,参数3为高度,默认宽高为140*48,可不填写)
	 *          - $.goTop(); //返回顶部,(参数1:和屏幕底部的距离,参数2:和屏幕右侧的距离; PS:自定义一定要加单位,比如px,em, 也可以是百分比哦)
	 *          - $.dialog('alert','提示','hello'); 或者 $.dialog('confirm','提示','确认么?',0,function(){ alert('ok'); });  //消息框,(参数1:消息框类型(alert/confirm),参数2:消息框标题;参数3:消息框内容度;参数4:消息框自动关闭时间,以毫秒为单位(默认0:不自动关闭);参数5: 回调函数)
	 *          - $.closeDialog(); 或者 $.closeDialog(function(){ alert('ok'); }); //关闭消息框,(参数1:回调函数)
	 */


当然还有其他的功能,自己去探索吧。