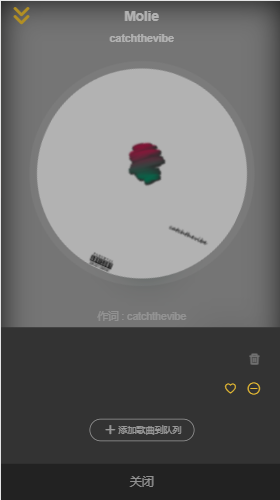
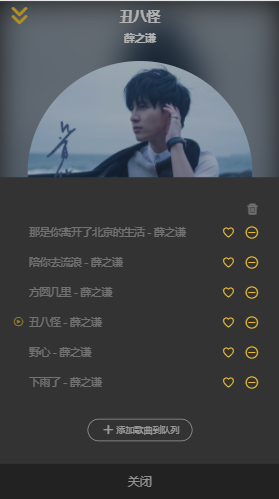
点击迷你播放器的列表按钮就会弹出一个当前播放的歌曲列表层,这个列表也有一些功能,比如播放模式的控制,点击歌曲播放,收藏歌曲以及从列表中删除歌曲,点击垃圾桶把歌曲列表清空,甚至还可以添加歌曲到队列。
首先是对首页进行开发,基本代码如下:


<template>
  <transition name="list-fade">
    <div class="playlist">
      <div class="list-wrapper">
        <div class="list-header">
          <h1 class="title">
            <i class="icon"></i>
            <span class="text"></span>
            <span class="clear"><i class="iconfont icon-clear"></i></span>
          </h1>
        </div>
        <div class="list-content">
          <ul>
            <li class="item">
              <i class="current"></i>
              <span class="text"></span>
              <span class="like">
                <i class="iconfont icon-not-favorite"></i>
              </span>
              <span class="delete">
                <i class="iconfont icon-delete"></i>
              </span>
            </li>
          </ul>
        </div>
        <div class="list-operate">
          <div class="add">
            <i class="iconfont icon-add"></i>
            <span class="text">添加歌曲到队列</span>
          </div>
        </div>
        <div class="list-close">
          <span>关闭</span>
        </div>
      </div>
    </div>
  </transition>
</template>

<script>
export default {
  data() {
    return {
      show: true,
    };
  },
};
</script>

<style lang="scss"  scoped >
.playlist {
  position: fixed;
  top: 0;
  left: 0;
  right: 0;
  bottom: 0;
  z-index: 200;
  background: $color-background-d;

  &.list-fade-enter-active,
  &.list-fade-leave-active {
    transition: opacity 0.3s;

    .list-wrapper {
      transition: all 0.3s;
    }
  }

  &.list-fade-enter,
  &.list-fade-leave-to {
    opacity: 0;

    .list-wrapper {
      transform: translate3d(0, 100%, 0);
    }
  }

  .list-wrapper {
    position: absolute;
    left: 0;
    bottom: 0;
    width: 100%;
    background-color: $color-highlight-background;

    .list-header {
      position: relative;
      padding: 20px 30px 10px 20px;

      .title {
        display: flex;
        align-items: center;

        .icon {
          margin-right: 10px;
          font-size: 30px;
          color: $color-theme-d;
        }

        .text {
          flex: 1;
          font-size: $font-size-medium;
          color: $color-text-l;
        }

        .clear {
          @include extend-click();

          .icon-clear {
            font-size: $font-size-medium;
            color: $color-text-d;
          }
        }
      }
    }

    .list-content {
      max-height: 240px;
      overflow: hidden;

      .item {
        display: flex;
        align-items: center;
        height: 40px;
        padding: 0 30px 0 20px;
        overflow: hidden;

        .current {
          flex: 0 0 20px;
          width: 20px;
          font-size: $font-size-small;
          color: $color-theme-d;
        }

        .text {
          flex: 1;

          @include no-wrap();

          font-size: $font-size-medium;
          color: $color-text-d;
        }

        .like {
          @include extend-click();

          margin-right: 15px;
          font-size: $font-size-small;
          color: $color-theme;

          .icon-favorite {
            color: $color-sub-theme;
          }
        }

        .delete {
          @include extend-click();

          font-size: $font-size-small;
          color: $color-theme;
        }
      }
    }

    .list-operate {
      width: 140px;
      margin: 20px auto 30px auto;

      .add {
        display: flex;
        align-items: center;
        padding: 8px 16px;
        border: 1px solid $color-text-l;
        border-radius: 100px;
        color: $color-text-l;

        .icon-add {
          margin-left: 5px;
          font-size: $font-size-small-s;
          padding-right: 5px;
        }

        .text {
          font-size: $font-size-small;
        }
      }
    }

    .list-close {
      text-align: center;
      line-height: 50px;
      background: $color-background;
      font-size: $font-size-medium-x;
      color: $color-text-l;
    }
  }
}
</style>
在player引入该组件
<transition class="mini" >
</transition>
<playlist></playlist>

import Playlist from '../playlist/playlist.vue';

components: {
    ProgressBar,
    ProgressCircle,
    Scroll,
    Playlist,
  },
由外层来控制playlist的显示,首先在playlist定义showFlag来判断它的显示并提供2个方法
    <div class="playlist" v-show="showFlag">


 data() {
    return {
      showFlag: false,
    };
  },

 methods: {
    show() {
      this.showFlag = true;
    },
    hide() {
      this.showFlag = false;
    },
  },
外层就可以通过这2个方法来控制playlist的显示和隐藏,当点击歌曲列表图标的时候就可以让它显示,所以还要给歌曲列表图片添加点击事件。
 <div class="control" @click="showPlaylist">
        <i class="iconfont icon-playlist"></i>
 </div>


<playlist ref="playlist"></playlist>


 showPlaylist() {
      this.$refs.playlist.show();
    },
当点击歌曲列表下方的关闭则让它隐藏。在playlist的整个朦胧层和关闭添加点击事件“hide”。同时还需要在朦胧层的子组件阻止其冒泡,否则点击内部内容时也会隐藏。
<div class="playlist" v-show="showFlag" @click="hide">
      <div class="list-wrapper" @click.stop>
        ......

         <div class="list-close" @click="hide">
          <span>关闭</span>
        </div>
       </div>
</div>

接下来就是显示播放列表的数据,通过vuex拿到数据然后在dom上遍历。
import { mapGetters } from 'vuex';

computed: {
    ...mapGetters([
      'sequenceList',
    ]),
  },
<div class="list-content">
          <ul>
            <li class="item" v-for="(item,index) in sequenceList" :key="index">
              <i class="current"></i>
              <span class="text">{{item.name}} - {{item.singer}}</span>
              <span class="like">
                <i class="iconfont icon-not-favorite"></i>
              </span>
              <span class="delete">
                <i class="iconfont icon-delete"></i>
              </span>
            </li>
          </ul>
</div>

当列表很长的时候,就需要添加scroll组件让它可以滚动。引入scroll组件将list-content的div改为scroll,同时在show的时候重新计算scroll的高度,这样就可以保证dom在渲染了以后调用refresh重新计算的高度是正确的。
 <scroll :data="sequenceList" class="list-content" ref="listContent">

 show() {
      this.showFlag = true;
      setTimeout(() => {
        this.$refs.listContent.refresh();
      }, 20);
    },
有了数据之后我们还要给当前正在播放的歌曲添加样式。
思路:通过vuex获得的currentSong的id与遍历的item的id进行比较,若id相同则为当前正在播放的歌曲并添加样式。
 <i class="iconfont current" :class="getCurrentIcon(item)"></i>

computed: {
    ...mapGetters([
      'sequenceList',
      'currentSong',
    ]),
  },


 getCurrentIcon(item) {
      if (this.currentSong.id === item.id) {
        return 'icon-play';
      }
      return '';
    },
有了这个播放按钮,再去点击别的列表元素,希望播放图标能切到对应的位置。
首先,需要获得播放模式类型,还有从vuex获得播放列表playlist以及currentIndex的mutations。
import { playMode } from '../../common/js/config';
import { mapGetters, mapMutations } from 'vuex';
 ...mapMutations({
      setCurrentIndex: 'SET_CURRENT_INDEX',
    }),
然后给li元素添加点击事件selectItem(item,index):根据播放模式设置currentIndex然后调用mutation去set currentIndex。
<li class="item" v-for="(item,index) in sequenceList" :key="index" @click="selectItem(item,index)">
可以看到播放列表的图标及播放列表的歌曲可以切换了,但是在暂停时切换歌曲,歌曲在播放但是播放状态却显示为暂停。所以需要设置下播放状态
selectItem(item, index) {
      // 调用mutation去set currentIndex
      // 播放模式为随机播放的话,index需要重新设置
      if (this.mode === playMode.random) {
        // 找到当前元素在playlist的索引
        index = this.playlist.findIndex((song) => {
          return song.id === item.id;
        });
      }
      this.setCurrentIndex(index);
      this.setPlayingState(true);
    },
...mapMutations({
      setCurrentIndex: 'SET_CURRENT_INDEX',
      setPlayingState: 'SET_PLAYING_STATE',
    }),
优化:每次点击播放列表时,player的背景也会弹上来。因为这个playlist组件的父容器也有一个click事件,所以就冒泡到父容器player上。所以要加个.stop阻止冒泡
 <div class="control" @click.stop="showPlaylist">
          <i class="iconfont icon-playlist"></i>
 </div>

实现列表滚动到当前播放歌曲的功能:
在playlist组件定义scrollToCurrent方法
 scrollToCurrent(current) {
      // 找到当前元素current在sequenceList的索引
      const index = this.sequenceList.findIndex((song) => {
        return current.id === song.id;
      });
      // 根据索引滚动对应的列表元素
      this.$refs.listContent.scrollToElement(this.$refs.listItem[index], 300);
    },
当我们歌曲切换成功的时候就可以滚动,这需要使用watch观测currentSong的变化;除此之外每次点击playlist显示的时候也要滚动到当前播放歌曲。
 show() {
      this.showFlag = true;
      setTimeout(() => {
        this.$refs.listContent.refresh();
        this.scrollToCurrent(this.currentSong);
      }, 20);
    },


watch: {
    currentSong(newSong, oldSong) {
      // 如果组件不显示或者歌曲没有被切换
      if (!this.showFlag || newSong.id === oldSong.id) {
        return;
      }
      this.scrollToCurrent(newSong);
    },
  },

点击叉号实现从歌曲列表删除所选元素的功能:
- 首先给叉号添加点击事件(.stop是因为父容器也有click,防止冒泡)
 <span class="delete" @click.stop="deleteOne(item)">
         <i class="iconfont icon-delete"></i>
</span>
- 在vuex中添加删除歌曲的action
export const deleteSong = function ({ commit, state }, song) {
  let playlist = state.playlist.slice();
  let sequenceList = state.sequenceList.slice();
  let { currentIndex } = state;
  // 找到被删元素在playlist的索引
  let pIndex = findIndex(playlist.song);
  // playlist通过索引删除元素
  playlist.splice(pIndex, 1);
  // 找到被删元素在sequenceList的索引
  let sIndex = findIndex(sequenceList, song);
  // sequenceList通过索引删除元素
  sequenceList.splice(sIndex, 1);
  // 删除完之后需要做个判断:删除元素的索引是否在当前索引之后,如果在前则currentIndex要--;还有一种情况是删除的是最后一首歌
  if (currentIndex > pIndex || currentIndex === playlist.length) {
    currentIndex--;
  }
  // 提交mutation
  commit(types.SET_PLAYLIST, playlist);
  commit(types.SET_SEQUENCE_LIST, sequenceList);
  commit(types.SET_CURRENT_INDEX, currentIndex);
  // 如果删完列表长度为空
  if (!playlist.length) {
    // 把playingState置为false
    commit(types.SET_PLAYING_STATE, false);
  } else {
    // 设置播放状态
    commit(types.SET_PLAYING_STATE, true);
  }
};
- 在点击事件中调用它
deleteOne(item) {
      this.deleteSong(item);
    },

...mapActions([
      'deleteSong',
    ]),
- 当删除完所有歌曲后,再点击一首歌曲后会有报错并且歌曲列表自动展示。
自动展示原因:playlist是在player组件里的,当歌曲列表长度为0的时候,player的v-show效果为隐藏,但是实际上playlist组件还是为显示状态,所以当点击一首歌曲后,它就自动弹出显示了。
解决方法:在删除歌曲后判断它长度是否为0,为0则调用hide方法将其隐藏。
  deleteOne(item) {
      this.deleteSong(item);
      if (!this.playlist.length) {
        this.hide();
      }
    },
报错原因:删除歌曲的时候修改了playlist以及currentIndex,这样就导致了currentSong发生了变化。在player组件里有个watch,它会watch currentSong的变化。列表中已经没有歌曲了,currentSong(newSong,oldSong)的newSong实际上为空的object,显示为defined。
解决方法:对newSong做边界条件的判断,当为空object时不会继续执行下面的逻辑。
watch: {
    currentSong(newSong, oldSong) {
      if (!newSong.id) {
        return;
      }
      if (newSong.id === oldSong.id) {
        return;
      }
      if (this.currentLyric) {
        this.currentLyric.stop();
      }
      setTimeout(() => {
        this.$refs.audio.play().catch((error) =>  {
          this.togglePlaying();
          // eslint-disable-next-line no-alert
          alert('播放出错,暂无该歌曲资源');
        }, 1000);
        // 这里不直接调用currentSong.getLyric()
        this.getLyric();
      });
    },
  },
- 优化:给删除加一下动画,使得不生硬
把ul替换为transition-group,和transition一样也起一个动画名称,同时指定一个tag属性让它渲染成"ul"
<transition-group name="list" tag="ul">
添加动画样式
 &.list-enter-active,
 &.list-leave-active {
          transition: all 0.1s;
        }

  &.list-enter,
  &.list-leave-to { height: 0; }