2. Container
介绍
- stack
- service
- container
使用Docker的方式构建一个app。我们从app的层次结构的最下层开始,最下层是容器。接下来上层是service,这一层定义了生产环境容器如何运作,最顶层是stack,定义了service是如何交互的。
新的开发环境
在过去你要写一个python app的时候,你的第一件事情就是在你的机器上安装python环境。但是同样的,你的生产环境要完美的匹配你的开发环境。
使用Docker,你可以构建一个可移植的python runtime作为一个镜像,然后就没有安装的必要了。接下来,你可以将python镜像作为一个基础镜像脱离于你的app代码,确保app和依赖、运行时是独立的。
这些可移植的镜像可以通过Dockerfile来定义。
使用Dockerfile来定义一个容器
dockerfile定义你的容器里面的环境包含什么。在容器环境里,访问诸如网络和磁盘等资源都是被虚拟化了的,这些资源是和系统其他资源是隔离的,因此你需要对外做端口映射,和指定哪些文件需要被copy进容器环境中。完成上述工作后,你可以验证基于Dockerfile构建的app运行效果和预期一致。
Dockerfile
创建一个空目录,创建一个文件Dockerfile如下。
# Use an official Python runtime as a parent image
FROM python:2.7-slim

# Set the working directory to /app
WORKDIR /app

# Copy the current directory contents into the container at /app
COPY . /app

# Install any needed packages specified in requirements.txt
RUN pip install --trusted-host pypi.python.org -r requirements.txt

# Make port 80 available to the world outside this container
EXPOSE 80

# Define environment variable
ENV NAME World

# Run app.py when the container launches
CMD ["python", "app.py"]
Dockerfile需要两个额外的文件 app.py requirments.txt。
app
from flask import Flask
from redis import Redis, RedisError
import os
import socket

# Connect to Redis
redis = Redis(host="redis", db=0, socket_connect_timeout=2, socket_timeout=2)

app = Flask(__name__)

@app.route("/")
def hello():
    try:
        visits = redis.incr("counter")
    except RedisError:
        visits = "<i>cannot connect to Redis, counter disabled</i>"

    html = "<h3>Hello {name}!</h3>"
           "<b>Hostname:</b> {hostname}<br/>"
           "<b>Visits:</b> {visits}"
    return html.format(name=os.getenv("NAME", "world"), hostname=socket.gethostname(), visits=visits)

if __name__ == "__main__":
    app.run(host='0.0.0.0', port=80)
新建requirements.txt
Flask
Redis
构建app
运行docker命令构建镜像
docker build -t friendlyhello .
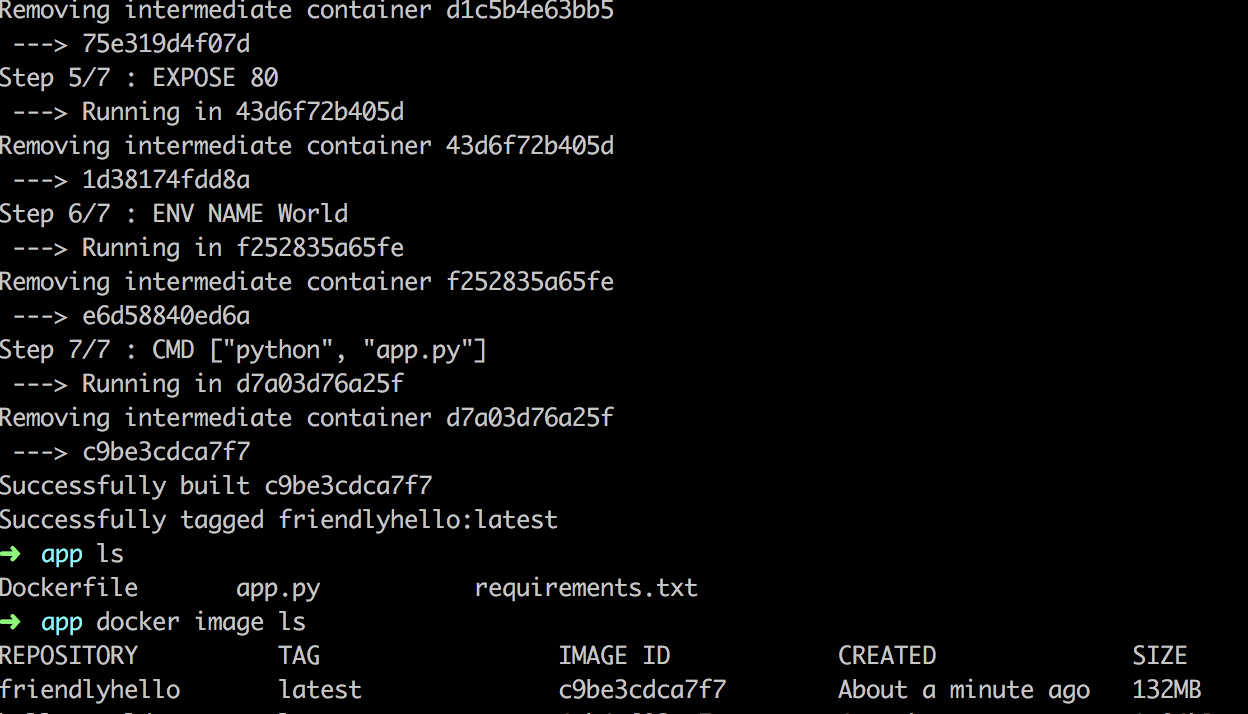
查看构建成功的镜像
docker image ls
运行app
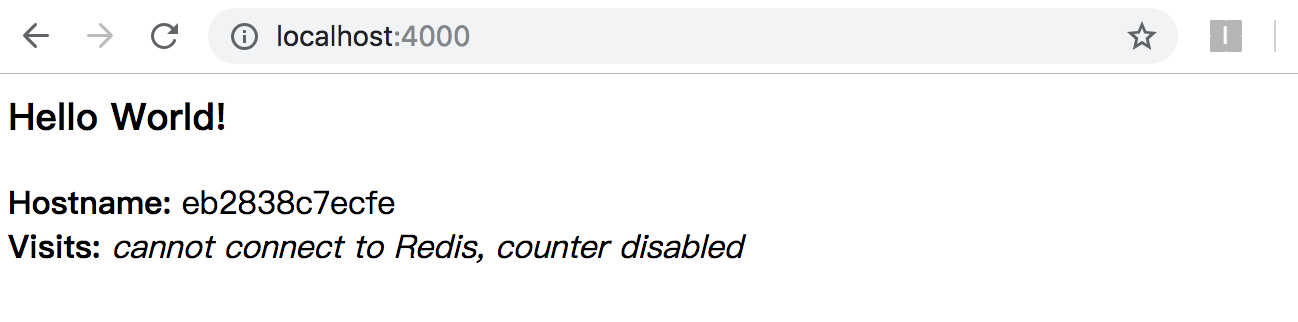
docker run -p 4000:80 friendlyhello

启动成功后访问localhost:4000
共享镜像
构建好的镜像可以将其push到镜像仓库中,便于和其他人共享。
registry是一系列仓库的集合,一个仓库又是一系列镜像的集合。
Docker官方提供一个公开的registry,免费的、预配置的。
使用Docker ID登录
运行命令:
docker login
镜像打标
将本地镜像和远程registry的仓库关联的写法是:username/repository:tag。
tag是可选的但是被推荐的写法,registry使用这个机制来给docker镜像打上一个版本。给repository和tag有意义的命名是推荐的。例如:get-started:part2,这个写法将镜像存放在get-started仓库,然后打上了part2标。
使用docker image tag命令,打标本地镜像。
docker tag image username/repository:tag
例如:
docker tag friendlyhello dockerjie/get-started:part2

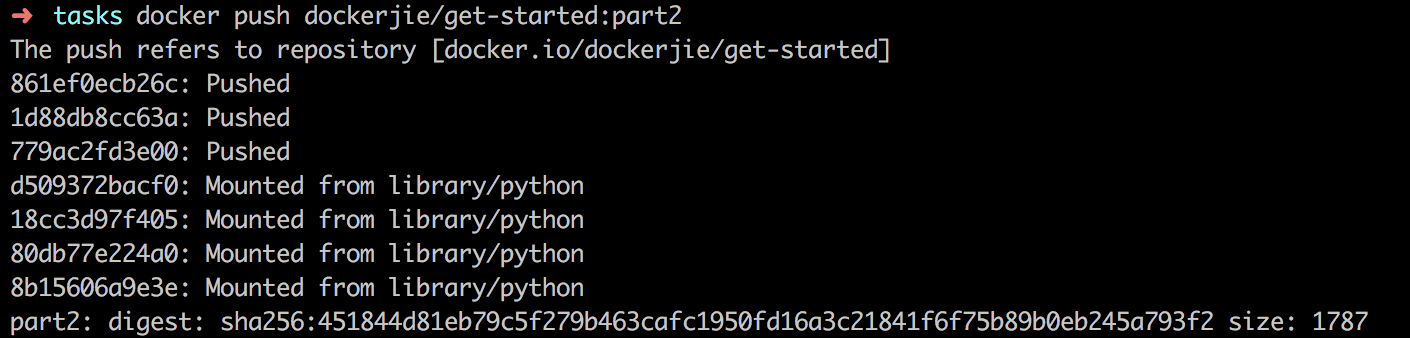
publish镜像
上传打标的镜像到远程的仓库。
docker push username/get-started:tag
一旦完成,这个上传的结果是公开可用的。如果我们登录到Docker Hub,我们可以看见新的镜像在那,可以使用pull命令。
一旦上传完成就可以使用远程仓库的镜像来创建容器了。
docker run -p 4000:80 username/get-started:part2
如果本地不存在该镜像,docker会使用远程的镜像。