在本教程中,我们将手把手的演示如何使用guzz,编写一个可以并行使用5台甚至更多数据库的留言板系统。
您可以一边看一边跟着做。在实际的教程做,只需要1台数据库用来模拟。
本教程将教会你:如何创建guzz项目,如何用guzz添加数据库记录,如何实现读写分离,如何进行多数据库之间分表、切表、分布式切表等,并对“服务”有个概念。
什么是guzz?什么时候用?
guzz[ˈɡuzi]念做谷子。稻谷的谷,意为种子、谷物等。
guzz和hibernate,ibatis同属于数据持久层框架,在应用架构上用于代替hibernate或者ibatis。使用guzz后,传统的ssh(spring + struts + hibernate)程序就变成了ssg(spring + struts + guzz)。同时guzz也可以和hibernate/ibatis并存,同时使用。
guzz适合于大型系统使用,包括访问量较大的系统和数据量较大的系统。当你的程序需要同时使用多台数据库,或者存在大表需要分切成小表时,guzz是目前通用持久层框架中最好的选择。guzz提供了面向未来的配置化分表、多库、表分切、读写分离,以及多台数据库之间透明的分布式事务支持等特性,使得多数据库编程和普通编程一样简单,对开发者透明。
同时guzz提供一些服务定义,帮助团队从零开始创建云服务计算平台。如果您计划将多个系统间的通用计算(功能)做成服务,并且还没有动手,guzz service将是个很好的起步点。
guzz框架免费开源,项目地址:http://code.google.com/p/guzz/
准备开发环境
在本教程中,我们使用MyEclipse IDE做开发演示。留言板将运行在1台Mysql5.0 + 1台Tomcat6上。因此您只需要自己的开发机器就可以跟上。
当然,如果你有5台或者更多数据库,会更好。
虽然教程中只有1台数据库,但效果一样。你可以更清楚的看到,guzz使用多台数据库还是只用1台数据库,对开发者基本透明。
创建MessageBoard工程
我们基于 springIOC + springMVC + guzz 架构创建留言板,因此先从guzz网站下载提供的空工程 a empty sample project buildxxxxxxx.zip :http://code.google.com/p/guzz/downloads/list
解压工程,并导入到Eclipse中(File -> Import -> General/Existing Projects into Workspace)。 这时工作区中多了一个名为“GuzzEmpty”的项目。选择项目,右键 -> Refactor -> Rename。输入MessageBoard,确定。
从 http://code.google.com/p/guzz/downloads/list 下载最新版的guzz发布包,如“guzz1.2.9 buildxxxxxx.zip”,解压文件,将最新的guzz.jar覆盖到刚刚创建的MessageBoard工程的 /WebRoot/WEB-INF/lib/ 下。
修改 /WebRoot/WEB-INF/ 下的 fms.properties 为 messageBoard.properties ,这个为我们的主配置文件。
配置工程,插入第1条留言
配置工程
我们定义留言为Message,在src源代码目录下创建域对象example/business/Message.java:
 1 package example.business;
 2
 3 import java.util.Date;
 4
 5 public class Message implements java.io.Serializable {
 6
 7         private int id ;
 8
 9         private String content ;
10
11         private Date createdTime ;
12
13         public int getId() {
14                 return id;
15         }
16
17         public void setId(int id) {
18                 this.id = id;
19         }
20
21         public String getContent() {
22                 return content;
23         }
24
25         public void setContent(String content) {
26                 this.content = content;
27         }
28
29         public Date getCreatedTime() {
30                 return createdTime;
31         }
32
33         public void setCreatedTime(Date createdTime) {
34                 this.createdTime = createdTime;
35         }
36
37 }
同时在 example/business/ 目录下创建域对象的映射文件 Message.hbm.xml:
 1 <?xml version="1.0"?>
 2 <!DOCTYPE hibernate-mapping PUBLIC "-//Hibernate/Hibernate Mapping DTD 3.0//EN"
 3 "http://hibernate.sourceforge.net/hibernate-mapping-3.0.dtd">
 4 <hibernate-mapping>
 5         <class name="example.business.Message" table="tb_message">
 6                 <id name="id" type="int" column="id">
 7                         <generator class="native" />
 8                 </id>
 9                 <property name="content" type="string" column="content" />
10                 <property name="createdTime" type="datetime" column="createdTime" />
11         </class>
12 </hibernate-mapping>
在映射文件中,留言存储在tb_message表中。tb_message用content字段存储留言内容。
启动并连上Mysql5.0,创建测试用数据库mb_main,并在其中创建表tb_message。sql语句如下:
1 create database mb_main default character set utf8 ;
2
3 use mb_main ;
4
5 create table tb_message(
6         id int not null auto_increment primary key,
7         content text,
8         createdTime datetime
9 )engine=Innodb ;
好啦,现在需要配置数据库连接池,让mb_main数据库和MessageBoard工程对接上。
打开 /WebRoot/WEB-INF/guzz.xml 文件,选择源代码模式编辑。右键选择 /WebRoot/WEB-INF/messageBoard.properties -> Open With -> Properties File Editor(注意:不能用高级可视化编辑器打开),打开主配置文件。
修改guzz.xml:删除默认配置的3组数据库组中的updateDB和logDB;删除2个service服务;在business中增加Message域对象声明。修改后的guzz.xml为:
 1 <?xml version="1.0" encoding="UTF-8"?>
 2 <!DOCTYPE guzz-configs PUBLIC "-//GUZZ//DTD MAIN CONFIG//EN" "http://www.guzz.org/dtd/guzz.dtd">
 3
 4 <guzz-configs>
 5
 6         <dialect class="org.guzz.dialect.Mysql5Dialect" />
 7
 8         <tran>
 9                 <dbgroup name="default" masterDBConfigName="masterDB" />
10         </tran>
11
12         <config-server>
13                 <server class="org.guzz.config.LocalFileConfigServer">
14                         <param name="resource" value="messageBoard.properties" />
15                 </server>
16         </config-server>
17
18         <!-- business starts -->
19         <business dbgroup="default" name="message" file="classpath:example/business/Message.hbm.xml" />
20         <!-- business ends -->
21
22 </guzz-configs>
在新的guzz.xml中,留言对象使用default数据库组,default数据库组的master数据库的配置组名称为“masterDB”,没有slave数据库。修改刚刚打开的messageBoard.properties,修改masterDB配置组的连接池,指向我们刚才创建的数据库mb_main。其他数据库组配置删除。新的messageBoard.properties内容如下:
 1 #guzz app config file.
 2
 3 #master db
 4 [masterDB]
 5 guzz.identifer=defaultMasterDB1
 6 guzz.IP=localhost
 7 guzz.maxLoad=120
 8 driverClass=com.mysql.jdbc.Driver
 9 jdbcUrl=jdbc:mysql://localhost:3306/mb_main?useUnicode=true&characterEncoding=UTF-8&useServerPrepStmts=true
10 user=root
11 password=root
12 acquireIncrement=10
13 idleConnectionTestPeriod=60
14
15 #debug settings
16 [guzzDebug]
17 #runMode=debug/production
18 runMode=debug
19 #onError=halt/log/ignore
20 onError=halt
21 printSQL=true
22 printSQLParams=true
23 ignoreDemonThreadSQL=true
24 #print out how many nano-seconds a sql takes to execute.
25 measureTime=true
26 #only print out slow sqls that takes over xxx mill-seconds to execute. 0 means print out all.
27 onlySlowSQLInMillSeconds=0
28
29 ############################### fundamental services #####################
打开 /WebRoot/WEB-INF/applicationContext.xml,删除bean:insertQueueService 。
部署工程到Tomcat6上,然后启动。如果没有错误,则配置已经成功。如果报错,请检查数据库是否给予了访问授权等。
停止tomcat6.
插入留言
下面我们开始插入第一条留言。
在/WebRoot/下创建jsp文件:messagesList.jsp,用于显示留言填写表单,内容如下:
 1 <%@ page language="java" pageEncoding="UTF-8" errorPage="/WEB-INF/jsp/include/defaultException.jsp"%>
 2 <%@include file="/WEB-INF/jsp/include/tags.jsp"%>
 3
 4 <!DOCTYPE HTML PUBLIC "-//W3C//DTD HTML 4.01 Transitional//EN">
 5 <html>
 6   <head>
 7         <title>Message List</title>
 8   </head>
 9
10   <body>
11
12         Leave a message:<br>
13
14         <form method="POST" action="./newMessage.do">
15                 <textarea name="content" cols="80" rows="10"></textarea>
16
17                 <br/>
18                 <input type="submit" />
19         </form>
20   </body>
21 </html>
创建java文件 example.view.action.NewMessageAction.java 用于处理添加新留言的Form表单提交,内容如下:
 1 package example.view.action;
 2
 3 import javax.servlet.http.HttpServletRequest;
 4 import javax.servlet.http.HttpServletResponse;
 5
 6 import org.guzz.GuzzContext;
 7 import org.guzz.transaction.WriteTranSession;
 8 import org.springframework.web.servlet.ModelAndView;
 9 import org.springframework.web.servlet.mvc.Controller;
10
11 import example.business.Message;
12
13 public class NewMessageAction implements Controller {
14
15         private GuzzContext guzzContext ;
16
17         public ModelAndView handleRequest(HttpServletRequest request, HttpServletResponse response) throws Exception {
18                 String content = request.getParameter("content") ;
19
20                 WriteTranSession write = guzzContext.getTransactionManager().openRWTran(true) ;
21
22                 Message msg = new Message() ;
23                 msg.setContent(content) ;
24                 msg.setCreatedTime(new java.util.Date()) ;
25
26                 try{
27                         write.insert(msg) ;
28                 }finally{
29                         write.close() ;
30                 }
31
32                 return new ModelAndView("redirect:/messageList.jsp");
33         }
34
35         public GuzzContext getGuzzContext() {
36                 return guzzContext;
37         }
38
39         public void setGuzzContext(GuzzContext guzzContext) {
40                 this.guzzContext = guzzContext;
41         }
42
43 }
修改/WebRoot/WEB-INF/dispatcher-servlet.xml文件,增加NewMessageAction的映射bean:
1 <bean name="/newMessage.do" class="example.view.action.NewMessageAction">
2         <property name="guzzContext" ref="guzzContext" />
3 </bean>
部署程序,启动Tomcat6,访问:http://localhost:8080/guzz/messageList.jsp ,输入留言“I am the first message. What about you?”,提交。
打开数据tb_message表,可以看到1条记录已经成功插入。
分页列出发表的留言
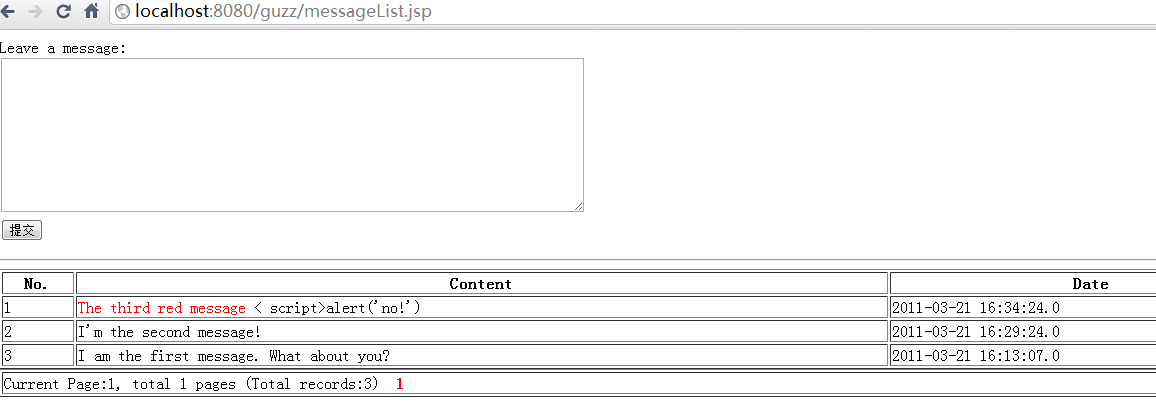
我们在messageList.jsp中列出所有发表的留言,每页30条,分页显示。对于数据库简单的读操作,我们使用guzz taglib实现。新的 messageList.jsp 内容如下;
 1 <%@ page language="java" pageEncoding="UTF-8" errorPage="/WEB-INF/jsp/include/defaultException.jsp"%>
 2 <%@include file="/WEB-INF/jsp/include/tags.jsp"%>
 3 <g:page business="message" var="m_messages" pageNo="${param.pageNo}" pageSize="30" orderBy="id desc" scope="request" />
 4
 5 <!DOCTYPE HTML PUBLIC "-//W3C//DTD HTML 4.01 Transitional//EN">
 6 <html>
 7   <head>
 8     <title>Message List</title>
 9   </head>
10
11   <body>
12
13         Leave a message:<br>
14
15         <form method="POST" action="./newMessage.do">
16                 <textarea name="content" cols="80" rows="10"></textarea>
17
18                 <br/>
19                 <input type="submit" />
20         </form>
21
22         <hr>
23         <table width="96%" border="1">
24                 <tr>
25                         <th>No.</th>
26                         <th>Content</th>
27                         <th>Date</th>
28                 </tr>
29
30                 <c:forEach items="${m_messages.elements}" var="m_msg">
31                 <tr>
32                         <td>${m_messages.index}</td>
33                         <td><g:out value="${m_msg.content}" escapeXml="false" escapeScriptCode="true" /></td>
34                         <td>${m_msg.createdTime}</td>
35                 </tr>
36                 </c:forEach>
37         </table>
38
39         <table width="96%" border="1">
40                 <tr>
41                         <c:import url="/WEB-INF/jsp/include/console_flip.jsp" />
42                 </tr>
43         </table>
44
45   </body>
46 </html>
在这个jsp中,
1 <g:page business="message" var="m_messages" pageNo="${param.pageNo}" pageSize="30" orderBy="id desc" scope="request" />
根据当前传入的页码查询message,并按照id desc排序。然后我们用1个c:forEach循环,打印出结果。用m_messages.index打印出当前记录从1开始的排序位置,用g:out标签打印出允许html元素但不允许script执行的正文。最后引用通用的分页文件 /WEB-INF/jsp/include/console_flip.jsp 显示分页情况。
再次访问:http://localhost:8080/guzz/messageList.jsp ,可以看到分页显示的留言列表了:
实现读写分离(启用第2台数据库)
如果你有多台数据库,创建mb_main数据库的从库(具体可参看http://guzz.javaeye.com/blog/366508)。修改guzz.xml的
1 <dbgroup name="default" masterDBConfigName="masterDB" />
增加从数据库配置属性slaveDBConfigName,我们设置值为slaveDB。如下:
1 <dbgroup name="default" masterDBConfigName="masterDB" slaveDBConfigName="slaveDB" />
在messageBoard.properties文件增加slaveDB配置项的具体信息,如下:
 1 [slaveDB]
 2 guzz.identifer=defaultSlaveDB1
 3 guzz.IP=localhost
 4 guzz.maxLoad=80
 5 driverClass=com.mysql.jdbc.Driver
 6 jdbcUrl=jdbc:mysql://localhost:3306/mb_main?useUnicode=true&characterEncoding=UTF-8&useServerPrepStmts=true
 7 user=root
 8 password=root
 9 acquireIncrement=10
10 idleConnectionTestPeriod=60
当然,如果你有单独的从数据库,jdbcUrl处修改为从库地址。
此时完成的 messageBoard.properties 文件内容为:
 1 #guzz app config file.
 2
 3 #master db
 4 [masterDB]
 5 guzz.identifer=defaultMasterDB1
 6 guzz.IP=localhost
 7 guzz.maxLoad=120
 8 driverClass=com.mysql.jdbc.Driver
 9 jdbcUrl=jdbc:mysql://localhost:3306/mb_main?useUnicode=true&characterEncoding=UTF-8&useServerPrepStmts=true
10 user=root
11 password=root
12 acquireIncrement=10
13 idleConnectionTestPeriod=60
14
15 [slaveDB]
16 guzz.identifer=defaultSlaveDB1
17 guzz.IP=localhost
18 guzz.maxLoad=80
19 driverClass=com.mysql.jdbc.Driver
20 jdbcUrl=jdbc:mysql://localhost:3306/mb_main?useUnicode=true&characterEncoding=UTF-8&useServerPrepStmts=true
21 user=root
22 password=root
23 acquireIncrement=10
24 idleConnectionTestPeriod=60
25
26 #debug settings
27 [guzzDebug]
28 #runMode=debug/production
29 runMode=debug
30 #onError=halt/log/ignore
31 onError=halt
32 printSQL=true
33 printSQLParams=true
34 ignoreDemonThreadSQL=true
35 #print out how many nano-seconds a sql takes to execute.
36 measureTime=true
37 #only print out slow sqls that takes over xxx mill-seconds to execute. 0 means print out all.
38 onlySlowSQLInMillSeconds=0
39
40 ############################### fundamental services #####################
至此,即完成了读写分离的配置。系统启动后,将创建两个连接池,上面留言读取的g:page将自动从slave数据库连接操作。在调用guzz持久化API时,所有选择允许延迟的读操作也将从slave连接池操作。
实现1个多用户留言板
为了实现多用户留言板,首先我们需要增加User域对象。User对象只有三个属性,用户编号、用户名和留言数。创建example.business.User.java:
 1 package example.business;
 2
 3 public class User implements java.io.Serializable {
 4
 5         private int id ;
 6
 7         private String userName ;
 8
 9         private int messageCount ;
10
11         public int getId() {
12                 return id;
13         }
14
15         public void setId(int id) {
16                 this.id = id;
17         }
18
19         public String getUserName() {
20                 return userName;
21         }
22
23         public void setUserName(String userName) {
24                 this.userName = userName;
25         }
26
27         public int getMessageCount() {
28                 return messageCount;
29         }
30
31         public void setMessageCount(int messageCount) {
32                 this.messageCount = messageCount;
33         }
34
35 }
创建映射文件User.hbm.xml:
 1 <?xml version="1.0"?>
 2 <!DOCTYPE hibernate-mapping PUBLIC "-//Hibernate/Hibernate Mapping DTD 3.0//EN"
 3 "http://hibernate.sourceforge.net/hibernate-mapping-3.0.dtd">
 4 <hibernate-mapping>
 5     <class name="example.business.User" table="tb_user">
 6         <id name="id" type="int" column="id">
 7                 <generator class="native" />
 8         </id>
 9         <property name="userName" type="string" column="userName" />
10         <property name="messageCount" type="int" column="messageCount" />
11     </class>
12 </hibernate-mapping>
同时在Message.java、Message.hbm.xml 中增加userId属性对应User对象的id属性。新的Message.java和Message.hbm.xml为:
 1 package example.business;
 2
 3 import java.util.Date;
 4
 5 public class Message implements java.io.Serializable {
 6
 7         private int id ;
 8
 9         private String content ;
10
11         private int userId ;
12
13         private Date createdTime ;
14
15         public int getId() {
16                 return id;
17         }
18
19         public void setId(int id) {
20                 this.id = id;
21         }
22
23         public String getContent() {
24                 return content;
25         }
26
27         public void setContent(String content) {
28                 this.content = content;
29         }
30
31         public Date getCreatedTime() {
32                 return createdTime;
33         }
34
35         public void setCreatedTime(Date createdTime) {
36                 this.createdTime = createdTime;
37         }
38
39         public int getUserId() {
40                 return userId;
41         }
42
43         public void setUserId(int userId) {
44                 this.userId = userId;
45         }
46
47 }
 1 <?xml version="1.0"?>
 2 <!DOCTYPE hibernate-mapping PUBLIC "-//Hibernate/Hibernate Mapping DTD 3.0//EN"
 3 "http://hibernate.sourceforge.net/hibernate-mapping-3.0.dtd">
 4 <hibernate-mapping>
 5     <class name="example.business.Message" table="tb_message">
 6         <id name="id" type="int" column="id">
 7                 <generator class="native" />
 8         </id>
 9         <property name="userId" type="int" column="userId" />
10         <property name="content" type="string" column="content" />
11         <property name="createdTime" type="datetime" column="createdTime" />
12     </class>
13 </hibernate-mapping>
在mb_main数据库中增加tb_user表,并调整tb_message表:
 1 use mb_main ;
 2
 3 create table tb_user(
 4         id int not null auto_increment primary key,
 5         userName varchar(64) not null,
 6         messageCount int(11)default 0
 7 )engine=Innodb ;
 8
 9 alter table tb_message add column userId int(11) default 1 ;
10 create index idx_msg_uid on tb_message(userId) ;
11
12 insert into tb_user(userName) values('Lucy') ;
13 insert into tb_user(userName) values('Lily') ;
14 insert into tb_user(userName) values('Cathy') ;
15 insert into tb_user(userName) values('Polly, The Bird') ;
16
17 update tb_user set messageCount = (select count(*) from tb_message) where id = 1 ;
修改guzz.xml,增加User域对象的声明:
1 <business dbgroup="default" name="user" file="classpath:example/business/User.hbm.xml" />
由于是多用户留言板,因此 messageList.jsp 中我们需要增加一个参数用来区分用户。此参数定义为userId。无论是访问留言板,还是发表留言,我们都用userId标记当前留言板所属用户。修改 messageList.jsp 增加对userId参数的支持:
 1 <%@ page language="java" pageEncoding="UTF-8" errorPage="/WEB-INF/jsp/include/defaultException.jsp"%>
 2 <%@include file="/WEB-INF/jsp/include/tags.jsp"%>
 3 <g:get business="user" var="m_user" limit="id=${param.userId}" />
 4
 5 <g:boundary>
 6         <g:addLimit limit="userId=${m_user.id}" />
 7         <g:page business="message" var="m_messages" tableCondition="${m_user.id}" pageNo="${param.pageNo}" pageSize="30" orderBy="id desc" scope="request" />
 8 </g:boundary>
 9
10 <!DOCTYPE HTML PUBLIC "-//W3C//DTD HTML 4.01 Transitional//EN">
11 <html>
12   <head>
13     <title>${m_user.userName}'s Message List</title>
14   </head>
15
16   <body>
17         Leave a message:<br>
18
19         <form method="POST" action="./newMessage.do">
20                 <input type="hidden" name="userId" value="${m_user.id}" />
21
22                 <textarea name="content" cols="80" rows="10"></textarea>
23                 ....
在新的 messageList.jsp 中,g:page增加了1个查询条件。而在form表单提交时,增加了隐藏的userId参数。
修改 NewMessageAction.java 增加对userId参数的支持:
 1  public ModelAndView handleRequest(HttpServletRequest request, HttpServletResponse response) throws Exception {
 2                 int userId = RequestUtil.getParameterAsInt(request, "userId", 0) ;
 3                 String content = request.getParameter("content") ;
 4
 5                 Message msg = new Message() ;
 6                 msg.setContent(content) ;
 7                 msg.setCreatedTime(new java.util.Date()) ;
 8
 9                 //close auto-commit
10                 WriteTranSession write = guzzContext.getTransactionManager().openRWTran(false) ;
11
12                 try{
13                         User user = (User) write.findObjectByPK(User.class, userId) ;
14                         user.setMessageCount(user.getMessageCount() + 1) ;
15
16                         msg.setUserId(userId) ;
17
18                         write.insert(msg) ;
19                         write.update(user) ;
20
21                         write.commit() ;
22                 }catch(Exception e){
23                         write.rollback() ;
24
25                         throw e ;
26                 }finally{
27                         write.close() ;
28                 }
29
30                 return new ModelAndView("redirect:/messageList.jsp", "userId", userId);
31         }
因为要同时更新两张表,因此我们选择手工控制事务的提交。
重新部署并启动应用,访问:http://localhost:8080/guzz/messageList.jsp?userId=1 ,看到Lucy's Message List;访问http://localhost:8080/guzz/messageList.jsp?userId=1 看到Lily's Message List。
多用户留言板完成。
使用2组数据库(启用第3、4台数据库)
随着业务的增长我们发现mb_main数据库负载太高,需要将tb_user表挪出去,部署到另外一组数据库中。这组数据库有1台主库(第3台数据库)和1台从库(第4台数据库)。
我们给这组新数据库取名为userDB。首先,很显然需要将现有的tb_user表导出并装载到userDB数据库组中,并建好数据库主从。假设此步骤已经完成。
为了演示,我们在本机上创建 mb_user 数据库作为userDB。
1 create database mb_user default character set utf8 ;
2
3 create table mb_user.tb_user select * from mb_main.tb_user ;
4
5 alter table mb_user.tb_user modify column id int(11) not null auto_increment primary key ;
6
7 drop table mb_main.tb_user ;
这时我们有2组数据库:mb_main存放tb_message, mb_user存放tb_user。
为了让应用知道mb_user库的存在,修改guzz.xml的tran,增加一个userDB dbgroup:
1 <dbgroup name="userDB" masterDBConfigName="userMasterDB" slaveDBConfigName="userSlaveDB" />
修改User域对象使用userDB:
1 <business dbgroup="userDB" name="user" file="classpath:example/business/User.hbm.xml" />
修改messageBoard.properties主配置文件,增加userDB主从数据库连接池的配置信息userMasterDB和userSlaveDB:
 1 [userMasterDB]
 2 guzz.identifer=userMasterDB1
 3 guzz.IP=localhost
 4 guzz.maxLoad=120
 5 driverClass=com.mysql.jdbc.Driver
 6 jdbcUrl=jdbc:mysql://localhost:3306/mb_user?useUnicode=true&characterEncoding=UTF-8&useServerPrepStmts=true
 7 user=root
 8 password=root
 9 acquireIncrement=10
10 idleConnectionTestPeriod=60
11
12 [userSlaveDB]
13 guzz.identifer=userSlaveDB1
14 guzz.IP=localhost
15 guzz.maxLoad=80
16 driverClass=com.mysql.jdbc.Driver
17 jdbcUrl=jdbc:mysql://localhost:3306/mb_user?useUnicode=true&characterEncoding=UTF-8&useServerPrepStmts=true
18 user=root
19 password=root
20 acquireIncrement=10
21 idleConnectionTestPeriod=60
如果你有第3、4台独立数据库,将上面的jdbcUrl改到具体的数据库地址即可。
重新部署并启动应用,这时您的应用已经开始使用4台数据库。当你发表新留言时,更新tb_user和tb_message表的操作将自动在一个分布式事务中完成。代码不需要做任何调整。
注意: 1. 通过create table ..select..的方式,索引将不复存在,真实环境下注意重新创建索引。2. 上面例子中的sql语句通过db.table的方式操作数据库,mysql主从复制可能会忽略这类操作的复制;如果从库没有执行,需要手工在从库执行sql。下同。
将留言表分切成小表
随着业务的进一步发展,很快留言数突破千万,tb_message查询缓慢,已经成为系统的性能瓶颈。我们决定将留言表按照用户分成多张小表。
分切的规则是:每个用户1张表,表名规则为tb_message${userId}。
切表的详细说明文档,请参看:TutorialShadowTable 。
为了实现表分切,首先需要实现分切规则,创建一个新的java类 example.business.MessageShadowTableView 定义规则:
 1 package example.business;
 2
 3 import org.guzz.exception.GuzzException;
 4 import org.guzz.orm.AbstractShadowTableView;
 5
 6 public class MessageShadowTableView extends AbstractShadowTableView {
 7
 8         public String toTableName(Object tableCondition) {
 9                 if (tableCondition = null) { // 强制要求必须设置表分切条件,避免编程时疏忽。
10                         throw new GuzzException("null table conditon is not allowed.");
11                 }
12
13                 Integer userId = (Integer) tableCondition;
14
15                 //tb_message_${userId}
16                 return "tb_message_" + userId.intValue() ;
17         }
18
19 }
可见,分切条件为用户编号userId。我们有4个用户,因此将tb_message分切成4张小表,分别为:tb_message_1, tb_message_2, tb_message_3, tb_message_4.
 1 use mb_main ;
 2
 3 create table tb_message_1 select * from tb_message where userId = 1 ;
 4 create table tb_message_2 select * from tb_message where userId = 2 ;
 5 create table tb_message_3 select * from tb_message where userId = 3 ;
 6 create table tb_message_4 select * from tb_message where userId = 4 ;
 7
 8 alter table tb_message_1 modify column id int(11) not null auto_increment primary key ;
 9 alter table tb_message_2 modify column id int(11) not null auto_increment primary key ;
10 alter table tb_message_3 modify column id int(11) not null auto_increment primary key ;
11 alter table tb_message_4 modify column id int(11) not null auto_increment primary key ;
12
13 drop table tb_message ;
为了让guzz知道表分切规则,修改Message.hbm.xml映射文件,在class元素中增加属性 shadow="example.business.MessageShadowTableView" ,同时将dtd定义改成guzz的。修改后的文件为:
 1 <?xml version="1.0"?>
 2 <!DOCTYPE guzz-mapping PUBLIC "-//GUZZ//GUZZ MAPPING DTD//EN" "http://www.guzz.org/dtd/guzz-mapping.dtd">
 3 <guzz-mapping>
 4     <class name="example.business.Message" table="tb_message" shadow="example.business.MessageShadowTableView">
 5         <id name="id" type="int" column="id">
 6                 <generator class="native" />
 7         </id>
 8         <property name="userId" type="int" column="userId" />
 9         <property name="content" type="string" column="content" />
10         <property name="createdTime" type="datetime" column="createdTime" />
11     </class>
12 </guzz-mapping>
这时guzz已经知道Message对象需要根据 example.business.MessageShadowTableView 进行切表。在所有操作 Message 的地方,需要传入userId作为切表条件(称作:tableCondition)。
对于留言读取的地方,修改 messageList.jsp 的g:page调用为:
1 <g:page business="message" var="m_messages" tableCondition="${param.userId}" pageNo="${param.pageNo}" pageSize="30" orderBy="id desc" scope="request" />
通过tableCondition属性传入切表条件。
修改 NewMessageAction.java的 write.insert(msg) 为 write.insert(msg, userId) 通过insert方法的第二个参数传入切表条件。
重新部署并启动应用,可以看到我们的留言板已经在4个小表中工作了。
分布式切表以应对超级大表
随着业务的更进一步发展,我们发现tb_message即使分成了小表,都存储在一台数据库中也过于庞大。在实际的应用中,可能是您的数据已经分切成了上百张表,总量非常大。现在,我们需要将这些分切后的小表,存储到不同的数据库机器中,减少单台数据库数据量过大的问题,同时也减少1台数据库上表的总个数。
为了解决这个问题,guzz提供了分布式切表功能,称作VirtualDB。详细介绍请参看:TutorialVirtualDB
为了演示,我们个性化的小表存储规则为:编号为1的用户,留言继续存储在default数据库组中不变(mb_main库中);其他的存储到userDB中(mb_user库中)。当然在实际系统中,您可能不会这么切分,更可能引入第5、6、7、8甚至更多台的数据库机器。这里只是演示灵活的切分规则。
现在我们开始挪表,把tb_message_2, tb_message_3, tb_message_4从mb_main挪到mb_user中:
 1 create table mb_user.tb_message_2 select * from mb_main.tb_message_2 ;
 2 create table mb_user.tb_message_3 select * from mb_main.tb_message_3 ;
 3 create table mb_user.tb_message_4 select * from mb_main.tb_message_4 ;
 4
 5 alter table mb_user.tb_message_2 modify column id int(11) not null auto_increment primary key ;
 6 alter table mb_user.tb_message_3 modify column id int(11) not null auto_increment primary key ;
 7 alter table mb_user.tb_message_4 modify column id int(11) not null auto_increment primary key ;
 8
 9 drop table mb_main.tb_message_2 ;
10 drop table mb_main.tb_message_3 ;
11 drop table mb_main.tb_message_4 ;
创建一个新的java类,定义VirtualDB的表分布规则:
 1 package example.business;
 2
 3 import org.guzz.connection.AbstractVirtualDBView;
 4 import org.guzz.exception.GuzzException;
 5
 6 public class MessageVirtualDBView extends AbstractVirtualDBView {
 7
 8     public String getPhysicsDBGroupName(Object tableCondition) {
 9                 if (tableCondition = null) {
10                         throw new GuzzException("null table conditon is not allowed.");
11                 }
12
13                 int userId = (Integer) tableCondition;
14
15                 if(userId = 1){
16                          //store lucy's messages in the default database.
17                         return "default" ;
18                 }else{
19                          //store others in the userDB database.
20                         return "userDB" ;
21                 }
22     }
23
24 }
为了让 guzz 知道分布式切表,对于每个使用VirtualDB的领域对象,我们需要在guzz.xml中声明一个virtualdbgroup。对于Message,修改guzz.xml,在tran元素下增加virtualdbgroup:
1 <virtualdbgroup name="messageDB" shadow="example.business.MessageVirtualDBView" />
同时,修改Message领域对象的dbgroup到新的messageDB。修改好的guzz.xml为:
 1 <?xml version="1.0" encoding="UTF-8"?>
 2 <!DOCTYPE guzz-configs PUBLIC "-//GUZZ//DTD MAIN CONFIG//EN" "http://www.guzz.org/dtd/guzz.dtd">
 3
 4 <guzz-configs>
 5
 6         <dialect class="org.guzz.dialect.Mysql5Dialect" />
 7
 8         <tran>
 9                 <dbgroup name="default" masterDBConfigName="masterDB" slaveDBConfigName="slaveDB" />
10                 <dbgroup name="userDB" masterDBConfigName="userMasterDB" slaveDBConfigName="userSlaveDB" />
11
12                 <virtualdbgroup name="messageDB" shadow="example.business.MessageVirtualDBView" />
13         </tran>
14
15         <config-server>
16                 <server class="org.guzz.config.LocalFileConfigServer">
17                         <param name="resource" value="messageBoard.properties" />
18                 </server>
19         </config-server>
20
21         <!-- business starts -->
22         <business dbgroup="messageDB" name="message" file="classpath:example/business/Message.hbm.xml" />
23         <business dbgroup="userDB" name="user" file="classpath:example/business/User.hbm.xml" />
24         <!-- business ends -->
25
26 </guzz-configs>
重新部署并启动应用。此时的留言板将自动将lucy的留言存储到mb_main,其他人的留言存储到mb_user库中。完成分布式切表。
用计数器服务实现支持投票(启用第3组,第5台数据库)
实现投票功能
随着留言板应用的深入,用户希望能够对留言进行投票,像digg一样支持优秀的留言。我们需要给留言增加vote功能。Vote分为支持和反对,支持增加10分,反对减少8分。在Message中增加一个voteScore记录得票的总分数。我们给Message.java对象和对应的Message.hbm.xml文件增加3个int类型属性:
1 private int voteYes ;
2
3 private int voteNo ;
4
5 private int voteScore ;
调整数据库表结构,增加这3个字段:
 1 alter table mb_main.tb_message_1 add column voteYes int(11) default 0 ;
 2 alter table mb_main.tb_message_1 add column voteNo int(11) default 0 ;
 3 alter table mb_main.tb_message_1 add column voteScore int(11) default 0 ;
 4
 5 alter table mb_user.tb_message_2 add column voteYes int(11) default 0 ;
 6 alter table mb_user.tb_message_2 add column voteNo int(11) default 0 ;
 7 alter table mb_user.tb_message_2 add column voteScore int(11) default 0 ;
 8
 9 alter table mb_user.tb_message_3 add column voteYes int(11) default 0 ;
10 alter table mb_user.tb_message_3 add column voteNo int(11) default 0 ;
11 alter table mb_user.tb_message_3 add column voteScore int(11) default 0 ;
12
13 alter table mb_user.tb_message_4 add column voteYes int(11) default 0 ;
14 alter table mb_user.tb_message_4 add column voteNo int(11) default 0 ;
15 alter table mb_user.tb_message_4 add column voteScore int(11) default 0 ;
为支持用户投票,增加一个action处理此操作,example.view.action.VoteMessageAction.java:
 1 package example.view.action;
 2
 3 import javax.servlet.http.HttpServletRequest;
 4 import javax.servlet.http.HttpServletResponse;
 5
 6 import org.guzz.Guzz;
 7 import org.guzz.GuzzContext;
 8 import org.guzz.transaction.WriteTranSession;
 9 import org.guzz.util.Assert;
10 import org.guzz.util.RequestUtil;
11 import org.springframework.web.servlet.ModelAndView;
12 import org.springframework.web.servlet.mvc.Controller;
13
14 import example.business.Message;
15
16 public class VoteMessageAction implements Controller {
17
18         private GuzzContext guzzContext ;
19
20         public ModelAndView handleRequest(HttpServletRequest request, HttpServletResponse response) throws Exception {
21                 int userId = RequestUtil.getParameterAsInt(request, "userId", 0) ;
22                 int msgId = RequestUtil.getParameterAsInt(request, "msgId", 0) ;
23                 String type = request.getParameter("type") ;
24
25                 //auto-commit
26                 WriteTranSession write = guzzContext.getTransactionManager().openRWTran(true) ;
27
28                 try{
29                         //set tableCondition
30                         Guzz.setTableCondition(userId) ;
31                         Message msg = (Message) write.findObjectByPK(Message.class, msgId) ;
32                         Assert.assertNotNull(msg, "msg not found!") ;
33
34                         if("yes".equals(type)){
35                                 msg.setVoteYes(msg.getVoteYes() + 1) ;
36                                 msg.setVoteScore(msg.getVoteScore() + 10) ;
37                         }else{
38                                 msg.setVoteNo(msg.getVoteNo() + 1) ;
39                                 msg.setVoteScore(msg.getVoteScore() - 8) ;
40                         }
41
42                         write.update(msg) ;
43                 }finally{
44                         write.close() ;
45                 }
46
47                 return new ModelAndView("redirect:/messageList.jsp", "userId", userId);
48         }
49
50         public GuzzContext getGuzzContext() {
51                 return guzzContext;
52         }
53
54         public void setGuzzContext(GuzzContext guzzContext) {
55                 this.guzzContext = guzzContext;
56         }
57
58 }
在这个Action中,我们通过 Guzz.setTableCondition(userId) 设置当前线程所有数据库操作默认的分表条件,然后获取要投票的留言,增加计数后更新。
将这个Action的配置添加到dispatcher-servlet.xml中:
1 <bean name="/voteMessage.do" class="example.view.action.VoteMessageAction">
2         <property name="guzzContext" ref="guzzContext" />
3 </bean>
修改 messageList.jsp ,列出投票数和投票地址:
 1 <%@ page language="java" pageEncoding="UTF-8" errorPage="/WEB-INF/jsp/include/defaultException.jsp"%>
 2 <%@include file="/WEB-INF/jsp/include/tags.jsp"%>
 3
 4 <g:get business="user" var="m_user" limit="id=${param.userId}" />
 5
 6 <g:boundary>
 7         <g:addLimit limit="userId=${m_user.id}" />
 8         <g:page business="message" var="m_messages" tableCondition="${m_user.id}" pageNo="${param.pageNo}" pageSize="30" orderBy="id desc" scope="request" />
 9 </g:boundary>
10
11 <!DOCTYPE HTML PUBLIC "-//W3C//DTD HTML 4.01 Transitional//EN">
12 <html>
13   <head>
14     <title>${m_user.userName}'s Message List</title>
15   </head>
16
17   <body>
18         Leave a message:<br>
19
20         <form method="POST" action="./newMessage.do">
21                 <input type="hidden" name="userId" value="${m_user.id}" />
22
23                 <textarea name="content" cols="80" rows="10"></textarea>
24
25                 <br/>
26                 <input type="submit" />
27         </form>
28
29         <hr>
30         <table width="96%" border="1">
31                 <tr>
32                         <th>No.</th>
33                         <th>Vote</th>
34                         <th>Content</th>
35                         <th>Date</th>
36                 </tr>
37
38                 <c:forEach items="${m_messages.elements}" var="m_msg">
39                 <tr>
40                         <td>${m_messages.index}</td>
41                         <td>
42                                 voteYes: <a href="./voteMessage.do?type=yes&userId=${m_msg.userId}&msgId=${m_msg.id}">${m_msg.voteYes}</a><br>
43                                 voteNo: <a href="./voteMessage.do?type=no&userId=${m_msg.userId}&msgId=${m_msg.id}">${m_msg.voteNo}</a><br>
44                                 voteScore: ${m_msg.voteScore}
45                         </td>
46                         <td>vote<g:out value="${m_msg.content}" escapeXml="false" escapeScriptCode="true" /></td>
47                         <td>${m_msg.createdTime}</td>
48                 </tr>
49                 </c:forEach>
50         </table>
51
52         <table width="96%" border="1">
53                 <tr>
54                         <c:import url="/WEB-INF/jsp/include/console_flip.jsp" />
55                 </tr>
56         </table>
57
58   </body>
59 </html>
重新并重启应用,现在投票功能就可以使用了。
SlowUpdateService(使用第5台数据库)
虽然投票功能有了,但刚上线就发现了另外一个问题:投票的量太多。每次投票都需要进行一次数据库update操作,频繁的update操作对数据库的消耗太大。
我们希望将投票操作队列化,最好能够合并对同1条记录的多个update操作,然后用批操作的方式写入数据库,最大程度的减少数据库消耗,而不要每次都单独update。
这种场景出现的比较多,因此guzz内置了 SlowUpdateService 服务来完成这种队列化计数更新操作。详细的配置参数和工作原理,请参看:AppendCoreService
下面我们开始配置。为了减少对主库的影响,计数对列我们存储在第5台临时数据库中。创建数据库mb_temp,并创建计数队列存储的表tb_guzz_su:
 1 create database mb_temp default character set utf8 ;
 2
 3 use mb_temp ;
 4
 5 create table tb_guzz_su(
 6         gu_id bigint not null auto_increment primary key,
 7         gu_db_group varchar(32) not null,
 8         gu_tab_name varchar(64) not null,
 9         gu_inc_col varchar(64) not null ,
10         gu_tab_pk_col varchar(64) not null,
11         gu_tab_pk_val varchar(64) not null ,
12         gu_inc_count int(11) not null
13 )engine=Innodb ;
在guzz.xml中增加mb_temp对应的数据库组tempDB,并增加临时表对应域对象的声明:
1 <tran>
2                 ....
3                 <dbgroup name="tempDB" masterDBConfigName="tempMasterDB" />
4                 ....
5 </tran>
6
7 <business dbgroup="tempDB" name="guzzSlowUpdate" file="classpath:example/business/IncUpdateBusiness.hbm.xml" />
将工程src中的 fms/business/IncUpdateBusiness.hbm.xml 挪到 example/business/ 下。fms/business目录可以删掉了。
默认的 SlowUpdateService 服务为guzz内置服务。guzz在启动时会自动创建此服务,名称为guzzSlowUpdate,配置组的名称也为guzzSlowUpdate。修改messageBoard.properties主配置文件,增加此服务配置信息,同时增加tempDB数据库组主数据库的连接池配置:
[tempMasterDB]
guzz.identifer=tempMasterDB1
guzz.IP=localhost
guzz.maxLoad=120
driverClass=com.mysql.jdbc.Driver
jdbcUrl=jdbc:mysql://localhost:3306/mb_temp?useUnicode=true&characterEncoding=UTF-8&useServerPrepStmts=true
user=root
password=root
acquireIncrement=10
idleConnectionTestPeriod=60

[guzzSlowUpdate]
#max size of cached queue
queueSize=20480

#batch size for updating to the temporary database.
batchSize=2048
至此,计数队列的配置完成。为了方便spring使用,我们将此服务导出为spring bean,在applicationContext.xml中添加bean:
1 <bean id="guzzSlowUpdateService" class="org.guzz.web.context.spring.GuzzServiceFactoryBean">
2         <property name="serviceName" value="guzzSlowUpdate" />
3     </bean>
修改 VoteMessageAction.java 使用计数器服务:
 1 package example.view.action;
 2
 3 import javax.servlet.http.HttpServletRequest;
 4 import javax.servlet.http.HttpServletResponse;
 5
 6 import org.guzz.service.core.SlowUpdateService;
 7 import org.guzz.util.RequestUtil;
 8 import org.springframework.web.servlet.ModelAndView;
 9 import org.springframework.web.servlet.mvc.Controller;
10
11 import example.business.Message;
12
13 public class VoteMessageAction implements Controller {
14
15         private SlowUpdateService slowUpdateService ;
16
17         public ModelAndView handleRequest(HttpServletRequest request, HttpServletResponse response) throws Exception {
18                 int userId = RequestUtil.getParameterAsInt(request, "userId", 0) ;
19                 int msgId = RequestUtil.getParameterAsInt(request, "msgId", 0) ;
20                 String type = request.getParameter("type") ;
21
22                 if("yes".equals(type)){
23                         //public void updateCount(Class domainClass, Object tableCondition, String propToUpdate, Serializable pkValue, int countToInc) ;
24                         this.slowUpdateService.updateCount(Message.class, userId, "voteYes", msgId, 1) ;
25                         this.slowUpdateService.updateCount(Message.class, userId, "voteScore", msgId, 10) ;
26                 }else{
27                         this.slowUpdateService.updateCount(Message.class, userId, "voteNo", msgId, 1) ;
28                         this.slowUpdateService.updateCount(Message.class, userId, "voteScore", msgId, -8) ;
29                 }
30
31                 return new ModelAndView("redirect:/messageList.jsp", "userId", userId);
32         }
33
34         public SlowUpdateService getSlowUpdateService() {
35                 return slowUpdateService;
36         }
37
38         public void setSlowUpdateService(SlowUpdateService slowUpdateService) {
39                 this.slowUpdateService = slowUpdateService;
40         }
41
42 }
在新的Action中,不在直接操作数据库,而是调用updateCount将计数操作写入队列。
修改 dispatcher-servlet.xml ,在bean:/voteMessage.do 中注入guzzSlowUpdateService:
<bean name="/voteMessage.do" class="example.view.action.VoteMessageAction">
        <property name="slowUpdateService" ref="guzzSlowUpdateService" />
</bean>
重新部署并启动应用。投票。此时票数没有变化,没有关系,打开mb_temp数据库的tb_guzz_su表,可以看到计数操作已经成功写入到了队列中。
SlowUpdateServerService
为了将计数队列的数据写回各个表对应的主库,还需要启动计数队列服务的服务器端。修改guzz.xml文件,添加服务器端服务:
1 <service name="slowUpdateServer" configName="guzzSlowUpdateServer" class="org.guzz.service.db.impl.SlowUpdateServerImpl" />
修改messageBoard.properties文件,添加slowUpdateServer服务的详细配置信息:
 1 [guzzSlowUpdateServer]
 2 #batch size for updating the main database
 3 batchSize=50
 4
 5 #page size for reading from the temporary table
 6 pageSize=40
 7
 8 #how many pages to read from the temporary table for one loop updating
 9 combinePageCount=10
10
11 #millseconds to wait for the next round of updates checking
12 updateInterval=500
重新部署并启动应用。查看tb_guzz_su表,队列已经被处理,访问:http://localhost:8080/guzz/messageList.jsp?userId=1 ,看到计数已经正确更新了。
删除留言,批量删除留言
单条留言删除
创建删除留言的Action:example.view.action.DeleteMessageAction.java:
 1 package example.view.action;
 2
 3 import javax.servlet.http.HttpServletRequest;
 4 import javax.servlet.http.HttpServletResponse;
 5
 6 import org.guzz.Guzz;
 7 import org.guzz.GuzzContext;
 8 import org.guzz.service.core.SlowUpdateService;
 9 import org.guzz.transaction.WriteTranSession;
10 import org.guzz.util.RequestUtil;
11 import org.springframework.web.servlet.ModelAndView;
12 import org.springframework.web.servlet.mvc.Controller;
13
14 import example.business.Message;
15 import example.business.User;
16
17 public class DeleteMessageAction implements Controller {
18
19         private GuzzContext guzzContext ;
20
21         private SlowUpdateService slowUpdateService ;
22
23         public ModelAndView handleRequest(HttpServletRequest request, HttpServletResponse response) throws Exception {
24                 int userId = RequestUtil.getParameterAsInt(request, "userId", 0) ;
25                 int msgId = RequestUtil.getParameterAsInt(request, "msgId", 0) ;
26
27                 //auto-commit
28                 WriteTranSession write = guzzContext.getTransactionManager().openRWTran(true) ;
29
30                 try{
31                         Guzz.setTableCondition(userId) ;
32                         Message msg = (Message) write.findObjectByPK(Message.class, msgId) ;
33
34                         if(msg != null){
35                                 write.delete(msg) ;
36
37                                 //dec the message count
38                                 this.slowUpdateService.updateCount(User.class, null, "messageCount", userId, -1) ;
39                         }
40                 }finally{
41                         write.close() ;
42                 }
43
44                 return new ModelAndView("redirect:/messageList.jsp", "userId", userId);
45         }
46
47         public GuzzContext getGuzzContext() {
48                 return guzzContext;
49         }
50
51         public void setGuzzContext(GuzzContext guzzContext) {
52                 this.guzzContext = guzzContext;
53         }
54
55         public SlowUpdateService getSlowUpdateService() {
56                 return slowUpdateService;
57         }
58
59         public void setSlowUpdateService(SlowUpdateService slowUpdateService) {
60                 this.slowUpdateService = slowUpdateService;
61         }
62
63 }
配置到 dispatcher-servlet.xml 中:
1 <bean name="/deleteMessage.do" class="example.view.action.DeleteMessageAction">
2         <property name="guzzContext" ref="guzzContext" />
3         <property name="slowUpdateService" ref="guzzSlowUpdateService" />
4 </bean>
修改 messageList.jsp,增加delete链接到 ./deleteMessage.do?userId=${m_msg.userId}&msgId=${m_msg.id} 即可删除消息。在消息删除时,我们同时用slowUpdateService减少用户的留言数。
批量删除
我们在 messageList.jsp 中增加一个Form表单,提交表单时提交所有选择的留言编号,服务器端根据编号批量删除。messageList.jsp:
 1 <%@ page language="java" pageEncoding="UTF-8"%>
 2 <%@include file="/WEB-INF/jsp/include/tags.jsp"%>
 3
 4 <g:get business="user" var="m_user" limit="id=${param.userId}" />
 5
 6 <g:boundary>
 7         <g:addLimit limit="userId=${m_user.id}" />
 8         <g:page business="message" var="m_messages" tableCondition="${m_user.id}" pageNo="${param.pageNo}" pageSize="30" orderBy="id desc" scope="request" />
 9 </g:boundary>
10
11 <!DOCTYPE HTML PUBLIC "-//W3C//DTD HTML 4.01 Transitional//EN">
12 <html>
13   <head>
14     <title>${m_user.userName}'s Message List</title>
15   </head>
16
17   <body>
18         Leave a message:<br>
19
20         <form method="POST" action="./newMessage.do">
21                 <input type="hidden" name="userId" value="${m_user.id}" />
22
23                 <textarea name="content" cols="80" rows="10"></textarea>
24
25                 <br/>
26                 <input type="submit" />
27         </form>
28
29         <hr>
30         <form method="POST" action="./deleteMessage.do">
31                 <input type="hidden" name="userId" value="${m_user.id}" />
32
33                 <table width="96%" border="1">
34                         <tr>
35                                 <th>No.</th>
36                                 <th>Vote</th>
37                                 <th>Content</th>
38                                 <th>Date</th>
39                                 <th>OP</th>
40                         </tr>
41
42                         <c:forEach items="${m_messages.elements}" var="m_msg">
43                         <tr>
44                                 <td><input type="checkbox" name="ids" value="${m_msg.id}" />${m_messages.index}</td>
45                                 <td>
46                                         voteYes: <a href="./voteMessage.do?type=yes&userId=${m_msg.userId}&msgId=${m_msg.id}">${m_msg.voteYes}</a><br>
47                                         voteNo: <a href="./voteMessage.do?type=no&userId=${m_msg.userId}&msgId=${m_msg.id}">${m_msg.voteNo}</a><br>
48                                         voteScore: ${m_msg.voteScore}
49                                 </td>
50                                 <td>vote<g:out value="${m_msg.content}" escapeXml="false" escapeScriptCode="true" /></td>
51                                 <td>${m_msg.createdTime}</td>
52                                 <td><a href="./deleteMessage.do?userId=${m_msg.userId}&msgId=${m_msg.id}">Delete</a></td>
53                         </tr>
54                         </c:forEach>
55                 </table>
56                 <table width="96%" border="1">
57                         <tr>
58                                 <c:import url="/WEB-INF/jsp/include/console_flip.jsp" />
59                         </tr>
60                 </table>
61
62                 <table width="96%" border="1">
63                         <tr>
64                                 <td><input type="submit" value="Delete All Selected Messages" /></td>
65                         </tr>
66                 </table>
67         </form>
68
69   </body>
70 </html>
批量删除我们依然提交到 deleteMessage.do 中,只是采用POST方法提交。修改 DeleteMessageAction.java 以支持批量操作:
  1 package example.view.action;
  2
  3 import java.util.List;
  4
  5 import javax.servlet.http.HttpServletRequest;
  6 import javax.servlet.http.HttpServletResponse;
  7
  8 import org.guzz.Guzz;
  9 import org.guzz.GuzzContext;
 10 import org.guzz.jdbc.ObjectBatcher;
 11 import org.guzz.orm.se.SearchExpression;
 12 import org.guzz.orm.se.Terms;
 13 import org.guzz.service.core.SlowUpdateService;
 14 import org.guzz.transaction.ReadonlyTranSession;
 15 import org.guzz.transaction.WriteTranSession;
 16 import org.guzz.util.RequestUtil;
 17 import org.springframework.web.servlet.ModelAndView;
 18 import org.springframework.web.servlet.mvc.Controller;
 19
 20 import example.business.Message;
 21 import example.business.User;
 22
 23 public class DeleteMessageAction implements Controller {
 24
 25         private GuzzContext guzzContext ;
 26
 27         private SlowUpdateService slowUpdateService ;
 28
 29         public ModelAndView handleRequest(HttpServletRequest request, HttpServletResponse response) throws Exception {
 30                 int userId = RequestUtil.getParameterAsInt(request, "userId", 0) ;
 31
 32                 if("POST".equals(request.getMethod())){//Batch delete
 33                         int[] ids = RequestUtil.getParameterAsIntArray(request, "ids", 0) ;
 34
 35                         if(ids.length = 0){
 36                                 return new ModelAndView("redirect:/messageList.jsp", "userId", userId);
 37                         }
 38
 39                         List<Message> msgs = null ;
 40
 41                         //load the Messages to delete.
 42                         SearchExpression se = SearchExpression.forLoadAll(Message.class) ;
 43                         se.setTableCondition(userId) ;
 44                         se.and(Terms.in("id", ids)) ;
 45
 46                         //read from slave db.
 47                         ReadonlyTranSession read = guzzContext.getTransactionManager().openDelayReadTran() ;
 48                         try{
 49                                 msgs = read.list(se) ;
 50                         }finally{
 51                                 read.close() ;
 52                         }
 53
 54                         //Open write connections to the master db.
 55                         WriteTranSession write = guzzContext.getTransactionManager().openRWTran(false) ;
 56                         try{
 57                                 //Perform Batch operation.
 58                                 ObjectBatcher batcher = write.createObjectBatcher() ;
 59                                 batcher.setTableCondition(userId) ;
 60
 61                                 for(Message msg : msgs){
 62                                         batcher.delete(msg) ;
 63                                 }
 64
 65                                 batcher.executeUpdate() ;
 66
 67                                 write.commit() ;
 68                         }catch(Exception e){
 69                                 write.rollback() ;
 70
 71                                 throw e ;
 72                         }finally{
 73                                 write.close() ;
 74                         }
 75
 76                         //dec the message count
 77                         this.slowUpdateService.updateCount(User.class, null, "messageCount", userId, -msgs.size()) ;
 78                 }else{
 79                         //Delete one message
 80                         int msgId = RequestUtil.getParameterAsInt(request, "msgId", 0) ;
 81
 82                         //auto-commit
 83                         WriteTranSession write = guzzContext.getTransactionManager().openRWTran(true) ;
 84
 85                         try{
 86                                 Guzz.setTableCondition(userId) ;
 87                                 Message msg = (Message) write.findObjectByPK(Message.class, msgId) ;
 88
 89                                 if(msg != null){
 90                                         write.delete(msg) ;
 91
 92                                         //dec the message count
 93                                         this.slowUpdateService.updateCount(User.class, null, "messageCount", userId, -1) ;
 94                                 }
 95                         }finally{
 96                                 write.close() ;
 97                         }
 98                 }
 99
100                 return new ModelAndView("redirect:/messageList.jsp", "userId", userId);
101         }
102
103         public GuzzContext getGuzzContext() {
104                 return guzzContext;
105         }
106
107         public void setGuzzContext(GuzzContext guzzContext) {
108                 this.guzzContext = guzzContext;
109         }
110
111         public SlowUpdateService getSlowUpdateService() {
112                 return slowUpdateService;
113         }
114
115         public void setSlowUpdateService(SlowUpdateService slowUpdateService) {
116                 this.slowUpdateService = slowUpdateService;
117         }
118
119 }
对于POST提交的批量操作,我们获取所有提交的消息编号数组,通过 SearchExpression 查询符合的留言,创建批操作一次删除。guzz提供了两种批操作API,一种为基于对象化操作的 ObjectBatcher ,一种为基于直接SQL语句的SQLBatcher。本例子使用的是 ObjectBatcher 。