在最近的应用中,遇到这样一个需求,要在客户端做一个提醒小程序,比如说待批流程数提醒,应用看似挺简单的,可惜的是sharepoint的对像模型不支持客户端应用,所以变得有点麻烦了。为了能够使用moss 的对像模型开发,只能往服务端着手了,这时web service可是发挥出巨大的作用。下面我大概的说明一下应用逻辑:
自定义一个web Service,在这个web service中自定义函数,实现业务需求的数据,这个过程就可以调用对像模型帮忙处理数据了。开发好后,将这个web service部置到moss服务器上。这时,客户端就可以引用web service的方式,实现客户端与服务器端的数据交互。
具体的实现过程如下:
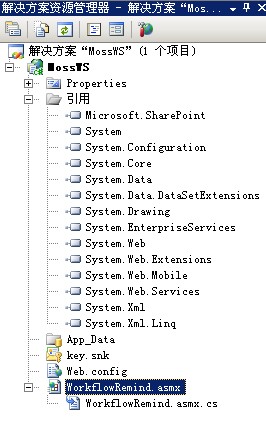
一:建立Webservice项目
1.使用vs2008建立一个webserivce项目来实现我们的webservice,如下图所示:
using System;
using System.Collections;
using System.ComponentModel;
using System.Data;
using System.Linq;
using System.Web;
using System.Web.Services;
using System.Web.Services.Protocols;
using System.Xml.Linq;
using Microsoft.SharePoint;
namespace MossWS
{
/// <summary>
/// WorkflowRemind 的摘要说明
/// </summary>
[WebService(Namespace = "http://tempuri.org/")]
[WebServiceBinding(ConformsTo = WsiProfiles.BasicProfile1_1)]
[ToolboxItem(false)]
// 若要允许使用 ASP.NET AJAX 从脚本中调用此 Web 服务,请取消对下行的注释。
// [System.Web.Script.Services.ScriptService]
public class WorkflowRemind : System.Web.Services.WebService
{
[WebMethod]
public string HelloWorld()
{
return "Hello World";
}
public SPUser GetSPUser(string UserName, string Domain, string SiteUrl)
{
SPUser user = null;
using (SPSite siteColl = new SPSite(SiteUrl))
{
Domain = Context.User.Identity.Name.Split('\\')[0];
user = siteColl.RootWeb.AllUsers[Domain + "\\" + UserName];
}
return user;
}
[WebMethod]
public int getWorkflowApproveCount(string UserName, string Password, string Domain, string SiteUrl)
{
SPUser user = GetSPUser(UserName, Domain, SiteUrl);
int returnCount = 0;
using (SPSite siteColl = new SPSite(SiteUrl))
{
SPWeb web = siteColl.OpenWeb("/workflowmodule");
string query = "<Where>"
+ " <And>"
+ " <Eq>"
+ " <FieldRef Name=\"_x5f53__x524d__x5ba1__x6279__x4e\" LookupId=\"TRUE\"/>"
+ " <Value Type=\"User\">" + user.ID + "</Value>"
+ " </Eq>"
+ " <Eq>"
+ " <FieldRef Name=\"_x72b6__x6001_\" />"
+ " <Value Type=\"Choice\">未启动</Value>"
+ " </Eq>"
+ " </And>"
+ " </Where>";
SPQuery spq = new SPQuery();
spq.Query = query;
SPListItemCollection items = web.Lists["workflowRecord"].GetItems(spq);
returnCount = items.Count;
}
return returnCount;
}
}
}
二.生成.wsdl,.disco文件
(1).copy webservice生成的bin到要部署的sharepoint 网站的虚拟目录bin下
(2).打开layouts目录(layouts地址C:\Program Files\Common Files\Microsoft Shared\web server extensions\12\TEMPLATE\LAYOUTS),拷贝webservice下的.asmx文件到layouts下
(3).开始--运行,输入cmd,转向layouts目录,运行
disco http://服务器:端口号/_layouts/WorkflowRemind.asmx
注:若没有disco.exe文件,则需要安装microsoft sdks,打开C:\Program Files\Microsoft SDKs\Windows\v6.0A\Bin,拷贝disco.exe到layouts目录下,运行disco http://服务器:端口号/_layouts/WorkflowRemind.asmx。
完成后会生成webservice文件WorkflowRemind.disco和WorkflowRemind.wsdl文件。
三、修改.wsdl,.disco文件
1.将WorkflowRemind.disco和WorkflowRemind.wsdl文件中的<?xml version="1.0" encoding="utf-8"?>该语句替换为以下语句:
<%@ Page Language="C#" Inherits="System.Web.UI.Page" %>
<%@ Assembly Name="Microsoft.SharePoint, Version=12.0.0.0, Culture=neutral, PublicKeyToken=71e9bce111e9429c" %>
<%@ Import Namespace="Microsoft.SharePoint.Utilities" %>
<%@ Import Namespace="Microsoft.SharePoint" %>
<% Response.ContentType = "text/xml"; %>
实际上就是把原来的纯xml变换成为一个page来解析。并且这个页面的解析是通过moss处理的。
2.将WorkflowRemind.disco中的
    <contractRef ref="http://moss/_layouts/WorkflowRemind.asmx?wsdl" docRef="http://moss/_layouts/WorkflowRemind.asmx" xmlns="http://schemas.xmlsoap.org/disco/scl/" />
    <soap address="http://moss/_layouts/WorkflowRemind.asmx" xmlns:q1="http://tempuri.org/" binding="q1:WorkflowRemindSoap" xmlns="http://schemas.xmlsoap.org/disco/soap/" />
    <soap address="http://moss/_layouts/WorkflowRemind.asmx" xmlns:q2="http://tempuri.org/" binding="q2:WorkflowRemindSoap12" xmlns="http://schemas.xmlsoap.org/disco/soap/" />
替换为:
    <contractRef ref=<% SPHttpUtility.AddQuote(SPHttpUtility.HtmlEncode(SPWeb.OriginalBaseUrl(Request) + "?wsdl"),Response.Output); %> docRef=<% SPHttpUtility.AddQuote(SPHttpUtility.HtmlEncode(SPWeb.OriginalBaseUrl(Request)), Response.Output); %> xmlns="http://schemas.xmlsoap.org/disco/scl/" />
    <soap address=<% SPHttpUtility.AddQuote(SPHttpUtility.HtmlEncode(SPWeb.OriginalBaseUrl(Request)),Response.Output); %> xmlns:q1="http://tempuri.org/" binding="q1:HelloWorld" xmlns="http://schemas.xmlsoap.org/disco/soap/" />
    <soap address=<% SPHttpUtility.AddQuote(SPHttpUtility.HtmlEncode(SPWeb.OriginalBaseUrl(Request)),Response.Output); %> xmlns:q2="http://tempuri.org/" binding="q2:ServiceSoap12" xmlns="http://schemas.xmlsoap.org/disco/soap/" />


  3.将service.wsdl中的
    <soap:address location="http://moss/_layouts/WorkflowRemind.asmx" />和
    <soap12:address location="http://moss/_layouts/WorkflowRemind.asmx" />
替换为:
<soap:address location=<% SPHttpUtility.AddQuote(SPHttpUtility.HtmlEncode(SPWeb.OriginalBaseUrl(Request)),Response.Output); %> />
和
<soap12:address location=<%SPHttpUtility.AddQuote(SPHttpUtility.HtmlEncode(SPWeb.OriginalBaseUrl(Request)),Response.Output); %> />
对于contractRef 还有soap address这两个节的更改,实际上是在页面里面重新编码了soap的查询url,这样做的目的也是为了moss托管的web service可以在运行时根据动态的请求来正确定位。
4.将WorkflowRemind.disco和WorkflowRemind.wsdl改名为WorkflowReminddisco.aspx和WorkflowRemindwsdl.aspx
四:部署webservice
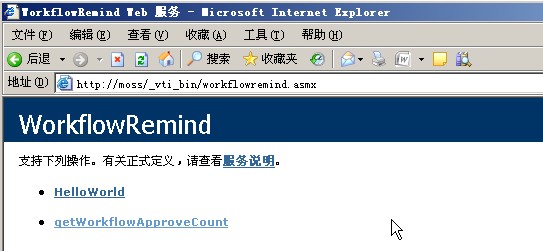
将WorkflowReminddisco.aspx,WorkflowRemindwsdl.aspx 和WorkflowRemind.asmx三个文件拷贝到c:\Program Files\Common Files\Microsoft Shared\Web Server Extensions\12\ISAPI目录中,然后我们就可以通过以下地址来检测我们部署是否成功了。http://moss/_vti_bin/WorkflowRemind.asmx.
如下图所示:
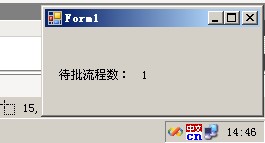
五:客户端调用
新建一个winform项目,添加一个web引用,地址为:http://moss/_vti_bin/WorkflowRemind.asmx,
为窗体编写代码如下:
using System;
using System.Collections.Generic;
using System.ComponentModel;
using System.Data;
using System.Drawing;
using System.Linq;
using System.Text;
using System.Windows.Forms;
using System.Net;
namespace WindowsForms
{
public partial class Form1 : Form
{
public Form1()
{
InitializeComponent();
}
private void Form1_Load(object sender, EventArgs e)
{
string UserName = "gaoyan";
string Password = "111111";
string Domain ="gsmn.com";
string SiteUrl = "http://moss";
moss.WorkflowRemind remind = new moss.WorkflowRemind();
remind.Credentials = new NetworkCredential(UserName, Password, Domain);
int wfCount = remind.getWorkflowApproveCount(UserName,Password, Domain, SiteUrl);
label2.Text = wfCount.ToString();
}
}
}