一、环境搭建准备(3台机器)
服务器三台:
127.0.0.1
127.0.0.2
127.0.0.3
将redis-3.2.9.tar.gz压缩包分别上传到各自机器上
二、安装
1、解压redis安装包:tar -zxvf redis-3.2.9.tar.gz
2、编译:
cd redis-3.2.9
make
3、安装:
make install PREFIX=/usr/local/redis
最后,查看Redis是否安装成功,进入/usr/local/redis
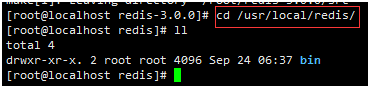
使用ll命令,可以看到bin文件夹,说明Redis已经安装成功。
三、主从模式配置
在/usr/local/redis/ 中新建redis.conf配置文件:
bind 0.0.0.0
protected-mode no
port 6379
logfile "/root/redis/redis.log"     #数据文件
pidfile "redis.pid"
masterauth "123456789"       #密码
requirepass "123456789"
tcp-backlog 511
timeout 0
tcp-keepalive 300
daemonize yes
supervised no
loglevel notice
databases 16
save 900 1
save 300 10
save 60 10000
stop-writes-on-bgsave-error yes
rdbcompression yes
rdbchecksum yes
dir "/home/oas/cluster2"
slave-serve-stale-data yes
slave-read-only yes
repl-diskless-sync no
repl-diskless-sync-delay 5
repl-disable-tcp-nodelay no
slave-priority 100
appendonly no
appendfilename "appendonly.aof"
appendfsync everysec
no-appendfsync-on-rewrite no
auto-aof-rewrite-percentage 100
auto-aof-rewrite-min-size 64mb
aof-load-truncated yes
lua-time-limit 5000
slowlog-log-slower-than 10000
slowlog-max-len 128
latency-monitor-threshold 0
notify-keyspace-events ""
hash-max-ziplist-entries 512
hash-max-ziplist-value 64
list-max-ziplist-size -2
list-compress-depth 0
set-max-intset-entries 512
zset-max-ziplist-entries 128
zset-max-ziplist-value 64
hll-sparse-max-bytes 3000
activerehashing yes
client-output-buffer-limit normal 0 0 0
client-output-buffer-limit slave 256mb 64mb 60
client-output-buffer-limit pubsub 32mb 8mb 60
hz 10
aof-rewrite-incremental-fsync yes
使用如下命令启动redis服务:
redis-server /usr/local/redis/redis.conf
动态改变主从关系,成为127.0.0.1的slave:
登录127.0.0.2机器:
redis-cli -h 127.0.0.2 -p 6379
127.0.0.2:6379> slaveof 127.0.0.1 6379
登录127.0.0.3机器:
redis-cli -h 127.0.0.3 -p 6379
127.0.0.3:6379> slaveof 127.0.0.1 6379
设置完成后开通防火墙端口:
登录127.0.0.1机器:
redis-cli -h 127.0.0.1 -p 6379
127.0.0.2:6379> info    #查看主从关系
四、sentinel模式集群管理配置
到/usr/local/redis/ 中创建sentinel.conf文件:
port 26379
daemonize yes
logfile "sentinel.log"
dir "/root/redis"
protected-mode no
sentinel monitor mymaster 127.0.0.1 6379 1
sentinel auth-pass mymaster 123456789
使用如下命令启动sentinel模式:
redis-sentinel sentinel.conf