本篇主要是介绍自定义处理器的开发方式及Nifi处理器开发的一些细节
Nifi-Processor自定义开发的流程
之前说过,大部分的数据处理,我们可以基于ExcuseGroovyScript处理器,编写Groovy脚本去完成(或者Jpython,Js脚本等对应的组件),只能说这是基于Nifi平台的使用层面,还不能算是对于Nifi的开发,真正基于Nifi开发,至少要掌握Nifi扩展自定义组件,即根据实际需求,进行内置处理器(Processor)的开发。当然Nifi本身官方是给出了扩展的口,如果我们下载Nifi源码,就能看到,在Nifi源码中有个 nifi-example-bundle 的代码包,就是Nifi提供的扩展方式,里面附了一个小样例,感兴趣的可以去看Nifi的源码。这里主要是对开发自定义处理器进行一个完整的经验总结。
总体来说,Nifi-Processor自定义开发的流程就是:基于Nifi规则下的编码—>代码打包为nar包——>发布使用。
基于Nifi规则下的编码
Nifi本身提供了扩展处理器的方法,并有一套完整的接口、类,只需要按着规则去实现接口、继承抽象类、覆盖方法,实现一个自己的Processor类
代码打包为nar包
Nifi内置Processor的存在形式就是nar包(Nifi自身定义的),必须将自定义的代码,按着一定的规则进行打包,最终你的Processor是以nar的形式嵌入Nifi中,其实下面的 “自定义Nifi-Processor项目的两种搭建方式” 主要就是maven项目两种不同的表现方式,根本目的是为了最终能生成nar包
发布使用
完成开发后,将打好的nar包,放到Nifi安装目录的lib下即可,lib目录本身存放了Nifi出厂自带的数据处理器nar包,如果想依样画葫芦的学习,可以随便摘取一个nar包,反编译一下看看它的写法。
自定义Nifi-Processor项目的两种搭建方式
nifi的项目主要是maven项目,我们必须按照maven规范进行开发Nifi的组件,这里经过踩坑,博主总结了两种Nifi处理器开发的方式:
- 基于Nifi官方提供的bundle模式
- 基于普通maven项目,通过pom文件的方式完成nar包的构建
不管哪种方式,自定义Nifi-Processor组件项目根本的步骤就是:
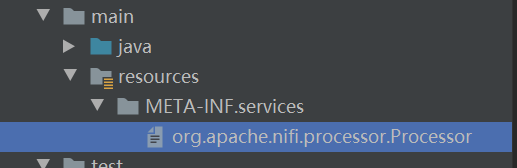
- 在resources目录下建立 META-INF.services目录,然创建文件 org.apache.nifi.processor.Processor
- org.apache.nifi.processor.Processor 文件内声明自己的Processor类的全路径
- 将项目配置成能够打包为nar包的结构
其实这种只是在 “将项目配置成能够打包为nar包的结构” 上有差异,本质上都是为了打成Nifi推出的nar程序包。总体上来讲,第一种更为规范,更符合项目工程化管控;第二种有点野路子的感觉,就是一个独立的maven项目,但是好理解、操作方便,建议新手可以从第二种方式入手。
基于官方给出的bundle模式的开发
这种方式是官方给出的,特点就是便于管理和控制开发规范,我们从Nifi给出的样例码说起;
下载Nifi源码后,可以看见 nifi-example-bundle 的代码包,其实这一代码包就是标准的自定义Processor开发的模板,自定义创建的时候,可以参考该样例,创建一个maven项目,进行开发。
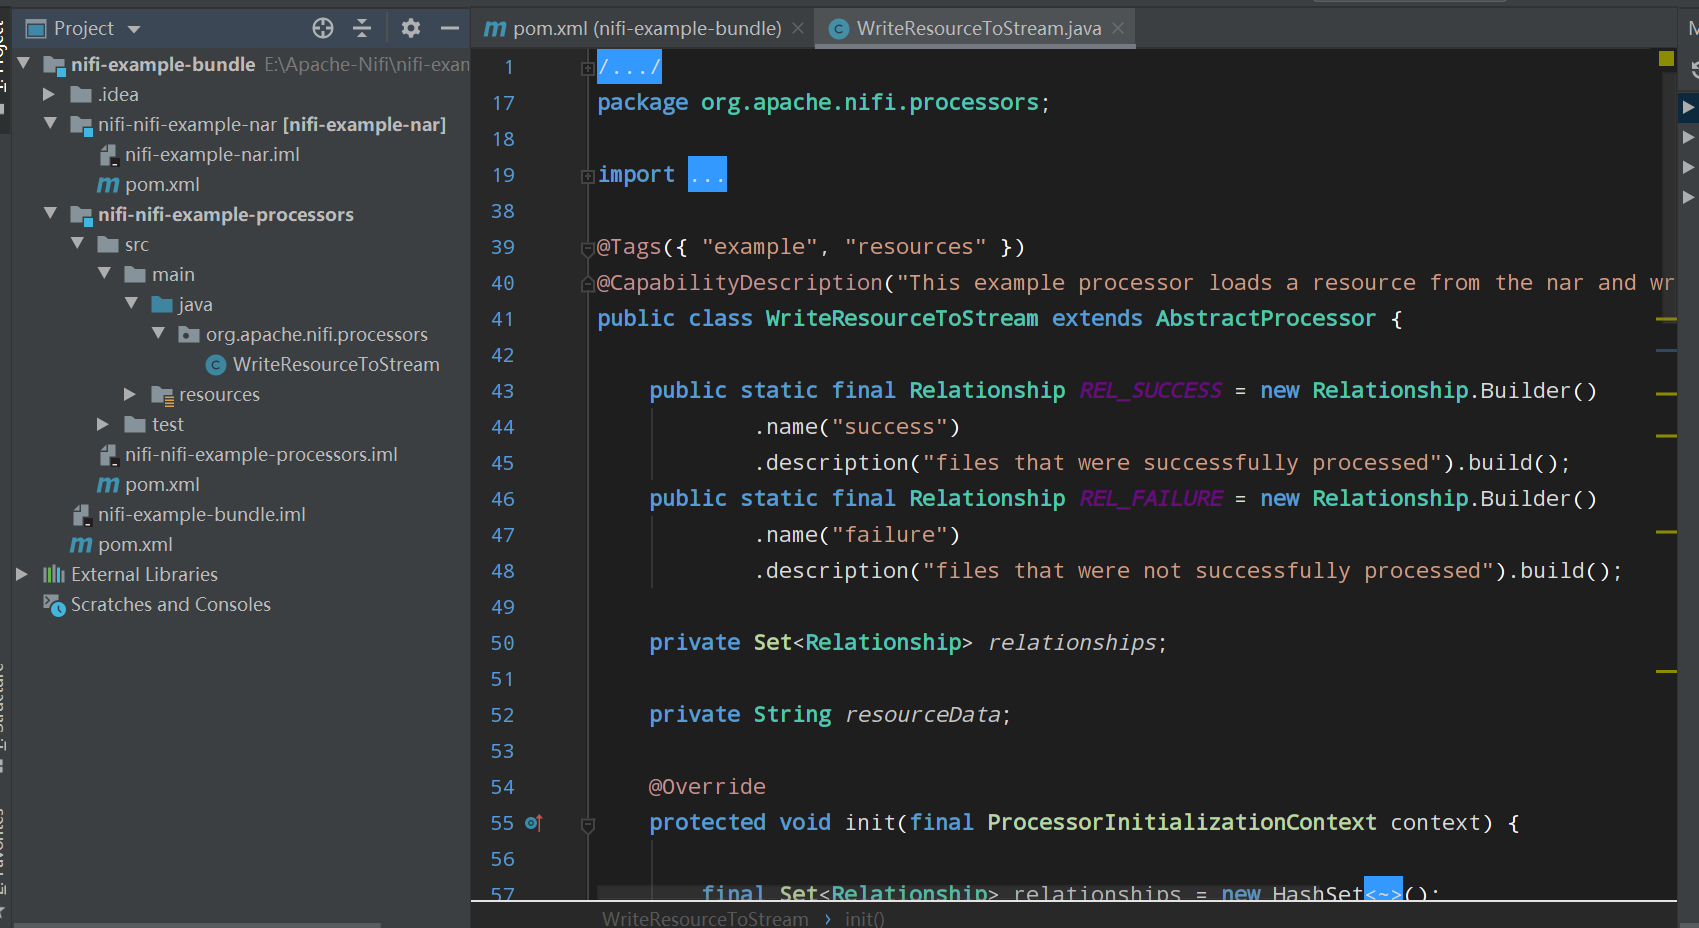
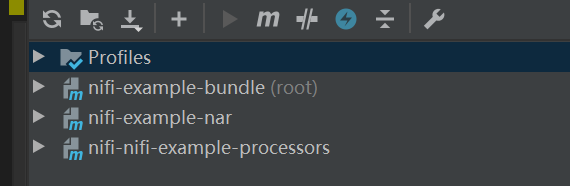
它本身是基于maven模块化的构建,整体的目录结构是nifi-example-bundle作为一个整体项目,下属两个模块包,nifi-nifi-example-nar和nifi-nifi-example-processors,其中nifi-example-bundle作为一个根项目,nifi-nifi-example-nar里只有一个pom文件,负责将程序打包成nar包,nifi-nifi-example-processors才是真正的灵魂,自定义Processor代码的存放处。
nifi-example-bundle
整体项目nifi-example-bundle作为一个maven根项目,通过pom文件管控nifi-nifi-example-nar和nifi-nifi-example-processors,其pom文件结构为:
<?xml version="1.0" encoding="UTF-8"?>

<project xmlns="http://maven.apache.org/POM/4.0.0" xmlns:xsi="http://www.w3.org/2001/XMLSchema-instance" xsi:schemaLocation="http://maven.apache.org/POM/4.0.0 https://maven.apache.org/xsd/maven-4.0.0.xsd">
    <modelVersion>4.0.0</modelVersion>

    <parent>
        <groupId>org.apache.nifi</groupId>
        <artifactId>nifi-external</artifactId>
        <version>1.11.4</version>
    </parent>

    <artifactId>nifi-example-bundle</artifactId>
    <packaging>pom</packaging>

    <modules>
        <module>nifi-nifi-example-processors</module>
        <module>nifi-nifi-example-nar</module>
    </modules>

    <dependencyManagement>
        <dependencies>
            <dependency>
                <groupId>org.apache.nifi</groupId>
                <artifactId>nifi-nifi-example-processors</artifactId>
                <version>1.13.2</version>
            </dependency>
        </dependencies>
    </dependencyManagement>
</project>
nifi-nifi-example-processors
nifi-nifi-example-processors项目是核心的,也是我们主要写代码的地方,我们要写的自定义Processor即在这里完成,

1、在resources目录下建立 META-INF.services,然创建文件 org.apache.nifi.processor.Processor
# Licensed to the Apache Software Foundation (ASF) under one or more
# contributor license agreements.  See the NOTICE file distributed with
# this work for additional information regarding copyright ownership.
# The ASF licenses this file to You under the Apache License, Version 2.0
# (the "License"); you may not use this file except in compliance with
# the License.  You may obtain a copy of the License at
#
#     http://www.apache.org/licenses/LICENSE-2.0
#
# Unless required by applicable law or agreed to in writing, software
# distributed under the License is distributed on an "AS IS" BASIS,
# WITHOUT WARRANTIES OR CONDITIONS OF ANY KIND, either express or implied.
# See the License for the specific language governing permissions and
# limitations under the License.
org.apache.nifi.processors.WriteResourceToStream
2、开发自己的Processor程序,建立一个Processor类,并且继承实现抽象类 AbstractProcessor,根据自己需要实现一些方法
package org.apache.nifi.processors;

import java.io.IOException;
import java.io.InputStream;
import java.io.OutputStream;
import java.nio.charset.Charset;
import java.util.Collections;
import java.util.HashSet;
import java.util.Set;
import org.apache.commons.io.IOUtils;
import org.apache.nifi.annotation.documentation.CapabilityDescription;
import org.apache.nifi.annotation.documentation.Tags;
import org.apache.nifi.annotation.lifecycle.OnScheduled;
import org.apache.nifi.flowfile.FlowFile;
import org.apache.nifi.processor.AbstractProcessor;
import org.apache.nifi.processor.ProcessContext;
import org.apache.nifi.processor.ProcessSession;
import org.apache.nifi.processor.ProcessorInitializationContext;
import org.apache.nifi.processor.Relationship;
import org.apache.nifi.processor.exception.ProcessException;
import org.apache.nifi.processor.io.OutputStreamCallback;

@Tags({ "example", "resources" })
@CapabilityDescription("This example processor loads a resource from the nar and writes it to the FlowFile content")
public class WriteResourceToStream extends AbstractProcessor {

    public static final Relationship REL_SUCCESS = new Relationship.Builder()
            .name("success")
            .description("files that were successfully processed").build();
    public static final Relationship REL_FAILURE = new Relationship.Builder()
            .name("failure")
            .description("files that were not successfully processed").build();

    private Set<Relationship> relationships;

    private String resourceData;

    @Override
    protected void init(final ProcessorInitializationContext context) {

        final Set<Relationship> relationships = new HashSet<Relationship>();
        relationships.add(REL_SUCCESS);
        relationships.add(REL_FAILURE);
        this.relationships = Collections.unmodifiableSet(relationships);
        final InputStream resourceStream = getClass()
                .getClassLoader().getResourceAsStream("file.txt");
        try {
            this.resourceData = IOUtils.toString(resourceStream, Charset.defaultCharset());
        } catch (IOException e) {
            throw new RuntimeException("Unable to load resources", e);
        } finally {
            IOUtils.closeQuietly(resourceStream);
        }

    }

    @Override
    public Set<Relationship> getRelationships() {
        return this.relationships;
    }

    @OnScheduled
    public void onScheduled(final ProcessContext context) {

    }

    @Override
    public void onTrigger(final ProcessContext context,
            final ProcessSession session) throws ProcessException {
        FlowFile flowFile = session.get();
        if (flowFile == null) {
            return;
        }

        try {
            flowFile = session.write(flowFile, new OutputStreamCallback() {

                @Override
                public void process(OutputStream out) throws IOException {
                    IOUtils.write(resourceData, out, Charset.defaultCharset());

                }
            });
            session.transfer(flowFile, REL_SUCCESS);
        } catch (ProcessException ex) {
            getLogger().error("Unable to process", ex);
            session.transfer(flowFile, REL_FAILURE);
        }
    }
}
3、nifi-nifi-example-processors的pom文件样例:
<?xml version="1.0" encoding="UTF-8"?>
<project xmlns="http://maven.apache.org/POM/4.0.0" xmlns:xsi="http://www.w3.org/2001/XMLSchema-instance" xsi:schemaLocation="http://maven.apache.org/POM/4.0.0 https://maven.apache.org/xsd/maven-4.0.0.xsd">
    <modelVersion>4.0.0</modelVersion>

    <parent>
        <groupId>org.apache.nifi</groupId>
        <artifactId>nifi-example-bundle</artifactId>
        <version>1.13.2</version>
    </parent>

    <artifactId>nifi-nifi-example-processors</artifactId>
    <packaging>jar</packaging>

    <dependencies>
        <dependency>
            <groupId>org.apache.nifi</groupId>
            <artifactId>nifi-api</artifactId>
            <version>1.13.2</version>
        </dependency>
        <dependency>
            <groupId>org.apache.nifi</groupId>
            <artifactId>nifi-processor-utils</artifactId>
            <version>1.13.2</version>
        </dependency>
        <dependency>
            <groupId>org.apache.nifi</groupId>
            <artifactId>nifi-mock</artifactId>
            <version>1.13.2</version>
            <scope>test</scope>
        </dependency>
        <dependency>
            <groupId>commons-io</groupId>
            <artifactId>commons-io</artifactId>
            <version>2.6</version>
        </dependency>
    </dependencies>
    <build>
        <plugins>
            <plugin>
                <groupId>org.apache.rat</groupId>
                <artifactId>apache-rat-plugin</artifactId>
                <configuration>
                    <excludes>
                        <exclude>src/main/resources/file.txt</exclude>
                    </excludes>
                </configuration>
            </plugin>
        </plugins>
    </build>
</project>
nifi-nifi-example-nar
这一maven只是负责把Processor的jar整合打包成nar包,只有一个pom文件
<?xml version="1.0" encoding="UTF-8"?>

<project xmlns="http://maven.apache.org/POM/4.0.0" xmlns:xsi="http://www.w3.org/2001/XMLSchema-instance" xsi:schemaLocation="http://maven.apache.org/POM/4.0.0 https://maven.apache.org/xsd/maven-4.0.0.xsd">
    <modelVersion>4.0.0</modelVersion>

    <parent>
        <groupId>org.apache.nifi</groupId>
        <artifactId>nifi-example-bundle</artifactId>
        <version>1.13.2</version>
    </parent>

    <artifactId>nifi-example-nar</artifactId>
    <packaging>nar</packaging>
    <properties>
        <maven.javadoc.skip>true</maven.javadoc.skip>
        <source.skip>true</source.skip>
    </properties>

    <dependencies>
        <dependency>
            <groupId>org.apache.nifi</groupId>
            <artifactId>nifi-nifi-example-processors</artifactId>
        </dependency>
    </dependencies>

</project>
完整的demo代码可以去github中查看 :https://github.com/GCC1566/Apache-Nifi-Processor/tree/master/nifi-JsonProcessor-bundle
独立的maven程序模式开发
这种方式很独立,即当作一个maven项目去建立,不需要考虑过多。
按着maven项目的构建方式,构建一个基本的maven项目:

修改pom.xml文件
这种方式看起来更容易,只是所有的难点都集中在了pom文件,具体的pom文件样例下面给出,可直接复制到自己的项目中,有额外需要的依赖,自行追加。
<?xml version="1.0" encoding="UTF-8"?>
<project xmlns="http://maven.apache.org/POM/4.0.0"
         xmlns:xsi="http://www.w3.org/2001/XMLSchema-instance"
         xsi:schemaLocation="http://maven.apache.org/POM/4.0.0 http://maven.apache.org/xsd/maven-4.0.0.xsd">
    <modelVersion>4.0.0</modelVersion>

    <groupId>net.gcc.nifi</groupId>
    <artifactId>JsonDistributeProcessor</artifactId>
    <version>1.0</version>
    <packaging>nar</packaging>

    <properties>
        <project.build.sourceEncoding>UTF-8</project.build.sourceEncoding>
        <maven.compiler.source>1.8</maven.compiler.source>
        <maven.compiler.target>1.8</maven.compiler.target>
        <nifi.version>1.13.2</nifi.version>
    </properties>

    <dependencies>
        <dependency>
            <groupId>org.apache.nifi</groupId>
            <artifactId>nifi-api</artifactId>
            <version>${nifi.version}</version>
        </dependency>
        <dependency>
            <groupId>org.apache.nifi</groupId>
            <artifactId>nifi-utils</artifactId>
            <version>${nifi.version}</version>
        </dependency>
        <dependency>
            <groupId>org.apache.nifi</groupId>
            <artifactId>nifi-processor-utils</artifactId>
            <version>${nifi.version}</version>
        </dependency>

        <dependency>
            <groupId>org.apache.nifi</groupId>
            <artifactId>nifi-mock</artifactId>
            <version>${nifi.version}</version>
            <scope>test</scope>
        </dependency>
        <dependency>
            <groupId>junit</groupId>
            <artifactId>junit</artifactId>
            <version>4.13</version>
            <scope>test</scope>
        </dependency>
    </dependencies>

    <build>
        <plugins>
            <plugin>
                <groupId>org.apache.nifi</groupId>
                <artifactId>nifi-nar-maven-plugin</artifactId>
                <version>1.3.1</version>
                <extensions>true</extensions>
            </plugin>
            <plugin>
                <groupId>org.apache.maven.plugins</groupId>
                <artifactId>maven-surefire-plugin</artifactId>
                <version>2.18.1</version>
            </plugin>
            <plugin>
                <groupId>org.apache.maven.plugins</groupId>
                <artifactId>maven-resources-plugin</artifactId>
                <version>3.1.0</version>
            </plugin>
            <plugin>
                <groupId>org.apache.maven.plugins</groupId>
                <artifactId>maven-compiler-plugin</artifactId>
                <version>3.1</version>
            </plugin>
            <plugin>
                <groupId>org.apache.maven.plugins</groupId>
                <artifactId>maven-install-plugin</artifactId>
                <version>2.5.2</version>
            </plugin>
            <plugin>
                <groupId>org.apache.maven.plugins</groupId>
                <artifactId>maven-deploy-plugin</artifactId>
                <version>2.8.2</version>
            </plugin>
        </plugins>
    </build>

</project>
在项目里建立自己的java文件,实现 AbstractProcessor 类
前置都准备好了,就可以开始编写自定义的Processor,就随便建个类,并让他继承 AbstractProcessor,然后完成一些方法。
例如:

demo:
package net.gcc.nifi.processors;
import org.apache.nifi.annotation.behavior.SideEffectFree;
import org.apache.nifi.annotation.documentation.CapabilityDescription;
import org.apache.nifi.annotation.documentation.Tags;
import org.apache.nifi.components.PropertyDescriptor;
import org.apache.nifi.expression.ExpressionLanguageScope;
import org.apache.nifi.flowfile.FlowFile;
import org.apache.nifi.processor.*;
import org.apache.nifi.processor.exception.ProcessException;
import org.apache.nifi.processor.util.StandardValidators;
import org.apache.nifi.util.StringUtils;

import java.util.*;
import java.util.concurrent.ConcurrentHashMap;

/**
 * JSONDistributeProcessor
 * According to the rules, distribute the data to the specified Relationship
 * @author GCC
 */

@SideEffectFree
@Tags({"JsonDataDistribute","net.gcc"})
@CapabilityDescription("Divide data according to configuration")
public class JsonDataDistributeProcessor extends AbstractProcessor{

   public static final Relationship REL_SUCCESS = new Relationship.Builder()
            .name("success")
            .description("files that were successfully processed").build();
    public static final Relationship REL_FAILURE = new Relationship.Builder()
            .name("failure")
            .description("files that were not successfully processed").build();

    private Set<Relationship> relationships;

    @Override
    protected void init(final ProcessorInitializationContext context) {

        final Set<Relationship> relationships = new HashSet<Relationship>();
        relationships.add(REL_SUCCESS);
        relationships.add(REL_FAILURE);
        this.relationships = Collections.unmodifiableSet(relationships);

    }

    @Override
    public Set<Relationship> getRelationships() {
        return this.relationships;
    }

    @OnScheduled
    public void onScheduled(final ProcessContext context) {

    }

    @Override
    public void onTrigger(final ProcessContext context,
          //具体的数据处理
    }
}
在resources目录下建立 META-INF.services,然创建文件 org.apache.nifi.processor.Processor
类实现后,将实现类的全路径写在Nifi规定的配置文件种。
org.apache.nifi.processor.Processor文件的内容样例(可直接复制,只需要改动最后一行即可):
# Licensed to the Apache Software Foundation (ASF) under one or more
# contributor license agreements.  See the NOTICE file distributed with
# this work for additional information regarding copyright ownership.
# The ASF licenses this file to You under the Apache License, Version 2.0
# (the "License"); you may not use this file except in compliance with
# the License.  You may obtain a copy of the License at
#
#     http://www.apache.org/licenses/LICENSE-2.0
#
# Unless required by applicable law or agreed to in writing, software
# distributed under the License is distributed on an "AS IS" BASIS,
# WITHOUT WARRANTIES OR CONDITIONS OF ANY KIND, either express or implied.
# See the License for the specific language governing permissions and
# limitations under the License.
net.gcc.nifi.processors.JsonDataDistributeProcessor
这里,最后一行为个人自定义Processor组件的类全路径,一个maven项目中可以创建多个Processor,只需要在这里追加。
完整的demo代码可以去github中查看 :https://github.com/GCC1566/JsonDistributeProcessor
关于Nifi-Processor开发的一些知识
FlowFile
FlowFile是一种逻辑概念,它将一段数据与一组关于该数据的属性相关联。这些属性包括FlowFile的唯一标识符,以及其名称,大小和任何数量的其他特定于流的值。虽然FlowFile的内容和属性可以更改,但FlowFile对象是不可变的。ProcessSession可以对FlowFile进行修改。
FlowFiles的核心属性在org.apache.nifi.flowfile.attributes.CoreAttributes枚举中定义。您将看到的最常见属性是filename,path和uuid。引号中的字符串是CoreAttributes枚举中属性的值。
-
Filename(“filename”):FlowFile的文件名。文件名不应包含任何目录结构。
-
UUID(“uuid”):分配给此FlowFile的通用唯一标识符,用于区分FlowFile与系统中的其他FlowFiles。
-
Path(“path”):FlowFile的路径指示FlowFile所属的相对目录,不包含文件名。
-
Absolute Path (“absolute.path”):FlowFile的绝对路径表示FlowFile所属的绝对目录,不包含文件名。
-
Priority(“priority”):表示FlowFile优先级的数值。
-
MIME Type(“mime.type”):此FlowFile的MIME类型。
-
Discard Reason(“discard.reason”):指定丢弃FlowFile的原因。
-
Alternative Identifier(“alternate.identifier”):表示已知引用此FlowFile的FlowFile的UUID以外的标识符。
ProcessSession
ProcessSession通常简称为“会话”,它提供了一种机制,通过该机制可以创建,销毁,检查,克隆FlowFiles并将其传输到其他处理器。此外,ProcessSession还提供了通过添加或删除属性或修改FlowFile内容来创建FlowFiles的修改版本的机制。ProcessSession还公开了一种用于发布源代码事件的机制,该机制提供了跟踪FlowFile的沿袭和历史的能力。在一个或多个FlowFiles上执行操作后,可以提交或回滚ProcessSession。
ProcessorInitializationContext
创建处理器后,initialize将使用InitializationContext对象调用其方法。此对象向处理器公开配置,该配置在处理器的整个生命周期内不会更改,例如处理器的唯一标识符。
ProcessContext
ProcessContext提供了处理器和框架之间的桥梁。它提供有关处理器当前如何配置的信息,并允许处理器执行特定于Framework的任务,例如产生其资源,以便框架将安排其他处理器运行而不会不必要地消耗资源。
PropertyDescriptor
PropertyDescriptor定义将由Processor,ReportingTask或ControllerService使用的属性。属性的定义包括其名称,属性的描述,可选的默认值,验证逻辑,以及关于处理器是否有效所需的属性的指示符。PropertyDescriptors是通过实例化PropertyDescriptor.Builder 类的实例,调用适当的方法来填充有关属性的详细信息,最后调用该build方法来创建的。
Validator(验证器)
PropertyDescriptor必须指定一个或多个Validator,可用于确保用户输入的属性值有效。如果Validator指示属性值无效,则在属性生效之前,将无法运行或使用Component。如果未指定Validator,则假定Component无效,NiFi将报告该属性不受支持。
Relationship
关系定义FlowFile可以从处理器传输到的路由。通过实例化Relationship.Builder 类的实例,调用适当的方法来填充关系的细节,最后调用 build方法来创建关系。
ComponentLog
鼓励处理器通过ComponentLog接口执行日志记录 ,而不是获取第三方记录器的直接实例。这是因为通过ComponentLog进行日志记录允许框架将超出可配置严重性级别的日志消息呈现给用户界面,从而允许在发生重要事件时通知监视数据流的人员。此外,它通过在DEBUG模式下记录堆栈跟踪并在日志消息中提供处理器的唯一标识符,为所有处理器提供一致的日志记录格式。
Processor的职责和一些基本概念
我们来看一个自定义Processor的继承结构:

图中,Tags,SideEffectFree、CapabilityDescription,是基于注解的,都是为了UI页面上的展示,这里我们忽略不看,主要看它的主线,整个自定义Processor继承自AbstractProcessor,而AbstractProcessor又继承了一系列。这里说明一下,虽然Processor是一个可以直接实现的接口,但这样做非常罕见,因为它org.apache.nifi.processor.AbstractProcessor是几乎所有处理器实现的基类。AbstractProcessor类提供的功能的显著,这使得开发的处理器更容易,更方便的任务。对于本文档的范围,我们将主要关注AbstractProcessor处理Processor API时的类。
处理器AbstractProcessor
处理器有很多方法,关乎着处理器的加载、运行、处理数据等等,这里只介绍几个最为重要的。
init()
该方法在处理器初始化的时候被调用,该方法采用单个参数,即类型ProcessorInitializationContext。上下文对象为Processor提供ComponentLog,Processor的唯一标识符和ControllerServiceLookup,可用于与配置的ControllerServices交互。每个这样的对象是由AbstractProcessor存储,并且可以由子类经由获得getLogger,getIdentifier和 getControllerServiceLookup方法。
getRelationships()
处理器通过覆盖该getRelationships方法来公开有效的关系集 。这个方法没有参数,并返回Set的Relationship 对象。对于大多数处理器,此Set将是静态的,但其他处理器将根据用户配置动态生成Set。对于Set为静态的那些处理器,建议在Processor的构造函数或init方法中创建一个不可变的Set并返回该值,而不是动态生成Set。这种模式有助于实现更清晰的代码和更好的性能。
getSupportedPropertyDescriptors()
大多数处理器在能够使用之前需要一些用户配置。处理器支持的属性通过该getSupportedPropertyDescriptors方法向页面的组件公开 。这个方法没有参数,并返回List的 PropertyDescriptor对象。List中对象的顺序很重要,因为它决定了在用户界面中呈现属性的顺序。
PropertyDescriptor目的是通过创建一个新的实例构造PropertyDescriptor.Builder对象,调用构建器的适当的方法,并最终调用build方法。
虽然此方法涵盖了大多数用例,但有时需要允许用户配置名称未知的其他属性。这可以通过覆盖该getSupportedDynamicPropertyDescriptor方法来实现 。此方法将 String唯一参数作为参数,该参数指示属性的名称。该方法返回一个PropertyDescriptor对象,该 对象可用于验证属性的名称以及值。应该构建从此方法返回的任何PropertyDescriptor,isDynamic在PropertyDescriptor.Builder类中将值设置为true 。AbstractProcessor的默认行为是不允许任何动态创建的属性。
然后处理器的属性,是需要验证的,如果处理器的配置无效,则无法启动处理器。可以通过在PropertyDescriptor上设置Validator或通过PropertyDescriptor.Builder的allowableValues方法或identifiesControllerService方法限制属性的允许值来验证Processor属性。
但是,有时候单独验证处理器的属性是不够的。为此,AbstractProcessor公开了一个customValidate方法。该方法采用单个参数类型ValidationContext。此方法的返回值是描述验证期间发现的任何问题Collection的 ValidationResult对象。只应返回其isValid方法返回的ValidationResult对象 false。仅当所有属性根据其关联的Validators和Allowable Values有效时,才会调用此方法。即,只有当所有属性本身都有效时才会调用此方法,并且此方法允许整体验证处理器的配置。
onPropertyModified()
这方法总的作用就是:响应配置更改,也就是当页面组件的配置标签页里配置发生变化,该方法就会被执行一次。当用户更改Processor的属性值时,onPropertyModified将为每个已修改的属性调用该 方法。该方法有三个参数:PropertyDescriptor,它指示修改了哪个属性,旧值和新值。如果属性没有先前的值,则第二个参数将是null。如果删除了属性,则第三个参数将是null。重要的是要注意,无论值是否有效,都将调用此方法。只有在实际修改了值时才会调用此方法,而不是在用户更新处理器而不更改其值时调用此方法。在调用此方法时,保证调用此方法的线程是当前在Processor中执行代码的唯一线程,除非Processor本身创建自己的线程。
onTrigger()
当处理器有工作要做时,它计划onTrigger通过框架调用其方法来完成。该方法有两个参数:a ProcessContext和aProcessSession。该onTrigger方法的第一步通常是通过调用getProcessSession上的一个方法来获取要在其上执行工作的FlowFile 。对于从外部源将数据提取到NiFi的处理器,将跳过此步骤。然后,处理器可以自由检查FlowFile属性; 添加,删除或修改属性; 读取或修改FlowFile内容; 并将FlowFiles传输到适当的关系。
处理器被触发时(When Processors are Triggered)
onTrigger只有在计划运行处理器并且处理器存在工作时,才会调用处理器的方法。如果满足以下任何条件,则称处理器存在工作:
-
-
目标为Processor的Connection在其队列中至少有一个FlowFile
-
处理器没有传入的连接
-
处理器使用@TriggerWhenEmpty批注进行批注
-
有几个因素会导致onTrigger调用Processor的 方法。首先,除非用户已将处理器配置为运行,否则不会触发处理器。如果计划运行处理器,则周期性地(该周期由用户界面中的用户配置)检查处理器是否有工作,如上所述。如果是这样,框架将检查处理器的下游目的地。如果处理器的任何出站连接已满,则默认情况下,将不会安排处理器运行。
但是,@TriggerWhenAnyDestinationAvailable注释可以添加到Processor的类中。在这种情况下,需求被更改,以便只有一个下游目标必须“可用”(如果连接的队列未满,则目标被视为“可用”),而不是要求所有下游目标都可用。
与处理器调度有关的还有@TriggerSerially 注释。使用此Annotation的处理器永远不会有多个线程onTrigger同时运行该方法。但是,必须注意,执行代码的线程可能会从调用更改为调用。因此,仍然必须注意确保处理器是线程安全的!
自定义Nifi-Processor组件的单元测试
处理器或控制器服务的大多数单元测试都是通过创建TestRunner 类的实例来完成的。
一般需要额外引入maven依赖,由apache-nifi官方提供
<dependency>
    <groupId>org.apache.nifi</groupId>
    <artifactId>nifi-mock</artifactId>
    <version>${nifi version}</version>
</dependency>
TestRunner
TestRunner类是Nifi专门用来模拟实际环境下,运行Processor或者ControllerService的一个接口,它的实例可以通过 TestRunner.newTestRunner()来创建,newTestRunner方法的参数是你要运行的Proccessor的类;例如
TestRunner run = TestRunner.newTestRunner(JSONDistributeProcessor.class);
添加ControllerServices
在启动一个处理器的时候,有些处理器可能需要额外需要ControllerService才能正常运行,这时候,可以通过模拟追加ControllerService来完成。
它的性质可以通过调用被设置:
setProperty(ControllerService, PropertyDescriptor, String),
setProperty(ControllerService, String, String)
setProperty(ControllerService, PropertyDescriptor, AllowableValue)
任何一个来完成。每种方法都返回一个 ValidationResult。然后可以检查此对象以确保通过调用该属性有效isValid。可以通过调用setAnnotationData(ControllerService, String)方法来设置注释数据。
assertValid(ControllerService) 方法来模拟验证ControllerService有效
assertNotValid(ControllerService) 来模拟验证ControllerService无效
将Controller Service添加到Test Runner并进行配置后,通过调用:
enableControllerService(ControllerService)方法启用它 。
如果Controller Service无效,则此方法将抛出IllegalStateException。
设置属性值
每个处理器可能需要具备一定的属性配置,也就是Web页面中每个Processor的配置页面
这里可以通过:
setProperty(PropertyDescriptor, String)方法进行追加配置
每个setProperty方法再次返回一个ValidationResult属性,可用于确保属性值有效。
预制FlowFiles测试数据
然后模拟前置管道涌入的数据,待测数据,可以通过TestRunner的enqueue方法来模拟批量的FlowFile数据,本身enqueue方法本身支持几种输入:byte[] ,InputStram、Path、Map
当然也可以自行实现enqueue方法,来满足自身的扩展需要
运行处理器
配置Controller Services并将必要的FlowFile排入队列后,可以通过调用run方法来触发处理器运行TestRunner。如果在没有任何参数的情况下调用此方法,它将使用@OnScheduled注释调用Processor中的任何方法,调用Processor的onTrigger方法一次,然后运行@OnUnscheduledfinally @OnStopped方法。
如果希望在触发onTrigger其他事件@OnUnscheduled和 @OnStopped生命周期事件之前运行该方法的多次迭代,则该run(int)方法可用于指定现在onTrigger应该调用的许多迭代。
还有,当我们想要触发处理器上运行,但不会触发时间@OnUnscheduled和@OnStopped 生命周期事件。例如,这有助于在这些事件发生之前检查处理器的状态。这可以使用run(int, boolean)和传递false作为第二个参数来实现。但是,在执行此操作后,调用@OnScheduled生命周期方法可能会导致问题。因此,我们现在可以onTrigger再次运行,而不会通过使用方法的run(int,boolean,boolean)版本run并false作为第三个参数传递来发生这些事件。
如果测试多个线程发生的行为很有用,这也可以通过调用setThreadCount方法来实现 TestRunner。默认值为1个线程。如果使用多个线程,请务必记住,run调用TestRunner指定应触发处理器的次数,而不是每个线程应触发处理器的次数。因此,如果线程计数设置为2但 run(1)被调用,则只使用一个线程。
验证输出Relationship
处理器运行完毕后,单元测试通常需要验证FlowFiles是否符合预期要求。通过以下两种方法来查看:
TestRunnersassertAllFlowFilesTransferred():此方法将关系和整数作为参数,以指示应该将多少FlowFiles传输到该关系。除非将此数量的FlowFiles转移到给定的关系或者任何FlowFile被转移到任何其他关系,否则该方法将无法通过单元测试。
assertTransferCount():仅验证FlowFile计数是给定关系的预期数量。
如果想要获取实际输出的数据样例,通过以下方法:
getFlowFilesForRelationship(): 获得实际的输出FlowFiles 。这个方法返回一个List<MockFlowFile>。重要的是要注意List的类型MockFlowFile,而不是FlowFile接口。这样做是因为MockFlowFile有许多方法可以验证内容。
一个实际例子
public class JsonDataDistributeProcessorTest {

    private TestRunner runner = TestRunners.newTestRunner(new JsonDataDistributeProcessor());

    @Test
    public void runProcessor(){
        runner.setProperty("zhangsan","{
" +
                "    "logic":"&&",
" +
                "    "fields":[
" +
                "        {
" +
                "            "field":"name",
" +
                "            "value":["张三"]
" +
                "        },
" +
                "        {
" +
                "            "field":"age",
" +
                "            "value":[12]
" +
                "        }
" +
                "    ]
" +
                "}");
        runner.setProperty("lisi","{
" +
                "    "logic":"&&",
" +
                "    "fields":[
" +
                "        {
" +
                "            "field":"name",
" +
                "            "value":["张三"]
" +
                "        }" +
                "    ]
" +
                "}");
        runner.assertValid();
        runner.enqueue("[{"name":"张三","age":12},
" +
                "{"name":"王三","age":12},
" +
                "{"name":"张三","age":16},
" +
                "{"sdf":"wn","age":18}
" +
                "]");
        runner.run();
        List<MockFlowFile> zhangsanlist = runner.getFlowFilesForRelationship("zhangsan");
        List<MockFlowFile> lisi = runner.getFlowFilesForRelationship("lisi");

        for(MockFlowFile mk:zhangsanlist) {
            System.out.println(mk.toString());
        }
        for(MockFlowFile mk:lisi) {
            System.out.print(mk.toString());
        }

    }


}
1、Nifi:基本认识
2、Nifi:基础用法及页面常识
3、Nifi:ExcuseXXXScript组件的使用(一)
4、Nifi:ExcuseXXXScript组件的使用(二)
5、Nifi:ExcuseXXXScript组件的使用(三)
6、Nifi:自定义处理器的开发