写在前面
ALM(Application lifecycle management) 软件生命周期管控是每一个公司对软件开发流程非常重要的一个话题. Power Platform (下文中用PP代替) 是今年非常热火的微软第四朵云, 里面不仅囊括了D365的功能, 还有其他Azure的 SaaS产品 e.g. AI Builder, Virtual Agent etc.
Azure Devops背景是VSTS. 我在之前的blog中讲到怎么用azure devops来部署D365 CRM(CE) 的solution, 当时是用的三方的devops 工具. 有兴趣的可以查看 使用Azure Devops(VSTS) 来部署D365 CE(CRM) Solution
因为PP 就是D365的新界面. 我们开发,测试,部署,生产环境流程都和D365一样. 为了满足这些开发流程的环境, 我们要建各种不同的环境(sandbox)来支持我们的开发,测试,和生产环境.
那在D365中, 我们需要到D365的settings -> Solutions 中找到相关的solution, 并且export solution,然后import到其他的环境中.
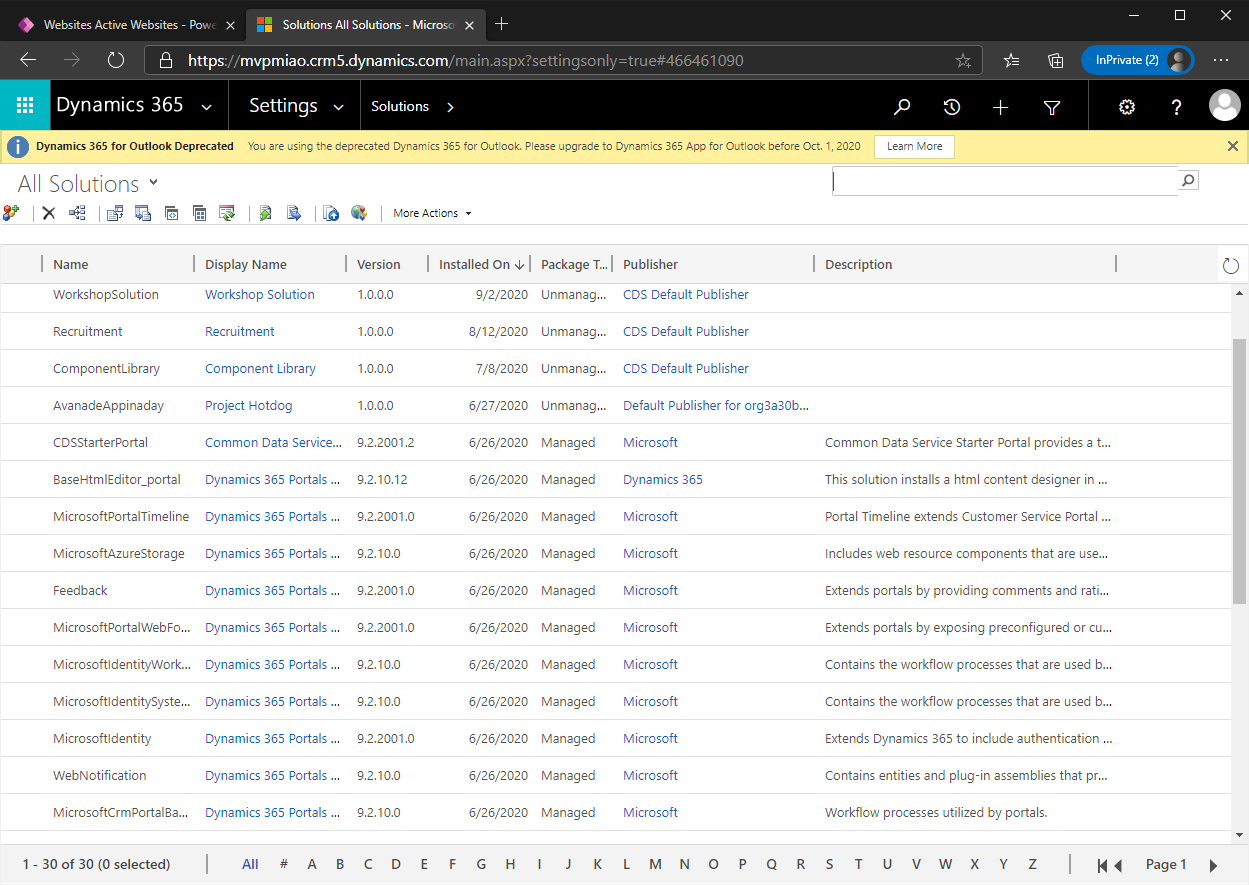
Power Platform ALM 管控
那同样PP我们也可以用D365 CRM(CE)这套Azure Devops 中CI/CD的流程来方便我们做环境的部署和切换.
在今年早些年, 微软推出了官方的用于 Azure DevOps 的 Microsoft Power Platform Build Tools 工具. 方便我们针对PP的solution来做CI/CD的自动化管控
那今天我们就在Azure Devops 中使用微软官方推出的Power Platform Build Tools 来做PP项目的ALM管控
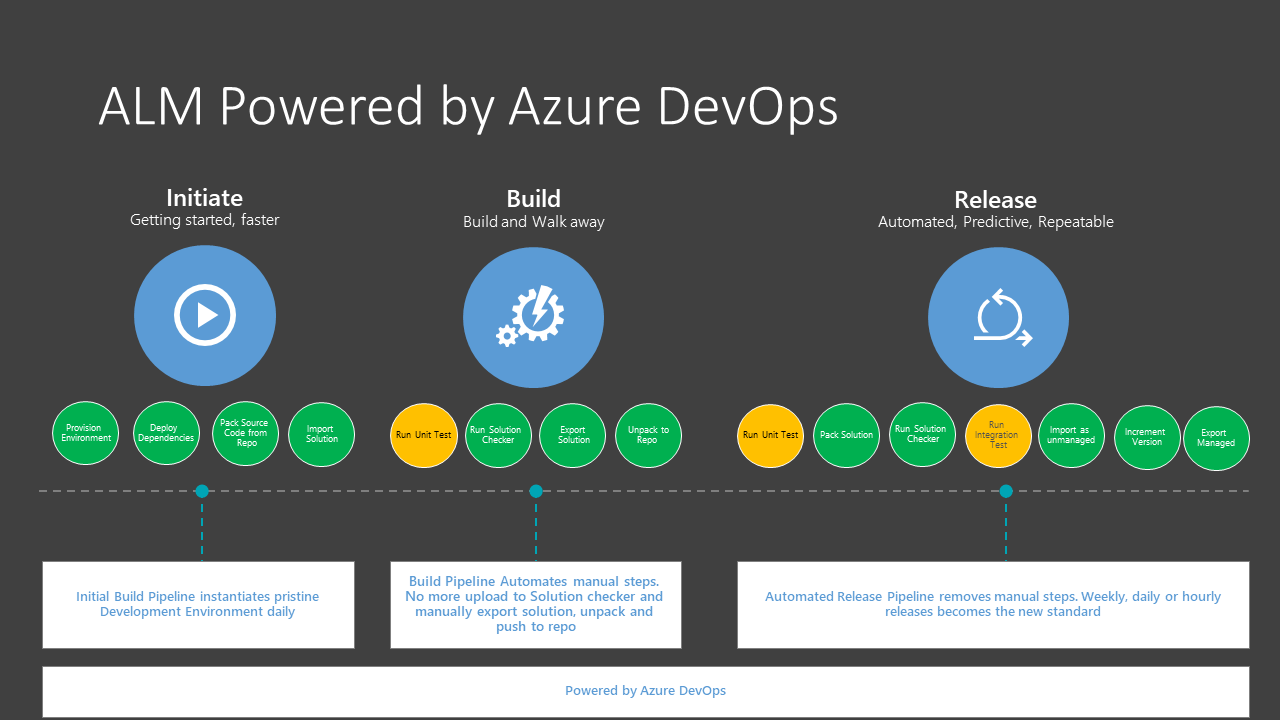
Power Platform Build Tool 教学
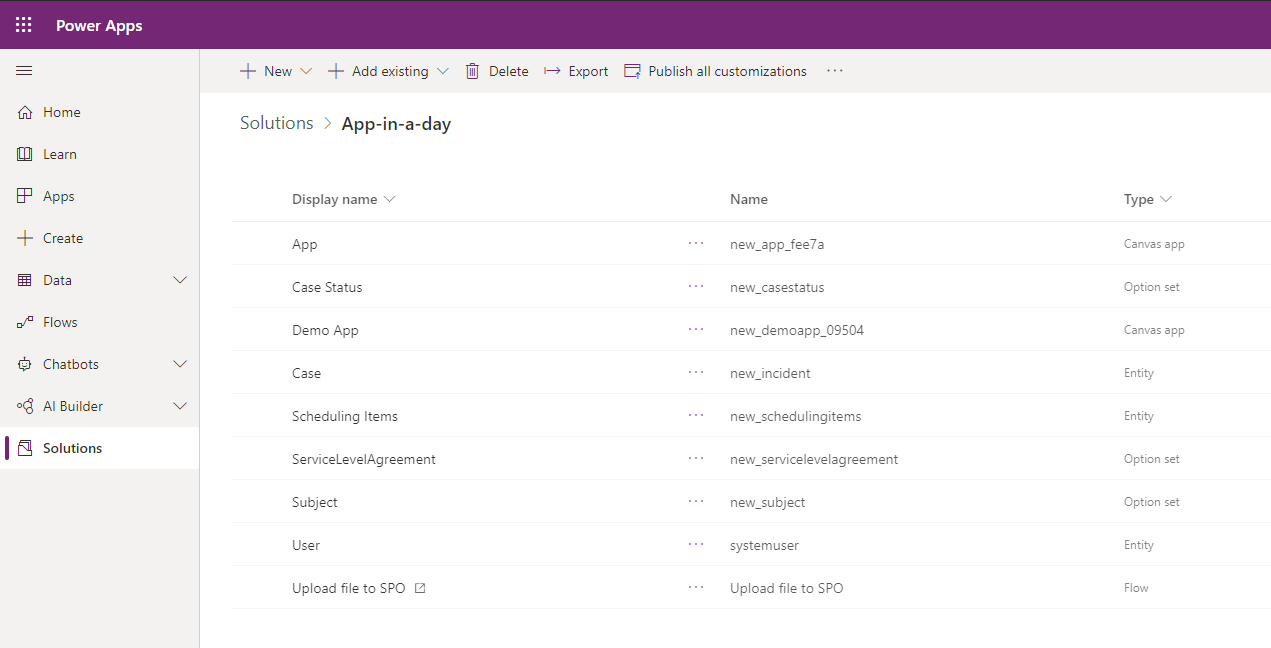
首先我们在source sandbox中创建一个solution
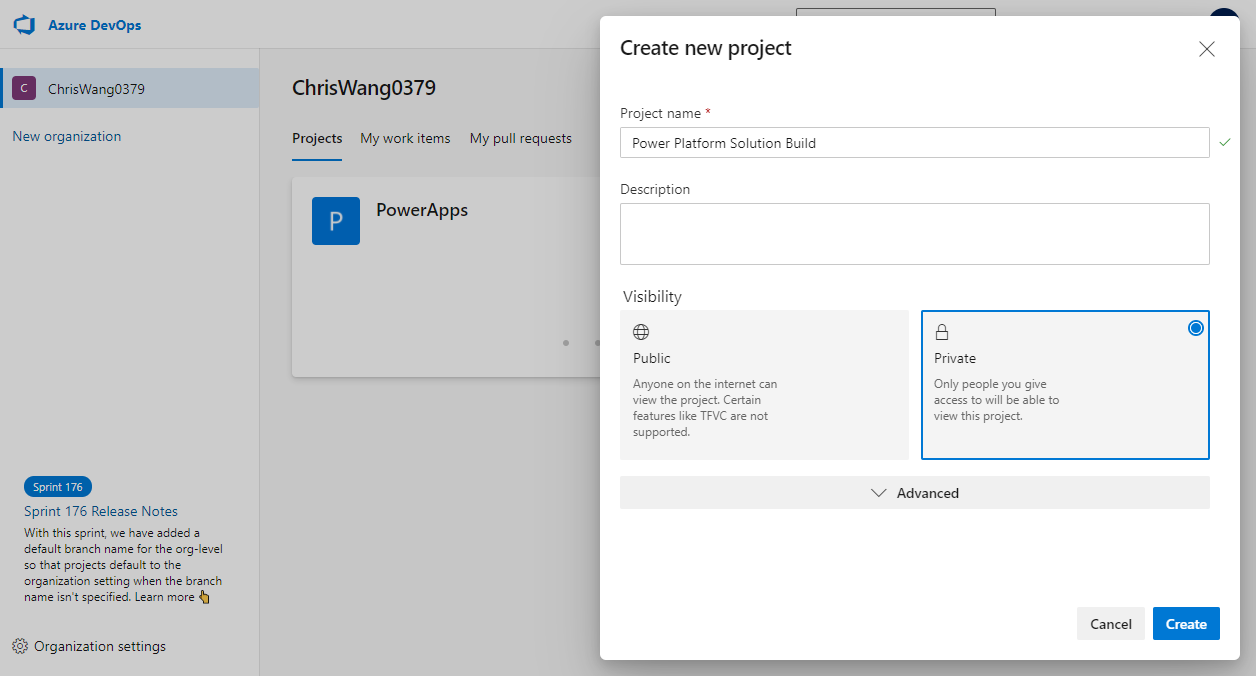
然后我们需要登陆Azure DevOps, 并且创建一个新的project
因为我们的内容使用到Git Repository, 所以这里我们要initialize一下Repos
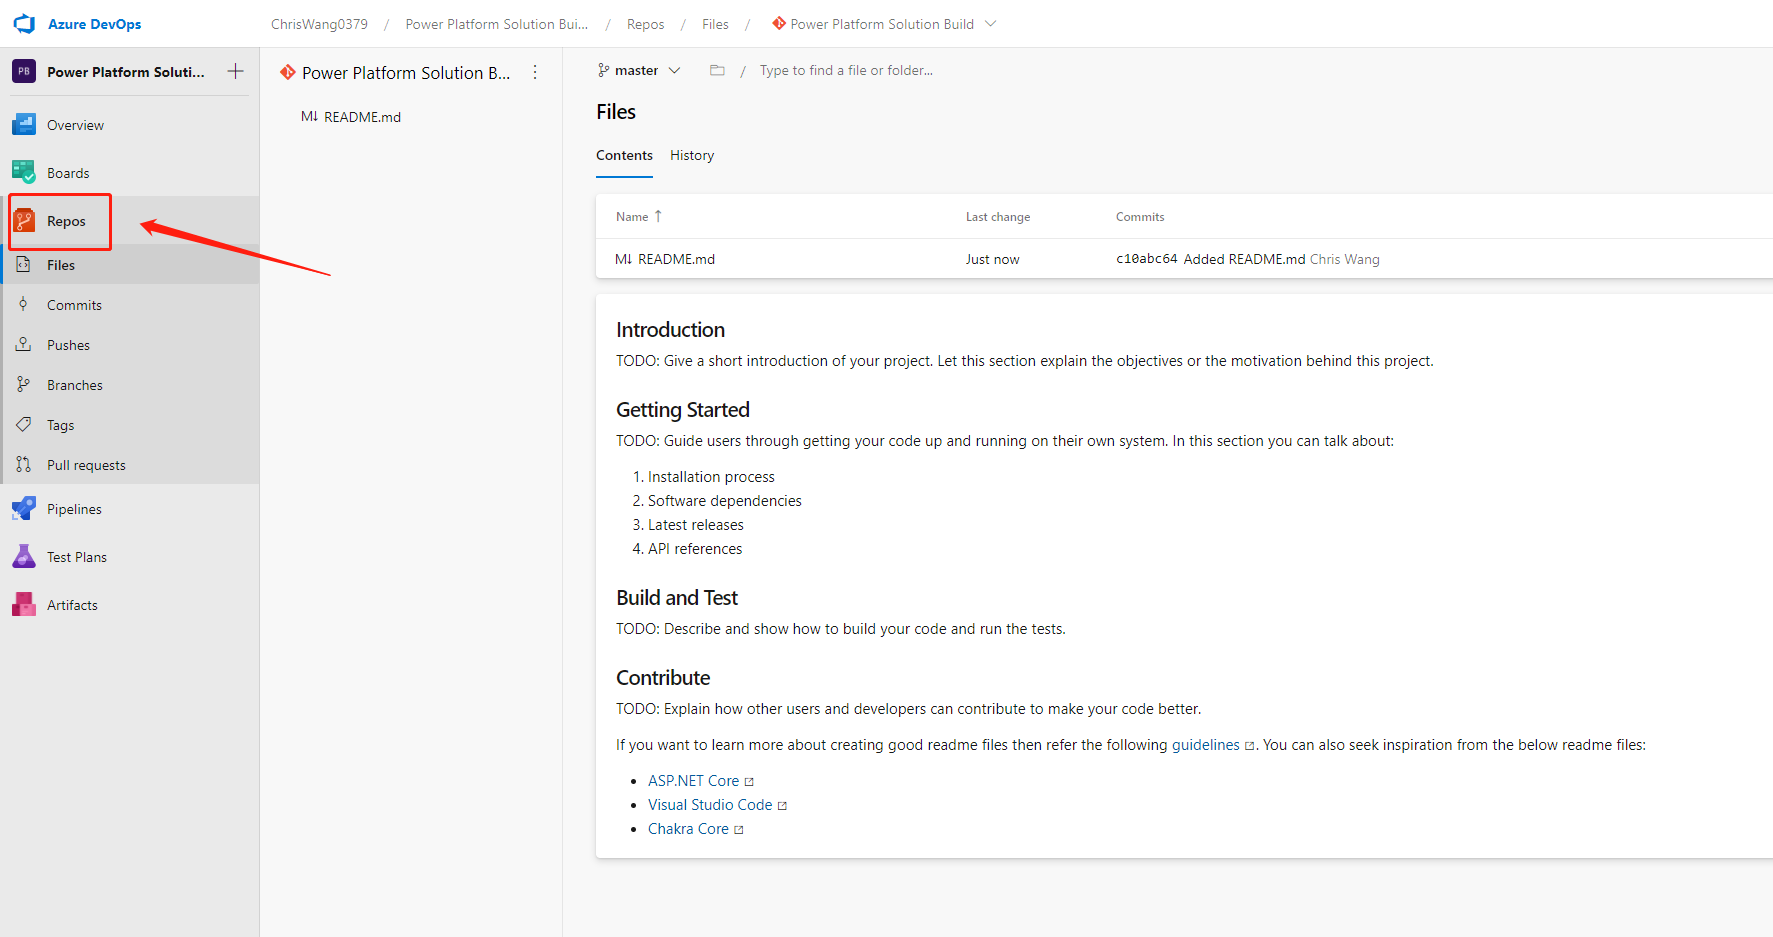
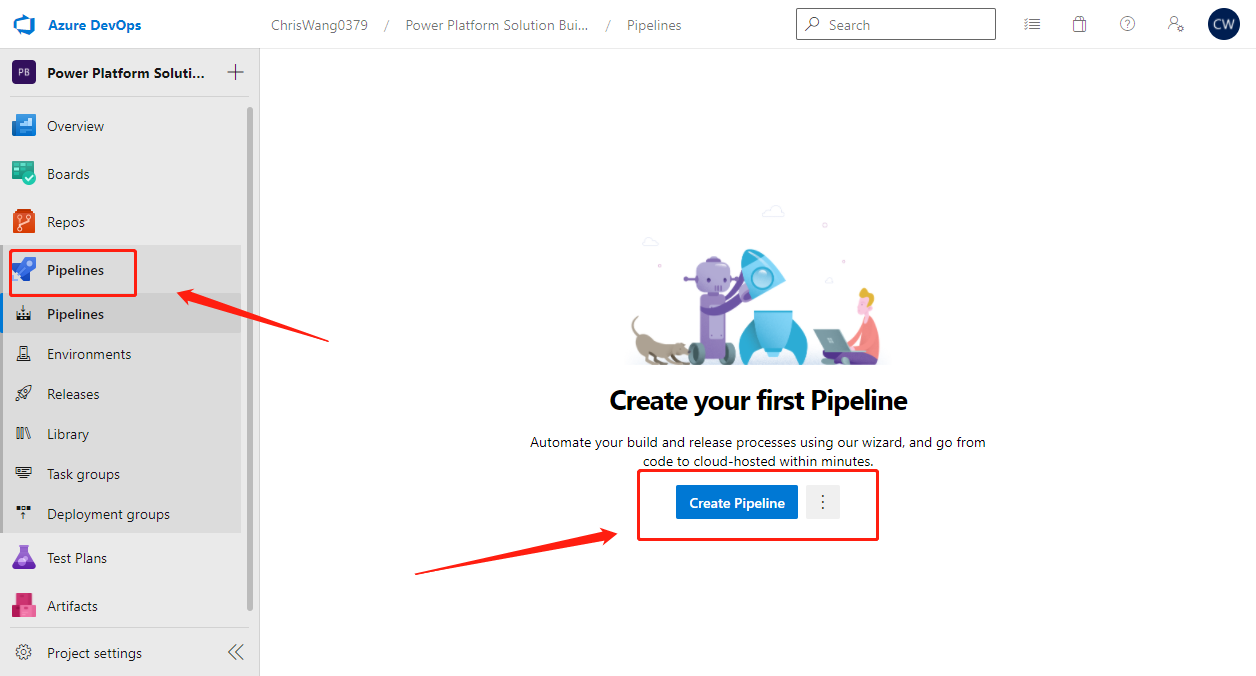
然后, 我们可以创建我Pipelines.
PS:如果不懂什么是Azure DevOps Pipelines, 强烈建议大家先阅读微软Pipelines的文档
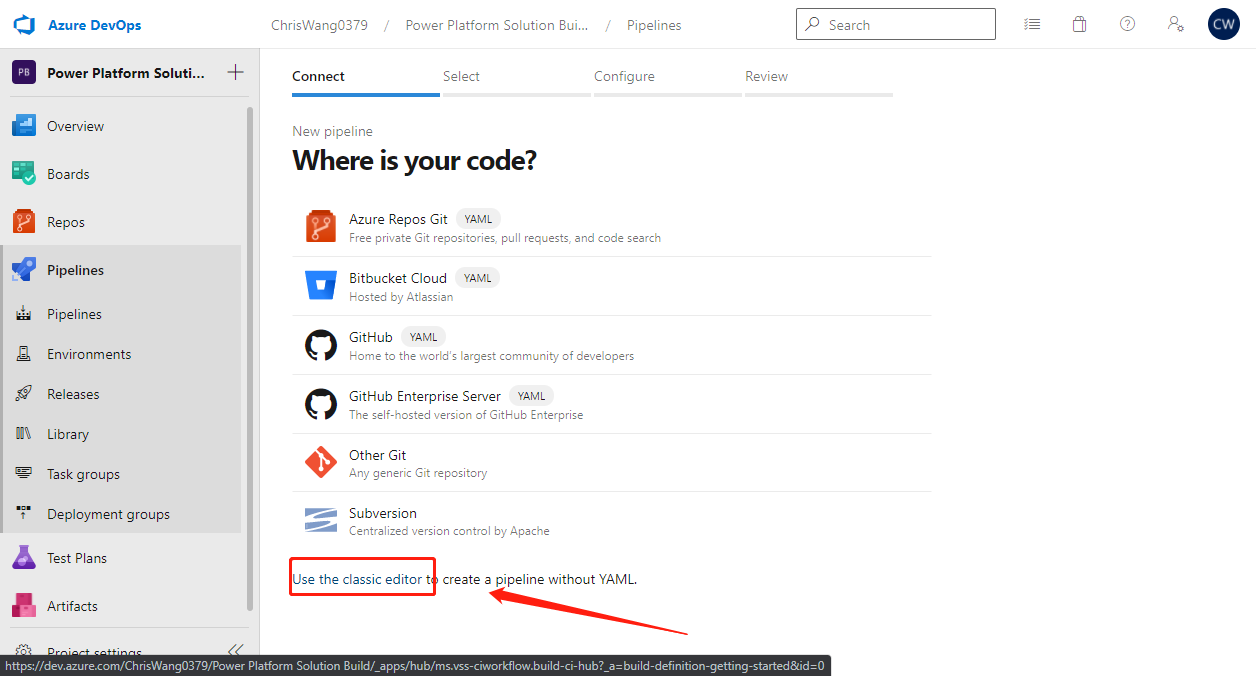
这里我们选择Use the classic editor 来创建我们的第一个pipeline
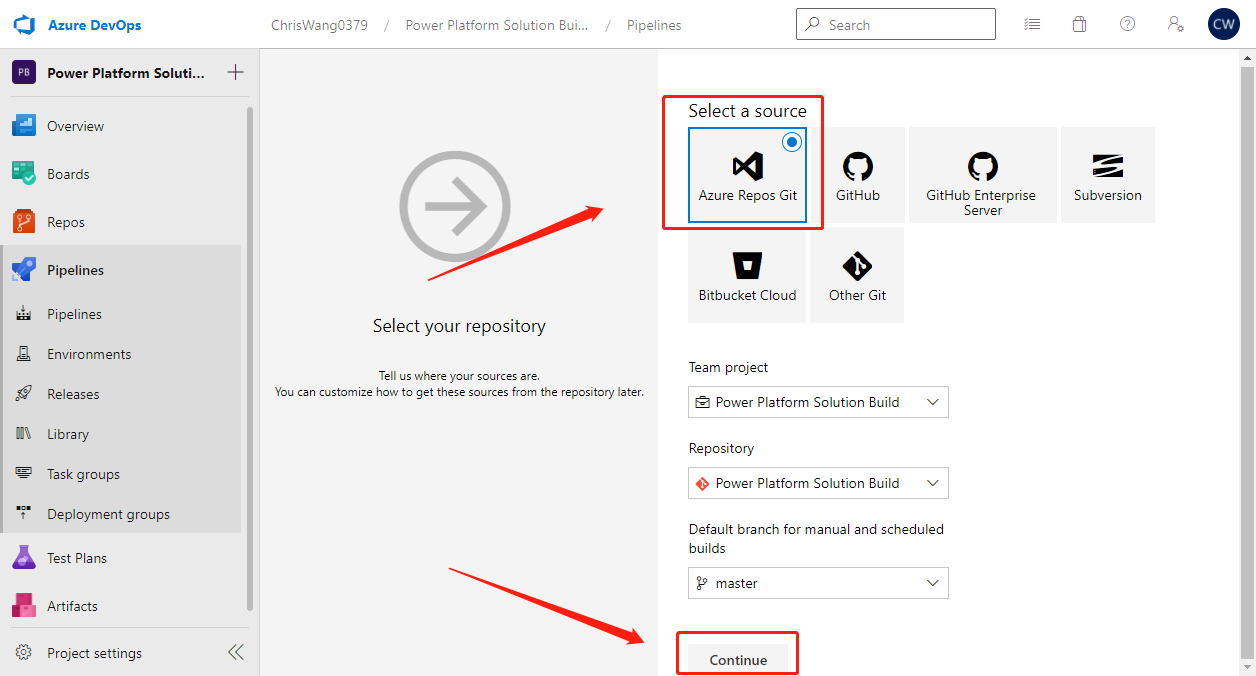
进入之后, 我们选择 Azure Repos Git
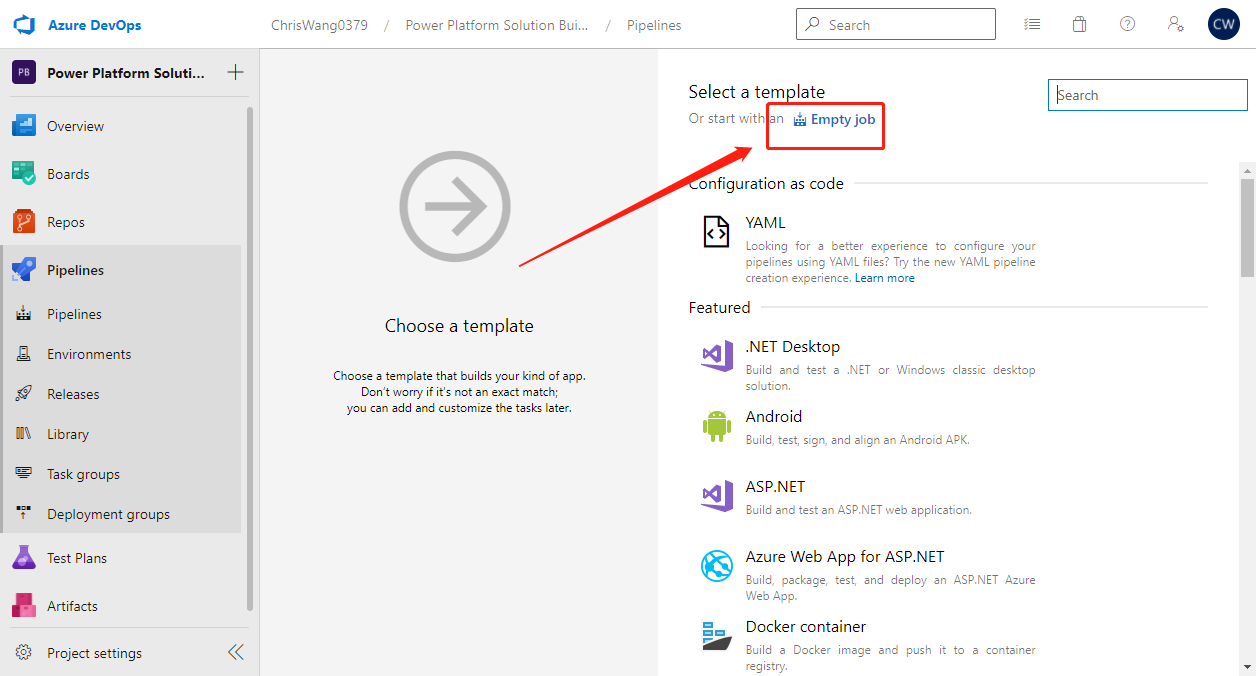
然后这里我们选择创建一个Empty Job, 没有任何模板使用
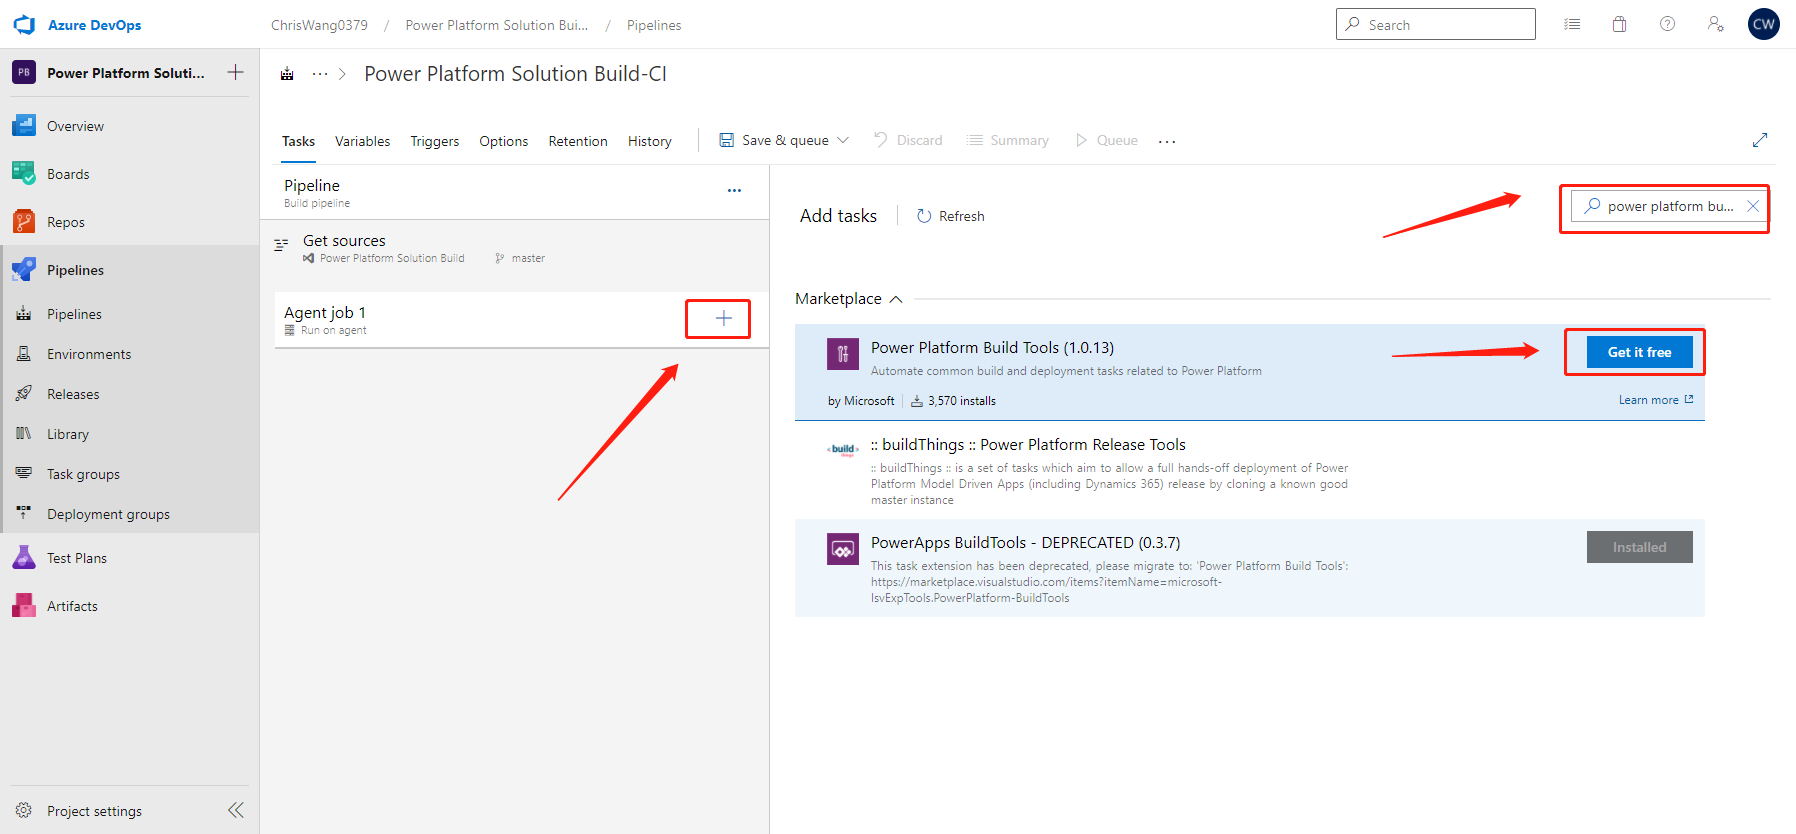
第一次使用 Power Platform Build Tools, 我们需要去在右上角搜索"power platform build tools" 并且在市场中安装
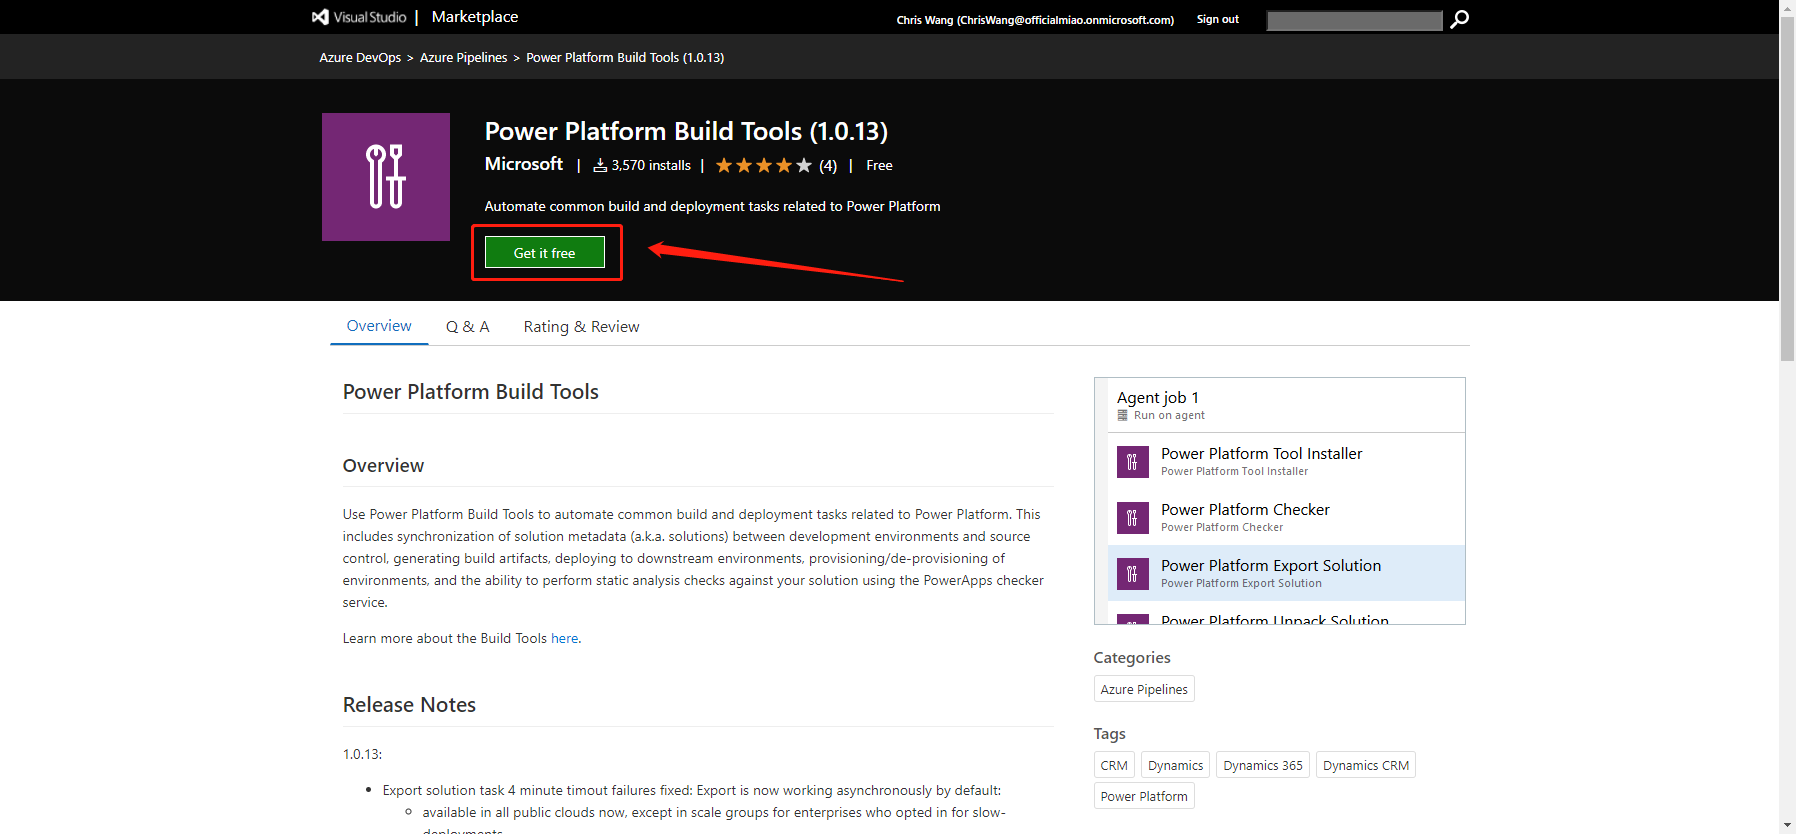
我们再Visual Studio 市场中找到 Power Platform Build Tools并且安装
ps: Power Apps Build Tools 已经被遗弃, 请大家确认使用Power Platform Build Tools
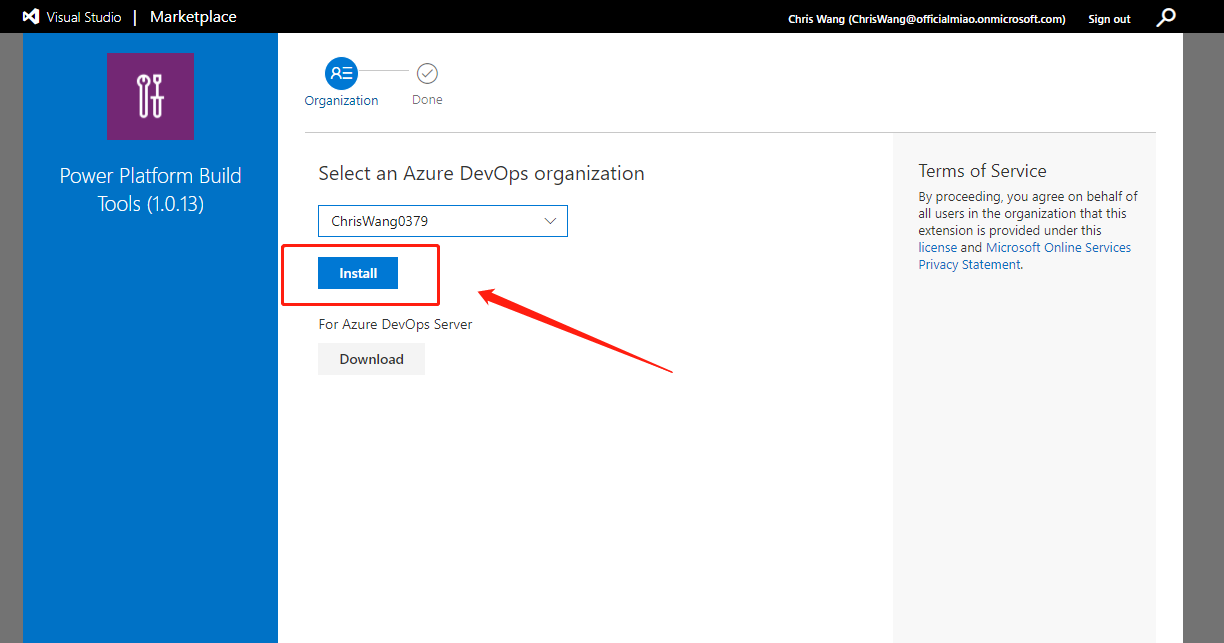
然后我们选择安装到当前tenant底下.
安装结束就可以回到Azure DevOps 中
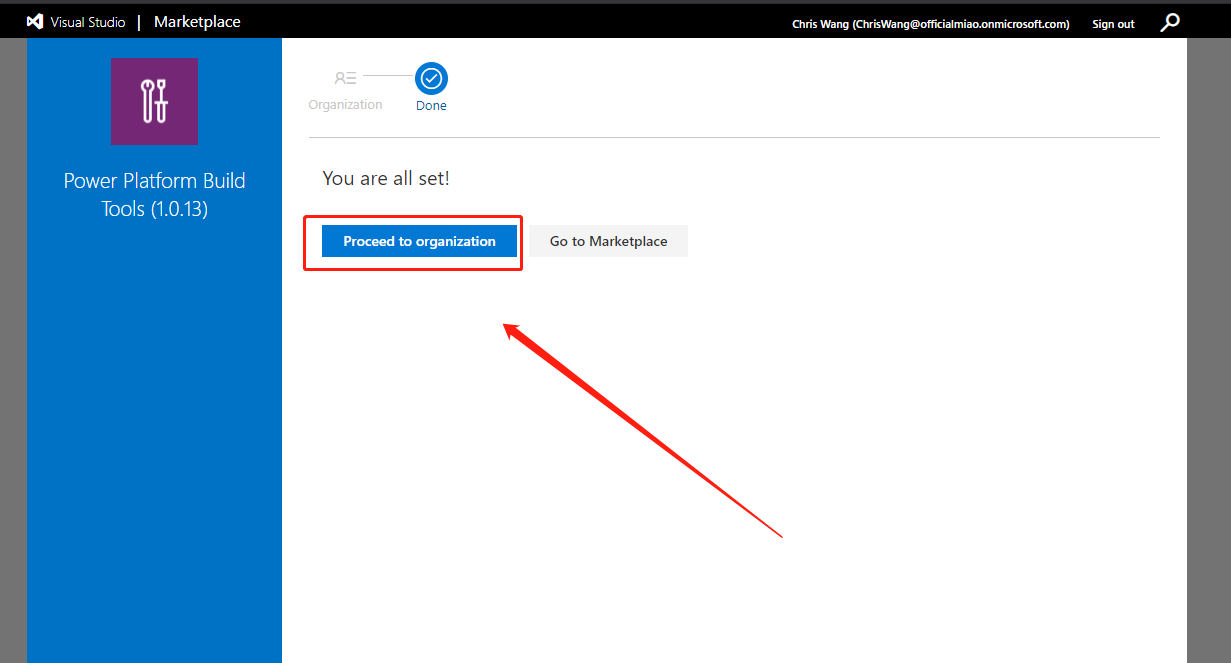
这里我们首先要停下来. 我们先思考一下我们的需求场景是什么.
当在dev sandbox中开发完, 需要部署到tesst sandbox中, 我们以往会从dev sandbox中export solution, 然后再test sandbox在import solution. 每次export和inport 都会浪费很多时间,并且重复相同的动作. 那我们可以借助pipeline来完成重复内容.
我们要规划一下所有的动作:
1. 找到source sandbox
2. 打包当前solution
3. 找到target sandbox
4. 安装solution
5. 打开包裹 (Option)
6. 把代码同步到Git Repository中 (Option)
那我们现在知道所需之后, 就去添加相关的内容.
首先,我们需要再Agent job中添加 power platform tool installer,
这一步是需要把power platform tool 安装到运行的vm中
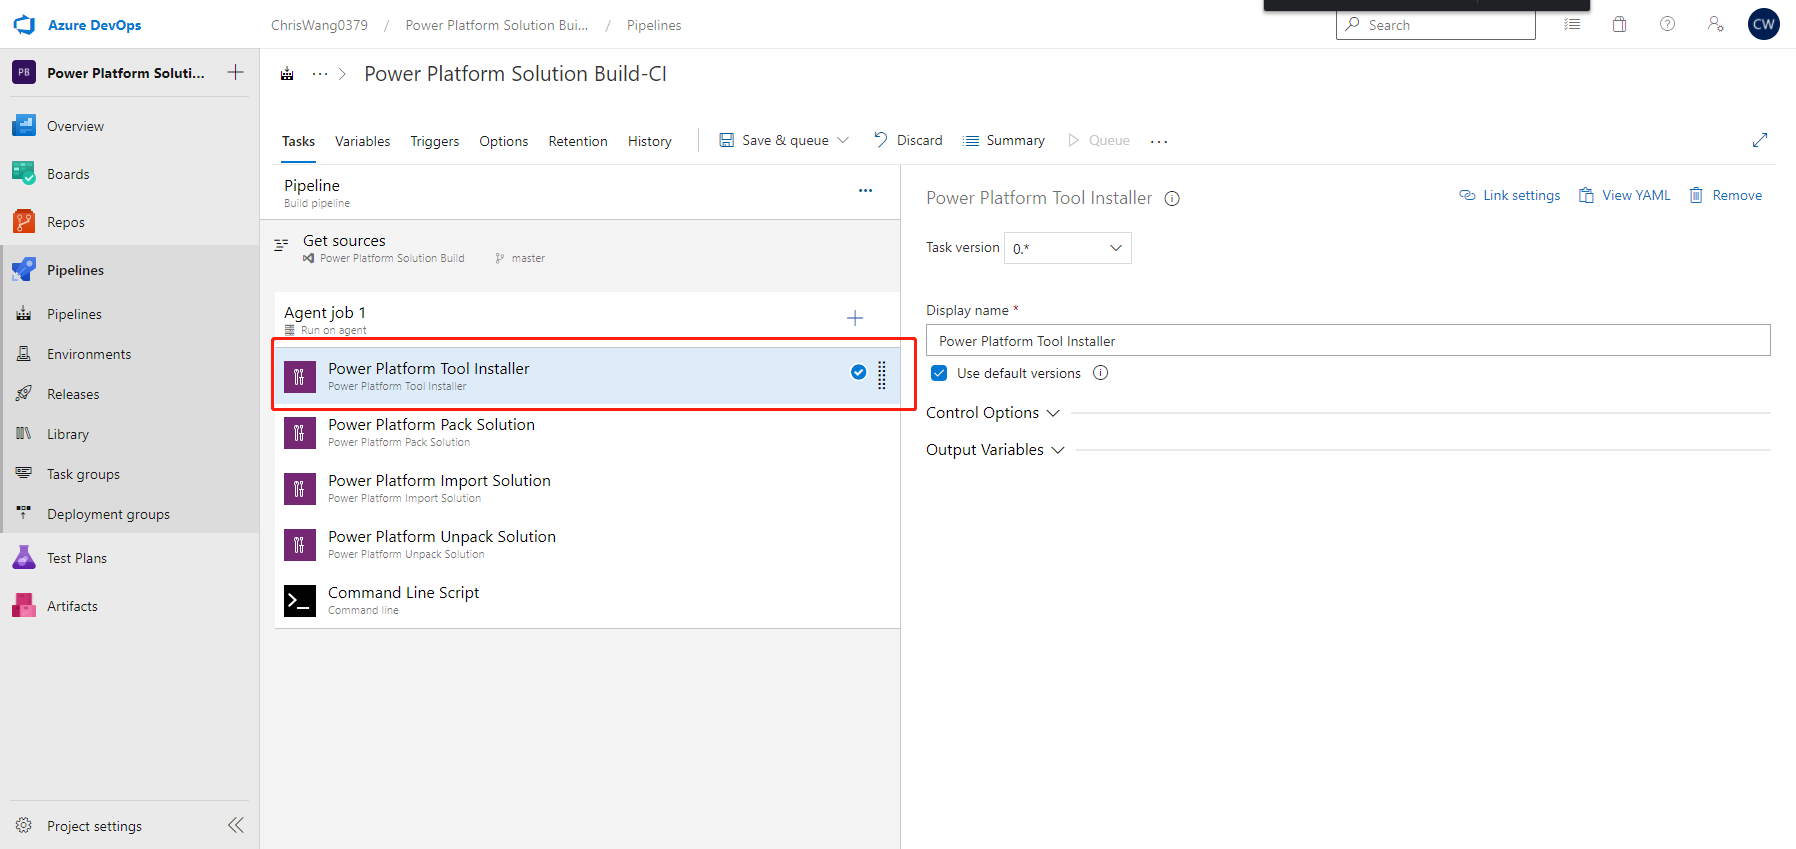
然后,我们需要做第1步找到source environment.
但是首先,我们需要添加power platform pack solution
然后我们需要创建 service connection. 这里有两种方法创建
1. 点击export solution中的 manage
2. 左下角project settings里找到 service connections
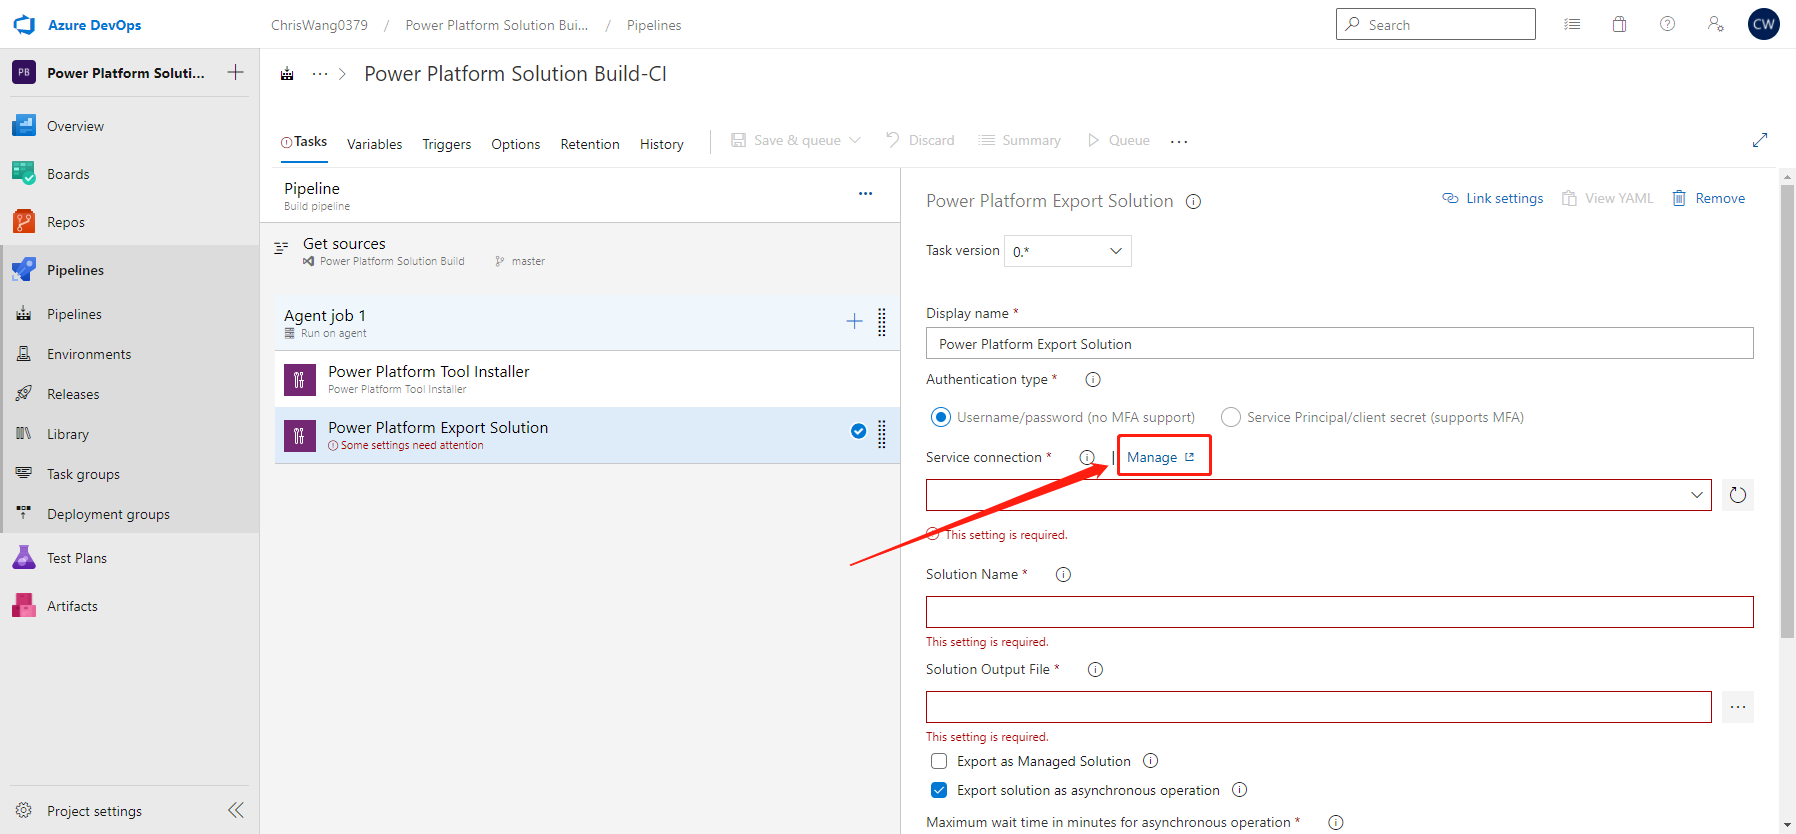
这里我们有两种方式创建 service connection
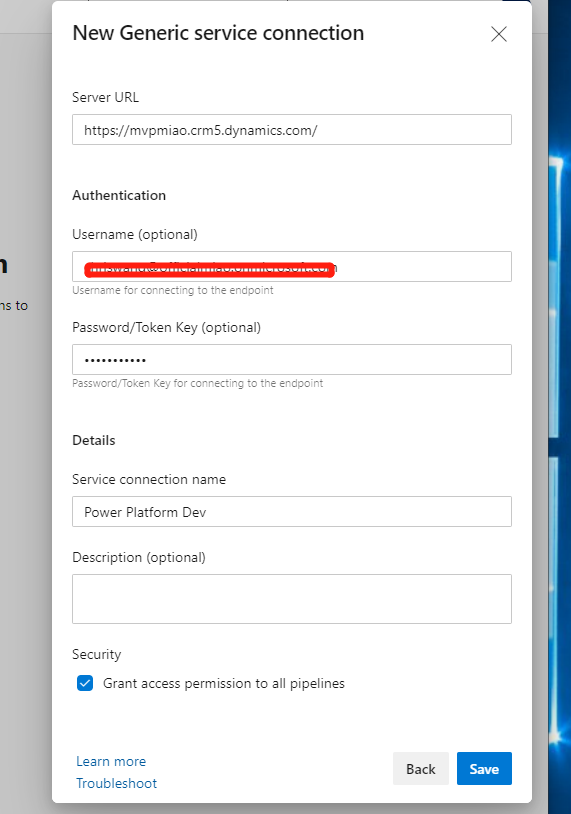
1. generic 输入domain, account+password
2. Server to Server (S2S 在选项里是power platform) 在AAD中的app registration 可以参考我之前的blog 在AAD 注册 API permission
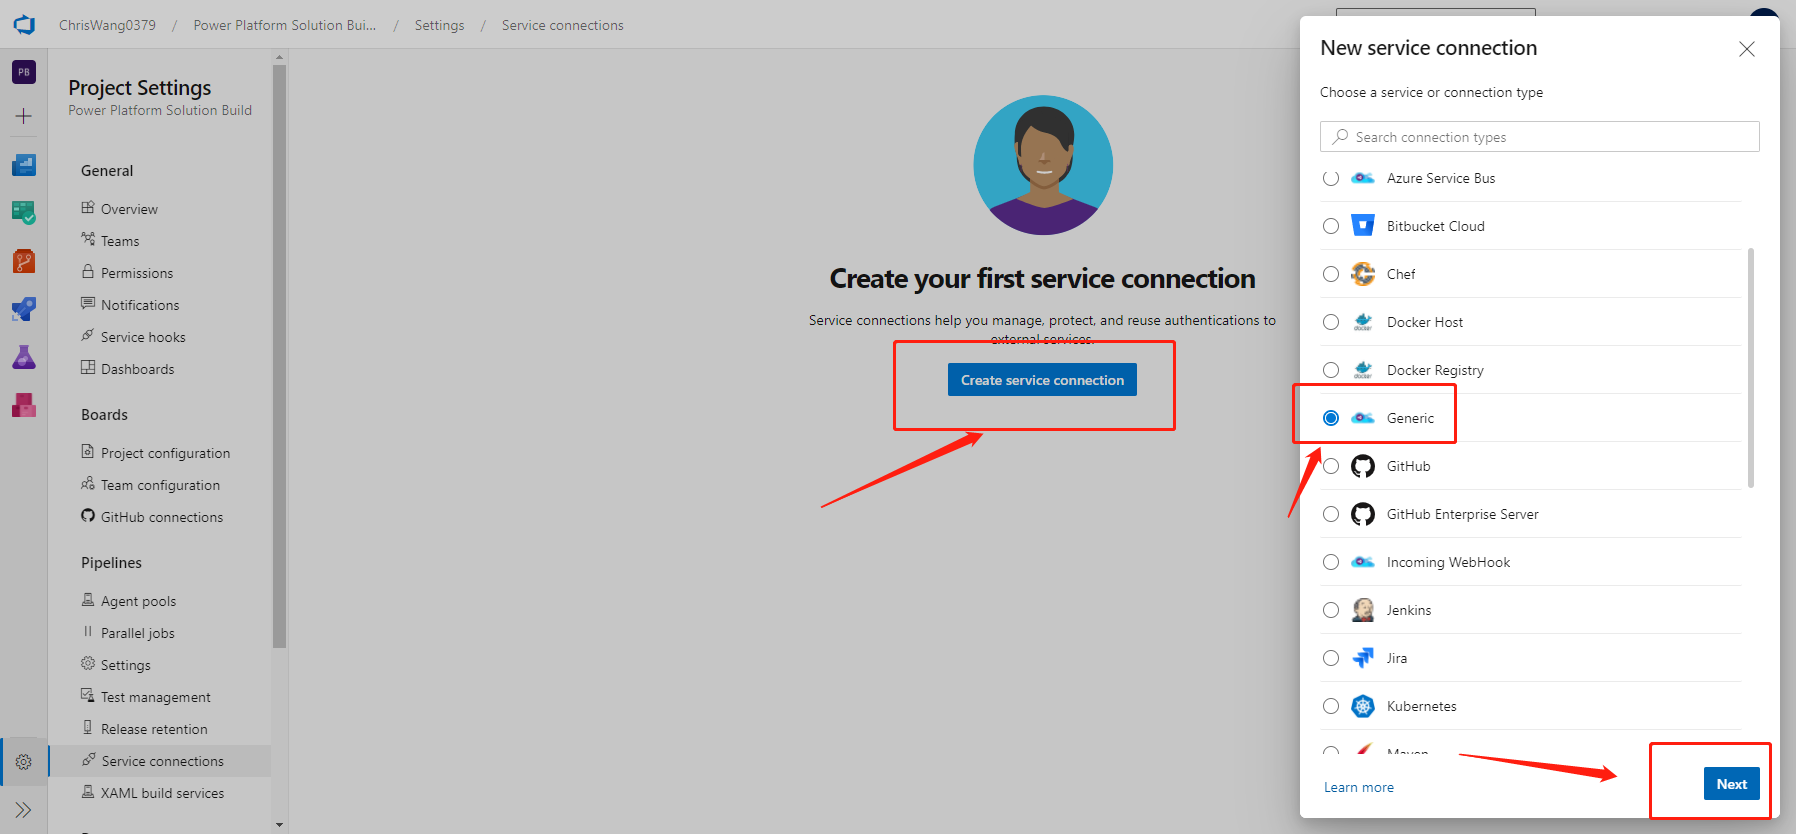
如果我们使用generic, 我们需要填写如下信息
接下来我们需要做第2步 打包当前solution
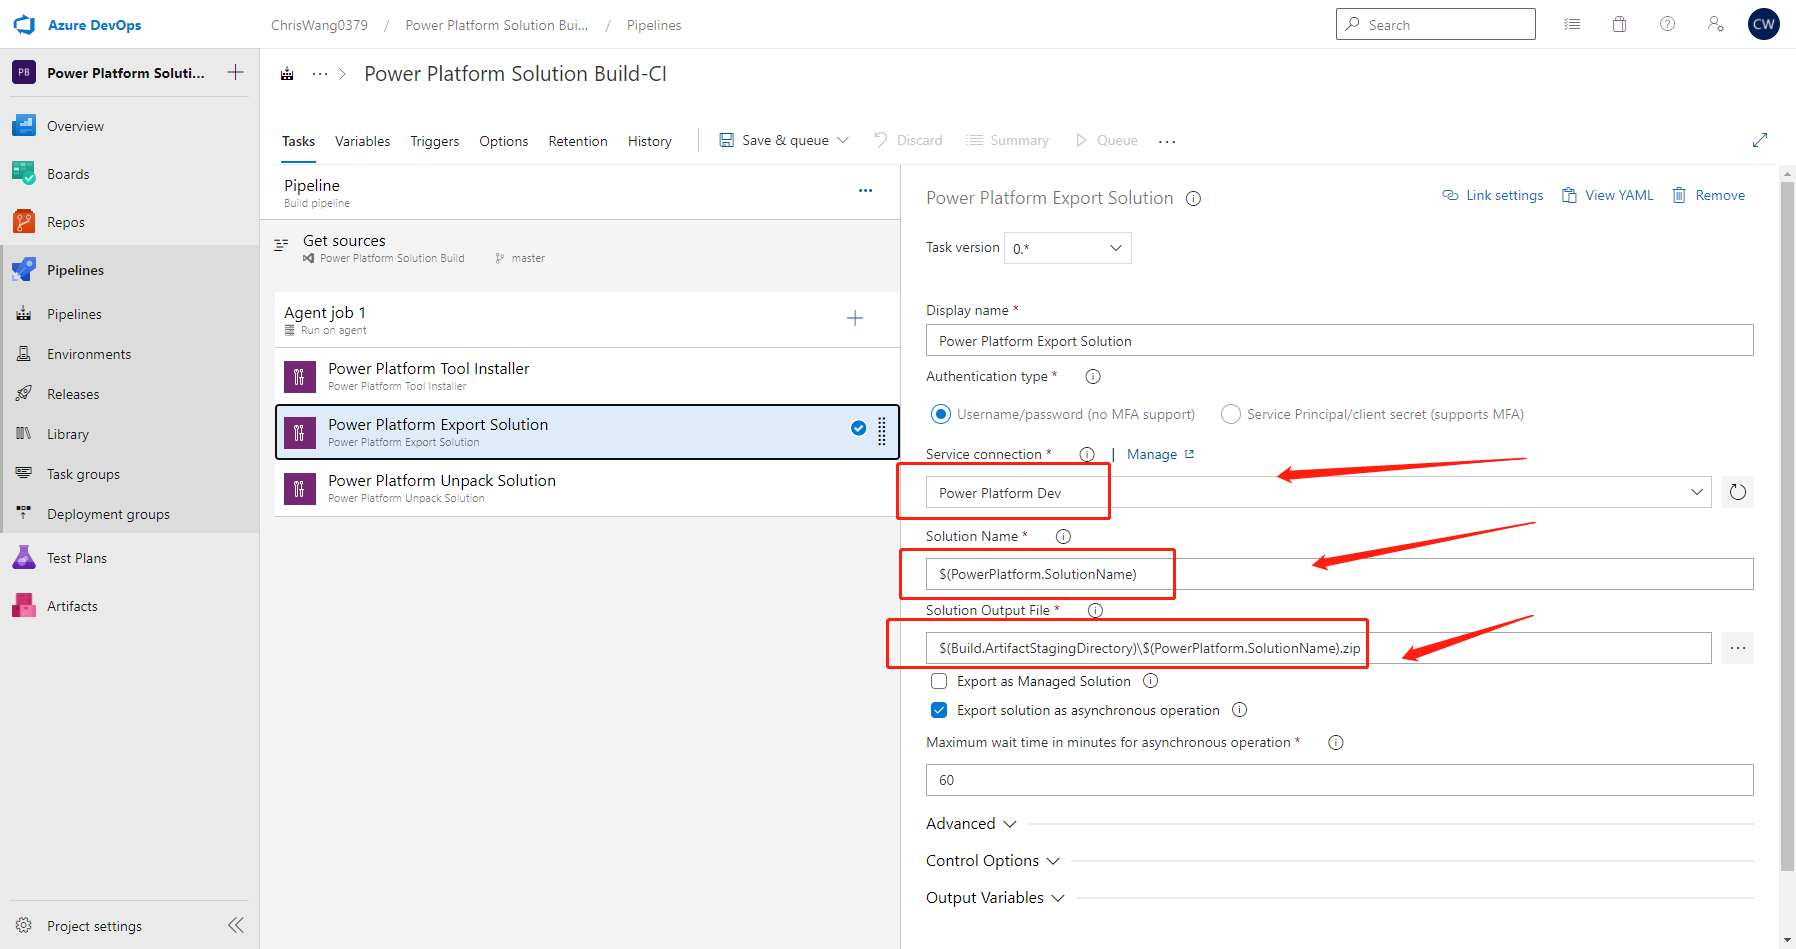
如果我们注册的generic 则选择no MFA
如果注册的S2S, 则选择service principle/client secret
solution name 我们写 $(PowerPlatform.SolutionName)
solution name的值我们不希望写死, 所以我们可以动态的来设置variable值. 随后的步骤中会介绍怎样动态设置variable
solution output file 我们写$(Build.ArtifactStagingDirectory)$(PowerPlatform.SolutionName).zip
这里我们需要动态的获取当前vm中的地址, 并且把打包好的solution放在相关的地址, 这样便于我们获取打包文件的地址, 做后面的动作
在前面,我们做了找到source sandbox, 打包solution的动作. 接下来我们要找到target sandbox, 并且import 打包好的solution到target sandbox中
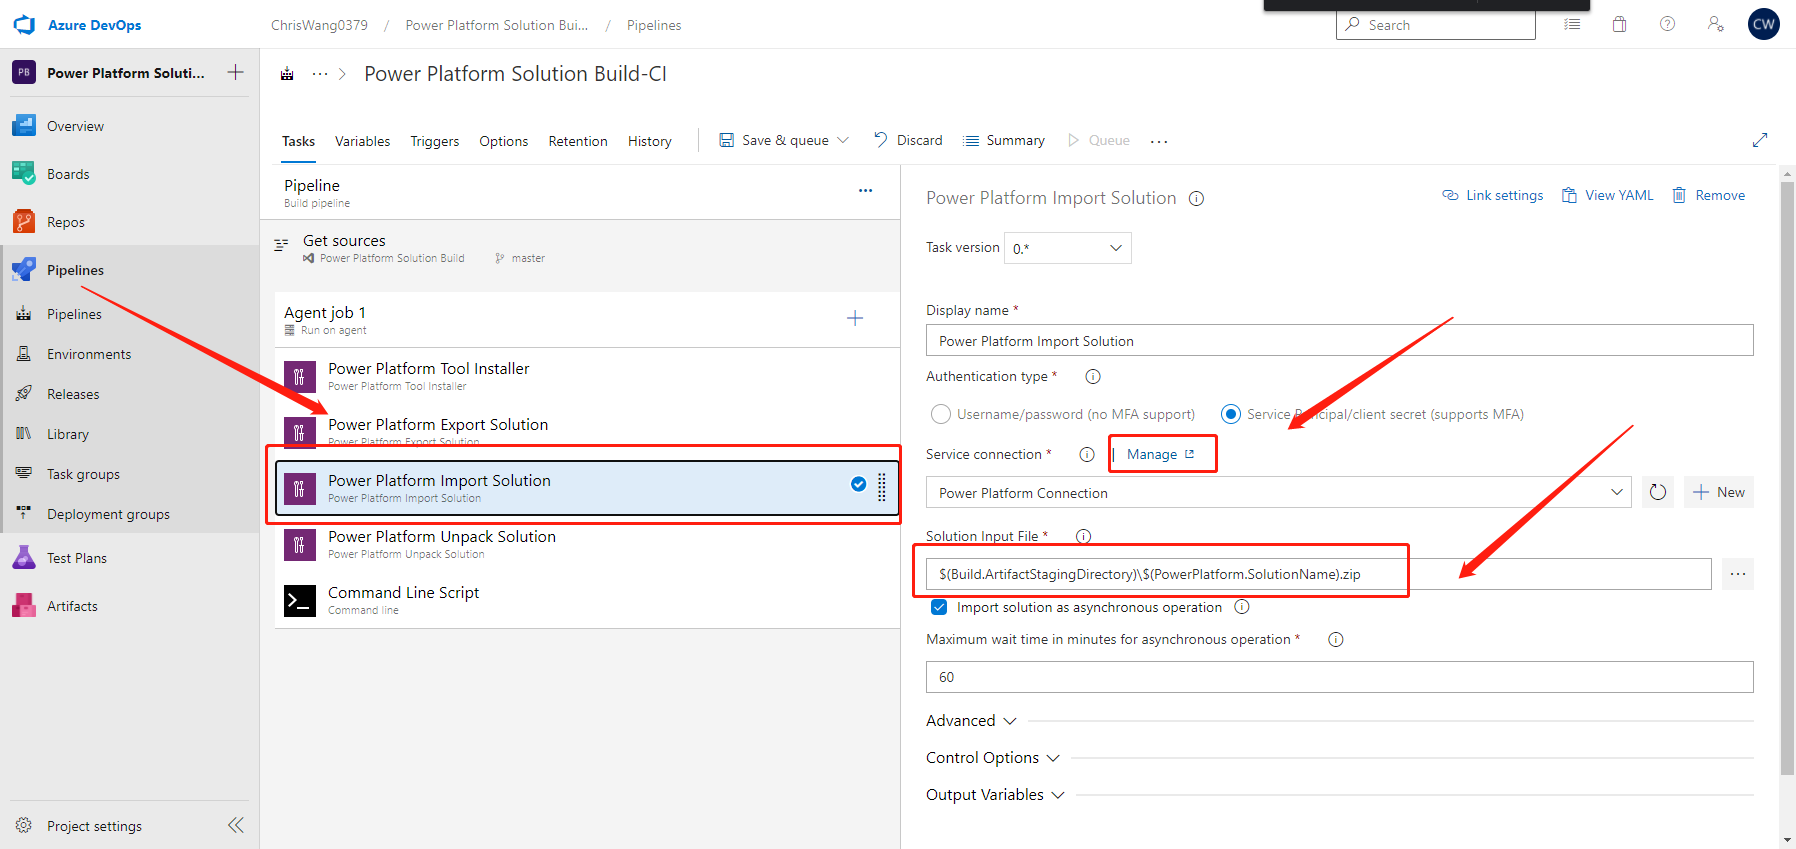
那首先我们需要添加新的步骤, power platform import solution
并且, 我们需要按照上面的步骤创建service connection(target sandbox)
其次,我们要找到刚才打包zip文件的文件地址, 把文件上传到target sandbox中.
solution input file: $(Build.ArtifactStagingDirectory)$(PowerPlatform.SolutionName).zip
然后,我们应该添加的步骤就添加完毕.
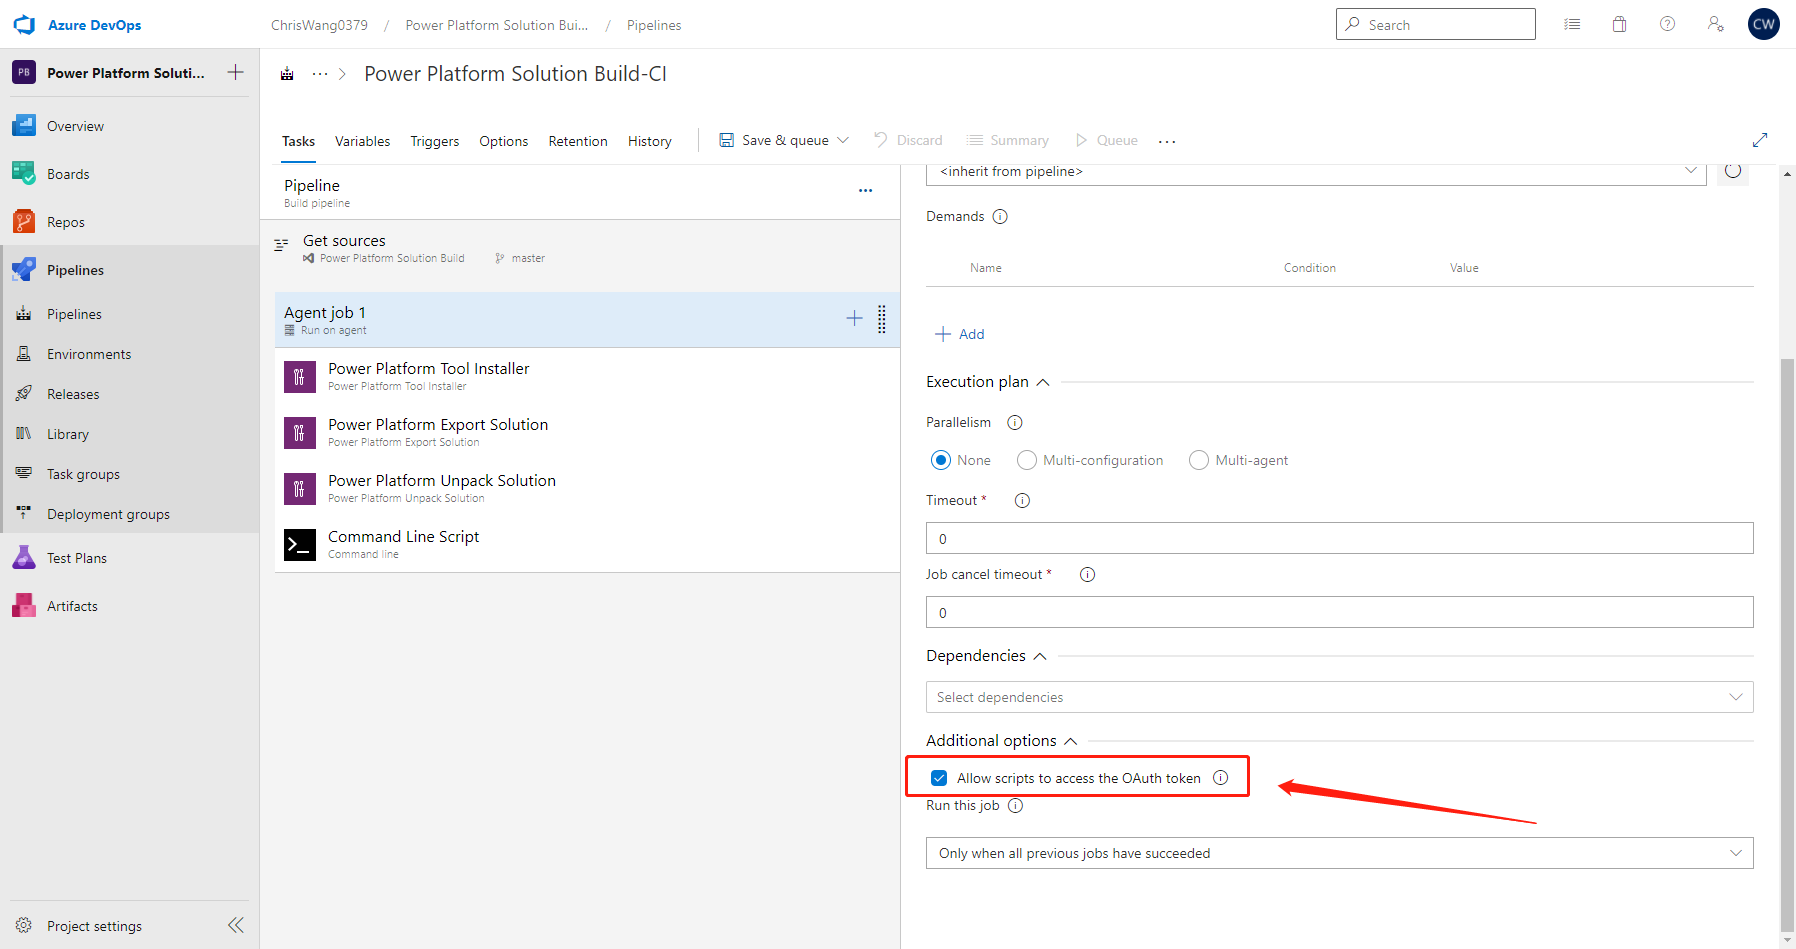
我们需要做一些额外的配置. 我们点到Agent job, 并且勾选"Allow script to oaccess the OAuth token"
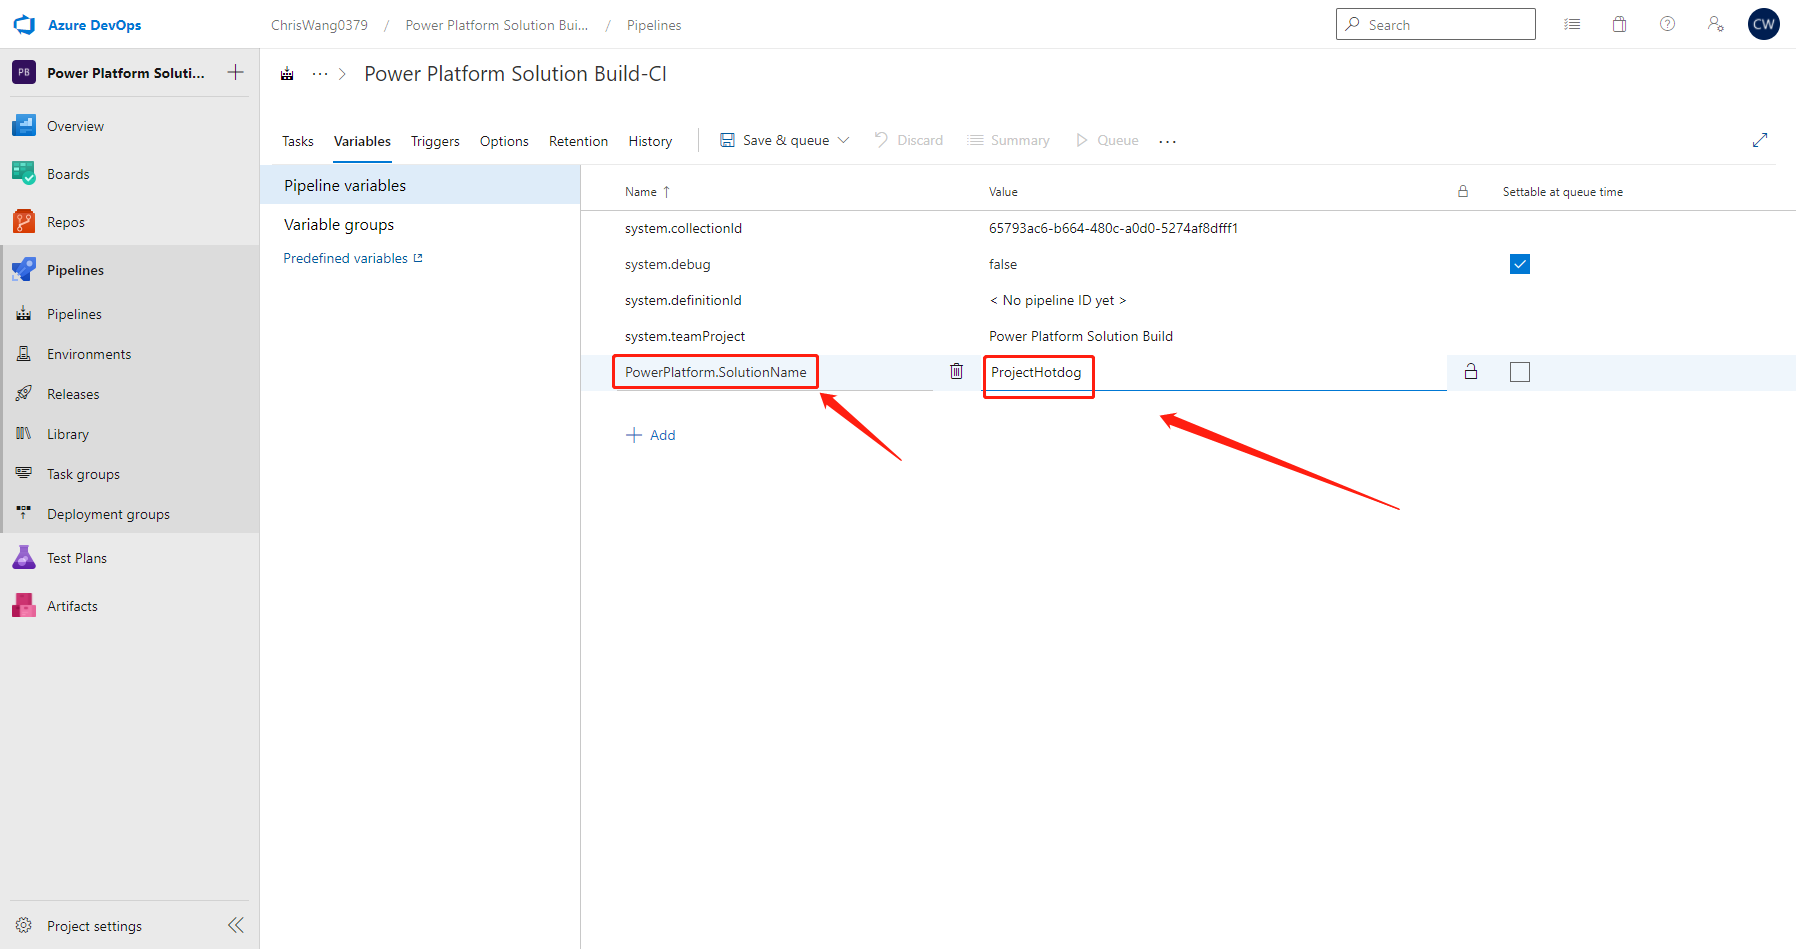
然后,我们点开"variables", 并且设定PowerPlatform.SolutionName的值. 在PP中, 我的solution叫ProjectHotdog, 所以这里的value我设定成ProjectHotdog.
variable可以设置成变量, 我们也可以通过 power automate flow来控制. 后面有时间我会讲怎么用power automate来配合我们的pipeline.
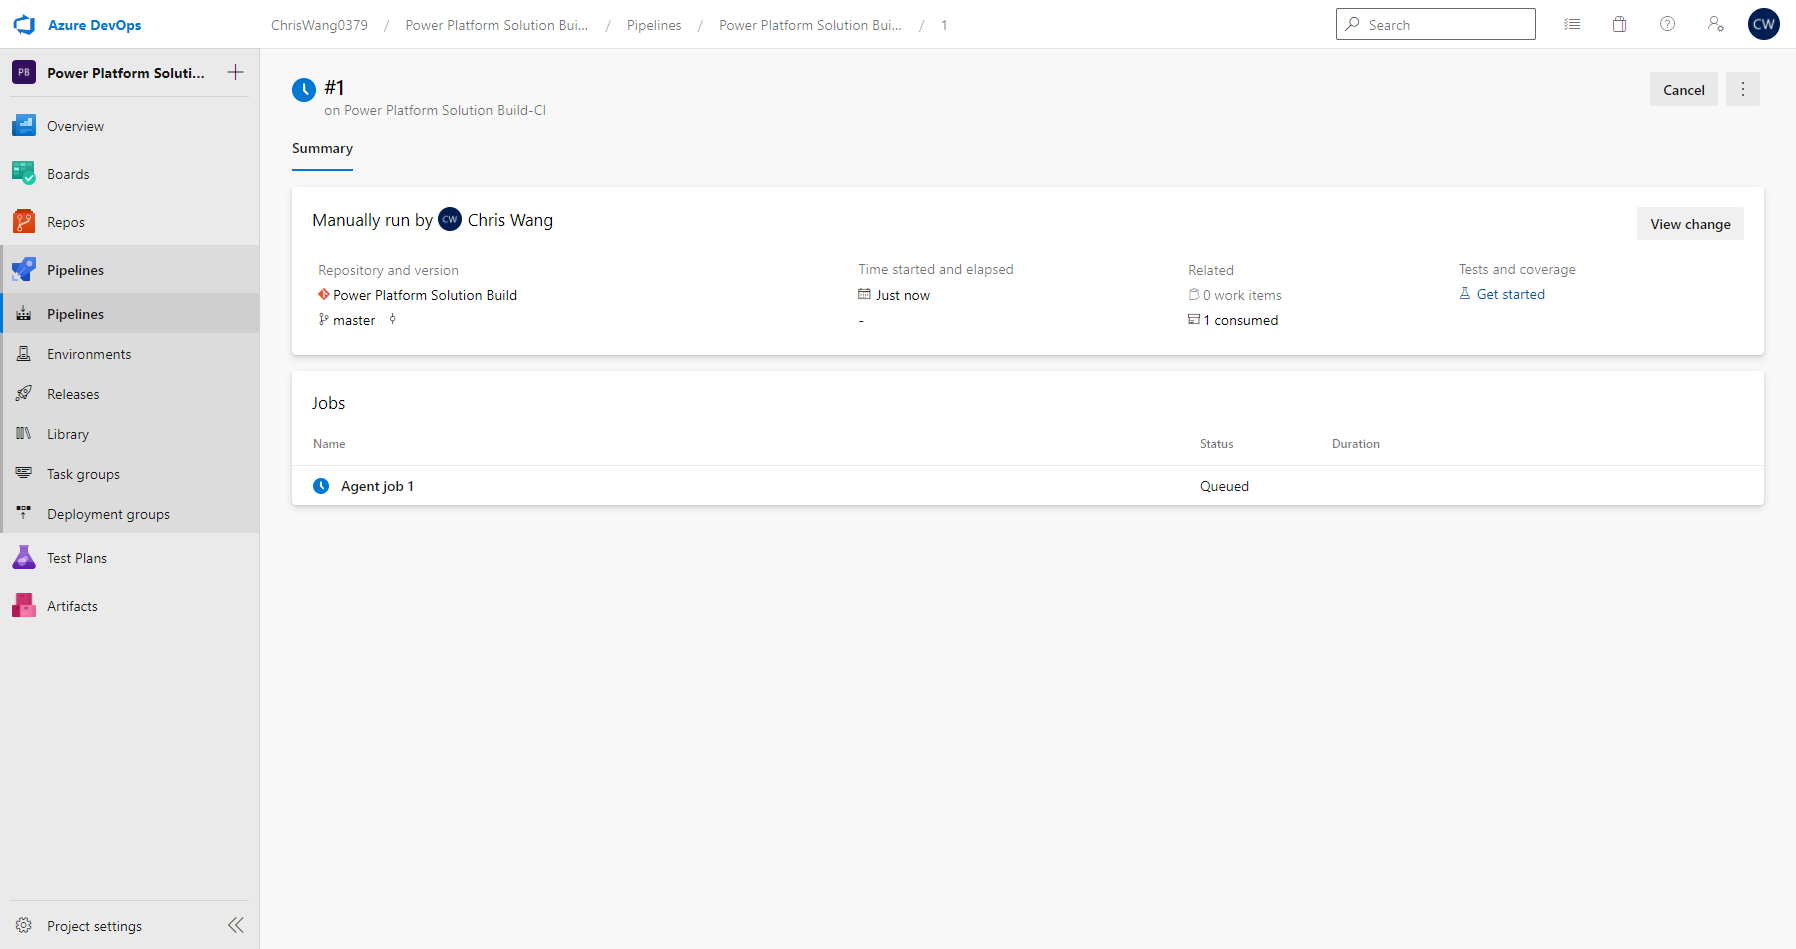
到此为止, 我们的4个步骤就全部做完. 然后,我们就可以第一次run我们的pipeline
我们可以看到source sandbox中的solution被import到target solution中
随后,我们还有两个option的流程.
我们不管在开发canvas还是automate. 我们都是接触的UI界面. 很难去管控其后面的代码. 并且我们也非常困难去管控版本迭代.
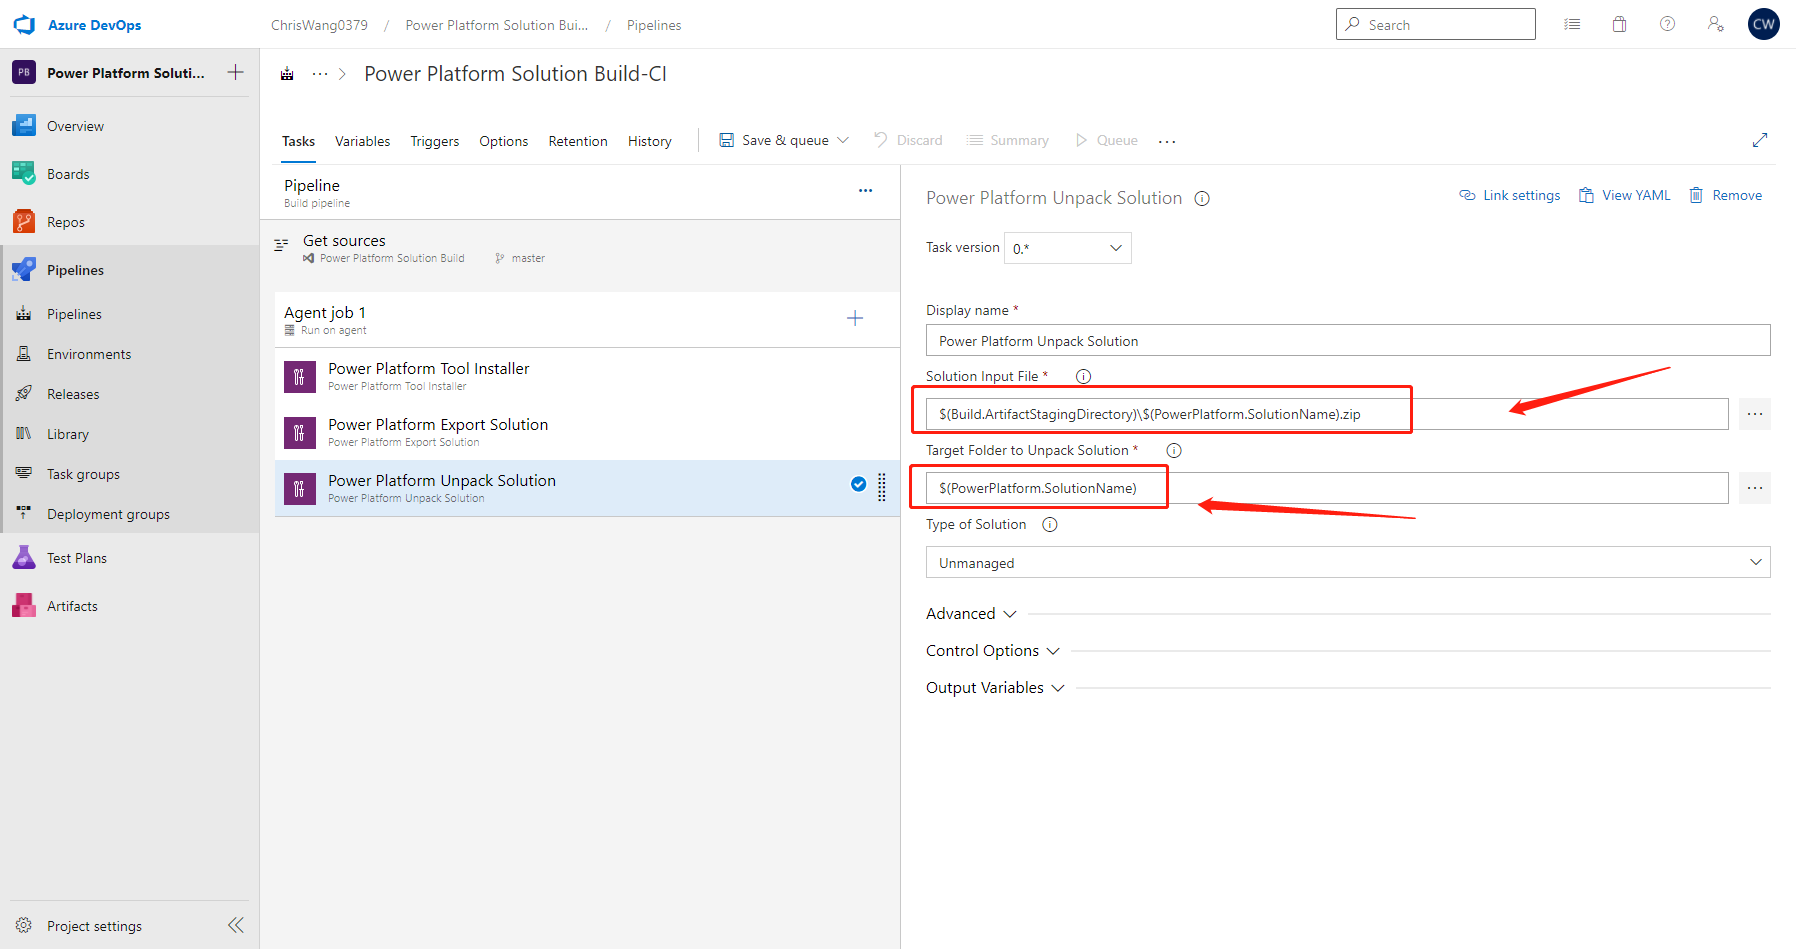
这里这一步我们可以使用unpack 功能来打开solution .zip文件, 获取到原始的.json 或者 .xml 各个文档. 然后我们可以把文档用cmd 去上传到之前创建好的Git Repository中.
首先我们需要拿到文档
solution input file
$(Build.ArtifactStagingDirectory)$(PowerPlatform.SolutionName).zip
Target foler to unpack solution
$(PowerPlatform.SolutionName)
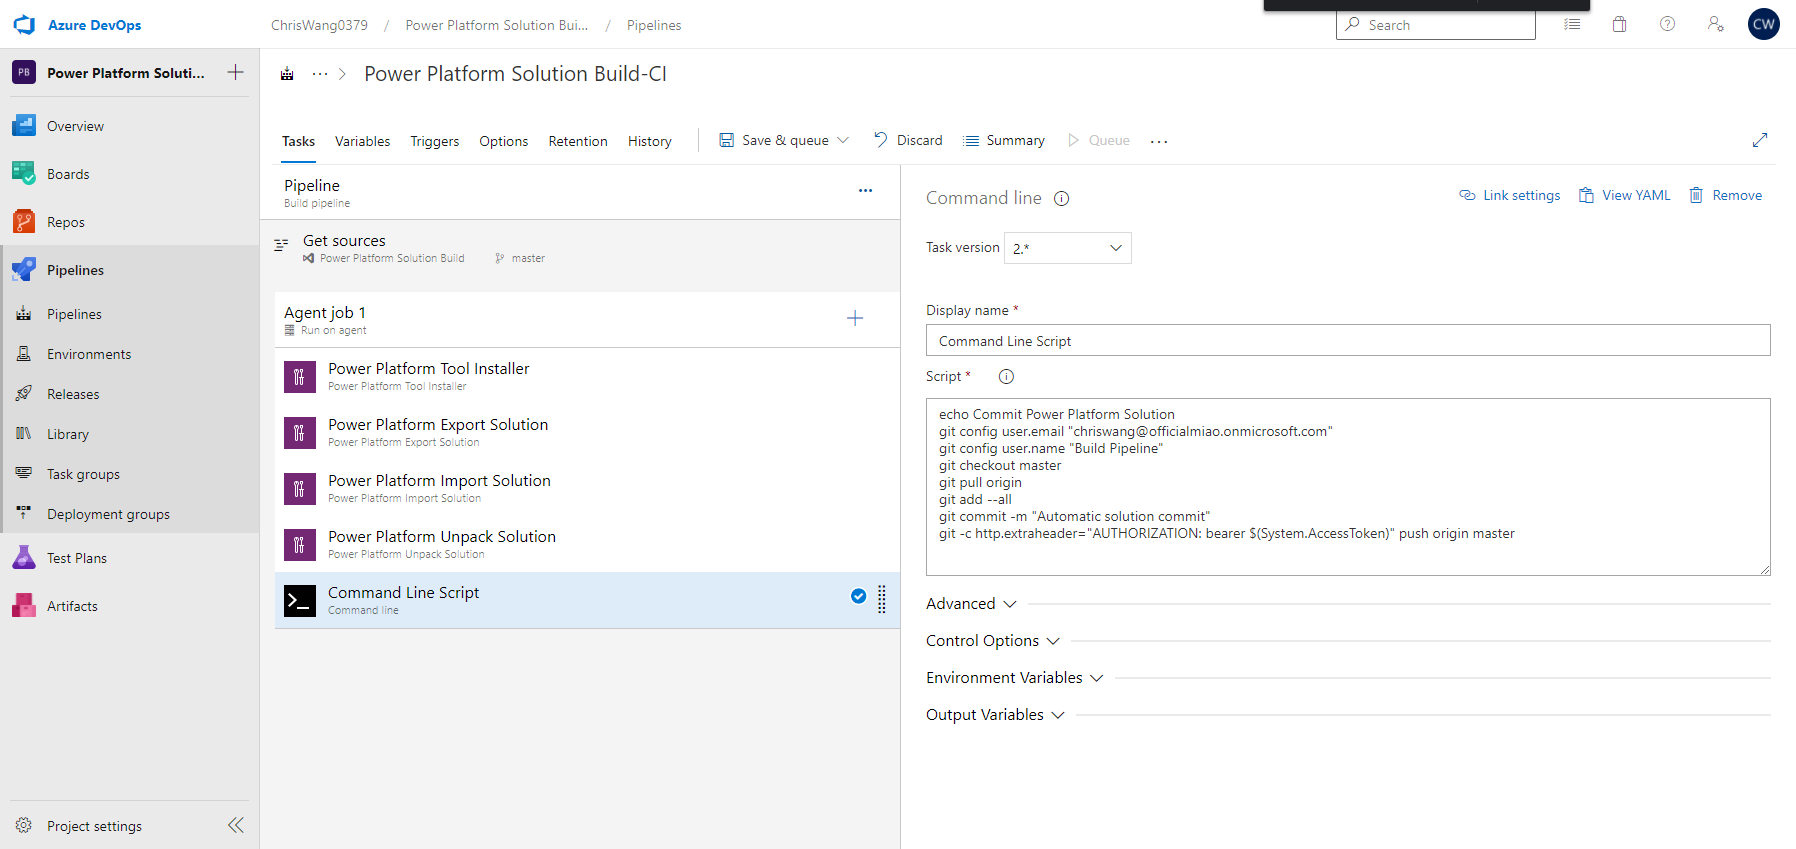
这一步, 我们把刚才解压缩在文件夹中的所有文件上传到Git Repository中.
echo Commit Power Platform Solution
git config user.email "build.pipeline@xxx.com"
git config user.name "Build Pipeline"
git checkout master
git pull origin
git add --all
git commit -m "Automatic solution commit"
git -c http.extraheader="AUTHORIZATION: bearer $(System.AccessToken)" push origin master
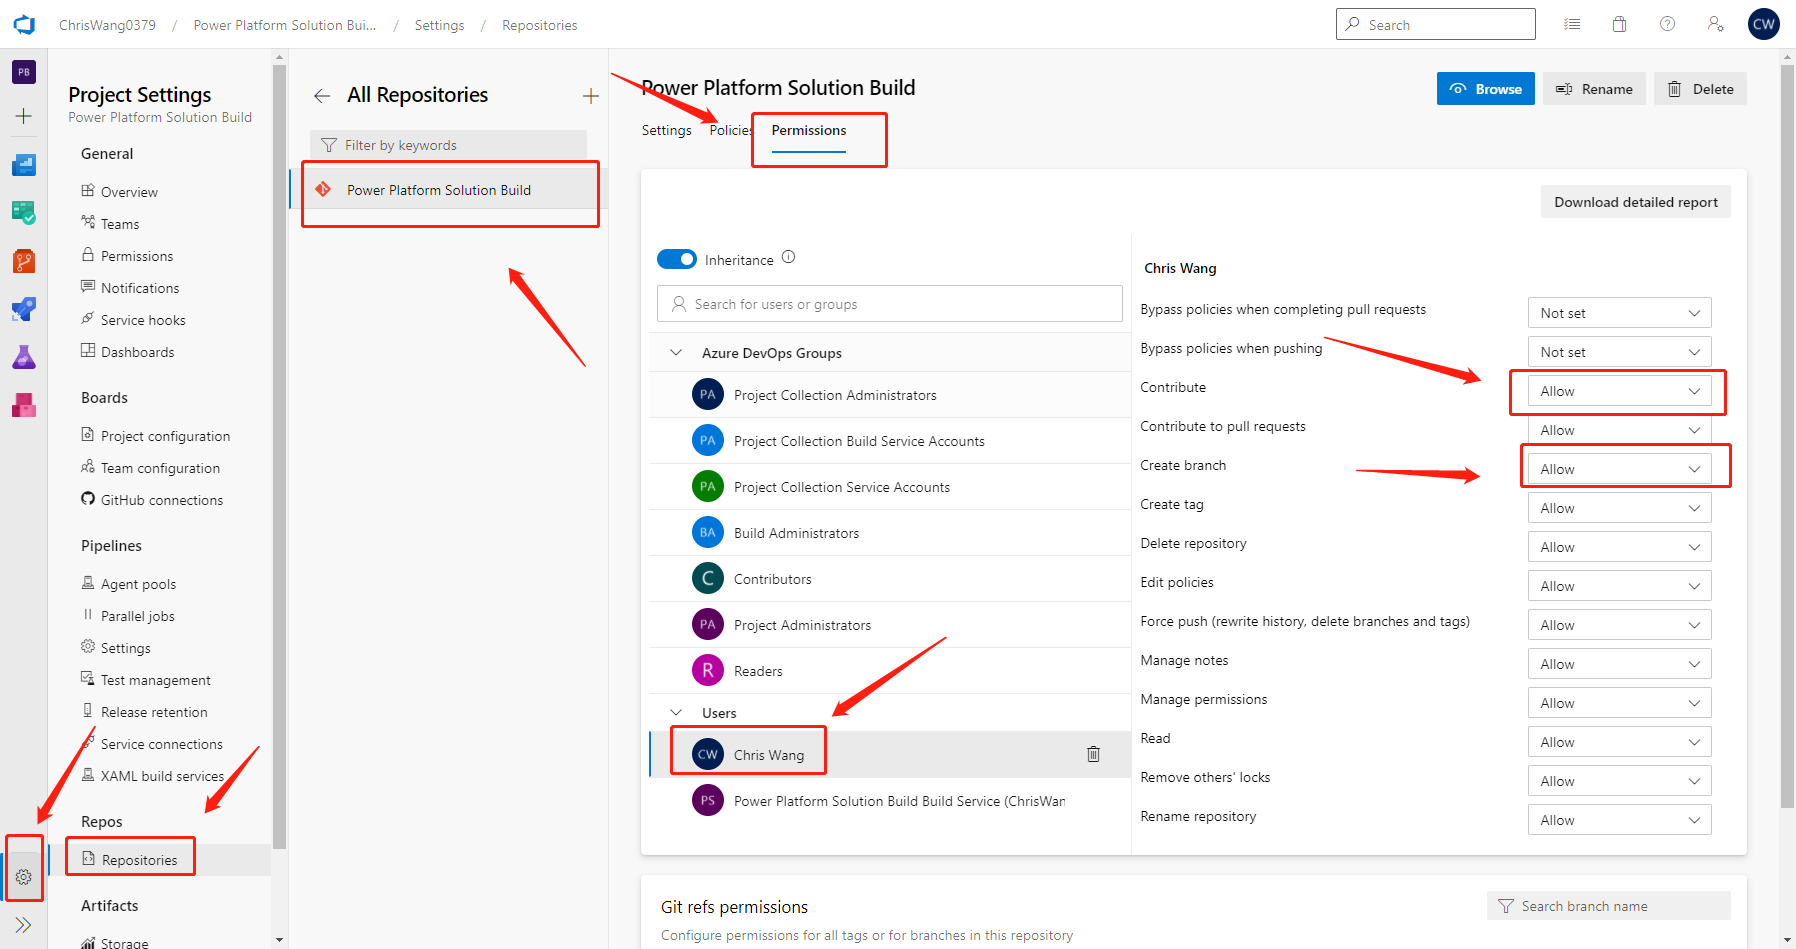
我们需要做最后一步的设置, 我们需要去project setting -> All Repositories -> Power Platform Solution Build -> Permission 中把Contribute 和 create branch的权限打开.
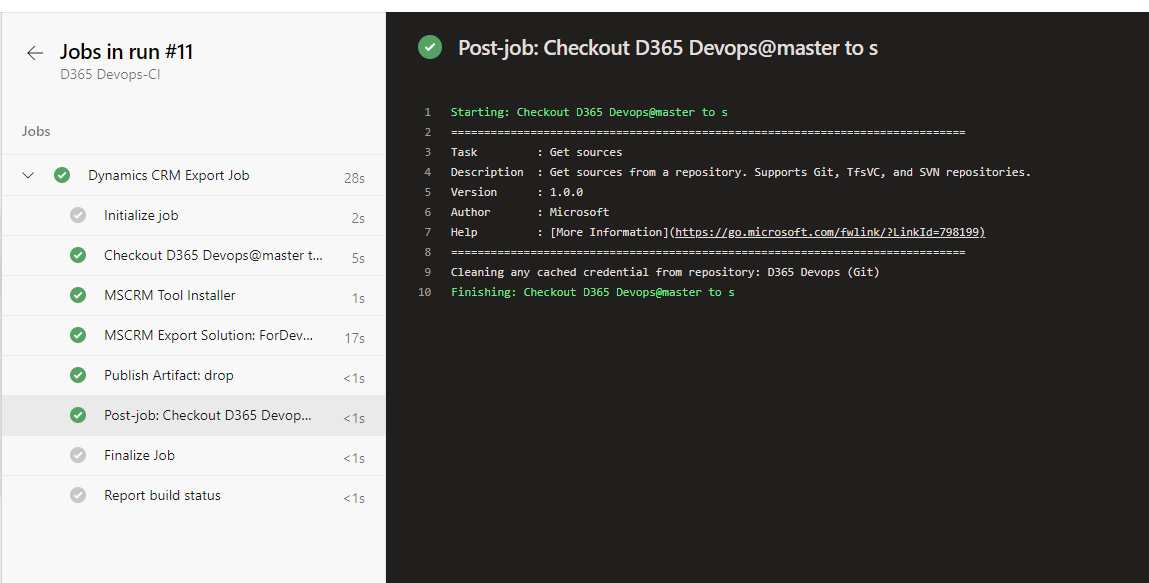
然后我们run pipeline
写在最后
Power Platform Build Tool 帮我们解决了开发当中非常大的一个忙, AML 开发周期的管控. 并且解放了我们不停的做环境切换, 部署的问题.
后面,我会在随后的blog中介绍怎么使用power automate来打通pipeline部署, 并且以power apps canvas作为UI来管控PP平台. 并且也会专注PP平台项目管控解决方案. 希望大家关心的管控流程/其他意见可以留言告诉我