开发工具:STS
前言:
What is ActiveMq?
ActiveMq:实现了Jms规范的一款Java 消息中间件。
消息中间件:
处理消息的一个消息机制,负责接收消息与转发。
用途:
(1)功能解耦,
(2)高并发
(3)简单的说,就是不太重要的资源,类似给用户发送邮件验证码之类的,我告诉它一下,我就返回到前端了,不在这里等你发送完,
提高用户体验感。然后之后,消息中间件转发给专门负责发邮件的模块,发送邮件就可以了,节约了互联网资源。
一、简单实例:
1.pom依赖:
 1 <?xml version="1.0" encoding="UTF-8"?>
 2 <project xmlns="http://maven.apache.org/POM/4.0.0" xmlns:xsi="http://www.w3.org/2001/XMLSchema-instance"
 3     xsi:schemaLocation="http://maven.apache.org/POM/4.0.0 http://maven.apache.org/xsd/maven-4.0.0.xsd">
 4     <modelVersion>4.0.0</modelVersion>
 5
 6     <groupId>com.xm</groupId>
 7     <artifactId>springboot_jms</artifactId>
 8     <version>0.0.1-SNAPSHOT</version>
 9     <packaging>jar</packaging>
10
11     <name>springboot_jms</name>
12     <description>This is a Web about springcloud</description>
13
14     <parent>
15         <groupId>org.springframework.boot</groupId>
16         <artifactId>spring-boot-starter-parent</artifactId>
17         <version>1.5.14.RELEASE</version>
18         <relativePath/> <!-- lookup parent from repository -->
19     </parent>
20
21     <properties>
22         <project.build.sourceEncoding>UTF-8</project.build.sourceEncoding>
23         <project.reporting.outputEncoding>UTF-8</project.reporting.outputEncoding>
24         <java.version>1.8</java.version>
25     </properties>
26
27     <dependencies>
28         <dependency>
29             <groupId>org.springframework.boot</groupId>
30             <artifactId>spring-boot-starter-activemq</artifactId>
31         </dependency>
32
33         <dependency>
34             <groupId>org.springframework.boot</groupId>
35             <artifactId>spring-boot-starter-test</artifactId>
36             <scope>test</scope>
37         </dependency>
38     </dependencies>
39
40     <build>
41         <plugins>
42             <plugin>
43                 <groupId>org.springframework.boot</groupId>
44                 <artifactId>spring-boot-maven-plugin</artifactId>
45             </plugin>
46         </plugins>
47     </build>
48
49
50 </project>
2.配置文件:
1 spring:
2   activemq:
3     broker-url: tcp://127.0.0.1:61617
4     #发送Object需要开启,并且Object需要实现序列化接口
5     packages:
6       trust-all: true
3.发送者:
 1 package com.xm.jms.query;
 2
 3
 4 import javax.jms.Destination;
 5
 6 import org.springframework.beans.factory.annotation.Autowired;
 7 import org.springframework.jms.core.JmsMessagingTemplate;
 8 import org.springframework.stereotype.Service;
 9
10 import com.xm.jms.pojo.Student;
11
12 @Service
13 public class Producer {
14
15     @Autowired
16     private JmsMessagingTemplate template;
17
18     public void sendMeseage(Destination destination) {
19
20         Student s = new Student();
21         s.setId(1);
22         s.setName("郭小明");
23         template.convertAndSend(destination,s);
24
25     }
26
27 }
4.接收者:
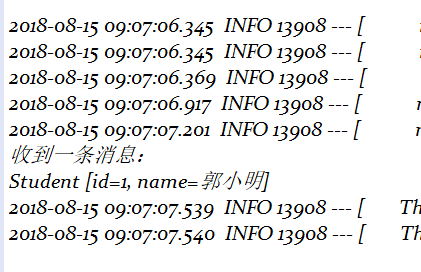
 1 package com.xm.jms.query;
 2
 3 import org.springframework.jms.annotation.JmsListener;
 4 import org.springframework.stereotype.Component;
 5
 6 import com.xm.jms.pojo.Student;
 7
 8 @Component
 9 public class Consumer {
10
11     @JmsListener(destination = "queueText")
12     public void getQuery(Student s) {
13         System.out.println("收到一条消息:");
14         System.out.println(s);
15     }
16
17 }
5.测试类:
 1 package com.xm.jms;
 2
 3 import javax.jms.Destination;
 4 import javax.jms.JMSException;
 5
 6 import org.apache.activemq.command.ActiveMQObjectMessage;
 7 import org.apache.activemq.command.ActiveMQQueue;
 8 import org.junit.Test;
 9 import org.junit.runner.RunWith;
10 import org.springframework.beans.factory.annotation.Autowired;
11 import org.springframework.boot.test.context.SpringBootTest;
12 import org.springframework.messaging.Message;
13 import org.springframework.test.context.junit4.SpringRunner;
14
15 import com.xm.jms.pojo.Student;
16 import com.xm.jms.query.Producer;
17
18 @RunWith(SpringRunner.class)
19 @SpringBootTest
20 public class SpringbootJmsApplicationTests {
21
22     @Autowired
23     private Producer producer;
24
25     @Test
26     public void contextLoads() throws JMSException {
27
28         Destination destination = new  ActiveMQQueue("queueText");
29
30
31             producer.sendMeseage(destination);
32
33
34     }
35
36 }
二、开启ActiveMq
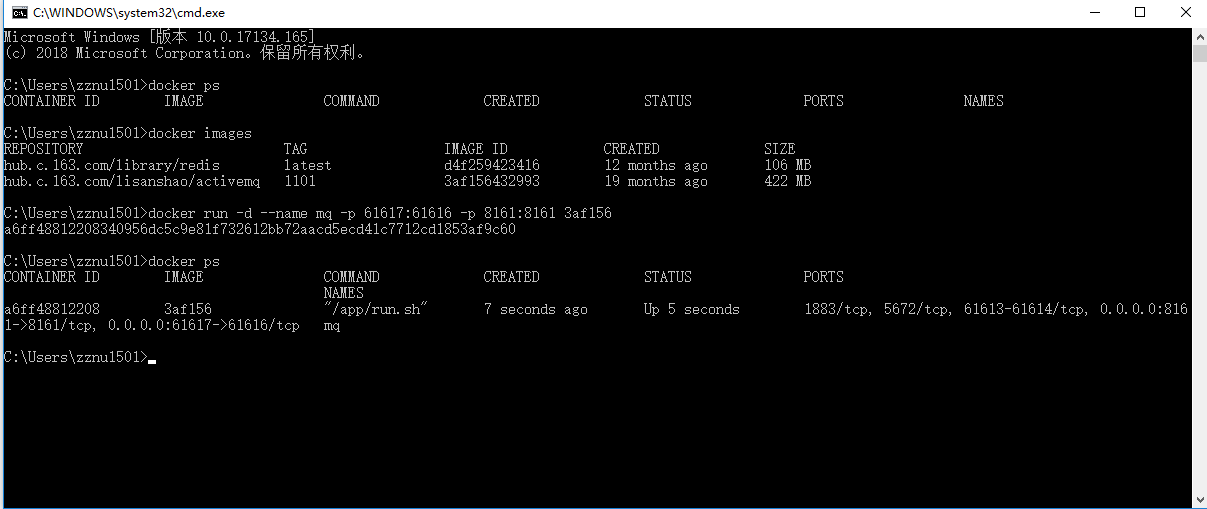
1.docker容器中开启activemq:
docker run -d:后台运行
-p:端口映射
--name:命名
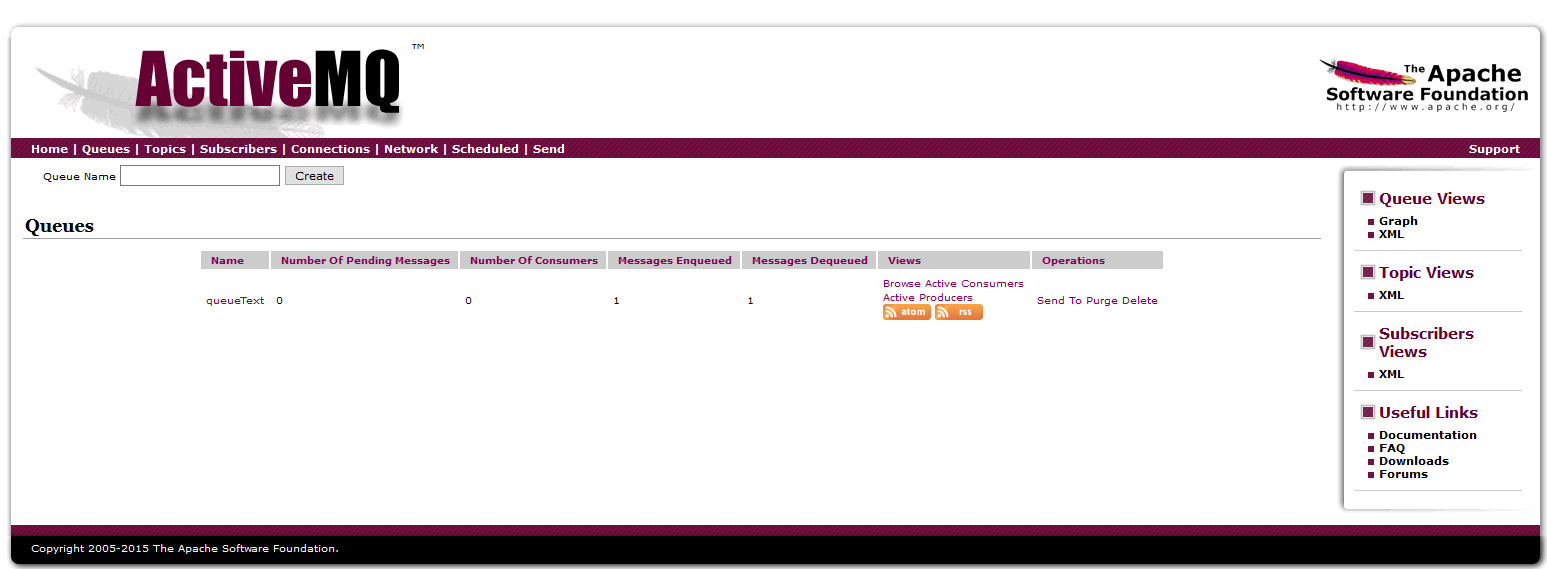
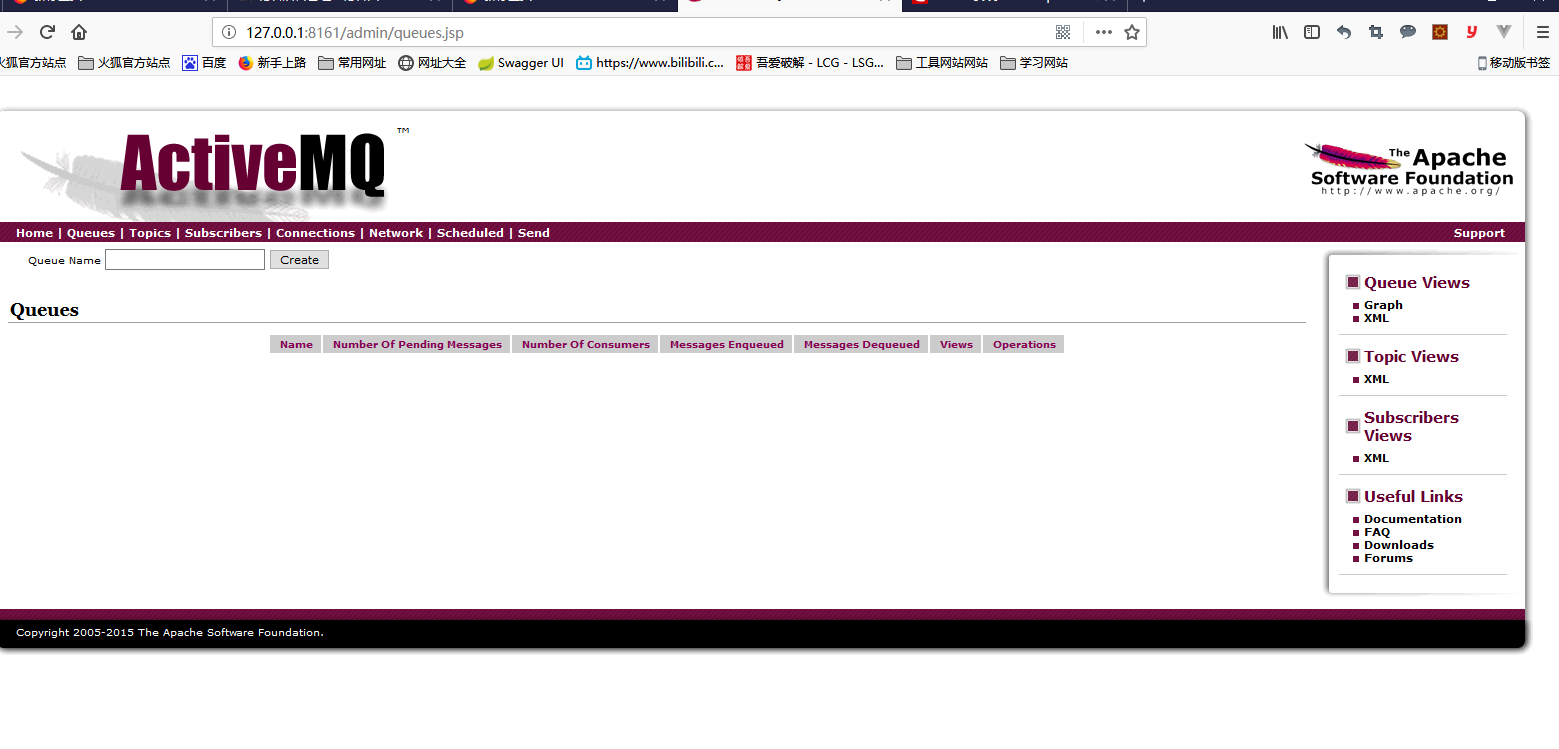
2.在浏览器中查看mq:
默认账号、密码:admin、admin
三、运行测试: