1.在树莓派中安装opencv库
(1)展开文件系统
sudo raspi-config
然后选择“高级选项”菜单项
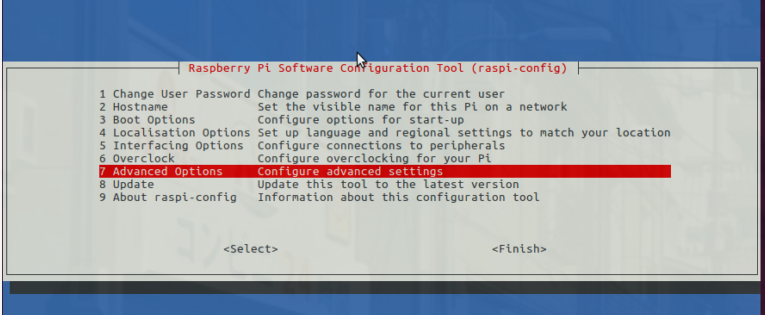
接下来选择“扩展文件系统”

选择第一个选项“ A1。展开“文件系统”,按键盘上的Enter键,向下箭头单击“
然后重新启动Pi
sudo reboot
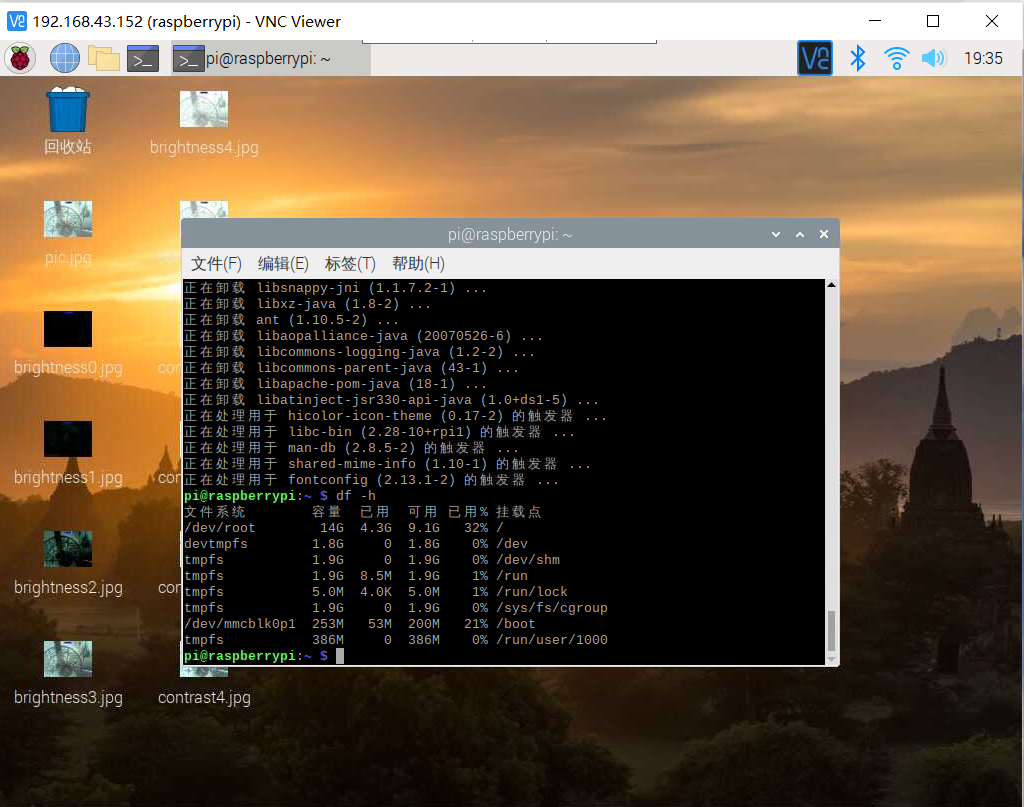
通过执行以下操作来验证磁盘是否已扩展并检查输出
df -h
(2)安装依赖项
pip3 install --upgrade setuptools
pip3 install numpy Matplotlib

sudo apt-get install libjpeg-dev libtiff5-dev libjasper-dev libpng12-dev
sudo apt-get install libavcodec-dev libavformat-dev libswscale-dev libv4l-dev
sudo apt-get install libxvidcore-dev libx264-dev
sudo apt-get install libgtk2.0-dev libgtk-3-dev
sudo apt-get install libatlas-base-dev
sudo apt install libqt4-test
(3)安装opencv
pip3 install opencv-python
2.使用opencv和python控制树莓派的摄像头
(1)picamera模块安装
$ source ~/.profile
$ workon cv
$ pip install "picamera[array]"
(2)在Python代码中导入OpenCV控制摄像头
# import the necessary packages
from picamera.array import PiRGBArray
from picamera import PiCamera
import time
import cv2
# initialize the camera and grab a reference to the raw camera capture
camera = PiCamera()
rawCapture = PiRGBArray(camera)
# allow the camera to warmup
time.sleep(3) #此处把0.1改成了3
# grab an image from the camera
camera.capture(rawCapture, format="bgr")
image = rawCapture.array
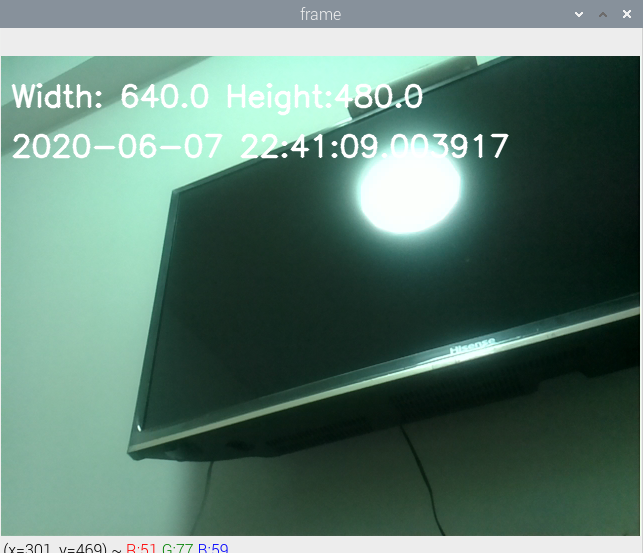
# display the image on screen and wait for a keypress
cv2.imshow("Image", image)
cv2.waitKey(0)
3.利用树莓派的摄像头实现人脸识别
在前面创建的python虚拟环境cv中安装dlib和face_recognition
source ~/.profile
workon cv
pip install dlib
pip install face_recognition
- facerec_on_raspberry_pi.py
# This is a demo of running face recognition on a Raspberry Pi.
# This program will print out the names of anyone it recognizes to the console.
# To run this, you need a Raspberry Pi 2 (or greater) with face_recognition and
# the picamera[array] module installed.
# You can follow this installation instructions to get your RPi set up:
# https://gist.github.com/ageitgey/1ac8dbe8572f3f533df6269dab35df65
import face_recognition
import picamera
import numpy as np
# Get a reference to the Raspberry Pi camera.
# If this fails, make sure you have a camera connected to the RPi and that you
# enabled your camera in raspi-config and rebooted first.
camera = picamera.PiCamera()
camera.resolution = (320, 240)
output = np.empty((240, 320, 3), dtype=np.uint8)
# Load a sample picture and learn how to recognize it.
print("Loading known face image(s)")
learn_image = face_recognition.load_image_file("test.jpg")
learn_face_encoding = face_recognition.face_encodings(learn_image)[0]
# Initialize some variables
face_locations = []
face_encodings = []
while True:
print("Capturing image.")
# Grab a single frame of video from the RPi camera as a numpy array
camera.capture(output, format="rgb")
# Find all the faces and face encodings in the current frame of video
face_locations = face_recognition.face_locations(output)
print("Found {} faces in image.".format(len(face_locations)))
face_encodings = face_recognition.face_encodings(output, face_locations)
# Loop over each face found in the frame to see if it's someone we know.
for face_encoding in face_encodings:
# See if the face is a match for the known face(s)
match = face_recognition.compare_faces([learn_face_encoding], face_encoding)
name = "<Unknown Person>"
if match[0]:
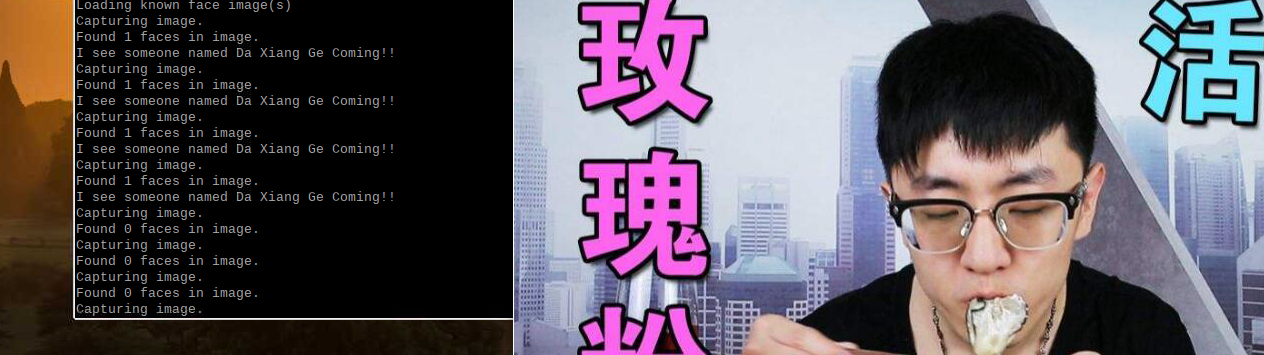
name = "Da Xiang Ge Coming!"
print("I see someone named {}!".format(name))
将test.jpg放在python代码同一目录下,摄像头对准所需识别的照片
若识别成功

若识别失败

- facerec_from_webcam_faster.py
import face_recognition
import cv2
import numpy as np

# This is a demo of running face recognition on live video from your webcam. It's a little more complicated than the
# other example, but it includes some basic performance tweaks to make things run a lot faster:
#   1. Process each video frame at 1/4 resolution (though still display it at full resolution)
#   2. Only detect faces in every other frame of video.

# PLEASE NOTE: This example requires OpenCV (the `cv2` library) to be installed only to read from your webcam.
# OpenCV is *not* required to use the face_recognition library. It's only required if you want to run this
# specific demo. If you have trouble installing it, try any of the other demos that don't require it instead.

# Get a reference to webcam #0 (the default one)
video_capture = cv2.VideoCapture(0)

# Load a sample picture and learn how to recognize it.
DaXiangGe_image = face_recognition.load_image_file("DaXiangGe.jpg")
DaXiangGe_face_encoding = face_recognition.face_encodings(DaXiangGe_image)[0]

# Load a second sample picture and learn how to recognize it.
LuoXiang = face_recognition.load_image_file("LuoXiang.jpg")
LuoXiang_face_encoding = face_recognition.face_encodings(LuoXiang)[0]

# Create arrays of known face encodings and their names
known_face_encodings = [
    DaXiangGe_face_encoding,
    LuoXiang_face_encoding
]

known_face_names = [
    "DaXiangGe",
    "LuoXiang"
]


# Initialize some variables
face_locations = []
face_encodings = []
face_names = []

process_this_frame = True

while True:

    # Grab a single frame of video
    ret, frame = video_capture.read()

    # Resize frame of video to 1/4 size for faster face recognition processing
    small_frame = cv2.resize(frame, (0, 0), fx=0.25, fy=0.25)

    # Convert the image from BGR color (which OpenCV uses) to RGB color (which face_recognition uses)
    rgb_small_frame = small_frame[:, :, ::-1]

    # Only process every other frame of video to save time
    if process_this_frame:

        # Find all the faces and face encodings in the current frame of video
        face_locations = face_recognition.face_locations(rgb_small_frame)
        face_encodings = face_recognition.face_encodings(rgb_small_frame, face_locations)

        face_names = []
        for face_encoding in face_encodings:
            # See if the face is a match for the known face(s)
            matches = face_recognition.compare_faces(known_face_encodings, face_encoding, tolerance=0.30)
            name = "Unknown"

            # # If a match was found in known_face_encodings, just use the first one.
            # if True in matches:
            #     first_match_index = matches.index(True)
            #     name = known_face_names[first_match_index]
            # Or instead, use the known face with the smallest distance to the new face
            face_distances = face_recognition.face_distance(known_face_encodings, face_encoding)
            best_match_index = np.argmin(face_distances)
            if matches[best_match_index]:
                name = known_face_names[best_match_index]

            face_names.append(name)

    process_this_frame = not process_this_frame

    # Display the results
    for (top, right, bottom, left), name in zip(face_locations, face_names):
        # Scale back up face locations since the frame we detected in was scaled to 1/4 size
        top *= 4
        right *= 4
        bottom *= 4
        left *= 4

        # Draw a box around the face
        cv2.rectangle(frame, (left, top), (right, bottom), (0, 0, 255), 2)

        # Draw a label with a name below the face
        cv2.rectangle(frame, (left, bottom - 35), (right, bottom), (0, 0, 255), cv2.FILLED)
        font = cv2.FONT_HERSHEY_DUPLEX
        cv2.putText(frame, name, (left + 6, bottom - 6), font, 1.0, (255, 255, 255), 1)

    # Display the resulting image
    cv2.imshow('Video', frame)

    # Hit 'q' on the keyboard to quit!
    if cv2.waitKey(1) & 0xFF == ord('q'):
        break

# Release handle to the webcam
video_capture.release()
cv2.destroyAllWindows()
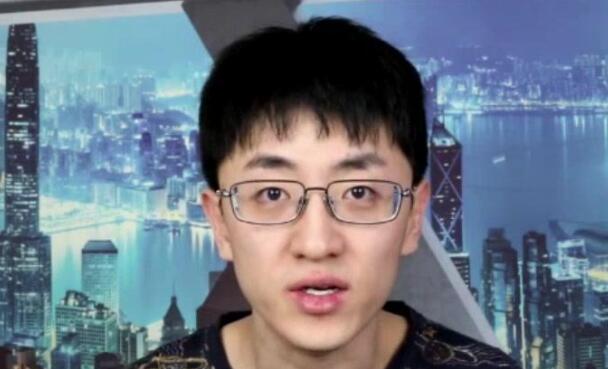
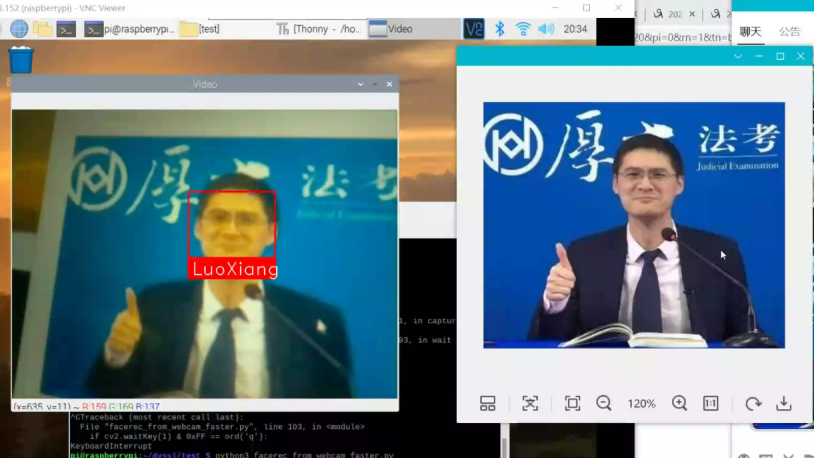
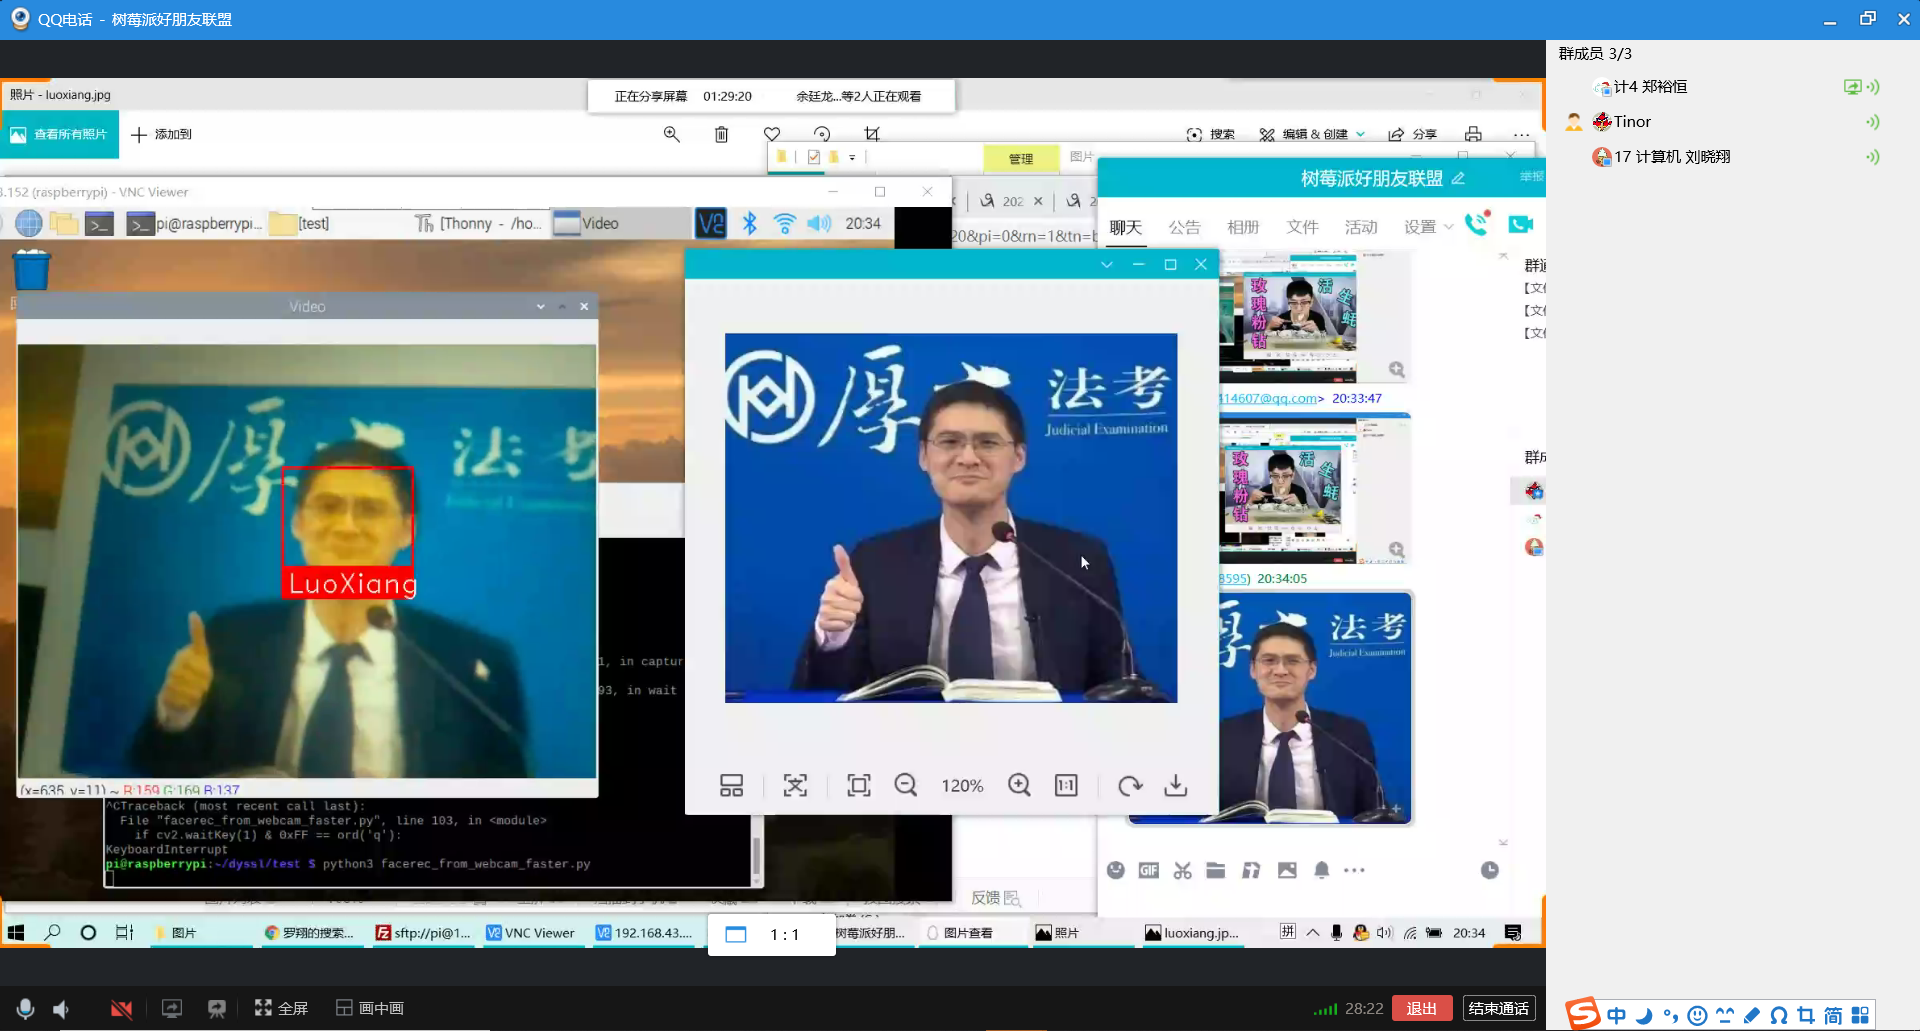
同时识别罗翔
识别大祥哥

4.结合微服务的进阶任务
(1)安装docker
下载安装脚本
curl -fsSL https://get.docker.com -o get-docker.sh
执行安装脚本
sh get-docker.sh --mirror Aliyun
查看docker版本以确定是否安装成功
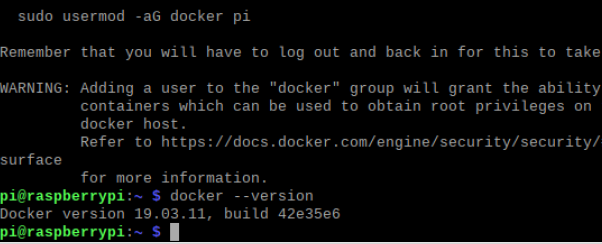
添加用户pi到docker组
sudo usermod -aG docker pi
退出当前登录,重新登录树莓派,使得刚刚添加的用户组生效
exit
ssh pi@raspiberry
(2)自定义opencv镜像
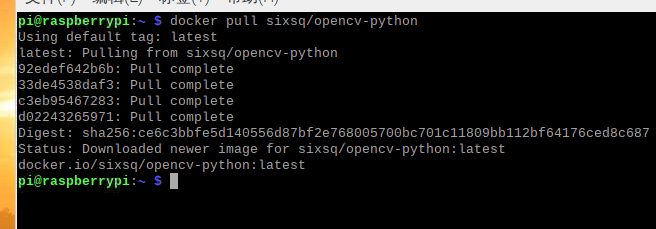
拉取镜像
docker pull sixsq/opencv-python
创建并进入容器
docker run -it sixsq/opencv-python /bin/bash
在容器中安装这三个库:"picamera[array]",dlib和face_recognition
pip3 install "picamera[array]"
pip3 install dlib
pip3 install face_recognition

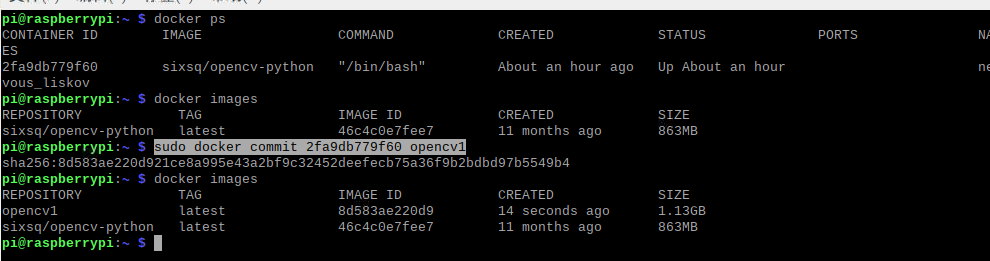
退出容器,查找刚刚运行的容器的id,然后将其构建成新的镜像,这样我们就获得一个安装有人脸识别相关库的opencv-python镜像
exit
docker ps
sudo docker commit 2fa9db779f60 opencv1
自定义镜像
准备好Dockerfile和用于人脸识别的代码和图片,文件结构如下

Dockerfile
FROM opencv1
RUN mkdir /myapp
WORKDIR /myapp
COPY myapp .
构建镜像
docker build -t opencv2 .
(3)在容器中测试人脸识别代码
跑通facerec_on_raspberry_pi.py
docker run -it --device=/dev/vchiq --device=/dev/video0 --name myopencv opencv2
python3 facerec_on_raspberry_pi.py

(4)选做部分
首先在windows中安装Xming
在putty中开启树莓派ssh配置的x11,这样就可以为Xming提供图形界面

查看DISPLAY环境变量值
Printenv

编写run.sh,这个脚本中的内容就是进入容器然后执行测试代码
#sudo apt-get install x11-xserver-utils
xhost +
docker run -it
        --net=host
        -v $HOME/.Xauthority:/root/.Xauthority
        -e DISPLAY=:10.0
        -e QT_X11_NO_MITSHM=1
        --device=/dev/vchiq
        --device=/dev/video0
        --name facerecgui
        opencv2
	python3 facerec_from_webcam_faster.py
打开终端,运行run.sh
sh run.sh


5.问题和解决方法&&小组名单、分工、各自贡献&&在线协作照片
(1)遇到的问题和解决方法
问题1:我们首先是按照参考链接中的方法去安装opencv库,中间也遇到很多问题,都一一解决了,但是到了编译这一步,有一个报错一直没能解决
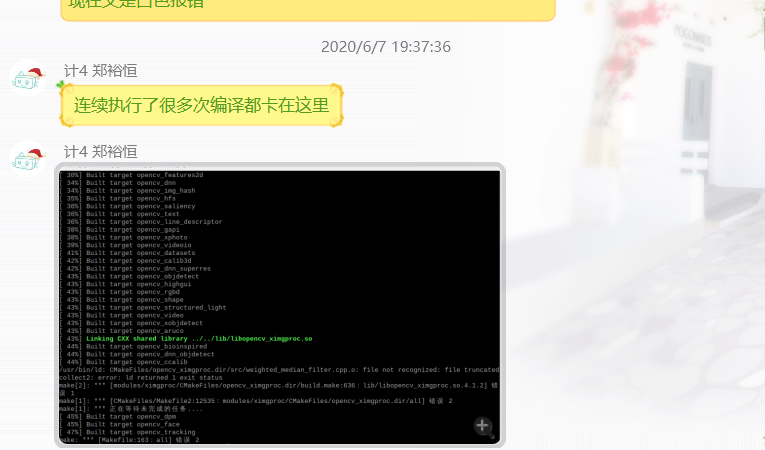
解决:
我们在其他同学的博客中找到了一键完成的方法
先安装完一系列依赖包后,只要执行以下命令就可以完成opencv和python的安装,可以省去繁琐的步骤,而且不会遇到问题。
pip3 install opencv-python
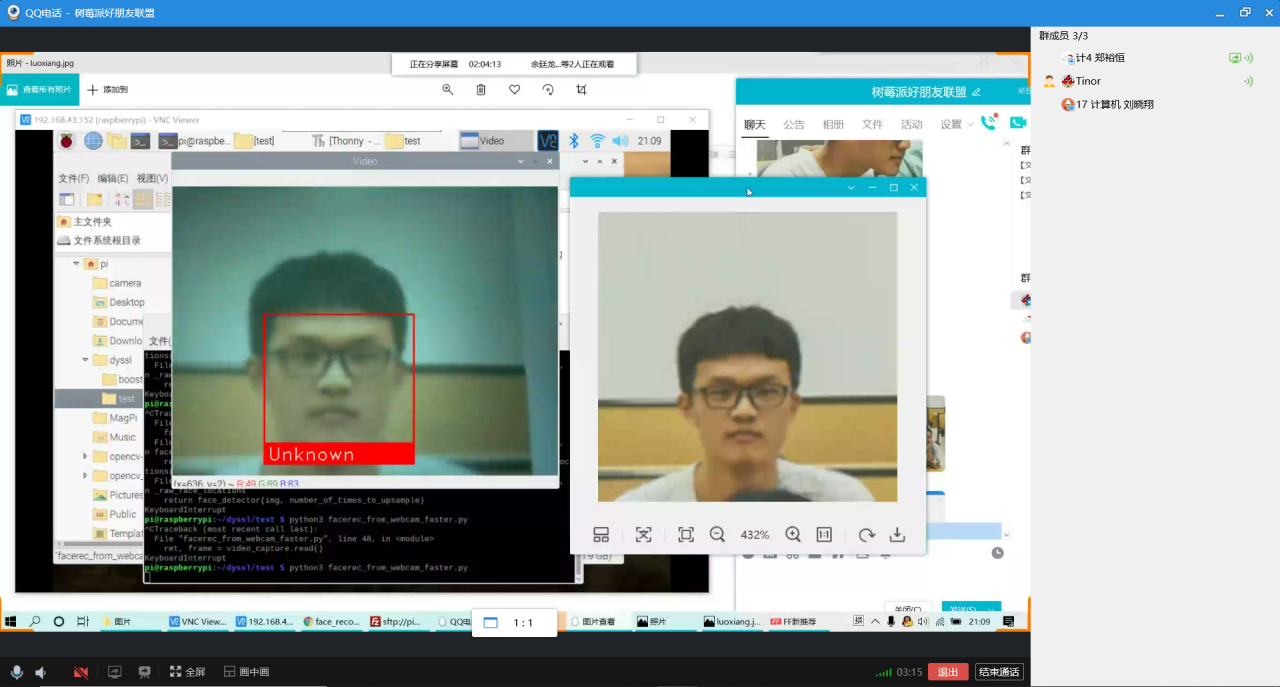
问题2:我们以大祥哥和罗翔老师作为学习样本测试人脸识别代码,如图1和图2所示,在分别识别他们的其他照片成功后,我们又找了小组同学的照片来测试,看看会不会误识别,结果还真的错把这个同学识别为罗翔老师,如图3所示。


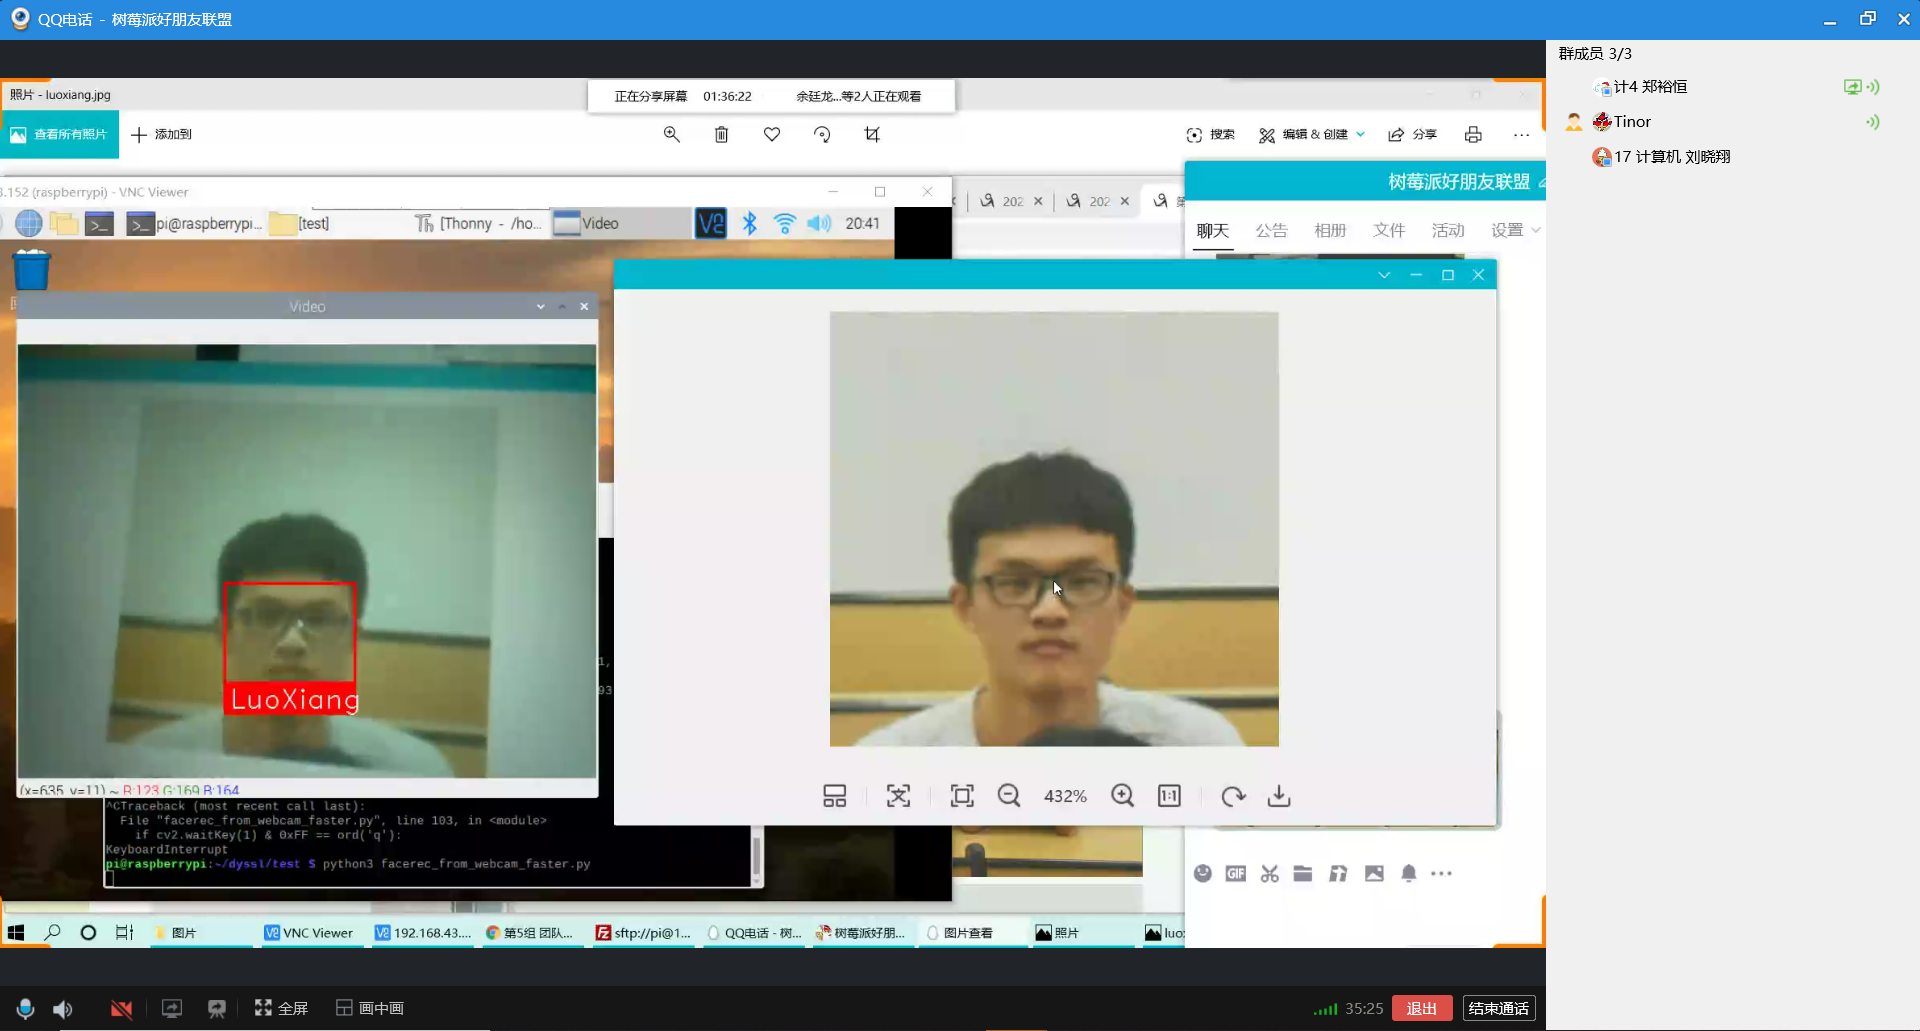
解决:经过小组成员一起查找资料,发现我们测试的人脸识别代码是有一个阈值需要手动设置的(就是下面这一行代码的tolerance),我们刚开始没有设置这个阈值,可能这个阈值的默认值过于“宽容”,所有就出现了误识别的问题。
我们先是把这个阈值设置为0.5,发现还是会误识别,然后我们进过反复的调试,最后在设置为0.3的时候就既可以正确识别真正的罗翔老师,又不会把小组同学误识别为罗翔老师
matches = face_recognition.compare_faces(known_face_encodings, face_encoding, tolerance=0.30)

问题3:在执行测试代码的时候,我们发现无论放什么照片,只要是个人就能成功识别
解决:经过阅读代码,我们发现在代码中在匹配特征值的时候,用的都是同一个特征值,所以会这个匹配结果永远都是成功的,解决方法就是将[]中的变量换成从训练样本图片中提取的特征值就好。

问题4:安装好opencv后发现不能导入cv2模块
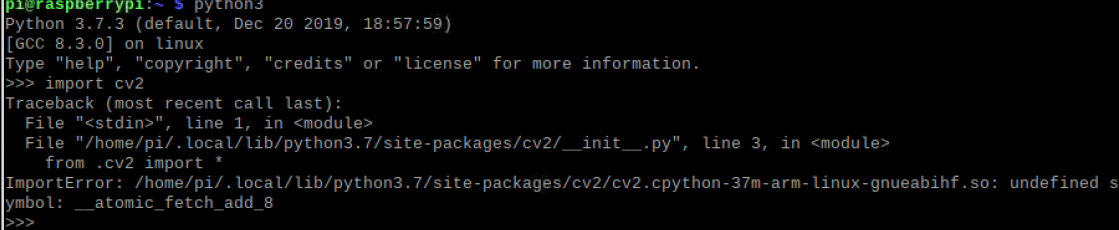
解决:在根目录下的.bashrc文件中加入以下代码,然后使用source .bashrc使只生效。
export LD_ sudo nano .bashrc PRELOAD=/usr/lib/arm-linux-gnueabihf/libatomic.so.1
问题5:跑代码时超时并提示资源暂时不可用

解决:看到资源暂时不可用的提示,估计是摄像头出问题了,经过小组成员一起查找资料,最后发现很肯能是摄像头没有接好,最后证实确实是摄像头没有接好。

(2)小组成员名单、分工
| 学号 | 姓名 | 分工 |
|---|---|---|
| 031702441 | 余廷龙 | 撰写博客、查阅资料、观看实操并寻找解决问题的方法 |
| 031702424 | 郑裕恒 | 实际操作、查阅资料 |
| 031702433 | 刘晓翔 | 撰写博客、查阅资料、观看实操并寻找解决问题的方法 |
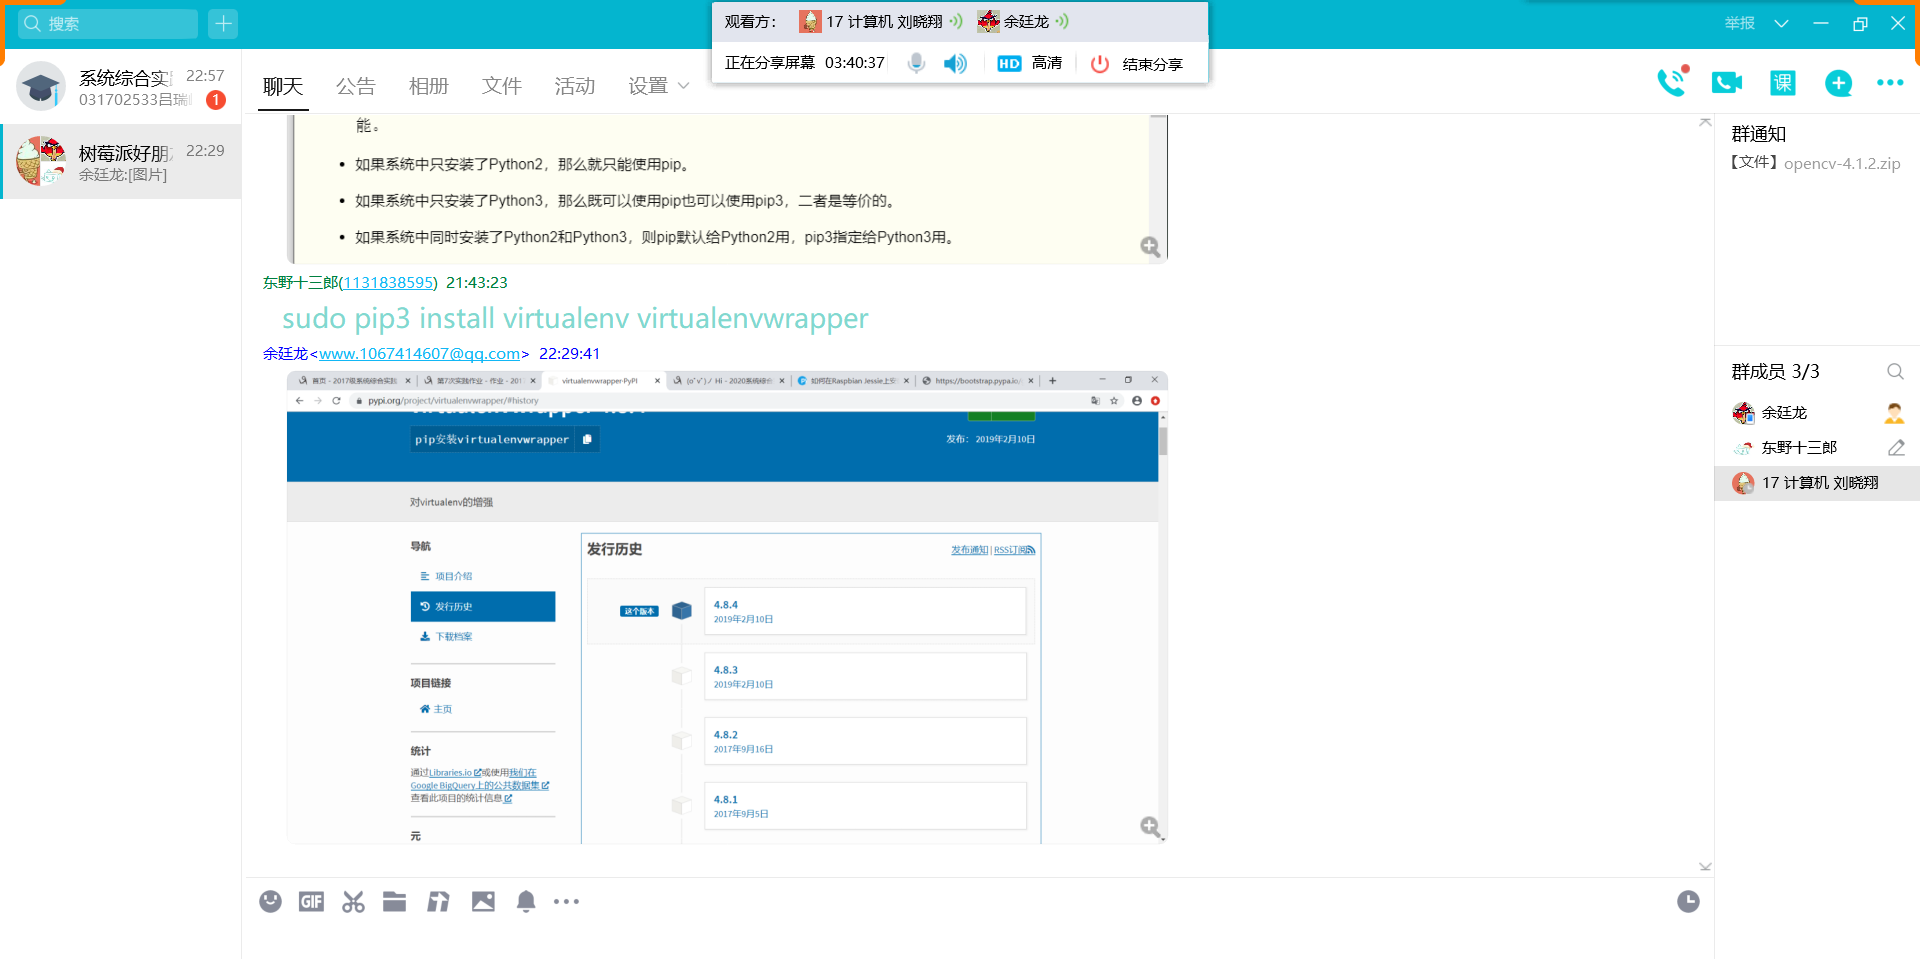
(3)在线协作照片
我们花费四个晚上完成这个实验
- day 1
使用屏幕共享,这一天就是用参考链接的方法安装opencv,卡在编译那一步。
- day 2
继续解决前一天编译的问题,弄到怀疑人生也没能解决,就在山重水复疑无路时,我们找到了一键安装的办法,由于都是在下载一些东西,分析屏幕有点多余,我们直接在QQ群内在线协作。

- day 3
opencv终于安装好了,这一天完成了人脸识别代码的测试和结合微服务的进阶操作的一部分。使用屏幕分享进行在线协作。
- day 4
最后一天完成了容器中的代码测试和选做题,使用屏幕分享进行在线协作。
