- Scrapy框架的安装
- pip install pywin32
- 下载 Twisted 包 pip install Twisted包的路径
- pip insatll scrapy
- Scrapy的基本使用
- 切换到开始项目的目录
- scrapy startproject my_first_spider 命令创建一个新项目
- scrapy genspider my_first_spider www.xxx.com
- 目录结构如下
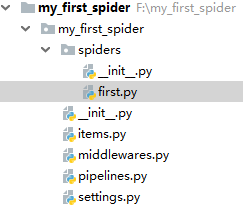
-
 first.py
# -*- coding: utf-8 -*-
import scrapy
from my_first_spider.items import MyFirstSpiderItem


class FirstSpider(scrapy.Spider):
    # 当前spider的名称
    name = 'first'

    # 允许的域名
    # allowed_domains = ['www.xxx.com']

    # 开始的第一个url
    start_urls = ['https://www.zhipin.com/c101010100/?query=python开发&page=1&ka=page-1']

    url = 'https://www.zhipin.com/c101010100/?query=python开发&page=%d&ka=page-1'
    page = 1

    # 用于解析的解析函数, 适用 xpath, 必传参数response
    def parse(self, response):
        div_list = response.xpath('//div[@class="job-list"]/ul/li')
        for div in div_list:
            job = div.xpath('./div/div[1]/h3/a/div[1]/text()').extract_first()
            salary = div.xpath('./div/div[1]/h3/a/span/text()').extract_first()
            company = div.xpath('./div/div[2]/div/h3/a/text()').extract_first()

            item = MyFirstSpiderItem()

            item['job'] = job
            item['salary'] = salary
            item['company'] = company

            yield item  # 将item对象返回给数据持久化管道(pipelines)

        # 分页爬取
        if self.page <= 7:
            print(f'第{self.page}页爬取完毕,开始爬取第{self.page+1}页')
            self.page += 1
            yield scrapy.Request(url=self.url%self.page, callback=self.parse)
-
item.py
# -*- coding: utf-8 -*-

# Define here the models for your scraped items
#
# See documentation in:
# https://doc.scrapy.org/en/latest/topics/items.html

import scrapy


# 与管道交互,实例化item对象进行交互,将爬取到的数据封装在对象中,以对象的方式进行文件间数据传递
class MyFirstSpiderItem(scrapy.Item):
    # define the fields for your item here like:
    # name = scrapy.Field()
    job = scrapy.Field()
    salary = scrapy.Field()
    company = scrapy.Field()
-
pipeline.py
# -*- coding: utf-8 -*-

# Define your item pipelines here
#
# Don't forget to add your pipeline to the ITEM_PIPELINES setting
# See: https://doc.scrapy.org/en/latest/topics/item-pipeline.html

import redis

# 写入boss.txt文件
class MyFirstSpiderPipeline(object):

    fp = None

    def open_spider(self, spider):
        print('开始爬虫')
        self.fp = open('./boss.txt', 'w', encoding='utf8')

    def close_spider(self, spider):
        self.fp.close()
        print('爬虫结束')

    def process_item(self, item, spider):

        self.fp.write(item['job']+':'+item['salary']+':'+item['company']+'
')

        return item


# MySQL 写入管道
class MySqlPipeline(object):
    conn = None
    cursor = None

    # 爬虫开始后如若使用管道, 首先执行open_spider方法(打开mysql数据库连接)
    def open_spider(self, spider):

        import pymysql.cursors

        self.conn = pymysql.connect(host='127.0.0.1', port=3306, user='root', password='root',
                                     db='scrapy', charset='utf8')
        # print('-----', self.conn)
        print('打开MySQL连接, 开始写入')

    # 第二步 执行process_item 函数, 在其中进行写入操作, 如若有在此管道之后还有管道 此方法要将item对象返回
    def process_item(self, item, spider):

        self.cursor = self.conn.cursor()
        try:
            self.cursor.execute(
                'INSERT INTO boss (job_name, salary, company) VALUES ("%s", "%s", "%s")' % (item['job'], item['salary'], item['company']))
            self.conn.commit()
        except Exception as e:
            self.conn.rollback()
            print('出现错误, 事件回滚')
            print(e)

    # 第三部爬虫结束后执行close_spider方法(关闭MySQL连接)
    def close_spider(self, spider):

        self.conn.close()
        self.cursor.close()
        print('MySQl 写入完毕')


# Redis 写入管道
class RedisPipeline(object):

    conn = None

    def open_spider(self, spider):
        self.conn = redis.Redis(host='127.0.0.1', port=6379)

    #  第二步 执行process_item 函数, 在其中进行写入操作, 如若有在此管道之后还有管道 此方法要将item对象返回
    def process_item(self, item, spider):
        import json
        dic = {
            'job_name': item['job'],
            'salary': item['salary'],
            'company': item['company']
        }
        try:
            self.conn.lpush('boss', json.dumps(dic))
            print('redis 写入成功')
        except Exception as e:

            print('redis 写入失败', e)
        return item
-
setting.py
# Configure item pipelines
# See https://doc.scrapy.org/en/latest/topics/item-pipeline.html
ITEM_PIPELINES = {
   'my_first_spider.pipelines.MyFirstSpiderPipeline': 300,
   'my_first_spider.pipelines.RedisPipeline': 301,
   'my_first_spider.pipelines.MySqlPipeline': 302,
}


BOT_NAME = 'my_first_spider'

SPIDER_MODULES = ['my_first_spider.spiders']
NEWSPIDER_MODULE = 'my_first_spider.spiders'


# Crawl responsibly by identifying yourself (and your website) on the user-agent
USER_AGENT = 'Mozilla/5.0 (Windows NT 10.0; Win64; x64) AppleWebKit/537.36 (KHTML, like Gecko) Chrome/71.0.3578.98 Safari/537.36'

# Obey robots.txt rules
ROBOTSTXT_OBEY = False
-
- 在命令行中输入 scrapy crawl first --nolog --nolog不显示日志
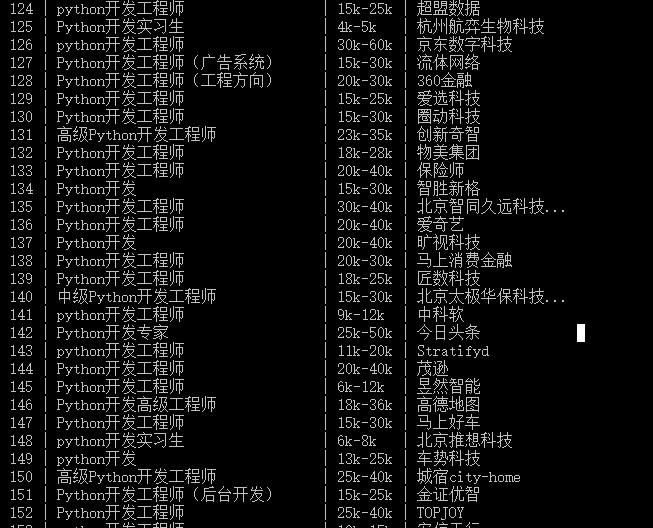
- 爬取成功