最近在Linux上搞Qt, vim环境还用不太习惯, QtCreator之前使用时莫名其妙崩溃然后丢失代码之后就被我彻底放弃了, 于是研究了一下用VsCode进行Qt开发.
首先是系统环境和下载安装包:
Linux系统使用Ubuntu18.04 LTS.
Qt官网下载需要注册账号,但实际上官方有不需要注册账号的列表下载通道: http://download.qt.io, 在official_releases/qt/分支中找到自己想要的版本,下载 .run 文件即可, 关于Qt环境搭建, 网上有很多教程, 不再赘述.
VsCode直接官网下载最新版的 .deb, 下载成功使用dpkg -i命令安装即可.
安装成功后输入qmake --version进行检查, 出现下图内容说明Qt环境已经ok了, 如果没找到qmake命令, 在系统环境变量中添加qmake路径

接下来配置VsCode
在命令行输入code即可打开vscode编辑器,打开编辑器后创建一个测试文件夹test, 在test目录中创建如下结构
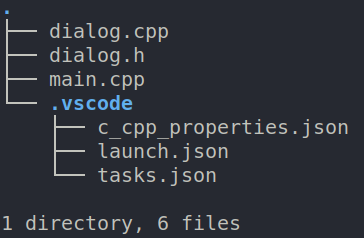
2个cpp和1个header用于测试, 代码如下
dialog.h
 1 #ifndef _MAIN_DIALOG_
 2 #define _MAIN_DIALOG_
 3
 4 #include <QDialog>
 5 #include <QLabel>
 6
 7
 8
 9 class Dialog : public QDialog
10 {
11   Q_OBJECT
12
13 public:
14   Dialog(QWidget *parent = 0);
15   ~Dialog();
16
17 private:
18   QLabel *label_test;
19 }
20
21 #endif
dialog.cpp
 1 #include <QLayout>
 2 #include "dialog.h"
 3
 4 Dialog::Dialog(QWidget *parent) : QDialog(parent)
 5 {
 6   this->setWindowTitle("hello");
 7
 8   label_test = new QLabel(this);
 9   label_test->setText("HelloWorld");
10
11   QGridLayout *main_layout = new QGridLayout(this);
12   main_layout->addWidget(label_test, 0, 0);
13 }
14
15 Dialog::~Dialog()
16 {
17 }
main.cpp
 1 #include <QApplication>
 2 #include "dialog.h"
 3
 4 int main(int argc, char *argv[])
 5 {
 6   QApplication a(argc, argv);
 7
 8   Dialog dialog;
 9   dialog.show();
10
11   return a.exec();
12 }
接下来配置.vscode文件夹中的json
先配置tasks.json, 配置一些任务项, 并在生成项目之前先调用这些任务项
 1 {
 2     "version": "2.0.0",
 3     "tasks": [
 4         {
 5             "type": "shell",
 6             "label": "qmake build makefile",
 7             "command": "/home/tsing/Qt5/5.9/gcc_64/bin/qmake",
 8             "args": [],
 9             "options": {},
10             "problemMatcher": [],
11             "group": "build"
12         },
13         {
14             "type": "shell",
15             "label": "make build activefile",
16             "command": "/usr/bin/make",
17             "args": [],
18             "options": {},
19             "problemMatcher": [],
20             "group": "build"
21             "dependsOn": ["qmake build makefile"]
22         }
23     ]
24 }
上面一共配置了两个任务项
第一个任务项qmake build makefile用于对当前项目生成makefile文件
第二个任务项make build activefile依赖于第一个任务项, 用于针对makefile文件生成当前项目的可执行文件
两个任务项中"command"标识了要运行的指令的地址, 需要根据自己pc的环境进行调整
第二个任务项使用make指令, 需提前安装
接下来配置launch.json, 配置vscode运行当前项目的可执行文件前的工作
 1 {
 2     "version": "0.2.0",
 3     "configurations": [
 4         {
 5             "name": "qt build and debug active file",
 6             "type": "cppdbg",
 7             "request": "launch",
 8             "program": "${fileDirname}/${workspaceRootFolderName}",
 9             "args": [],
10             "stopAtEntry": false,
11             "cwd": "${workspaceFolder}",
12             "environment": [],
13             "externalConsole": false,
14             "MIMode": "gdb",
15             "setupCommands": [
16                 {
17                     "description": "为 gdb 启用整齐打印",
18                     "text": "-enable-pretty-printing",
19                     "ignoreFailures": true
20                 }
21             ],
22             "prelaunchTask": "make build activefile",
23             "miDebuggerPath": "/usr/bin/gdb"
24         }
25     ]
26 }
launch.json中配置了调试的各项工作, "program"指定了要运行的程序, "prelaunchTask"指定了运行前要执行的task, "miDebuggerPath"指定了调试工具gdb的路径
目前为止VsCode还不能对代码进行智能识别和Qt相关代码高亮, 配置c_cpp_properties.json如下
 1 {
 2     "version": 4,
 3     "configurations": [
 4         {
 5             "name": "gcc_64",
 6             "intelliSenseMode": "gcc-x64",
 7             "includePath": [
 8                 "/home/tsing/Qt5/5.9/gcc_64/include",
 9                 "/home/tsing/Qt5/5.9/gcc_64/include/QtCore",
10                 "/home/tsing/Qt5/5.9/gcc_64/include/QtGui",
11                 "/home/tsing/Qt5/5.9/gcc_64/include/QtGui",
12                 "/home/tsing/Qt5/5.9/gcc_64/include/QtWidgets",
13                 "${workspaceRoot}"
14             ],
15             "browse": {
16                 "path": [
17                     "/home/tsing/Qt5/5.9/gcc_64/include",
18                     "/home/tsing/Qt5/5.9/gcc_64/include/QtCore",
19                     "/home/tsing/Qt5/5.9/gcc_64/include/QtGui",
20                     "/home/tsing/Qt5/5.9/gcc_64/include/QtGui",
21                     "/home/tsing/Qt5/5.9/gcc_64/include/QtWidgets",
22                     "${workspaceRoot}"
23                 ]
24             },
25             "compilerPath": "/usr/bin/gcc",
26             "cStandard": "c11",
27             "cppStandard": "c++17"
28         }
29     ]
30 }
"includePath"和"path"标定了查找的headers的位置, "compilerPath"标定了分析用的编译器的路径, 这里我使用的gcc编译器, 需要提前安装
到目前为止所有准备工作都已经就绪, 在启动程序之前要先用qmake生成qt project, 这一步由于我使用5.X版本的原因, 需要修改 .pro文件, 所以我没有把这一步集成到tasks.json里
首先在命令行界面中将工作目录切换到test
使用qmake -project命令生成 .pro文件
在 .pro 文件中增加一行内容: QT += widgets core gui
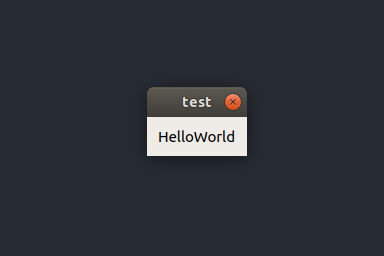
之后F5运行出现对话框
切回命令行 tree -a看一下文件目录结构能看到生成了makefile和qt用的moc打头的文件
如果需要断点调试, 清理一下项目(moc打头的qt宏文件, .o文件, Makefile以及生成的可执行程序), 在.pro文件中添加CONFIG += debug即可
至此开发环境搭建成功
目前只是粗略的搭建了一下环境, 还有很多可以优化的地方让开发过程更简便, 有机会再研究