这篇主要讲解springmvc的基本的使用,这里以helloworld项目为例。
目录结构:

1. 新建 web 项目 :springmvc_helloworld

2. 在 WebRootWEB-INFlib 下,导入jar包
commons-logging-1.1.1.jar
spring-beans-4.1.6.RELEASE.jar
spring-context-4.1.6.RELEASE.jar
spring-core-4.1.6.RELEASE.jar
spring-expression-4.1.6.RELEASE.jar
spring-web-4.1.6.RELEASE.jar
spring-webmvc-4.1.6.RELEASE.jar
3. 在 WebContentWEB-INF下,编写web.xml 文件
<?xml version="1.0" encoding="UTF-8"?>
<web-app xmlns:xsi="http://www.w3.org/2001/XMLSchema-instance" xmlns="http://java.sun.com/xml/ns/javaee" xsi:schemaLocation="http://java.sun.com/xml/ns/javaee http://java.sun.com/xml/ns/javaee/web-app_3_0.xsd" id="WebApp_ID" version="3.0">
  <display-name>01springmvc_helloworld</display-name>
  <servlet>
      <servlet-name>springmvc</servlet-name>
      <servlet-class>org.springframework.web.servlet.DispatcherServlet</servlet-class>
  </servlet>
  <servlet-mapping>
      <servlet-name>springmvc</servlet-name>
      <url-pattern>*.do</url-pattern>
  </servlet-mapping>
  <welcome-file-list>
    <welcome-file>index.html</welcome-file>
    <welcome-file>index.htm</welcome-file>
    <welcome-file>index.jsp</welcome-file>
    <welcome-file>default.html</welcome-file>
    <welcome-file>default.htm</welcome-file>
    <welcome-file>default.jsp</welcome-file>
  </welcome-file-list>
</web-app>
上面代码中标识的 springmvc 为前端控制器
4. 在 src 下编写 HelloController类
package cn.vincent.controller;

import javax.servlet.http.HttpServletRequest;
import javax.servlet.http.HttpServletResponse;

import org.springframework.web.servlet.ModelAndView;
import org.springframework.web.servlet.mvc.Controller;
/**
 * 实现Controller接口,默认处理方法是handleRequest
 *
 */
public class HelloController implements Controller{

    @Override
    public ModelAndView handleRequest(HttpServletRequest req,
            HttpServletResponse resp) throws Exception {
        // TODO Auto-generated method stub
        System.out.println("hello world 被执行");
        ModelAndView mv=new ModelAndView();
        mv.addObject("msg", "第一个springmvc应用程序");
        mv.setViewName("hello");

        return mv;
    }

}
5. 编写 spring mvc 配置文件,该配置文件默认放于 WEB-INF 下,并且文件名为 前端控制器名-servlet.xml
这里的名称为 springmvc-servlet.xml
<?xml version="1.0" encoding="UTF-8"?>
<beans xmlns="http://www.springframework.org/schema/beans"
    xmlns:xsi="http://www.w3.org/2001/XMLSchema-instance"
    xmlns:p="http://www.springframework.org/schema/p"
    xmlns:context="http://www.springframework.org/schema/context"
    xsi:schemaLocation="
        http://www.springframework.org/schema/beans
        http://www.springframework.org/schema/beans/spring-beans.xsd
        http://www.springframework.org/schema/context
        http://www.springframework.org/schema/context/spring-context.xsd">

  <!-- 配置handlerMapping -->
    <bean class="org.springframework.web.servlet.handler.BeanNameUrlHandlerMapping"/>
    <!-- 配置handlerAdapter -->
    <bean class="org.springframework.web.servlet.mvc.SimpleControllerHandlerAdapter"/>
    <!-- 配置Controller -->
    <bean name="/hello.do" class="cn.vincent.controller.HelloController"/>
    <!-- 配置视图解析器 -->
    <bean id="viewResolver"
        class="org.springframework.web.servlet.view.UrlBasedViewResolver">
        <property name="viewClass" value="org.springframework.web.servlet.view.JstlView"/>
           <!-- 为响应的视图名称加上前缀  -->
        <property name="prefix" value="/WEB-INF/jsp/"/>
        <!-- 为响应的视图名称加上后缀  -->
        <property name="suffix" value=".jsp"/>
    </bean>
</beans>
6. 编写 jsp
在 WebRoot/WEB-INF/jsp 文件夹下 添加 hello.jsp 文件
hello.jsp
<%@ page language="java" contentType="text/html; charset=utf-8"
    pageEncoding="utf-8"%>
<!DOCTYPE html PUBLIC "-//W3C//DTD HTML 4.01 Transitional//EN" "http://www.w3.org/TR/html4/loose.dtd">
<html>
<head>
<meta http-equiv="Content-Type" content="text/html; charset=utf-8">
<title>springmvc第一个程序</title>
</head>
<body>
    ${msg }
</body>
</html>
7.测试
这里可以直接这样输入:
http://localhost:8080/springmvc_helloworld/hello.do
也可以修改这样:
(1)在项目上右键,点击属性(Properties)

(2)修改 context-root
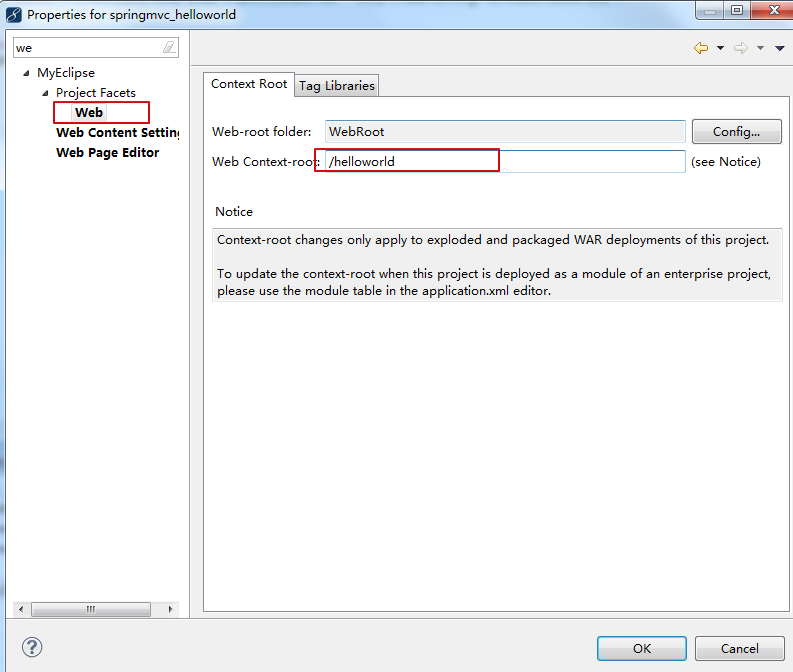
之后,重新部署,运行项目,输入地址
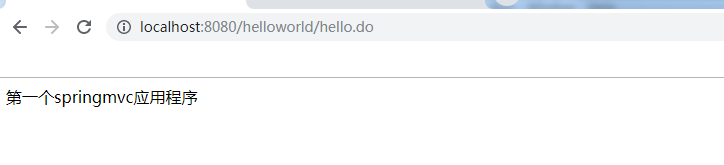
http://localhost:8080/helloworld/hello.do
8.效果如下
github地址:https://github.com/Vincent-yuan/springmvc_helloworld