第十一单元 系统恢复技术
一、系统引导过程概述
通电->bios 初始化->grub2 磁盘引导阶段->grub2 文件引导阶段->指定 boot 所在分区->启动内核,只读挂载/设备->启动 init 程序进入初始化阶段->启动 systemd 初始化进程->读取 /etc/systemd/中的文件->启动程序->启动登陆环境
二、bios 初始化
1.基本输入 / 输出系统 ( BIOS ) 是内置于标准 x86/x86-64硬件的固件接口 , 将硬件置于已知状态并准备好系统以加载操作系统
2.出现什么情况 ?
– 检测并初始化硬件
– 确定从中引导的设备
3.可能出现了什么错误 ?
– 错误或异常 BIOS 设置
– 错误引导设备顺序
4.可以如何中断或影响 ?
– 按特定于供应商的键
– 使用特定于供应商的配置实用程序
– 通常 , <F12> 可以执行一次引导顺序覆盖
三、grub 磁盘引导阶段
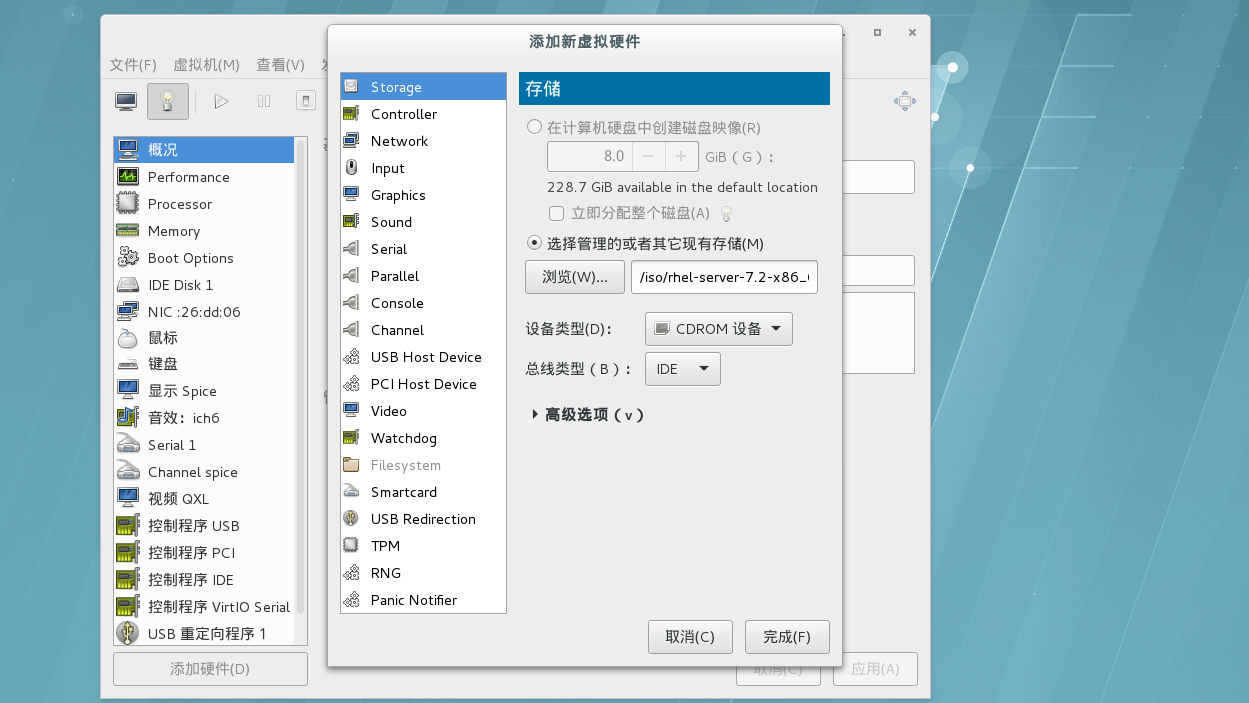
1.MBR
– mbr 的作用是为了记录 /boot 目录所在分区位置
– 磁盘的 0 磁道 1 扇区的前 446 字节
– dd if=/dev/zero of=/dev/xda bs=446 count=1
– grub2-install /dev/xda
eg:[root@localhost ~]# dd if=/dev/zero of=/dev/vda bs=446 count=1
记录了1+0 的读入
记录了1+0 的写出
446字节(446 B)已复制,0.000172568 秒,2.6 MB/秒
[root@localhost ~]# reboot
Connection to 172.25.254.142 closed by remote host.
Connection to 172.25.254.142 closed.
[kiosk@foundation42 Desktop]$ rht-vmctl view desktop
PS:图片
[kiosk@foundation42 Desktop]$ su -
密码:
上一次登录:Mon Apr 10 16:31:52 CST 2017pts/2 上
[root@foundation42 ~]# virt-manager
[root@foundation42 ~]#
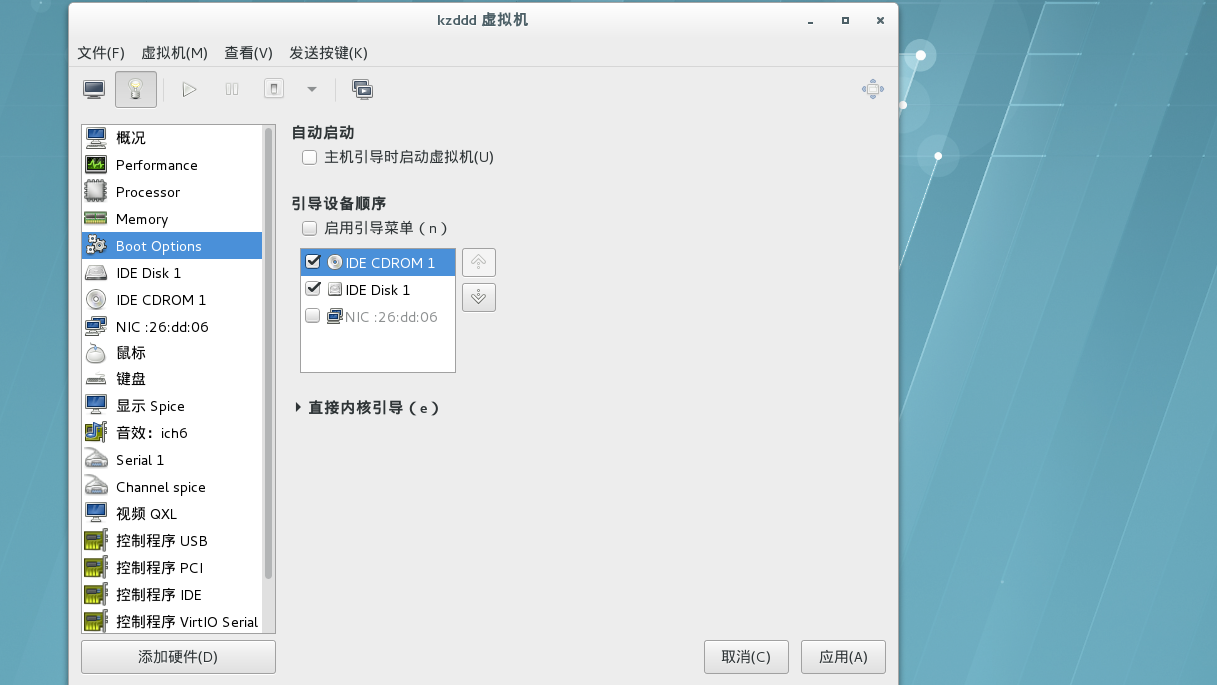
PS:图片
四、grub 文件引导阶段
1./boot/grub2/grub.cfg
– 指定 /boot 分区位置
– 加载内核
– 启动系统初始化进程
– grub2-mkconfig
eg:[root@localhost ~]# cat /boot/grub2/grub.cfg
set root='hd0,msdos1'
linux16 /boot/vmlinuz-3.10.0-123.el7.x86_64
initrd16 /boot/initramfs-3.10.0-123.el7.x86_64.img
[root@localhost ~]# df
文件系统 1K-块 已用 可用 已用% 挂载点
/dev/vda1 10473900 6807112 3666788 65% /
devtmpfs 927072 0 927072 0% /dev
tmpfs 942660 84 942576 1% /dev/shm
tmpfs 942660 17036 925624 2% /run
tmpfs 942660 0 942660 0% /sys/fs/cgroup
/dev/sr0 3654720 3654720 0 100% /run/media/root/RHEL-7.0 Server.x86_64
[root@localhost ~]# rm -fr /boot/grub2/grub.cfg
[root@localhost ~]# grub2-mkconfig >/boot/grub2/grib.cfg
Generating grub configuration file ...
Found linux image: /boot/vmlinuz-3.10.0-123.el7.x86_64
Found initrd image: /boot/initramfs-3.10.0-123.el7.x86_64.img
Found linux image: /boot/vmlinuz-0-rescue-946cb0e817ea4adb916183df8c4fc817
Found initrd image: /boot/initramfs-0-rescue-946cb0e817ea4adb916183df8c4fc817.img
done
[root@localhost ~]# rm -fr /boot/grub2/grub.cfg
[root@localhost ~]# reboot
Connection to 172.25.254.142 closed by remote host.
Connection to 172.25.254.142 closed.
[kiosk@foundation42 Desktop]$ su -
密码:
上一次登录:Tue Apr 11 11:19:01 CST 2017pts/1 上
[root@foundation42 ~]# virt-manager
[root@foundation42 ~]#
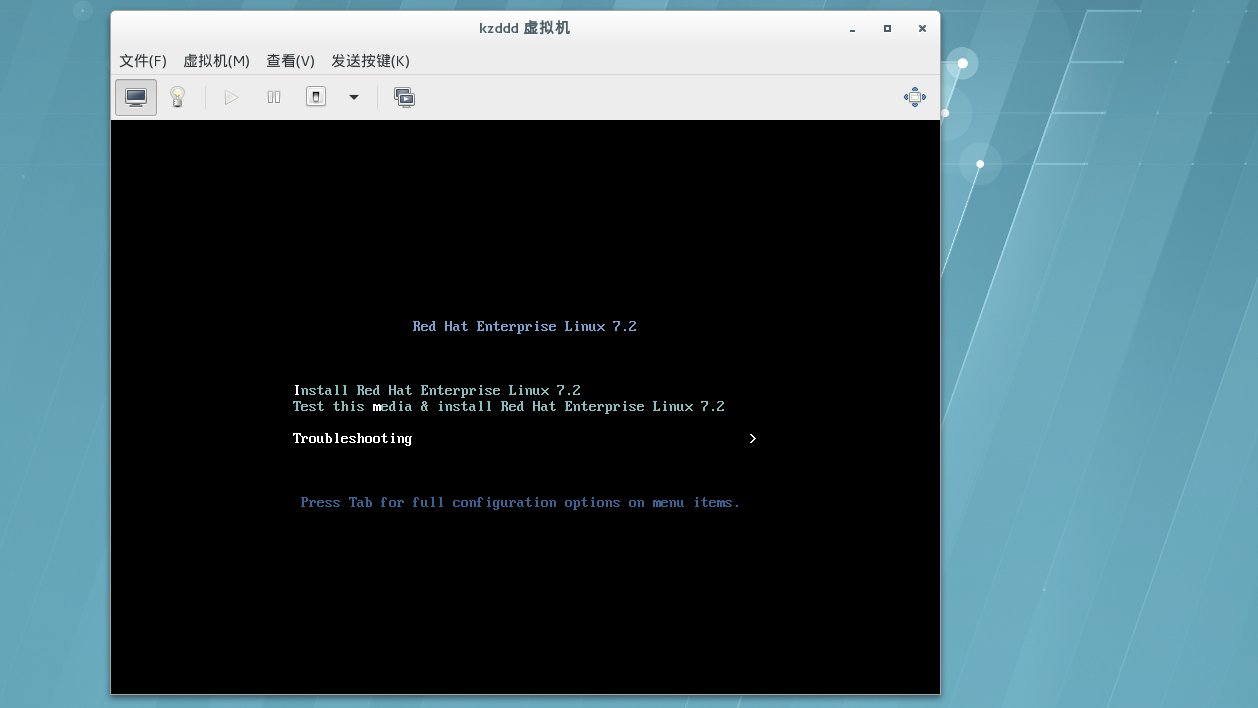
PS:图片
五、内核引导阶段
1.检测硬件设备
2.设备驱动初始化
3.将/只读挂在
4.载入初始进程 systemd
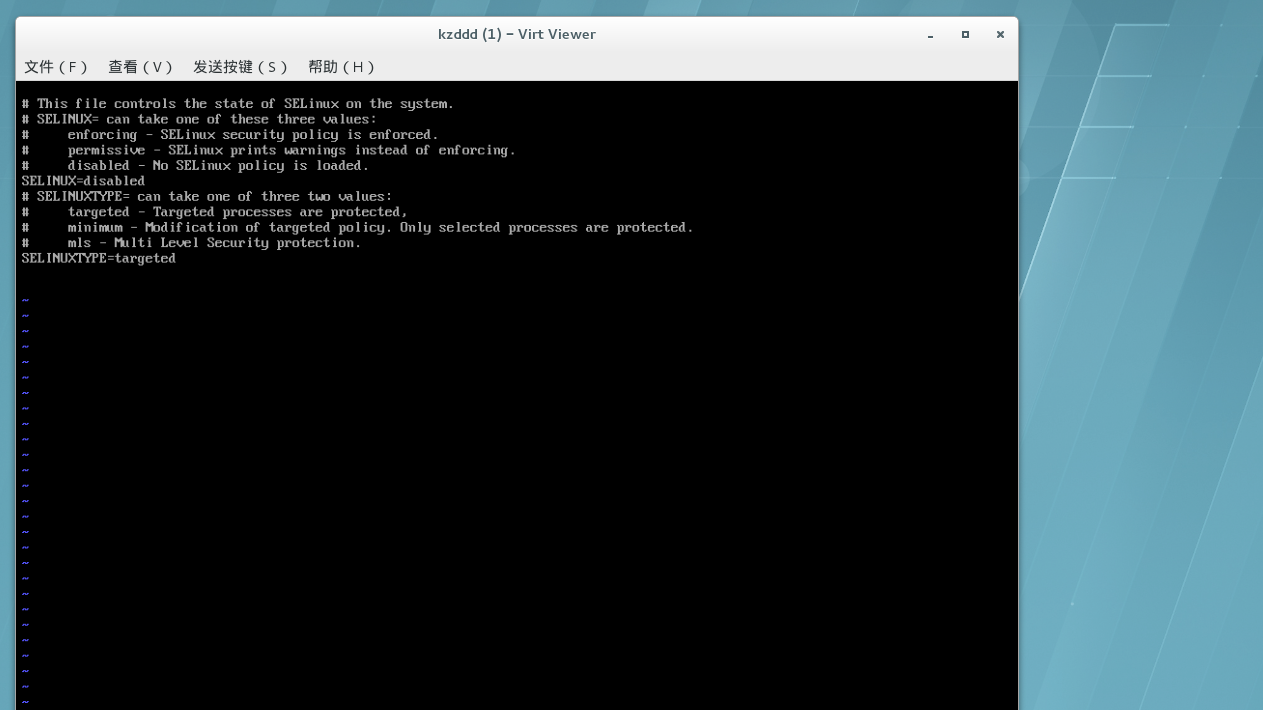
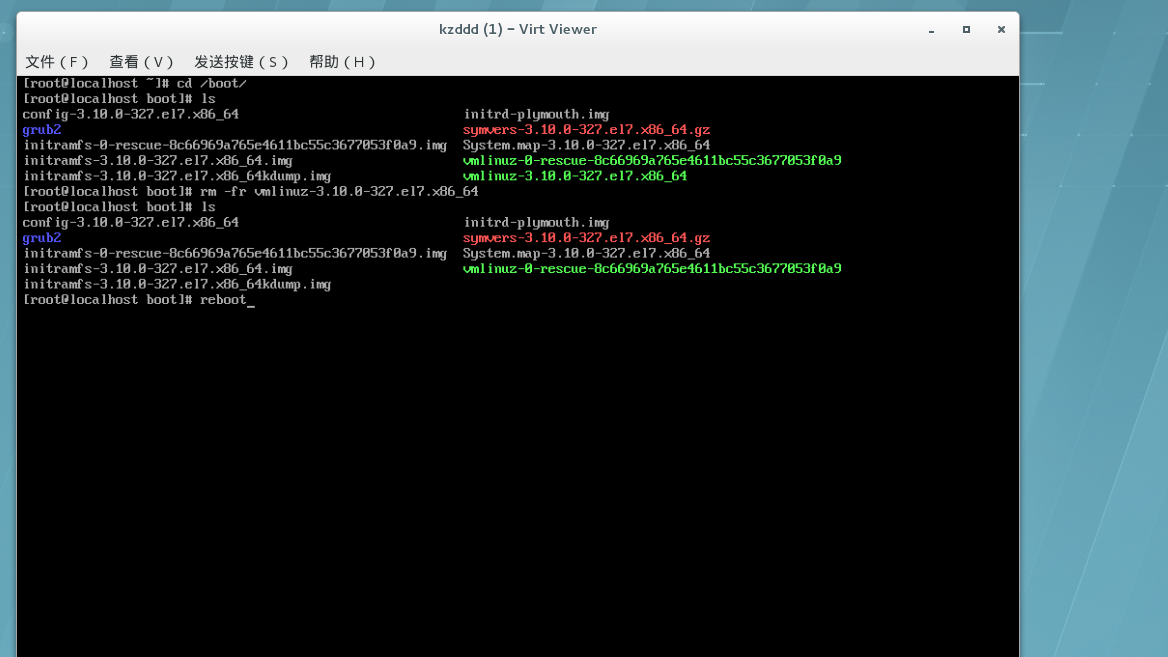
5.内核文件丢失请重新安装内核
eg:1.不小心删掉vmlinuz-$(uname -r)
#关掉selinux
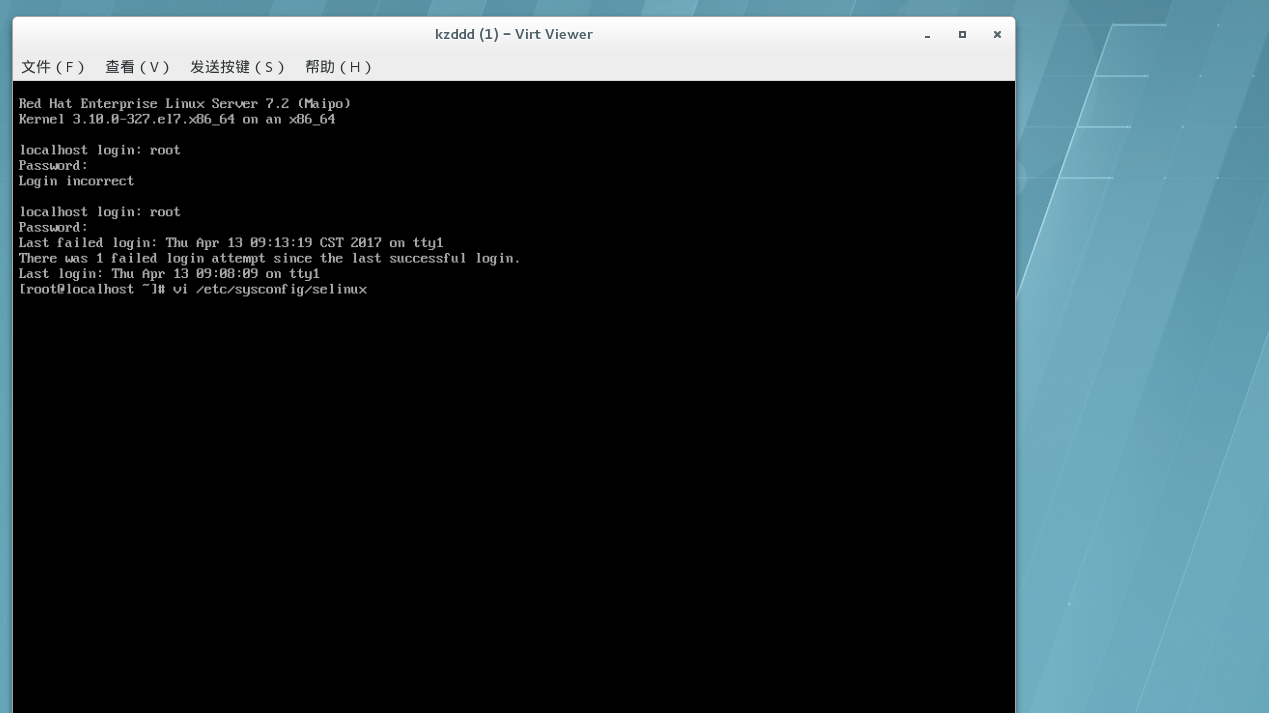
#不小心删掉vmliuz-$(uname -r),reboot
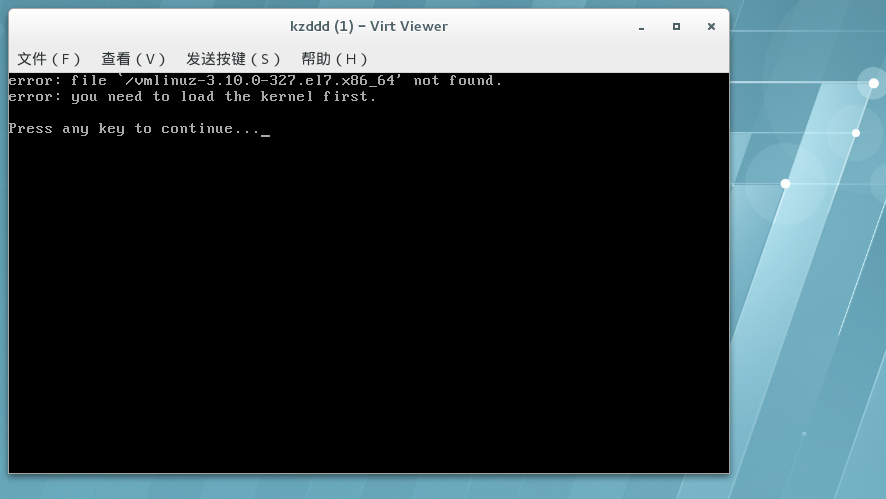
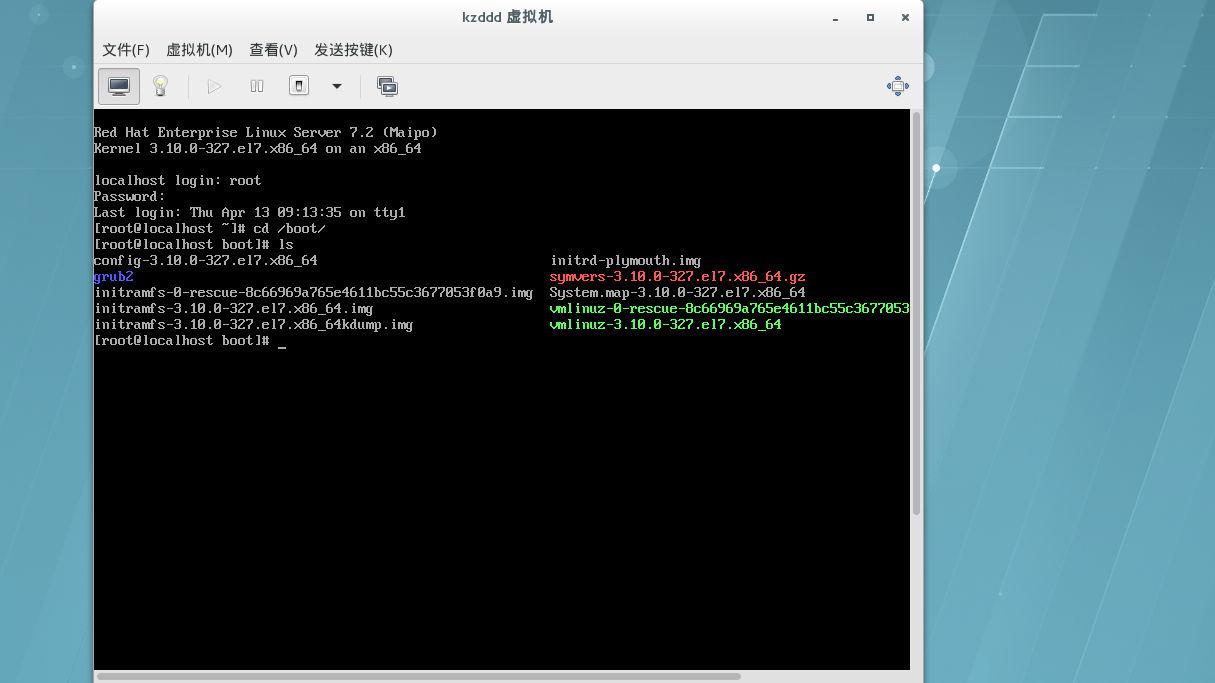
#修复
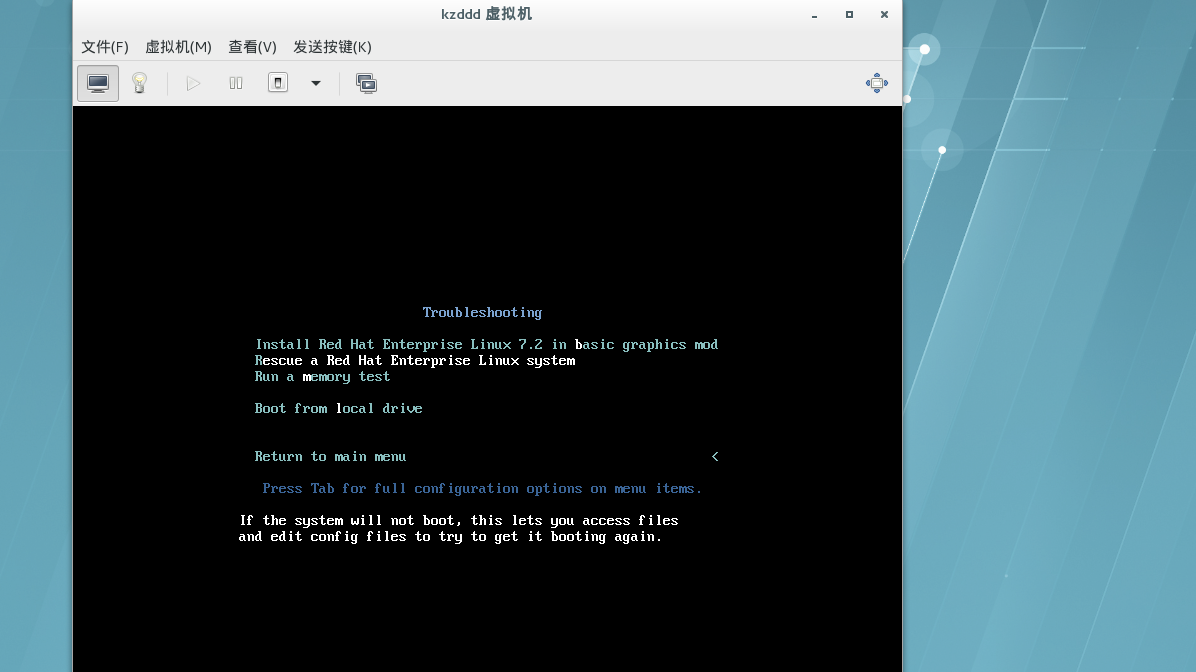

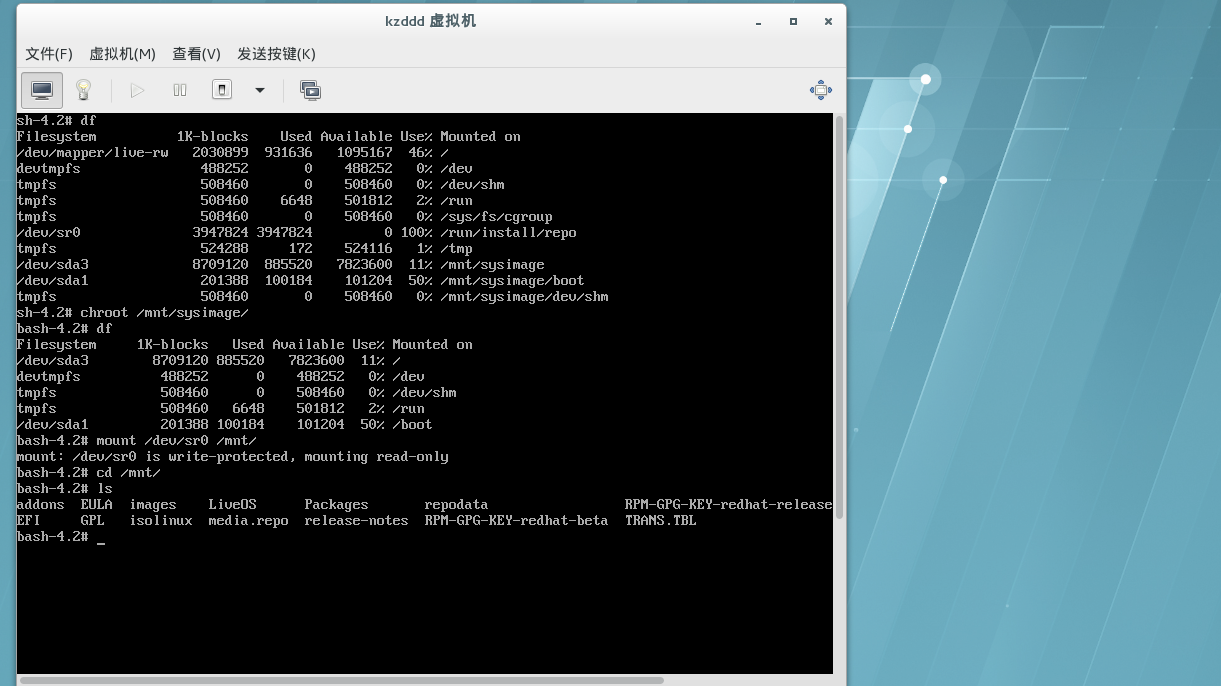
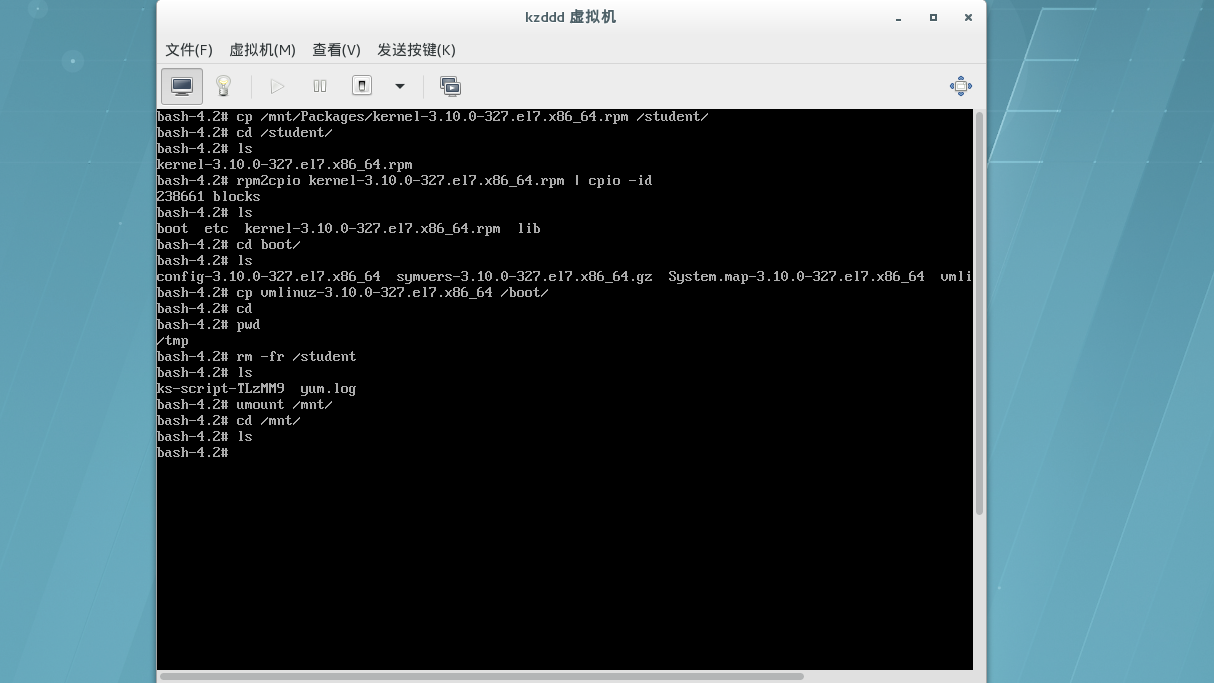
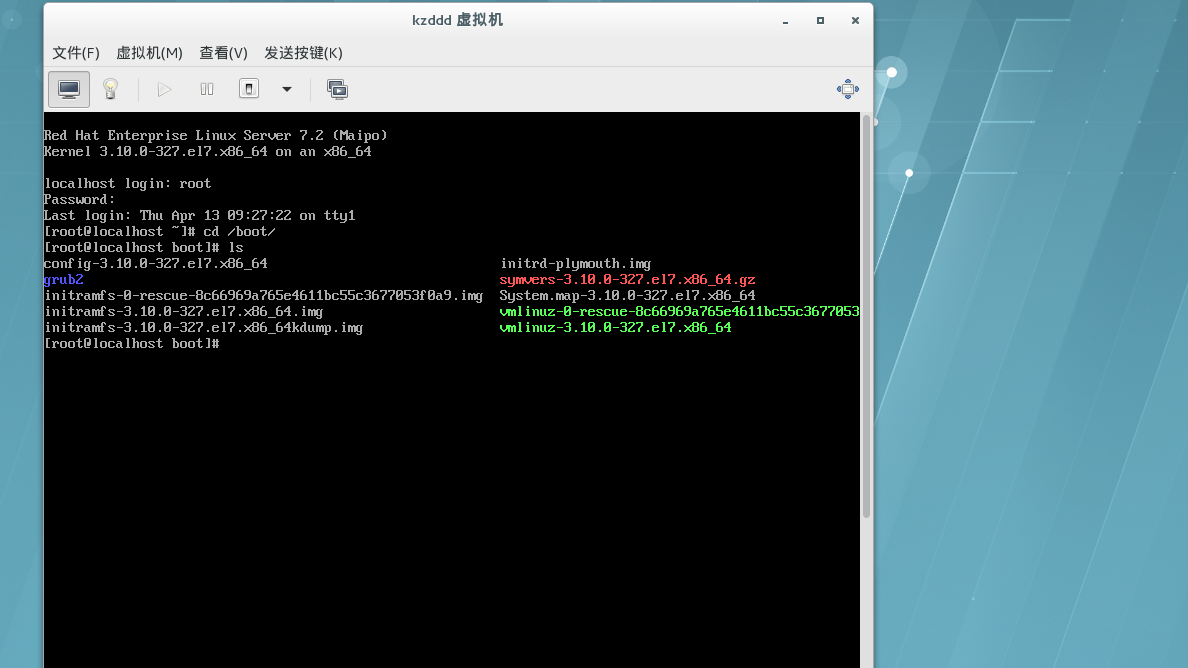
#修复成功
2.不小心删掉initrd16-$(uname -r).img
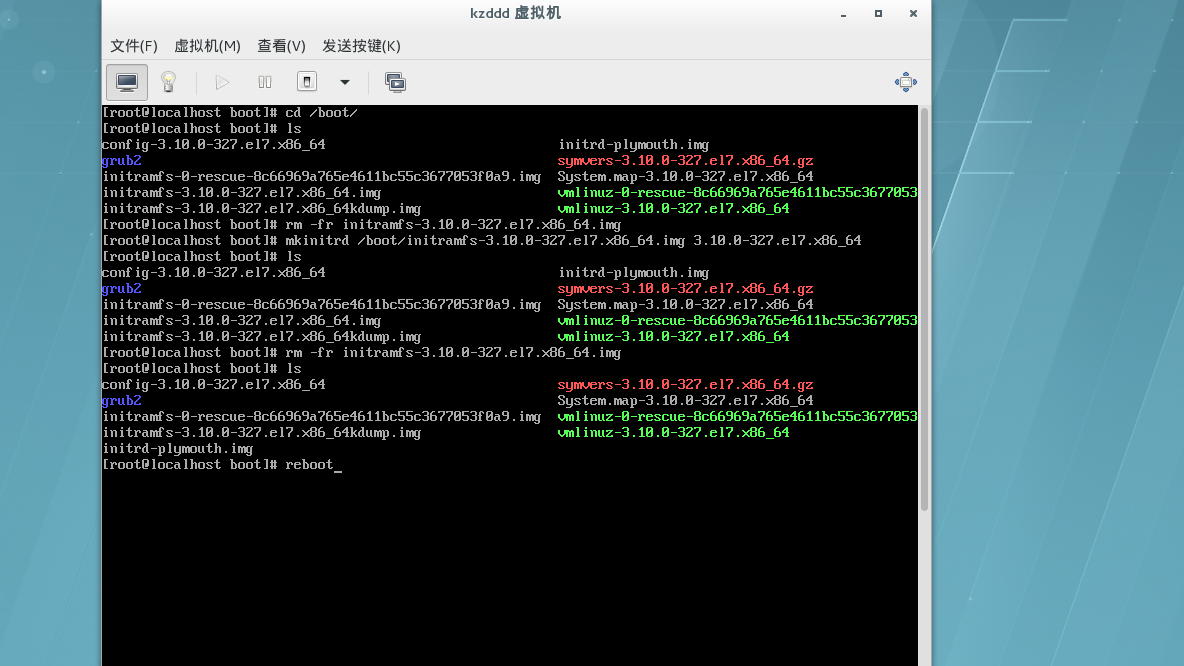

#修复

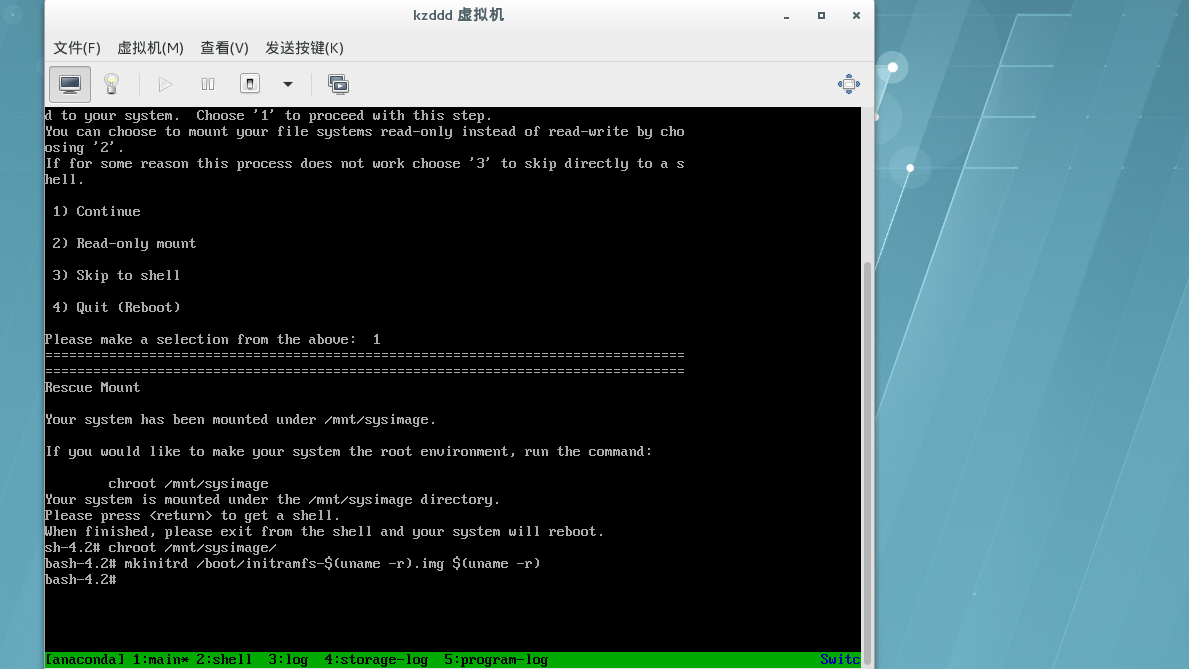
#修复成功
六、systemd 初始化
1.开启 selinux 和 systemd-tools
2.加载内核参数
3.加载系统时钟,键盘,主机名称
4.读写挂载 / 文件系统
5.激活 raid , lvm 设备
6.激活系统配额
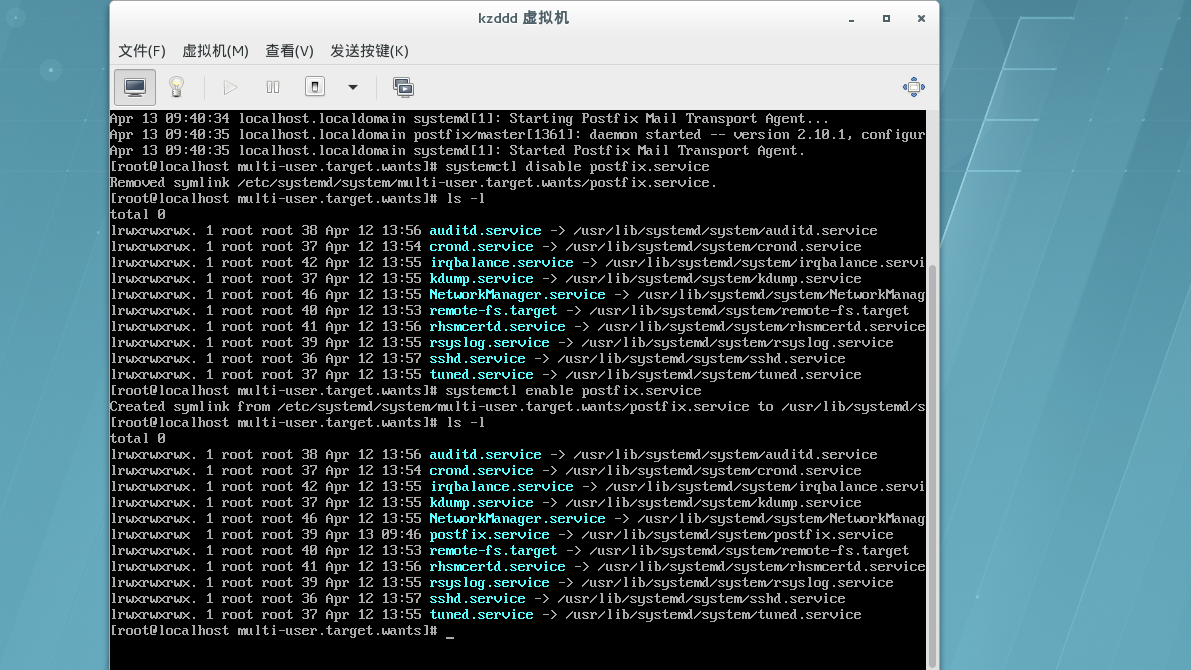
7.启动 multi-user.target.wants 中的所有服务脚本
8.启用虚拟控台
9.启动图形
七、启动级别
runlever0.target -> poweroff.target
runlever1.target -> rescue.target
runlever2.target -> multi-user.target
runlever3.target -> multi-user.target
runlever4.target -> multi-user.target
runlever5.target -> grapical.target
runlever6.target -> reboot.target
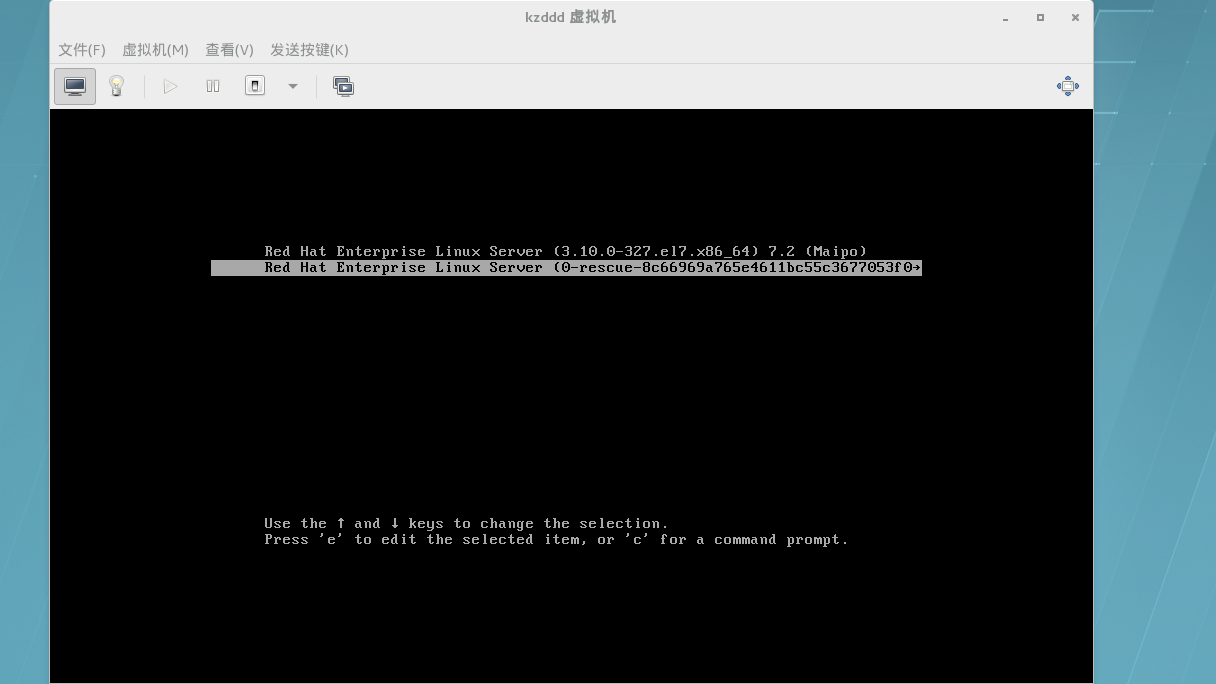
eg:修改启动级别后,修复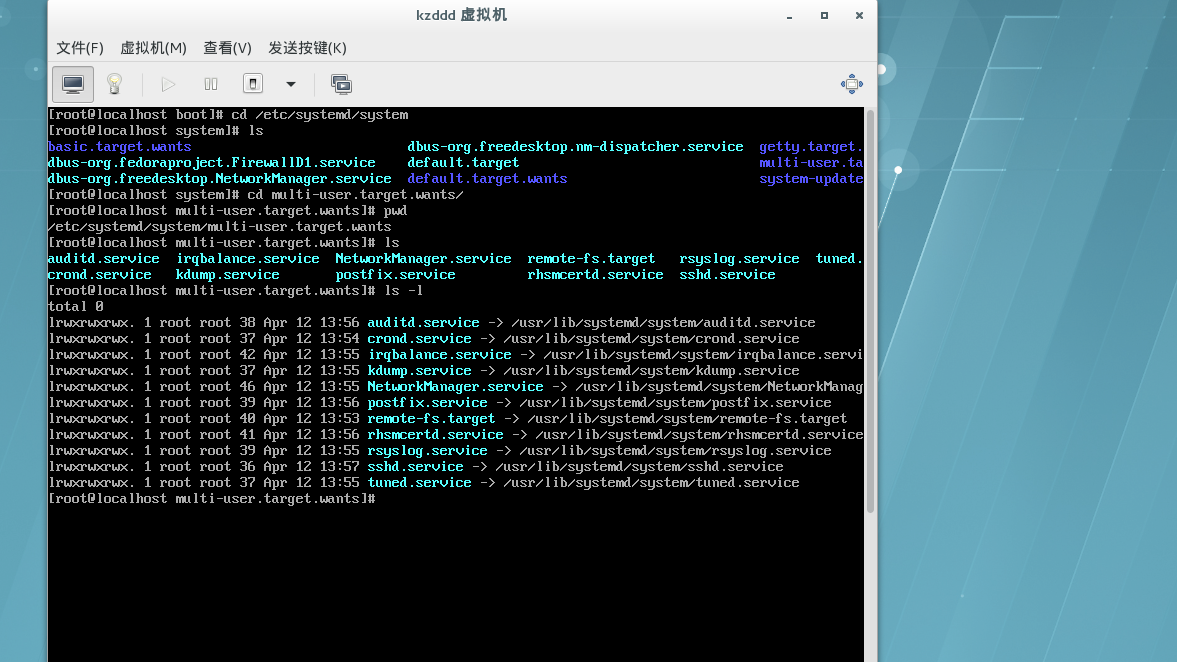
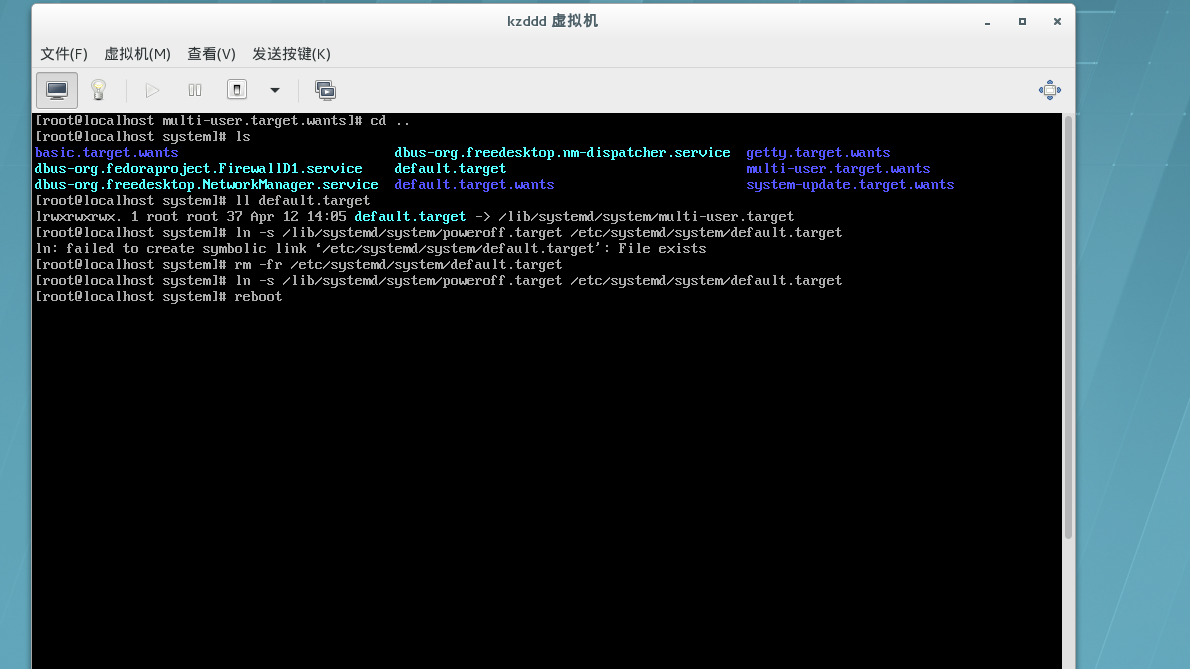
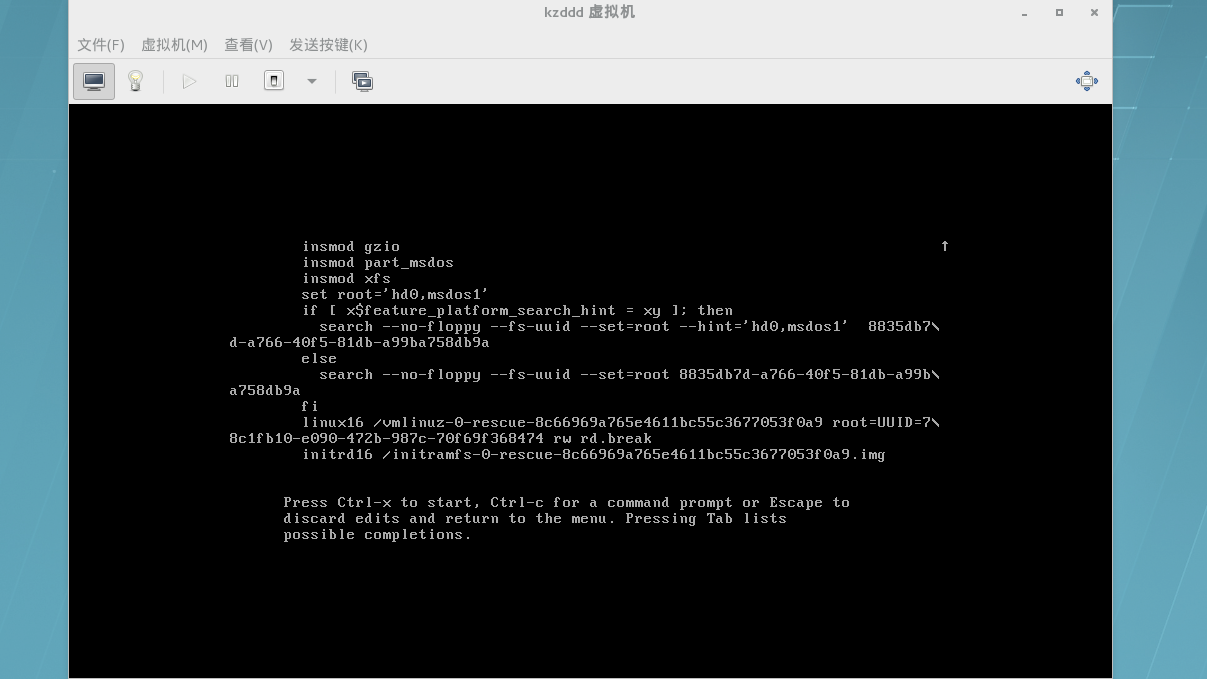
八、设定启动级别
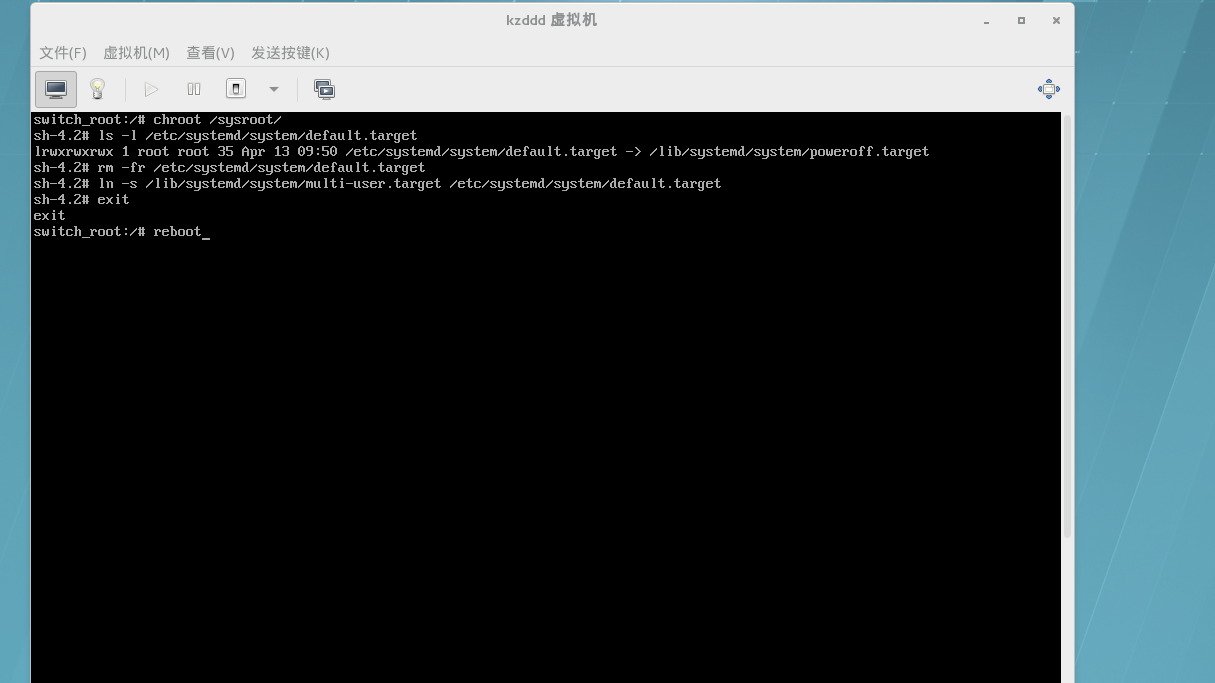
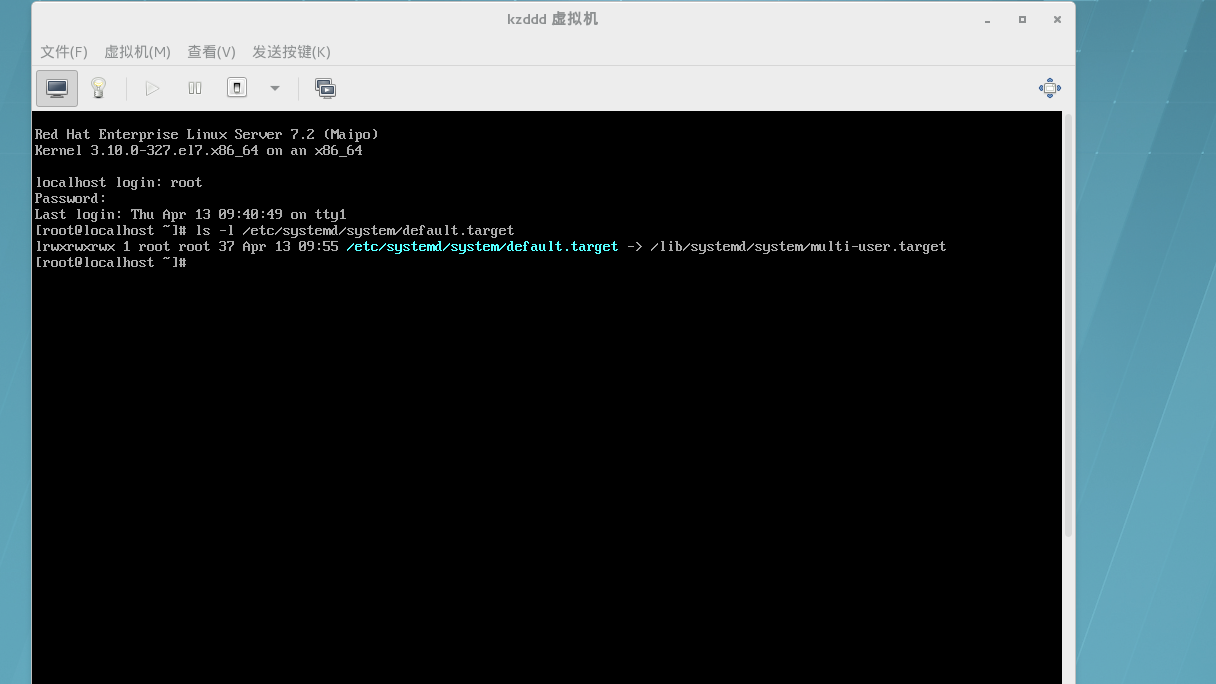
1.systemctl set-default + 启动级别
2./etc/systemd/system/default.target
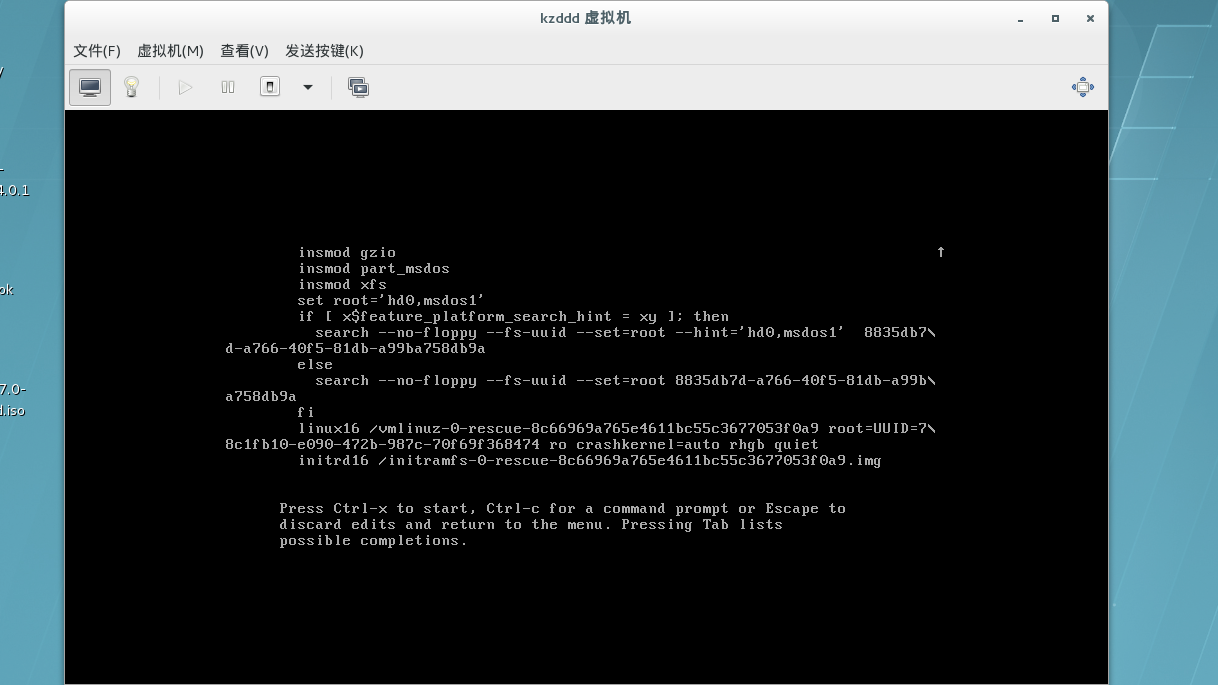
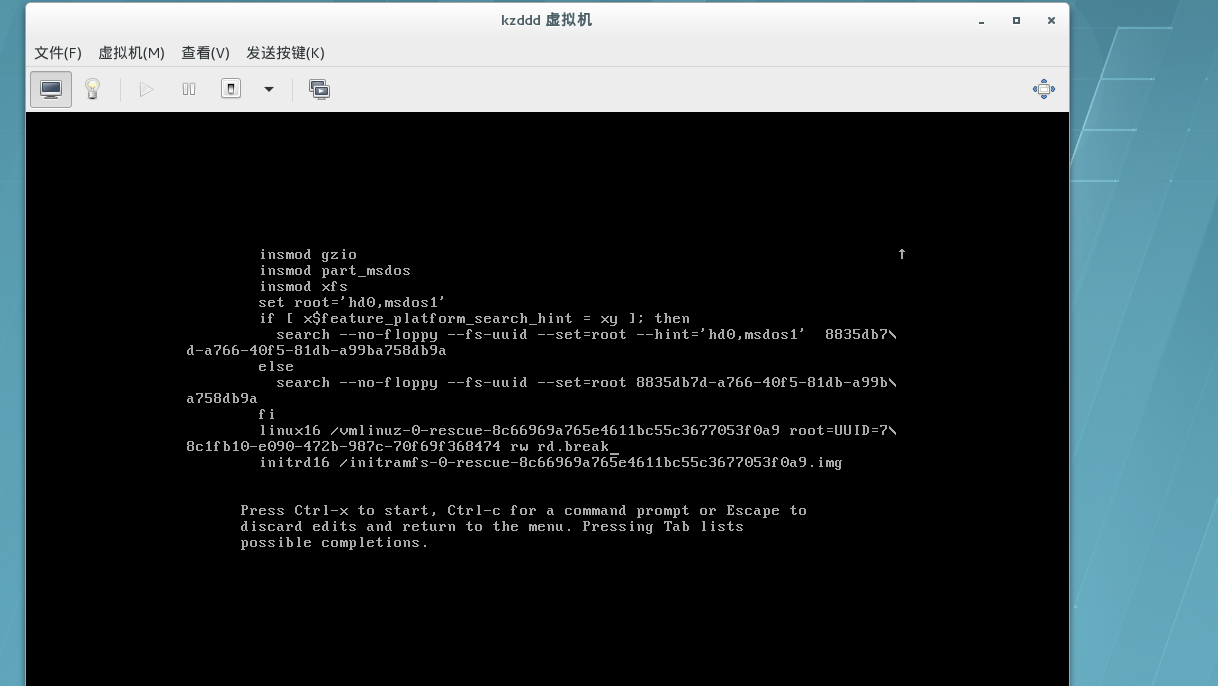
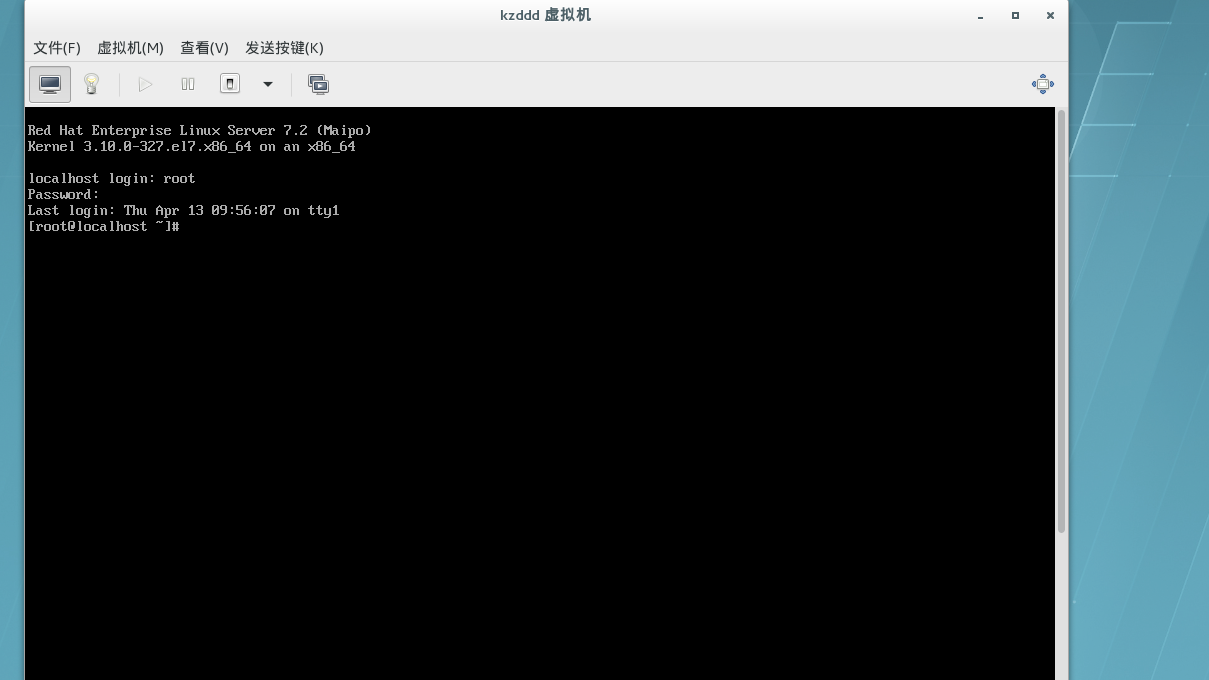
eg:不知道root密码,修复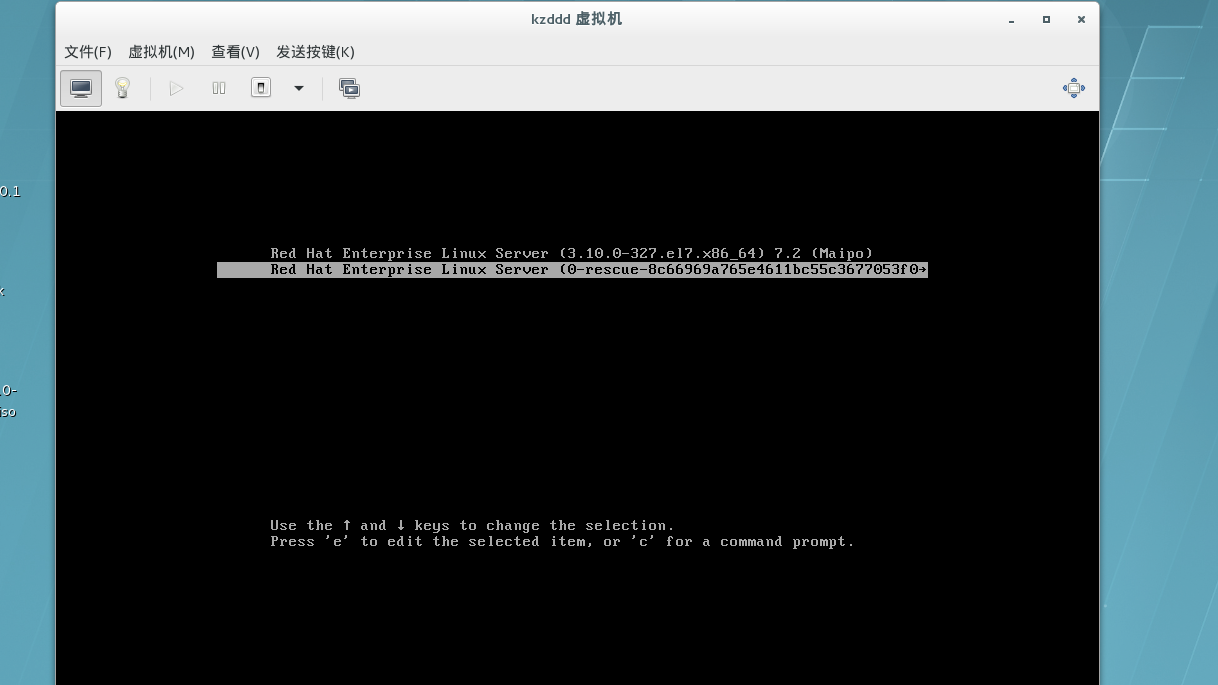

第七单元 访问网络文件共享服务
一、挂载网络文件系统
1.网络文件系统是由网络附加存储服务器通过网络向多个主机提供的一种文件系统 , 而不是由块设备 ( 例如硬盘驱动器 ) 提供的。客户端通过特殊的文件系统协议和格式访问远程存储
2.Linux 中有两种主要协议可用访问网络文件系统 : NFS 和CIFS 。 NFS ( Network File System ) 可看作是 Linux 、UNIX 及其它类似操作系统的标准文件系统。 CIFS( Comon Internet File System ) 则是针对 MicrosoftWindows 系统的标准网络文件系统
3.访问网络共享的三个基本步骤
– 1. 识别要访问的远程共享
– 2. 确定挂载点 ( 应该将共享挂载到的位置 ), 并创建挂载点的空目录
– 3. 通过相应的名利或配置更改挂载网络文件系统
二、通用网络文件系统
1.CIFS 是针对 Microsoft Windows 操作系统的本地网络文件系统。Linux 系统可以挂载和访问 CIFS 文件共享 , 如同常见的网络文件系统一样。然而 , 由于 CIFS 是基于 NTFS 文件系统权限模型及其自身的身份验证系统来构建的 , 因而 CIFS 协议中的所有内容并不能很好地映射到 Linux 中
2.samba-client RPM 软件包所包含的 smbclient 实用程序可用来识别由 Windows 或 Samba 文件服务器提供的 CIFS 共享。该实用程序工作起来犹如在 Microsoft Windows 中单击网上邻居。然后 mount命令可用于挂载共享。访问 CIFS 共享的命令
– 1. 识别 :# smbclient -L instructor.example.com
– 2. 确定挂载点 :# mkdir /remote2
– 3. 挂载 :# mount //instructor.example.com/ftp /remote2
eg:[root@localhost yum.repos.d]# yum install samba-client -y ###下载samba-client软件
[root@localhost ~]# smbclient -L //172.25.254.250 ###linux系统访问CIFS文件共享
Enter root's password:
Domain=[MYGROUP] OS=[Unix] Server=[Samba 4.1.1]
Sharename Type Comment
--------- ---- -------
westos1 Disk test share
westos2 Disk test share
westos3 Disk test share
westos4 Disk test share
westos5 Disk test share
westos6 Disk test share
westos7 Disk test share
westos8 Disk test share
westos9 Disk test share
westos10 Disk test share
IPC$ IPC IPC Service (Samba Server Version 4.1.1)
Domain=[MYGROUP] OS=[Unix] Server=[Samba 4.1.1]
Server Comment
--------- -------
Workgroup Master
--------- -------
[root@localhost ~]# smbclient //172.25.254.250/westos1
Enter root's password:
Domain=[MYGROUP] OS=[Unix] Server=[Samba 4.1.1]
smb: > ls
. D 0 Wed Apr 12 14:05:53 2017
.. D 0 Thu Dec 3 09:43:01 2015
48936 blocks of size 2097152. 14632 blocks available
smb: > put /etc/passwd ###无法下载
NT_STATUS_OBJECT_PATH_NOT_FOUND opening remote file /etc/passwd
smb: > !ls ###查看本地可上传文件
anaconda-ks.cfg
smb: > put anaconda-ks.cfg ###上传文件
putting file anaconda-ks.cfg as anaconda-ks.cfg (449.9 kb/s) (average 449.9 kb/s)
smb: > ls
. D 0 Thu Apr 13 10:51:52 2017
.. D 0 Thu Dec 3 09:43:01 2015
anaconda-ks.cfg A 1382 Thu Apr 13 10:51:52 2017
48936 blocks of size 2097152. 14632 blocks available
smb: > del anaconda-ks.cfg ###删除文件
smb: > ls
. D 0 Thu Apr 13 10:52:02 2017
.. D 0 Thu Dec 3 09:43:01 2015
48936 blocks of size 2097152. 14632 blocks available
smb: > quit
[root@localhost ~]# mount //172.25.254.250/westos1 /mnt/ -o username=guest ###挂载到/mnt底下
[root@localhost ~]# df
文件系统 1K-块 已用 可用 已用% 挂载点
/dev/sda3 8709120 1031704 7677416 12% /
devtmpfs 498984 0 498984 0% /dev
tmpfs 508456 0 508456 0% /dev/shm
tmpfs 508456 6704 501752 2% /run
tmpfs 508456 0 508456 0% /sys/fs/cgroup
/dev/sda1 201388 105236 96152 53% /boot
tmpfs 101692 0 101692 0% /run/user/0
//172.25.254.250/westos1 100221120 70254196 29966924 71% /mnt
[root@localhost ~]# cd /mnt/
[root@localhost mnt]# ls
[root@localhost mnt]# touch file{1..5} ###建立5个文件
[root@localhost mnt]# ls
file1 file2 file3 file4 file5
[root@localhost mnt]# cd ..
[root@localhost /]# umount /mnt/
[root@localhost /]# smbclient //172.25.254.250/westos1 ###连接
Enter root's password:
Domain=[MYGROUP] OS=[Unix] Server=[Samba 4.1.1]
smb: > ls ###五个文件可显示
. D 0 Thu Apr 13 10:54:26 2017
.. D 0 Thu Dec 3 09:43:01 2015
file1 N 0 Thu Apr 13 10:54:26 2017
file2 N 0 Thu Apr 13 10:54:26 2017
file3 N 0 Thu Apr 13 10:54:26 2017
file4 N 0 Thu Apr 13 10:54:26 2017
file5 N 0 Thu Apr 13 10:54:26 2017
48936 blocks of size 2097152. 14632 blocks available
smb: > quit
[root@localhost /]#
三、网络文件系统
1.NFS ( Network File System ) 是由 Linux 、 UNIX 及其他类似操作系统使用的互联网标准协议 , 可作为它们的本地网络文件系统。它是一种活动扩展之下的开放标准 , 可支持本地 Linux 权限和文件系统功能
2.Red Hat Enterprise Linux 7 在默认情况下支持 NFSv4 ( 该协议的版本 4 ), 并在该版本不可用的情况下自动回退到 NFSv3 和NFSv2 。对于在客户端上运行的所有版本的 NFS , 均应启用两种服务 : rpcbind 和 nfslock 。 NFSv4 使用 TCP 协议与服务器进行通信 , 而较早版本的 NFS 则可能使用 TCP 或 UDP
3.有两种方法用来确定由服务器提供的 NFS 导出 , 或叫做文件共享。如果服务器支持 NFSv3 或 NFSv2 , 您可以使用 showmount -eserver 命令来获取导出项列表。如果服务器支持 NFSv4 , 则可以将 / 导出项挂载到一个空目录并浏览所有导出文件系统的内容
四、访问 NFS 导出的命令
1. 识别
– # showmount -e instructor.example.com
2. 确定挂载点
– # mkdir /remote1
3. 挂载
– # mount
instructor.example.com:/var/ftp/pub /remote1
eg:[root@localhost yum.repos.d]# yum install nfs-utils.x86_64 -y ###下载nfs-utils软件
[root@localhost yum.repos.d]# showmount -e 172.25.254.250 ###识别
Export list for 172.25.254.250:
/nfsshare/nfs5 *
/nfsshare/nfs4 *
/nfsshare/nfs3 *
/nfsshare/nfs2 *
/nfsshare/nfs1 *
/content 172.25.0.0/255.255.0.0
[root@localhost yum.repos.d]# df
文件系统 1K-块 已用 可用 已用% 挂载点
/dev/sda3 8709120 1011692 7697428 12% /
devtmpfs 498984 0 498984 0% /dev
tmpfs 508456 0 508456 0% /dev/shm
tmpfs 508456 6732 501724 2% /run
tmpfs 508456 0 508456 0% /sys/fs/cgroup
/dev/sda1 201388 105236 96152 53% /boot
tmpfs 101692 0 101692 0% /run/user/0
[root@localhost yum.repos.d]# mount 172.25.254.250:/nfsshare/nfs1 /mnt ###挂载到/mnt下
[root@localhost yum.repos.d]# df
文件系统 1K-块 已用 可用 已用% 挂载点
/dev/sda3 8709120 1011208 7697912 12% /
devtmpfs 498984 0 498984 0% /dev
tmpfs 508456 0 508456 0% /dev/shm
tmpfs 508456 6736 501720 2% /run
tmpfs 508456 0 508456 0% /sys/fs/cgroup
/dev/sda1 201388 105236 96152 53% /boot
tmpfs 101692 0 101692 0% /run/user/0
172.25.254.250:/nfsshare/nfs1 100221952 70252544 29969408 71% /mnt ###已挂载
[root@localhost yum.repos.d]# cd /mnt/
[root@localhost mnt]# ls
[root@localhost mnt]# touch file{1..5}
[root@localhost mnt]# ls
file1 file2 file3 file4 file5
[root@localhost mnt]# cd ..
[root@localhost /]# umount /mnt/
[root@localhost /]# cd /mnt/
[root@localhost mnt]# ls
[root@localhost mnt]# cd ..
[root@localhost /]# mount 172.25.254.250:/nfsshare/nfs1 /mnt
[root@localhost /]# ls /mnt/
file1 file2 file3 file4 file5
[root@localhost /]# umount /mnt/
[root@localhost /]# ls /mnt/
[root@localhost /]# fuser
-bash: fuser: 未找到命令
[root@localhost /]# yum whatprovides */fuser
已加载插件:product-id, search-disabled-repos, subscription-manager
This system is not registered to Red Hat Subscription Management. You can use subscription-manager to register.
rhel7/filelists_db | 3.0 MB 00:00
psmisc-22.20-8.el7.x86_64 : Utilities for managing processes on your system
源 :rhel7
匹配来源:
文件名 :/usr/sbin/fuser
[root@localhost /]# yum install psmisc-22.20-8.el7.x86_64 -y
[root@localhost /]# fuser -kvm /mnt/
Connection to 172.25.254.142 closed by remote host.
Connection to 172.25.254.142 closed.
[kiosk@foundation42 Desktop]$ ssh root@172.25.254.142 -X
root@172.25.254.142's password:
X11 forwarding request failed on channel 0
Last login: Thu Apr 13 10:12:23 2017 from 172.25.254.42
[root@localhost ~]# mount 172.25.254.250:/nfsshare/nfs1 /mnt/
[root@localhost ~]# df
文件系统 1K-块 已用 可用 已用% 挂载点
/dev/sda3 8709120 1032992 7676128 12% /
devtmpfs 498984 0 498984 0% /dev
tmpfs 508456 0 508456 0% /dev/shm
tmpfs 508456 13064 495392 3% /run
tmpfs 508456 0 508456 0% /sys/fs/cgroup
/dev/sda1 201388 105236 96152 53% /boot
tmpfs 101692 0 101692 0% /run/user/0
172.25.254.250:/nfsshare/nfs1 100221952 70256640 29965312 71% /mnt
[root@localhost ~]# ls /mnt/
file1 file2 file3 file4 file5
[root@localhost ~]# umount /mnt/
[root@localhost ~]# vim /etc/rc.local
[root@localhost ~]# cat /etc/rc.local ###配置文件,永久挂载
#!/bin/bash
touch /var/lock/subsys/local
mount 172.25.254.250:/nfsshare/nfs1 /mnt
[root@localhost ~]# chmod +x /etc/rc.d/rc.local
[root@localhost ~]# vim /etc/rc.d/rc.local
[root@localhost ~]# df
文件系统 1K-块 已用 可用 已用% 挂载点
/dev/sda3 8709120 1033004 7676116 12% /
devtmpfs 498984 0 498984 0% /dev
tmpfs 508456 0 508456 0% /dev/shm
tmpfs 508456 13060 495396 3% /run
tmpfs 508456 0 508456 0% /sys/fs/cgroup
/dev/sda1 201388 105236 96152 53% /boot
tmpfs 101692 0 101692 0% /run/user/0
[root@localhost ~]# reboot
Connection to 172.25.254.142 closed by remote host.
Connection to 172.25.254.142 closed.
[kiosk@foundation42 Desktop]$ ssh root@172.25.254.142 -X
root@172.25.254.142's password:
X11 forwarding request failed on channel 0
Last login: Thu Apr 13 10:38:36 2017 from 172.25.254.42
[root@localhost ~]# df ###开机自挂载
文件系统 1K-块 已用 可用 已用% 挂载点
/dev/sda3 8709120 1031784 7677336 12% /
devtmpfs 498984 0 498984 0% /dev
tmpfs 508456 0 508456 0% /dev/shm
tmpfs 508456 6708 501748 2% /run
tmpfs 508456 0 508456 0% /sys/fs/cgroup
/dev/sda1 201388 105236 96152 53% /boot
172.25.254.250:/nfsshare/nfs1 100221952 70268928 29953024 71% /mnt
tmpfs 101692 0 101692 0% /run/user/0
[root@localhost ~]#
五、自动挂载网络存储
1.使用 mount 命令 , 需要具有 root 用户权限以连接到网络共享。或者 , 我们可以向 /etc/fstab 添加条目 , 但是随后与网络服务器的连接将始终处于活动状态。当某一程序试图访问网络共享中的文件时 , 可以将 automounter ( 或 autofs )服务配置为 “ 按需 ” 挂载网络共享。当共享不再使用并处于不活动状态一定时间以后 ,automounter 会对共享解除挂载
2.不活动状态的时间间隔默认为五分钟 , 但该时间间隔可在/etc/sysconfig/autofs 中进行全局更改
3.[root@instructor ~]# grep TIMEOUT /etc/sysconfig/autofs
# TIMEOUT - set the default mount timeout (default 600).
TIMEOUT=300
...output omitted....
通常 , 我们需要使用网络共享在不活动状态下保持挂载一小段时间 , 从而防止在段时间内对其进行再次使用。这能够避免不必要的挂载 / 解除挂载的周期
4.在本节中 , 我们将介绍使用自动挂载器的两种方法。首先 ,使用特殊的 /net 自动挂载挂载点 , 然后手动配置间接自动挂载映射。特殊映射 /net
5.默认情况下 , autofs 服务运行时 , 存在一个名为 /net 的特殊目录 , 但是该目录将显示为空
6.访问不存在的目录 /net/instructor.example.com 会使自动挂载器创建该子目录 , 并显示该 NFS 服务器上的所有NFS 导出项。这有时称为 “ 浏览 ” 共享
– # cd /net/instructor.example.com
– # ls
– home kickstart var
7.在 /net/instructor.example.com 之下的所有文件和目录停止使用且超时期满子后 ,autofs 将共享解除挂载并删除空的 /net/instructor.example.com 子目录
eg:[root@localhost ~]# yum install autofs -y ###下载自动挂载软件
[root@localhost ~]# systemctl start autofs ###开启软件
[root@localhost ~]# cd /net/
[root@localhost net]# ls
[root@localhost net]# cd 172.25.254.250
[root@localhost 172.25.254.250]# ls
content nfsshare
[root@localhost 172.25.254.250]# cd nfsshare/
[root@localhost nfsshare]# ls
nfs1 nfs2 nfs3 nfs4 nfs5
[root@localhost nfsshare]# cd nfs1
[root@localhost nfs1]# df ###已挂载
文件系统 1K-块 已用 可用 已用% 挂载点
/dev/sda3 8709120 1037740 7671380 12% /
devtmpfs 498984 0 498984 0% /dev
tmpfs 508456 0 508456 0% /dev/shm
tmpfs 508456 6716 501740 2% /run
tmpfs 508456 0 508456 0% /sys/fs/cgroup
/dev/sda1 201388 105236 96152 53% /boot
172.25.254.250:/nfsshare/nfs1 100221952 70253568 29968384 71% /mnt
tmpfs 101692 0 101692 0% /run/user/0
[root@localhost nfs1]# cd
[root@localhost ~]# df
文件系统 1K-块 已用 可用 已用% 挂载点
/dev/sda3 8709120 1037740 7671380 12% /
devtmpfs 498984 0 498984 0% /dev
tmpfs 508456 0 508456 0% /dev/shm
tmpfs 508456 6716 501740 2% /run
tmpfs 508456 0 508456 0% /sys/fs/cgroup
/dev/sda1 201388 105236 96152 53% /boot
172.25.254.250:/nfsshare/nfs1 100221952 70253568 29968384 71% /mnt
tmpfs 101692 0 101692 0% /run/user/0
[root@localhost etc]# rpm -ql autofs ###查询autofs配置文件
/etc/auto.master
/etc/auto.master.d
/etc/auto.misc
/etc/auto.net
/etc/auto.smb
/etc/autofs_ldap_auth.conf
/etc/sysconfig/autofs
[root@localhost etc]# vim /etc/sysconfig/autofs ###修改卸载时间,3s后卸载
#TIMEOUT=3
[root@localhost ~]# systemctl restart autofs
[root@localhost /]# cd /net/
[root@localhost net]# cd 172.25.254.250
[root@localhost 172.25.254.250]# cd nfsshare/
[root@localhost nfsshare]# cd nfs1
[root@localhost nfs1]# df ###挂载点/net/172.25.254.250/nfsshare/nfs1
文件系统 1K-块 已用 可用 已用% 挂载点
/dev/sda3 8709120 1036196 7672924 12% /
devtmpfs 498984 0 498984 0% /dev
tmpfs 508456 0 508456 0% /dev/shm
tmpfs 508456 6712 501744 2% /run
tmpfs 508456 0 508456 0% /sys/fs/cgroup
/dev/sda1 201388 105236 96152 53% /boot
tmpfs 101692 0 101692 0% /run/user/0
172.25.254.250:/nfsshare/nfs1 100221952 70258688 29963264 71% /net/172.25.254.250/nfsshare/nfs1
[root@localhost nfs1]# cd
[root@localhost ~]# df ###3s后自动卸载
文件系统 1K-块 已用 可用 已用% 挂载点
/dev/sda3 8709120 1036196 7672924 12% /
devtmpfs 498984 0 498984 0% /dev
tmpfs 508456 0 508456 0% /dev/shm
tmpfs 508456 6712 501744 2% /run
tmpfs 508456 0 508456 0% /sys/fs/cgroup
/dev/sda1 201388 105236 96152 53% /boot
tmpfs 101692 0 101692 0% /run/user/0
六、间接映射
1.除了使用 /net 映射 , 系统管理员也可以手动配置任意目录, 以便访问时在其子目录上 “ 按需 ” 挂载特定共享。示例:
2.间接映射使用两层配置文件语法。在顶级文件/etc/auto.master 中 , 每个管理的 “ 父 ” 目录和包含子目录挂载点与网络共享的单独的第二个配置文件的名称占一行
# cat /etc/auto.master
/demo /etc/auto.demo
# cat/etc/auto.demo
public -ro nfsserver.domain:/exported/path
service autofs reload 重载 autofs 服务
# cd /demo/public
eg:[root@localhost ~]# vim /etc/auto.master ###设置挂载点为/mnt
#/mnt /etc/auto.westos
[root@localhost ~]# vim /etc/auto.westos
#* 172.25.254.250:/nfsshare/&
[root@localhost ~]# systemctl restart autofs
[root@localhost ~]# cd /mnt/nfs1
[root@localhost nfs1]# df ###挂载点/mnt/nfs1
文件系统 1K-块 已用 可用 已用% 挂载点
/dev/sda3 8709120 1036216 7672904 12% /
devtmpfs 498984 0 498984 0% /dev
tmpfs 508456 0 508456 0% /dev/shm
tmpfs 508456 6712 501744 2% /run
tmpfs 508456 0 508456 0% /sys/fs/cgroup
/dev/sda1 201388 105236 96152 53% /boot
tmpfs 101692 0 101692 0% /run/user/0
172.25.254.250:/nfsshare/nfs1 100221952 70258688 29963264 71% /mnt/nfs1
[root@localhost nfs1]# cd
[root@localhost ~]# df ###3s后自动卸载
文件系统 1K-块 已用 可用 已用% 挂载点
/dev/sda3 8709120 1036216 7672904 12% /
devtmpfs 498984 0 498984 0% /dev
tmpfs 508456 0 508456 0% /dev/shm
tmpfs 508456 6712 501744 2% /run
tmpfs 508456 0 508456 0% /sys/fs/cgroup
/dev/sda1 201388 105236 96152 53% /boot
tmpfs 101692 0 101692 0% /run/user/0
[root@localhost ~]# cd /mnt/nfs2
[root@localhost nfs2]# df ###挂载点/dev/nfs2
文件系统 1K-块 已用 可用 已用% 挂载点
/dev/sda3 8709120 1036216 7672904 12% /
devtmpfs 498984 0 498984 0% /dev
tmpfs 508456 0 508456 0% /dev/shm
tmpfs 508456 6712 501744 2% /run
tmpfs 508456 0 508456 0% /sys/fs/cgroup
/dev/sda1 201388 105236 96152 53% /boot
tmpfs 101692 0 101692 0% /run/user/0
172.25.254.250:/nfsshare/nfs2 100221952 70258688 29963264 71% /mnt/nfs2
[root@localhost nfs2]# cd
[root@localhost ~]# df ###3s后自动卸载
文件系统 1K-块 已用 可用 已用% 挂载点
/dev/sda3 8709120 1036216 7672904 12% /
devtmpfs 498984 0 498984 0% /dev
tmpfs 508456 0 508456 0% /dev/shm
tmpfs 508456 6712 501744 2% /run
tmpfs 508456 0 508456 0% /sys/fs/cgroup
/dev/sda1 201388 105236 96152 53% /boot
tmpfs 101692 0 101692 0% /run/user/0
[root@localhost ~]#
第八单元 LDAP 网络用户账户
一、使用 LDAP 服务器进行网络身份验证
1.在本课程中 , 到目前为止 , 我们已经介绍了通过每台计算机上的本地文件( 例如 /etc/passwd ) 管理的本地用户账户。但是 , 在多个系统上将本地用户账户协调一致非常困难
2.本节中 , 我们将介绍如何将计算机设置为客户端 , 以使用现有 LDAP 目录服务提供的网络用户账户。这样 , LDAP 目录就成为我们组织中所有网络用户和组的中心机构
3.用户账户信息可以确定装户的特征和配置。身份验证方式用于确定尝试登录的人员是否应该获得对账户的使用权限。网络目录服务可以提供用户账户信息和身份验证方法
4.LDAP 目录服务器可以用作分布式、集中式、网络用户管理服务。目录条目按树结构排列 , 可以在其中进行搜索。基础 DN ( 区分名称 ) 是树的基础 , 用于搜索用户和组的目录条目
5.LDAP 客户端配置的主要元素
– 1. 服务器的完全限定主机名
– 2. 基础 DN , 用于搜索用户定义
– 3. 认证机构 (“ CA” ) 证书 , 用于签署 LDAP 服务器的 SSL 证书
二、安装客户端软件
1.authconfig-gtk
2.sssd
3.krb5-workstation
#yum sssd krb5-workstation -y
三、通过 authconfig-gtk 认证 ldap 用户
1.authconfig-gtk
2.authconfig-tui
┌────────────────┤ Authentication Configuration ├─────────────────┐
│ │
│ User Information Authentication │
│ [ ] Cache Information [ ] Use MD5 Passwords │
│ [*] Use LDAP [*] Use Shadow Passwords │
│ [ ] Use NIS [ ] Use LDAP Authentication │
│ [ ] Use IPAv2 [*] Use Kerberos │
│ [ ] Use Winbind [ ] Use Fingerprint reader │
│ [ ] Use Winbind Authentication │
│ [*] Local authorization is sufficient │
│ │
│ ┌────────┐ ┌──────┐ │
│ │ Cancel │ │ Next │ │
│ └────────┘ └──────┘ │
│ │
│ │
└─────────────────────────────────────────────────────────────────┘
┌─────────────────┤ LDAP Settings ├─────────────────┐
│ │
│ [*] Use TLS │
│ Server: ldap://classroom.example.com/___________ │
│ Base DN: dc=example,dc=com_______________________ │
│ │
│ ┌──────┐ ┌──────┐ │
│ │ Back │ │ Next │ │
│ └──────┘ └──────┘ │
│ │
│ │
└───────────────────────────────────────────────────┘
┌─────────────────┤ Kerberos Settings ├──────────────────┐
│ │
│ Realm: EXAMPLE.COM_____________________________ │
│ KDC: classroom.example.com___________________ │
│ Admin Server: classroom.example.com___________________ │
│ [ ] Use DNS to resolve hosts to realms │
│ [ ] Use DNS to locate KDCs for realms │
│ │
│ ┌──────┐ ┌────┐ │
│ │ Back │ │ Ok │ │
│ └──────┘ └────┘ │
│ │
│ │
└────────────────────────────────────────────────────────┘
<当出现以下报错时>
┌────────────────┤ Warning ├─────────────────┐
│ │
│ To connect to a LDAP server with TLS │
│ protocol enabled you need a CA certificate │
│ which signed your server's certificate. │
│ Copy the certificate in the PEM format to │
│ the '/etc/openldap/cacerts' directory. │
│ Then press OK. │
│ │
│ ┌────┐ │
│ │ Ok │ │
│ └────┘ │
│ │
│ │
└────────────────────────────────────────────┘
时因为tls的证书缺失,需要到服务器端下载所需要的证书到/etc/openldap/cacerts,用到的命令wget http://172.25.254.254/pub/example-ca.crt
<测试>
getent passwd ldapuser1
如果用户信息可以正常显示,证明客户端认成功。
列出所有用户
vim /etc/sssd/sssd.conf
enumerate = True
systemctl restart sssd
四、检测 ldap 认证用户
1.getent passwd ldapuserx
2.vim /etc/sssd.conf
– enumerate = ture | false
– systemctl restart sssd
五、通过 authconfig-tui 认证 ldap 用户
1.authconfig-tui
六、下载证书文件
1.cd /etc/openldap/cacerts
2.wget
http://classroom.example.com/pub/example-ca.crt
3.ls /etc/openldap/cacerts
七、自动挂在 ldap 用户家目录
1.安装 autofs
2.编辑 autofs 策略文件
– vim /etc/auto.master
/home/guests /etc/auto.ldap
– vim /etc/auto.ldap
ldapuser0 classroom.example.com:/home/guests/ldapuser0
3.yum install autofs -y
vim /etc/autofs.master
/home/guests /etc/auto.ldap
vim /etc/auto.ldap
ldapuser1 172.25.254.254:/home/guests/ldapuser1
+++++++++++++++++++++++++++++++++++++++++++++++++++++++
* 172.25.254.254:/home/guests/&
systemctl restart autofs
systemctl enable autofs