无论是在工作和学习中使用WPF时,我们通常都会接触到CustomControl,今天我们就CustomWindow之后的一些边角技术进行探讨和剖析。
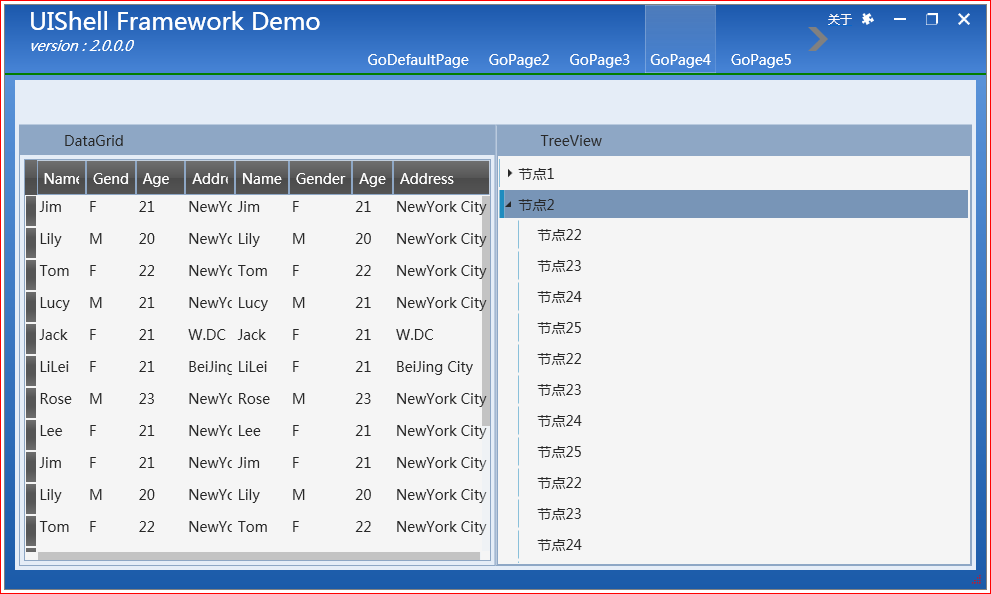
童鞋们在WPF开发过程中是否觉得默认的Style太丑,或者是由Balabala的一些原因,使你觉得重写一个“高大上”的Window来符合项目的UI要求(小明:“我们使用Telerik” 老师:“什么?你说你们使用第三方UI框架?滚出去!”)经过半天的努力我们搞定了一个帅气的Window! Like this:
[TemplatePart( Name = "PART_RichTitle", Type = typeof( RichTitleChrome ) )]
    [TemplatePart( Name = "PART_PluginArea", Type = typeof( ScrollItemsContainer ) )]
    [TemplatePart( Name = "PART_MenuButton", Type = typeof( Button ) )]
    [TemplatePart( Name = "PART_MinButton", Type = typeof( Button ) )]
    [TemplatePart( Name = "PART_MaxButton", Type = typeof( Button ) )]
    [TemplatePart( Name = "PART_CloseButton", Type = typeof( Button ) )]
    [TemplatePart( Name = "PART_NonWorkArea", Type = typeof( AdornerNonWorkArea ) )]
    [TemplatePart( Name = "PART_BusyIndicator", Type = typeof( BusyIndicator ) )]
    [TemplatePart( Name = "PART_ToolbarArea", Type = typeof( ScrollItemsContainer ) )]
    [TemplatePart( Name = "PART_ResizeGrip", Type = typeof( ResizeGrip ) )]
    [TemplatePart( Name = "PART_Shadow", Type = typeof( Border ) )]
    [DefaultProperty( "ToolBarContent" )]
    public class MultilayerWindowShell : Window, IFrameworkVisual, IWindowNavigationService, IBusyObservableVisual, IVersionComponent
    {

        static MultilayerWindowShell()
        {
            DefaultStyleKeyProperty.OverrideMetadata( typeof( MultilayerWindowShell ), new FrameworkPropertyMetadata( typeof( MultilayerWindowShell ) ) );
        }


        //
        // 一大堆依赖属性啊 事件啊 什么的
        //

        protected override void OnInitialized( EventArgs e )
        {
            // To do sth.
        }

        public override void OnApplyTemplate()
        {
            // To do sth.
        }

        // Other  sth.
    }
然后运行起来 Like this:
哎呀,顿时感觉“高大上”起来,可以拿来跟产品经理去吹牛了。(小明:“经理经理!这UI帅气吧!符合要求吧!” 经理:“很好很好,看起来不错嘛,我就说你这娃有创意有思想不会令我失望的!balabalabala... 咦? ” 小明:“...” 经理:“小明啊!做事不能敷衍啊!你这窗口拖拽四边和顶点不能改变大小啊!小明啊,这最大化位置也不对啊!我们要的最大化是距离屏幕上方有150px啊不要全屏啊!小明啊!你这子窗口弹出来的是模态的吗?为什么不会Blink Blink的闪烁呀!小明,别忽悠我哟!!” 经理:“小明今晚加班搞定哟!” 小明:“....WQNMLGB....”。
那么为了解决小明的问题,为了满足我们神圣的产(qu)品(shi)经(ba)理,我们来逐个搞定它!
-
窗口(对话框)模态闪动(Blink)
首先我们说明一下模态闪动为什么没了? 因为我们自定义Window 将 WindowStyle设置为None了,窗口被隐藏掉了非工作区和边框,只剩下了工作区,所以我们就看不到闪动了。
先来了解什么叫模态闪动, 当我们在父窗口之上弹出来一个模态的子窗口(比如 弹出另存为对话框),我们都知道模态窗口除非关闭,否则后面的任何窗口都不能接受处理。windows系统为了友好的提醒用户,所以当用户点击或者想要操作除模态窗口之外的区域时,使用Blink来提示用户,闪动的窗口必须要关闭才可以进行其他操作。
然而我们干掉了系统默认的窗口非客户区和边框,导致我们失去了模态闪动,所以我们的工作是恢复它或者是说是重新模拟它!想要模拟Blink,那么我们就需要知道我们需要在什么情况下让模态窗口闪动和怎么让它闪动?
第一个问题:模态闪动的触发时机是什么? 是模态子窗口为关闭期间,欲操作其他窗口(或者说是父窗口)时。那么我们又是怎么个欲操作呢?通常都是鼠标去点的,但是发现没反应。我们通过使用SPY++来监视父窗口的消息得知,即使模态子窗口未关闭,我们父窗口一样能接受到系统发送的鼠标指针消息,那么我们的触发Blink时机就可以确定为接收 WM_SETCURSOR 消息时进行判定和处理。
第二个问题:怎么进行Blink? 曾经有过研究的同学可能就要发表看法了。(小明:“我知道!Win32 API 有提供 FlashWindow 和FlashWindowEx! ”)恩,小明说的对。FlashWindow(Ex)确实是闪烁窗口的API,但是,那只是闪烁有系统窗口边的窗口和在任务栏中闪烁(类似QQ来消息后的黄色闪烁),很遗憾API对于我们的无边框自定义窗口无效!(所以,小明!滚出去!),API不好使,那么我们怎么办呢?别忘了,区区一个闪烁是WPF的强项啊!动画呗!所以我们可以搞一段闪烁动画来模拟它的Blink!
So,we try it now!
为了拦截系统消息,我们先给我们的窗口安装一个钩子。
            HwndSource hwndSource = PresentationSource.FromVisual( _wndTarget ) as HwndSource;

            if ( hwndSource != null )
            {
                hwndSource.AddHook( new HwndSourceHook( WndProc ) );
            }

        private IntPtr WndProc( IntPtr hwnd, int msg, IntPtr wParam, IntPtr lParam, ref bool handled )
        {
            switch ( msg )
            {

                case NativeMethods.WM_SETCURSOR:
                    {
                        WmSetCursor( lParam, ref handled );

                    }
                    break;


            }
            return IntPtr.Zero;
        }
在哪里开始安装钩子呢? 随便 OnApplyTemplate OnInitialized Onloaded 自己喜欢哪就挂哪吧,对于AddHook,这是与Win32互操作的基础,这里就不做讲解了。有童鞋不明白不懂的请去搜索“HwndSource”“PresentationSource”“SourceInitialized”等关键字一看便知。对于 “WndProc”方法,其实他是一个回调函数。有C++ 基础的人都知道。WndProc 这个回调中就是我们拦截消息的地方。
如上面代码片段所示,我们拦截了WM_SETCURSOR消息。其中的lParam参数就是具体消息携带的消息值,我们可以获取鼠标的状态信息,比如我们截取在LeftButtonDown/LeftButtonUp时对Blink进行触发判定。
// 0x202fffe: WM_LBUTTONUP and HitTest
// 0x201fffe: WM_LBUTTONDOWN and HitTest
我们再来分析我们的处理方式,我们从下面2点 1) 当父窗口未激活时 2)当父窗口激活时 来分析.
1父窗口未激活时
- 我们循环查找子窗口列表中处于激活状态的子窗口,然后Blink它,
- 如果父窗口没有子窗口,那么我们调用 GetActiveWindow 来获取当前进程中的Actived窗口,然后Blink它.为什么这么做,因为此时的模态窗口可能是MessageBox,或者文件打开/保存等通用对话框,并且没有设置它的Owner.
- 如果GetActiveWindow没有找到,我们在使用 Application.Current.Windows来找一找我们自己创建的窗口列表,并且找一找那个是模态的,然后Blink它. 如何判断某一个Window是否是模态,我们后面将.
2父窗口在上面而模态窗口跑到下面的情况同样需要找到,blink它.
private void WmSetCursor( IntPtr lParam, ref bool handled )
        {
            // 0x202fffe: WM_LBUTTONUP and HitTest
            // 0x201fffe: WM_LBUTTONDOWN and HitTest
            if ( lParam.ToInt32() == 0x202fffe || lParam.ToInt32() == 0x201fffe )
            {
                // if the wnd is not actived
                if ( !_wndTarget.IsActive )
                {
                    // we find the actived childwnd in parent's children wnds ,then blink it
                    if ( _wndTarget.OwnedWindows.Count > 0 )
                    {
                        foreach ( Window child in _wndTarget.OwnedWindows )
                        {
                            if ( child.IsActive )
                            {
                                // FlashWindowEx cann't use for non-border window...
                                child.Blink();
                                handled = true;
                                return;
                            }
                        }
                    }
                    else
                    {
                        // if target window  has 0 children
                        // then , find current active wnd and blink it.
                        // eg: MessageBox.Show("hello!"); the box without
                        // owner, when setcursor to target window , we will
                        // blink this box.
                        IntPtr pWnd = NativeMethods.GetActiveWindow();
                        if ( pWnd != IntPtr.Zero )
                        {
                            HwndSource hs = HwndSource.FromHwnd( pWnd );

                            Window activeWnd = null == hs ? null : hs.RootVisual as Window;
                            if ( null != activeWnd && activeWnd.IsActive )
                            {
                                activeWnd.Blink();
                                handled = true;
                                return;
                            }
                        }
                        else
                        {
                            var wnds = Application.Current.Windows;
                            if ( null != wnds && wnds.Count > 1 )
                            {

                                Window modalWnd = wnds.OfType<Window>().Where( p => p != _wndTarget ).FirstOrDefault( p => p.IsModal() );
                                if ( null != modalWnd )
                                {
                                    modalWnd.Activate();
                                    modalWnd.Blink();
                                    handled = true;
                                    return;
                                }

                            }
                        }
                    }
                }
                else
                {// 父窗口在上面 而模态的在下面的情况

                    var wnds = Application.Current.Windows;
                    if ( null != wnds && wnds.Count > 1 )
                    {

                        Window modalWnd = wnds.OfType<Window>().Where( p => p != _wndTarget ).FirstOrDefault( p => p.IsModal() );
                        if ( null != modalWnd )
                        {
                            modalWnd.Activate();
                            modalWnd.Blink();
                            handled = true;
                            return;
                        }

                    }
                }
            }

            handled = false;
        }
上面Code中有你没见过的方法,我们再写一下.
1) IsModal() 方法是一个扩展方法,用来判断指定窗口是不是模态的窗口.
        public static bool IsModal<TWindow>( this TWindow wnd ) where TWindow : Window
        {
            return (bool)typeof( TWindow ).GetField( "_showingAsDialog", BindingFlags.Instance | BindingFlags.NonPublic ).GetValue( wnd );
        }
其中的字段_showingAsDialog 为Window类私有的成员变量,用来保存窗口的显示模式.(小明:"你咋知道?" Me:"调试得来,休得再问,滚出去!") 所以我们只需要得到这个变量的值就知道了窗口是否是以模态形式Show的.
2)Blink() 方法同样为扩展类方法,用来生产动画并播放. 大致介绍一下Blinker类:
    class DialogBlinker<TWindow> where TWindow : Window
    {
    //
    //
    //
     public void Blink()
        {

        }


    }
我就不贴完整的类,就不让你全看到然后无脑copy,表着急,听我慢慢白活~~~ :)
在讲这个类之前,我们先大致了解一下,我们的动画该怎么来模仿系统的Blink闪烁.我们通常看到的是系统窗口的边框在闪烁,忽大忽小,如此反复若干次.其实闪烁的不是Border,而是窗口的阴影.那么好办了,WPF的UIElement元素都有Effect属性来设置元素的位图效果,
我们可以为我们的Window加入DropShadowEffect阴影效果,并控制这个阴影的大小状态来模拟闪烁.
所以,我们先构造一个静态的位图阴影效果并缓存到static变量中,在Blink时使用它.
        private static DropShadowEffect InitDropShadowEffect()
        {
            DropShadowEffect dropShadowEffect = new DropShadowEffect();
            dropShadowEffect.BlurRadius = 8;
            dropShadowEffect.ShadowDepth = 0;
            dropShadowEffect.Direction = 0;
            dropShadowEffect.Color = System.Windows.Media.Colors.Black;
            return dropShadowEffect;
        }
至于,DropShadowEffect的BlurRadius / Shadowdepth / Direction 属性的值,是在经过一万遍的实验中得到的一组相对靠谱的数据.如果想阴影再大些或者偏移些,请自行设定.
目前有了待处理的阴影效果,我们还需要一个来处理它的动画,来模拟系统Blink的具体动作方式.这里我使用了缓动关键帧动画(EasingDoubleKeyFrame)来处理它.然后我们通过动画来控制点啥呢?当然是控制DropShadowEffect的BlurRadius属性.
那么我们就让这个属性的值在指定时间内反复的变换吧, 再大些再粗些再大些再粗些再大些再粗些,再小些再细些再小些再细些再小些再细些,balabalabala~~~~.
我们来看看具体的Animation code:
            Storyboard storyboard = new Storyboard();

            DoubleAnimationUsingKeyFrames keyFrames = new DoubleAnimationUsingKeyFrames();

            EasingDoubleKeyFrame kt1 = new EasingDoubleKeyFrame( 0, KeyTime.FromTimeSpan( TimeSpan.FromSeconds( 0 ) ) );
            EasingDoubleKeyFrame kt2 = new EasingDoubleKeyFrame( 8, KeyTime.FromTimeSpan( TimeSpan.FromSeconds( 0.3 ) ) );

            kt1.EasingFunction = new ElasticEase() { EasingMode = EasingMode.EaseOut };
            kt2.EasingFunction = new ElasticEase() { EasingMode = EasingMode.EaseOut };

            keyFrames.KeyFrames.Add( kt1 );
            keyFrames.KeyFrames.Add( kt2 );

            storyboard.Children.Add( keyFrames );
            Storyboard.SetTargetProperty( keyFrames, new PropertyPath( System.Windows.Media.Effects.DropShadowEffect.BlurRadiusProperty ) );

            return storyboard;
哎~这里就有小明问了: WPF动画从来没有这么写过啊,我们都是用Blend拖拽的!!我不认识这些东西.. 那么我们再看一组code:
        <Storyboard x:Key="BlinkStory">
            <DoubleAnimationUsingKeyFrames Storyboard.TargetProperty="(UIElement.Effect).(DropShadowEffect.BlurRadius)" Storyboard.TargetName="border">
                <EasingDoubleKeyFrame KeyTime="0" Value="8">
                    <EasingDoubleKeyFrame.EasingFunction>
                        <ElasticEase EasingMode="EaseOut"/>
                    </EasingDoubleKeyFrame.EasingFunction>
                </EasingDoubleKeyFrame>
                <EasingDoubleKeyFrame KeyTime="0:0:0.3" Value="26">
                    <EasingDoubleKeyFrame.EasingFunction>
                        <ElasticEase EasingMode="EaseOut"/>
                    </EasingDoubleKeyFrame.EasingFunction>
                </EasingDoubleKeyFrame>
            </DoubleAnimationUsingKeyFrames>
        </Storyboard>
看懂了吗? 这俩如出一辙.一个是code behind 一个是xaml端的写法. 在0.3秒内让Effect的BlurRadius从0 到8的转变. 并且伴随 EasingMode.Easeout的缓动效果.
然后在Blink方法中 使用这个Storyboard来play就可以了. 还有一个技术点这里会涉及到.NameScope 的用法.那么它是个啥? 不过就是WPF对 名称-UI对象 的键值对映射而已.每一个NameScope都有一个识别范围.如果某个元素你想通过名称找到它,那么你需要向NameScope来注册这个名字(其实在XAML端,当你写出 <XXX x:Name="name" /> 时,Name已经被自动注册到了它所在的NameScope中). 我们需要使用Effect的名字,那么我需要注册它.
现在我们来看核心的Blink()
        public void Blink()
        {
            if ( null != targetWindow )
            {

                if ( null == NameScope.GetNameScope( targetWindow ) )
                    NameScope.SetNameScope( targetWindow, new NameScope() );

                originalEffect = targetWindow.Effect;

                if ( null == targetWindow.Effect || targetWindow.Effect.GetType() != typeof( DropShadowEffect ) )
                    targetWindow.Effect = dropShadowEffect;


                targetWindow.RegisterName( "_blink_effect", targetWindow.Effect );


                Storyboard.SetTargetName( blinkStoryboard.Children[0], "_blink_effect" );
                targetWindow.FlashWindowEx();
                blinkStoryboard.Begin( targetWindow, true );

                targetWindow.UnregisterName( "_blink_effect" );


            }
        }
为了保持Window原有的Effect 我们需要在动画执行完毕后 重新将之前保存起来的originalEffect赋回到Window中.
到此,我们的模态闪动就完成了.
下面展示完整的WindowBlinker<Window>类.
    class DialogBlinker<TWindow> where TWindow : Window
    {
        static Storyboard blinkStoryboard;
        static DropShadowEffect dropShadowEffect;
        Effect originalEffect;
        TWindow targetWindow = null;
        static DialogBlinker()
        {
            blinkStoryboard = InitBlinkStory();
            dropShadowEffect = InitDropShadowEffect();
        }


        internal DialogBlinker( TWindow target )
        {
            targetWindow = target;


            blinkStoryboard.Completed += blinkStoryboard_Completed;


        }
        void blinkStoryboard_Completed( object sender, EventArgs e )
        {
            targetWindow.Effect = originalEffect;

            blinkStoryboard.Completed -= blinkStoryboard_Completed;
        }

        public void Blink()
        {
            if ( null != targetWindow )
            {

                if ( null == NameScope.GetNameScope( targetWindow ) )
                    NameScope.SetNameScope( targetWindow, new NameScope() );

                originalEffect = targetWindow.Effect;

                if ( null == targetWindow.Effect || targetWindow.Effect.GetType() != typeof( DropShadowEffect ) )
                    targetWindow.Effect = dropShadowEffect;


                targetWindow.RegisterName( "_blink_effect", targetWindow.Effect );


                Storyboard.SetTargetName( blinkStoryboard.Children[0], "_blink_effect" );
                targetWindow.FlashWindowEx();
                blinkStoryboard.Begin( targetWindow, true );

                targetWindow.UnregisterName( "_blink_effect" );


            }
        }

        private static Storyboard InitBlinkStory()
        {
            #region xaml code

            /*
        <Storyboard x:Key="BlinkStory">
            <DoubleAnimationUsingKeyFrames Storyboard.TargetProperty="(UIElement.Effect).(DropShadowEffect.BlurRadius)" Storyboard.TargetName="border">
                <EasingDoubleKeyFrame KeyTime="0" Value="8">
                    <EasingDoubleKeyFrame.EasingFunction>
                        <ElasticEase EasingMode="EaseOut"/>
                    </EasingDoubleKeyFrame.EasingFunction>
                </EasingDoubleKeyFrame>
                <EasingDoubleKeyFrame KeyTime="0:0:0.3" Value="26">
                    <EasingDoubleKeyFrame.EasingFunction>
                        <ElasticEase EasingMode="EaseOut"/>
                    </EasingDoubleKeyFrame.EasingFunction>
                </EasingDoubleKeyFrame>
            </DoubleAnimationUsingKeyFrames>
        </Storyboard>
             */

            #endregion // xaml code

            Storyboard storyboard = new Storyboard();

            DoubleAnimationUsingKeyFrames keyFrames = new DoubleAnimationUsingKeyFrames();

            EasingDoubleKeyFrame kt1 = new EasingDoubleKeyFrame( 0, KeyTime.FromTimeSpan( TimeSpan.FromSeconds( 0 ) ) );
            EasingDoubleKeyFrame kt2 = new EasingDoubleKeyFrame( 8, KeyTime.FromTimeSpan( TimeSpan.FromSeconds( 0.3 ) ) );

            kt1.EasingFunction = new ElasticEase() { EasingMode = EasingMode.EaseOut };
            kt2.EasingFunction = new ElasticEase() { EasingMode = EasingMode.EaseOut };

            keyFrames.KeyFrames.Add( kt1 );
            keyFrames.KeyFrames.Add( kt2 );

            storyboard.Children.Add( keyFrames );
            Storyboard.SetTargetProperty( keyFrames, new PropertyPath( System.Windows.Media.Effects.DropShadowEffect.BlurRadiusProperty ) );

            return storyboard;
        }

        private static DropShadowEffect InitDropShadowEffect()
        {
            DropShadowEffect dropShadowEffect = new DropShadowEffect();
            dropShadowEffect.BlurRadius = 8;
            dropShadowEffect.ShadowDepth = 0;
            dropShadowEffect.Direction = 0;
            dropShadowEffect.Color = System.Windows.Media.Colors.Black;
            return dropShadowEffect;
        }
    }
-
自定义窗口的四边拖拽支持
在我们的自定义窗口中,如果不对四周进行特殊的拖拽处理的话,只能使用 ResizeGrip 组件来实现拖拽右下角实现改变窗口的大小,但是也只能拖拽右下角,而不能随意拖拽窗口的四边和角. 为了更完美的实现自定义窗口的功能,合理的人机交互,也为了神圣的产品经理
不对小明失望.我们来搞定它!
我们先来分析一下,或者说是猜测一下系统窗口的四边/角拖拽是怎么实现的?
1)当鼠标移动到应用程序窗口的四个边上或者附近时,光标变化为 可拖拽的箭头样子.
2)当鼠标移动四个角落或者附近时,光标发生变化.
这是2个拖拽响应前的一个光标位置判断.当此时鼠标按下并保持移动即可拖拽. 知道了拖拽的时机,那么又是怎么拖的呢?我们通过Spy++ 检测得到了鼠标命中测试消息(OnNcHitTest),So,我们可以通过手工发送鼠标命中测试枚举值给操作系统,来欺骗操作系统,让操作系统认为鼠标真实的Hit到了非客户区的某个地点.从而乖乖的为我们作出相应.
我大致列一下这些个HitTest枚举:
下面列出的鼠标击中测试枚举值之一。
· HTBORDER 在不具有可变大小边框的窗口的边框上。
· HTBOTTOM 在窗口的水平边框的底部。
· HTBOTTOMLEFT 在窗口边框的左下角。
· HTBOTTOMRIGHT 在窗口边框的右下角。
· HTCAPTION 在标题条中。
· HTCLIENT 在客户区中。
· HTERROR 在屏幕背景或窗口之间的分隔线上(与HTNOWHERE相同,除了Windows的DefWndProc函数产生一个系统响声以指明错误)。
· HTGROWBOX 在尺寸框中。
· HTHSCROLL 在水平滚动条上。
· HTLEFT 在窗口的左边框上。
· HTMAXBUTTON 在最大化按钮上。
· HTMENU 在菜单区域。
· HTMINBUTTON 在最小化按钮上。
· HTNOWHERE 在屏幕背景或窗口之间的分隔线上。
· HTREDUCE 在最小化按钮上。
· HTRIGHT 在窗口的右边框上。
· HTSIZE 在尺寸框中。(与HTGROWBOX相同)
· HTSYSMENU 在控制菜单或子窗口的关闭按钮上。
· HTTOP 在窗口水平边框的上方。
· HTTOPLEFT 在窗口边框的左上角。
· HTTOPRIGHT 在窗口边框的右上角。
· HTTRANSPARENT 在一个被其它窗口覆盖的窗口中。
· HTVSCROLL 在垂直滚动条中。
· HTZOOM 在最大化按钮上。
我们需要使用的只有Left/Top/Right/Bottom四边, TopLeft/BottomLeft/TopRight/BottomRight四角的枚举.
来看看具体实现:
    class WindowResizerImp
    {
        private readonly int agWidth = 12; //拐角宽度
        private readonly int bThickness = 4; // 边框宽度
        private Point mousePoint = new Point(); //鼠标坐标

        private IntPtr WndProc( IntPtr hwnd, int msg, IntPtr wParam, IntPtr lParam, ref bool handled )
        {
            switch ( msg )
            {
                case NativeMethods.WM_NCHITTEST:
                    {
                        return WmNCHitTest( lParam, ref handled );
                    }
            }
            return IntPtr.Zero;
        }

        private IntPtr WmNCHitTest( IntPtr lParam, ref bool handled )
        {
            // Update cursor point
            // The low-order word specifies the x-coordinate of the cursor.
            // #define GET_X_LPARAM(lp) ((int)(short)LOWORD(lp))
            this.mousePoint.X = (int)(short)( lParam.ToInt32() & 0xFFFF );
            // The high-order word specifies the y-coordinate of the cursor.
            // #define GET_Y_LPARAM(lp) ((int)(short)HIWORD(lp))
            this.mousePoint.Y = (int)(short)( lParam.ToInt32() >> 16 );

            // Do hit test
            handled = true;
            if ( Math.Abs( this.mousePoint.Y - _wndTarget.Top ) <= this.agWidth
                && Math.Abs( this.mousePoint.X - _wndTarget.Left ) <= this.agWidth )
            { // Top-Left
                return new IntPtr( (int)NativeMethods.HitTest.HTTOPLEFT );
            }
            else if ( Math.Abs( _wndTarget.ActualHeight + _wndTarget.Top - this.mousePoint.Y ) <= this.agWidth
                && Math.Abs( this.mousePoint.X - _wndTarget.Left ) <= this.agWidth )
            { // Bottom-Left
                return new IntPtr( (int)NativeMethods.HitTest.HTBOTTOMLEFT );
            }
            else if ( Math.Abs( this.mousePoint.Y - _wndTarget.Top ) <= this.agWidth
                && Math.Abs( _wndTarget.ActualWidth + _wndTarget.Left - this.mousePoint.X ) <= this.agWidth )
            { // Top-Right
                return new IntPtr( (int)NativeMethods.HitTest.HTTOPRIGHT );
            }
            else if ( Math.Abs( _wndTarget.ActualWidth + _wndTarget.Left - this.mousePoint.X ) <= this.agWidth
                && Math.Abs( _wndTarget.ActualHeight + _wndTarget.Top - this.mousePoint.Y ) <= this.agWidth )
            { // Bottom-Right
                return new IntPtr( (int)NativeMethods.HitTest.HTBOTTOMRIGHT );
            }
            else if ( Math.Abs( this.mousePoint.X - _wndTarget.Left ) <= this.bThickness )
            { // Left
                return new IntPtr( (int)NativeMethods.HitTest.HTLEFT );
            }
            else if ( Math.Abs( _wndTarget.ActualWidth + _wndTarget.Left - this.mousePoint.X ) <= this.bThickness )
            { // Right
                return new IntPtr( (int)NativeMethods.HitTest.HTRIGHT );
            }
            else if ( Math.Abs( this.mousePoint.Y - _wndTarget.Top ) <= this.bThickness )
            { // Top
                return new IntPtr( (int)NativeMethods.HitTest.HTTOP );
            }
            else if ( Math.Abs( _wndTarget.ActualHeight + _wndTarget.Top - this.mousePoint.Y ) <= this.bThickness )
            { // Bottom
                return new IntPtr( (int)NativeMethods.HitTest.HTBOTTOM );
            }
            else
            {
                handled = false;
                return IntPtr.Zero;
            }
        }
    }
定义了 为HitTest使用的拖拽边框厚度和拐点手柄的大小,当鼠标经过并进入定义的矩形区域内就触发相应的HitTest.
可拖拽区域的命中范围参考下图

Ok, 此项技术的关键点只是在于你要知道 一个Windows 窗口, 在某些情况下系统都偷偷的做了些什么.哪些事情是操作系统自动做的,而我们在什么时候的情况下也可以指示OS来为我们干活.
自定义窗口最大化(位置/大小)
有些情况下,我们可能需要应用程序的窗口最大化的时候不要铺满全屏,比如我需要窗口的最大化固定到我的屏幕右侧,或者距离屏幕顶端150px,这种情况的需求也许不多,但是有一种情况你肯定会遇到过.那么就是你自定义一个Window也实现了最大化功能.
但是你的Window你为其加入了阴影效果(啥是阴影,看上面的Blink) 由于我们的自定义窗口都是先禁用掉了系统边框(WindowStyle.None),并且支持透明化,然后在其基础之上进行的,你所有干的活其实都是在Window的客户区做的.那么你如果想为你的窗
口加入阴影效果,也许你会使用Margin等来为你的阴影让出一点显示的空位,否则你的阴影可能看不到.那么你的窗口在最大化的时候可能就不是完全的最大化,四边全部贴到屏幕显示屏的工作区,也许会有留白.为了干掉这个留白就用到了我们下面说的技术.
一个窗口在最大化的时候到底最大化到多大,最大化到什么位置其实是有 MINMAXINFO 这个结构体来决定的.这个结构体内包含了最大化需要的缺省数据.
结构体:
typedef struct {
POINT ptReserved;
POINT ptMaxSize;
POINT ptMaxPosition;
POINT ptMinTrackSize;
POINT ptMaxTrackSize;
} MINMAXINFO;参数说明:
ptMaxSize: 设置窗口最大化时的宽度、高度
ptMaxPosition: 设置窗口最大化时x坐标、y坐标
ptMinTrackSize: 设置窗口最小宽度、高度
ptMaxTrackSize:设置窗口最大宽度、高度
我们知道Windows系统是以消息为基础的系统,任何处理都有相应的WM消息.最大化也不例外 我们可以找到一个叫做 WM_GETMINMAXINFO 的消息(参见MS档案)
So, 我们知道该怎么做了. 一句话: 抓住 WM_GETMINMAXINFO消息 然后偷偷修改 MINMAXINFO 结构体数据,搞定.
    class WindowResizerImp
    {
        private const int WND_BORDER_DROPSHADOW_SIZE = 4;
        private int? _maxiX = null; // 窗口最大化时的左上角坐标X
        private int? _maxiY = null; // 窗口最大化时的左上角坐标Y
        private Func<int?> _maxiX_call = null;
        private Func<int?> _maxiY_call = null;
        private readonly bool _bUseCall = false; // 使用 xxx_call 还是 field,默认field

        private bool _bFailed = false;

        private Window _wndTarget = null;

        WindowResizerImp( Window wndTarget )
        {
            if ( null == wndTarget )
                _bFailed = true;

            _wndTarget = wndTarget;

            _wndTarget.SourceInitialized += _wndTarget_SourceInitialized;
        }

        public WindowResizerImp( Window wndTarget, Func<int?> maxiX_call = null, Func<int?> maxiY_call = null )
            : this( wndTarget )
        {
            this._maxiX_call = maxiX_call ?? ( () => null );
            this._maxiY_call = maxiY_call ?? ( () => null );

            _bUseCall = true;
        }


        void _wndTarget_SourceInitialized( object sender, EventArgs e )
        {
            addHook();
        }

        private void addHook()
        {
            if ( _bFailed )
                return;

            HwndSource hwndSource = PresentationSource.FromVisual( _wndTarget ) as HwndSource;

            if ( hwndSource != null )
            {
                hwndSource.AddHook( new HwndSourceHook( WndProc ) );
            }
        }


        private IntPtr WndProc( IntPtr hwnd, int msg, IntPtr wParam, IntPtr lParam, ref bool handled )
        {
            switch ( msg )
            {
                case NativeMethods.WM_GETMINMAXINFO:
                    {
                        WmGetMinMaxInfo( hwnd, lParam );
                        handled = true;
                    }
                    break;
            }
            return IntPtr.Zero;
        }

        private void WmGetMinMaxInfo( IntPtr hwnd, IntPtr lParam )
        {

            NativeMethods.MINMAXINFO mmi = (NativeMethods.MINMAXINFO)Marshal.PtrToStructure( lParam, typeof( NativeMethods.MINMAXINFO ) );


            IntPtr monitor = NativeMethods.MonitorFromWindow( hwnd, NativeMethods.MONITOR_DEFAULTTONEAREST );

            if ( monitor != IntPtr.Zero )
            {
                NativeMethods.MONITORINFOEX monitorInfo = new NativeMethods.MONITORINFOEX();
                monitorInfo.cbSize = Marshal.SizeOf( monitorInfo );
                NativeMethods.GetMonitorInfo( new HandleRef( this, monitor ), monitorInfo );
                NativeMethods.RECT rcWorkArea = monitorInfo.rcWork;
                NativeMethods.RECT rcMonitorArea = monitorInfo.rcMonitor;

                //mmi.ptMaxPosition.X = ( null != this.MaxiX ? this.MaxiX.Value : Math.Abs( rcWorkArea.Left - rcMonitorArea.Left ) ) - WND_BORDER_DROPSHADOW_SIZE;
                //mmi.ptMaxPosition.Y = ( null != this.MaxiY ? this.MaxiY.Value : Math.Abs( rcWorkArea.Top - rcMonitorArea.Top ) ) - WND_BORDER_DROPSHADOW_SIZE;


                if ( !_bUseCall )
                {// use field
                    mmi.ptMaxPosition.X = ( null != this._maxiX ? this._maxiX.Value : Math.Abs( rcWorkArea.Left - rcMonitorArea.Left ) ) - WND_BORDER_DROPSHADOW_SIZE;
                    mmi.ptMaxPosition.Y = ( null != this._maxiY ? this._maxiY.Value : Math.Abs( rcWorkArea.Top - rcMonitorArea.Top ) ) - WND_BORDER_DROPSHADOW_SIZE;
                }
                else
                {
                    if ( null == this._maxiX_call )
                        this._maxiX_call = () => null;
                    if ( null == this._maxiY_call )
                        this._maxiY_call = () => null;

                    int? ret_x = this._maxiX_call.Invoke();
                    int? ret_y = this._maxiY_call.Invoke();

                    mmi.ptMaxPosition.X = ( null != ret_x ? ret_x.Value : Math.Abs( rcWorkArea.Left - rcMonitorArea.Left ) ) - WND_BORDER_DROPSHADOW_SIZE;
                    mmi.ptMaxPosition.Y = ( null != ret_y ? ret_y.Value : Math.Abs( rcWorkArea.Top - rcMonitorArea.Top ) ) - WND_BORDER_DROPSHADOW_SIZE;
                }

                mmi.ptMaxSize.X =
                    Math.Abs(
                    Math.Abs( rcWorkArea.Right - rcWorkArea.Left ) + WND_BORDER_DROPSHADOW_SIZE - mmi.ptMaxPosition.X );
                mmi.ptMaxSize.Y = Math.Abs(
                    Math.Abs( rcWorkArea.Bottom - rcWorkArea.Top ) + WND_BORDER_DROPSHADOW_SIZE - mmi.ptMaxPosition.Y );
                mmi.ptMinTrackSize.X = (int)this._wndTarget.MinWidth;
                mmi.ptMinTrackSize.Y = (int)this._wndTarget.MinHeight;
            }

            Marshal.StructureToPtr( mmi, lParam, true );
        }
    }
- IntPtr monitor = NativeMethods.MonitorFromWindow( hwnd, NativeMethods.MONITOR_DEFAULTTONEAREST ); 为获取应用程序所在屏幕的句柄
- NativeMethods.GetMonitorInfo( new HandleRef( this, monitor ), monitorInfo ); 为获取 monitor屏幕的工作区大小等信息
- Func<int?> maxiX_call = null, Func<int?> maxiY_call = null 为方便在 自定义窗口基类中对这两个传入值进行Override. 如果不理解,你就当他是2个传入的自定义的宽高int值吧.
- 由于 MINMAXINFO结构数据为非托管数据.如果我们想要得到它,我们需要调用 Marshal.PtrToStructure(...) 方法来将非托管内存块封送到托管对象中,说白了就是从非托管拿数据来,然后存到我自己的变量中.
- 在我们重新修改数据后,怎么拿来的要怎么还回去.因此还回数据是将托管对象数据封送到指定的内存块中 , Marshal.StructureToPtr(...). marshal 是个牛x的类,记住哟!
到此, RT中的技术点已经介绍完了.
补充一点: "小明! 在Win7+ 的系统中最大化一个窗口后,鼠标无需双击标题栏来取消最大化,直接按住拽下来就可以.你知道嘛?" 小明:"啥?这么容易就脱下来了啊?" "滚出去!"
补充一下自定义窗口如何实现类似默认窗口的直接拖拽窗口标题栏就可以取消最大化的功能,一句话攻略: 向OS发送WM_NCLBUTTONDOWN消息,并携带HTCAPTION的HitTest值即可.具体,小明你自己玩去吧!
文章中涉及的部分代码整理, 由于代码是我自己的UIShell ui框架中的一部分,因此暂时无法提供窗口等Controls的源码,但是我已经免费奉送了 文章中关于这几个技术点的类,几个点我都是直接写到一个类中的.可以凑合看看.
传送门(CSDN的),你0分下载我也赚1分辛苦分: http://download.csdn.net/detail/wangye2008/8128519
/*******************************************************/
欢迎转载!欢迎拍砖!
版权所有 © Vito野子
E-mail: vito2015@live.com
转载请注明出处 http://www.cnblogs.com/Vito2008/p/WPF-UIShell-UIFramework-Blink-WmNCHitTest-WmGetMinMaxInfo.html
/*******************************************************/