一、JDBC模板使用入门
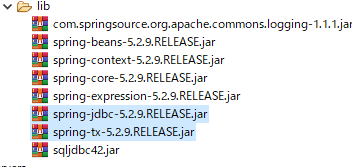
①、创建项目,引入jar包
-
- 引入基本开发包
- spring-beans-5.2.9.RELEASE.jar
- spring-context-5.2.9.RELEASE.jar
- spring-core-5.2.9.RELEASE.jar
- spring-expression-5.2.9.RELEASE.jar
- com.springsource.org.apache.commons.logging-1.1.1.jar
- 数据库驱动
- sqljdbc42.jar
- Spring的JDBC模板的jar包
- spring-jdbc-5.2.9.RELEASE.jar
- spring-tx-5.2.9.RELEASE.jar
- 引入基本开发包
②、创建数据库和表
create database [HibernateDB]
USE [HibernateDB]
CREATE TABLE [dbo].[account](
    [id] [int] IDENTITY(1,1) NOT NULL,
    [name] [varchar](50) NULL,
    [money] [decimal](18, 2) NULL,
 CONSTRAINT [PK_account] PRIMARY KEY CLUSTERED
(
    [id] ASC
)WITH (PAD_INDEX = OFF, STATISTICS_NORECOMPUTE = OFF, IGNORE_DUP_KEY = OFF, ALLOW_ROW_LOCKS = ON,
ALLOW_PAGE_LOCKS = ON) ON [PRIMARY]
) ON [PRIMARY]
GO
③、使用JDBC的模板:保存数据
public class JdbcDemo {
    @Test
    public void demo1() {
    //创建连接池
    DriverManagerDataSource dataSource=new DriverManagerDataSource();
    dataSource.setDriverClassName("com.microsoft.sqlserver.jdbc.SQLServerDriver");
    dataSource.setUrl("jdbc:sqlserver://localhost:1433;databaseName=HibernateDB;");
    dataSource.setUsername("sa");
    dataSource.setPassword("AAA@111");

    //创建jdbc模板
    JdbcTemplate jdbcTemplate=new JdbcTemplate(dataSource);
    jdbcTemplate.update("insert into account values(?,?)","zhangsan",1000000.00);
    }
}
④、将连接池和JDBC模板交给Spring管理
Ⅰ、引入spring-aop-5.x.jar
Ⅱ、新建Spring的配置文件
<beans xmlns="http://www.springframework.org/schema/beans"
    xmlns:xsi="http://www.w3.org/2001/XMLSchema-instance"
    xsi:schemaLocation="
        http://www.springframework.org/schema/beans
     https://www.springframework.org/schema/beans/spring-beans.xsd">

    <bean id="dataSource" class="org.springframework.jdbc.datasource.DriverManagerDataSource">
        <property name="driverClassName" value="com.microsoft.sqlserver.jdbc.SQLServerDriver"/>
        <property name="url" value="jdbc:sqlserver://localhost:1433;databaseName=HibernateDB;"/>
        <property name="username" value="sa"/>
        <property name="password" value="AAA@111"/>
    </bean>

    <bean id="jdbcTemplate" class="org.springframework.jdbc.core.JdbcTemplate">
        <!-- 属性注入  jdbcTemplate实例化时,需要dataSource-->
        <property name="dataSource" ref="dataSource"></property>
    </bean>

</beans>
Ⅲ、测试方法
//使用@SpringJUnitConfig此注解需要引入spring-test...jar包
@SpringJUnitConfig(locations = "classpath:applicationContext.xml")
public class JdbcDemo {
    @Autowired
    private JdbcTemplate jdbcTemplate;
    @Test
    public void demo1() {

    jdbcTemplate.update("insert into account values(?,?)","zhangsan",1000000.00);
    }
}
二、使用开源的数据库连接池
①、DBCP的使用
Ⅰ、引入jar包
com.springsource.org.apache.commons.dbcp-1.2.2.osgi.jar
com.springsource.org.apache.commons.logging-1.1.1.jar
Ⅱ、配置DBCP连接池
    <bean id="dataSource" class="org.apache.commons.dbcp.BasicDataSource">
        <property name="driverClassName" value="com.microsoft.sqlserver.jdbc.SQLServerDriver"/>
        <property name="url" value="jdbc:sqlserver://localhost:1433;databaseName=HibernateDB;"/>
        <property name="username" value="sa"/>
        <property name="password" value="AAA@111"/>
    </bean>

    <bean id="jdbcTemplate" class="org.springframework.jdbc.core.JdbcTemplate">
        <!-- 属性注入  jdbcTemplate实例化时,需要dataSource-->
        <property name="dataSource" ref="dataSource"></property>
    </bean>
②、C3P0的使用
Ⅰ、引入c3p0连接池jar包
com.springsource.com.mchange.v2.c3p0-0.9.1.2.jar
Ⅱ、配置c3p0连接池
    <bean id="dataSource" class="com.mchange.v2.c3p0.ComboPooledDataSource">
        <property name="driverClass" value="com.microsoft.sqlserver.jdbc.SQLServerDriver"/>
        <property name="jdbcUrl" value="jdbc:sqlserver://localhost:1433;databaseName=HibernateDB;"/>
        <property name="user" value="sa"/>
        <property name="password" value="AAA@111"/>
    </bean>

    <bean id="jdbcTemplate" class="org.springframework.jdbc.core.JdbcTemplate">
        <!-- 属性注入  jdbcTemplate实例化时,需要dataSource-->
        <property name="dataSource" ref="dataSource"></property>
    </bean>
三、抽取配置到属性文件(.properties)
①、定义一个属性文件(jdbc.properties)
jdbc.driverClass=com.microsoft.sqlserver.jdbc.SQLServerDriver
jdbc.url=jdbc:sqlserver://localhost:1433;databaseName=HibernateDB;
jdbc.username=sa
jdbc.password=AAA@111
②、在Spring的配置文件中引入属性文件
Ⅰ、通过一个bean标签引入(很少)
    <bean class="org.springframework.beans.factory.config.PropertyPlaceholderConfigurer">
        <property name="location" value="classpath:jdbc.properties"/>
    </bean>
Ⅱ、通过context标签引入
<context:property-placeholder location="classpath:jdbc.properties"/>
③、引入属性文件的值
    <bean id="dataSource" class="com.mchange.v2.c3p0.ComboPooledDataSource">
        <property name="driverClass" value="${jdbc.driverClass}"/>
        <property name="jdbcUrl" value="${jdbc.url}"/>
        <property name="user" value="${jdbc.username}"/>
        <property name="password" value="${jdbc.password}"/>
    </bean>
四、使用JDBC的模板完成CRUD的操作
①、插入
@SpringJUnitConfig(locations = "classpath:applicationContext.xml")
public class JdbcDemo {

    @Autowired
    private JdbcTemplate jdbcTemplate;

    @Test
    public void demo1() {
    jdbcTemplate.update("insert into account values(?,?)", "zhangsan", 1000000.00);
    }
}
②、更新
    @Test
    public void demo2() {
    jdbcTemplate.update("update account set name=?,money=? where id =?", "lisi", 2000000.00, 2);
    }
③、删除
    @Test
    public void demo3() {
    jdbcTemplate.update("delete from account where id=?", 3);
    }
以上[.update()]方法就可以了
④、查询
Ⅰ、查询某个属性(单个值)
    @Test
    public void demo4() {
    String name = jdbcTemplate.queryForObject("select name from account where id=?", String.class, 4);
    System.out.println(name);
    }

    @Test
    public void demo5() {
    Long count = jdbcTemplate.queryForObject("select count(*) from account ", Long.class);
    System.out.println(count);
    }
Ⅱ、查询某个属性集合
    @Test
    public void demo8() {
    List<Integer> list = jdbcTemplate.queryForList("select id from account ",Integer.class);
    for (Integer id : list) {
        System.out.println(id);
    }
    }
注意queryForList(sql,elementType)中的elementType:不支持自定义bean,这个class也只是支持Integer,String这些基本类型
Ⅲ、查询返回对象或集合
    @Test
    public void demo6() {
    Account account = jdbcTemplate.queryForObject("select * from account where id=?", new MyRowMapper(), 4);
    System.out.println(account);
    }

    @Test
    public void demo7() {
    List<Account> list = jdbcTemplate.query("select * from account ",new MyRowMapper());
    for (Account account : list) {
        System.out.println(account);
    }
    }

    class MyRowMapper implements RowMapper<Account> {
      @Override
      public Account mapRow(ResultSet rs, int rowNum) throws SQLException {
          Account account = new Account();
          account.setId(rs.getInt("id"));
          account.setName(rs.getString("name"));
          account.setMoney(rs.getBigDecimal("money"));
          return account;
      }
    }