1、创建root:
from tkinter import *

root = Tk()
root.title('GUI设计')
# root.attributes("-alpha", 0.3)窗口透明度70 %
# w, h = root.maxsize()
# root.geometry('%dx%d+%d+%d' % (1675, 976, -14/2, 0/2))  # 初始大小和屏幕位置
root.minsize(1024, 768)  # 屏幕最小
# root.resizable(width=False, height=False)  # 宽不可变 高bu可变 默认True

# 使用attributes()方法
# root.attributes("-fullscreen", True)  # 全屏显示

root.mainloop()
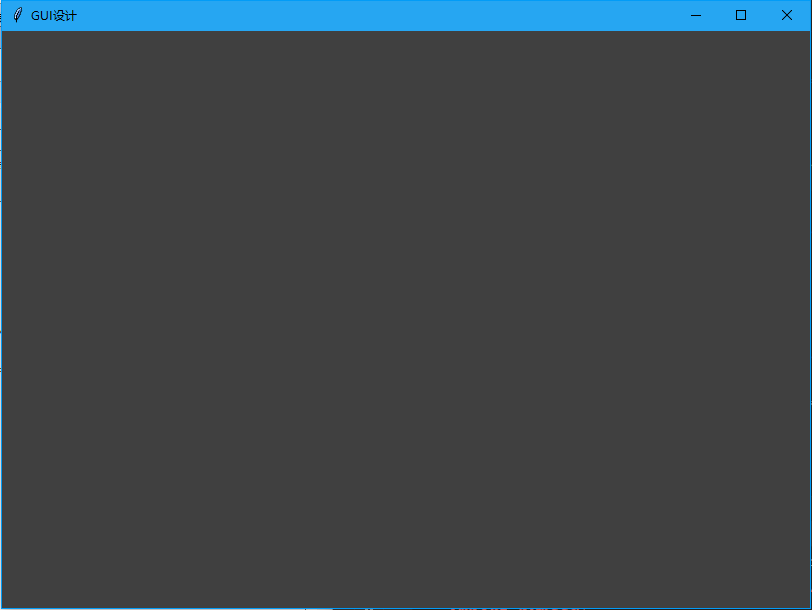
2、将整个画布涂灰:
这里我选择用一个Frame组件frm1进行覆盖。
frm1 = Frame(root, bg="#404040")
frm1.grid(sticky=W+E+N+S)

root.rowconfigure(0, weight=1)
root.columnconfigure(0, weight=1)
如图:
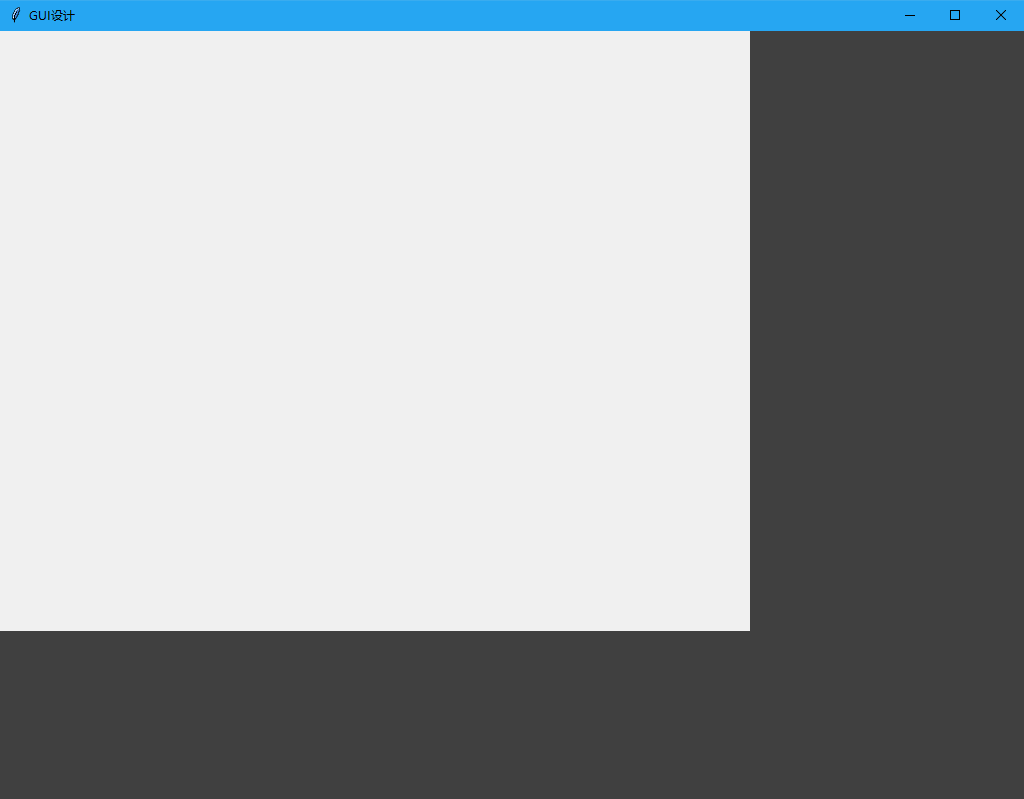
3、再新建一个Frame组件frm2:
frm2为的,是将界面的小部件都放到其中,相当于一个容器。
frm2 = Frame(frm1, width=750, height=600)
frm2.grid(row=0, column=0)
frm2.grid_propagate(0)  # 父部件大小与子部件大小无关
如图:
那得把frm2组件居中啊,可是如果输入sticky=CENTER程序就会报错,我们只能曲线救国了。
frm1.rowconfigure(0, weight=1)
frm1.columnconfigure(0, weight=1)
如图:
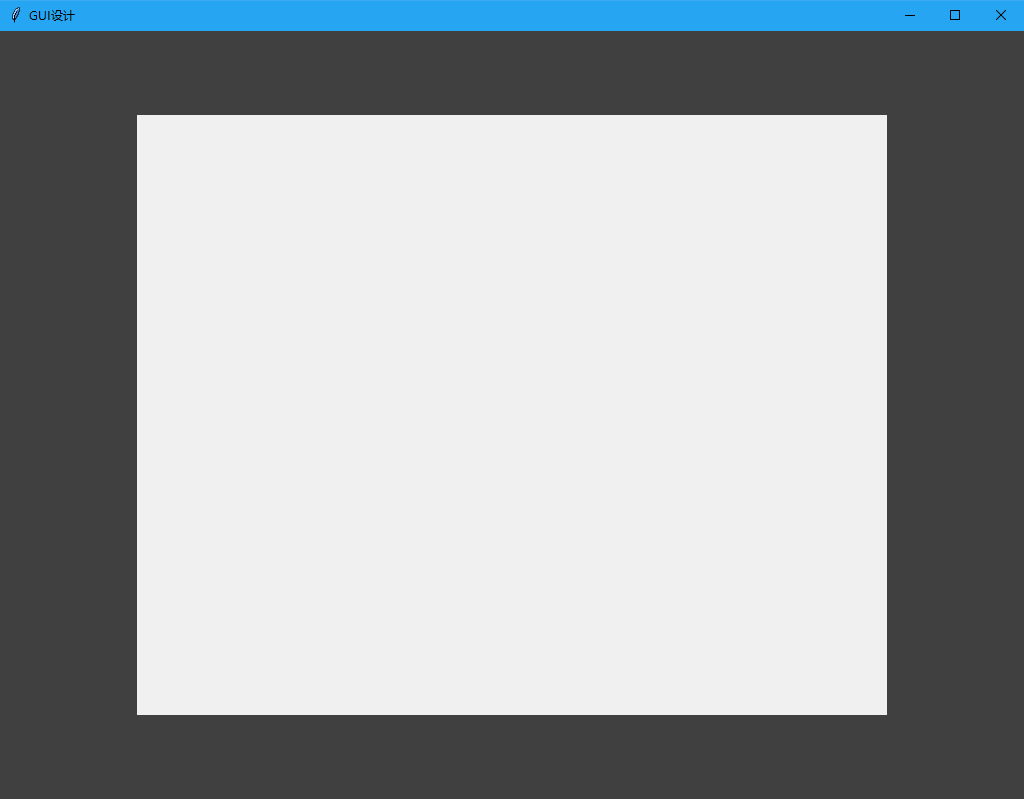
搞定,继续下一步吧。
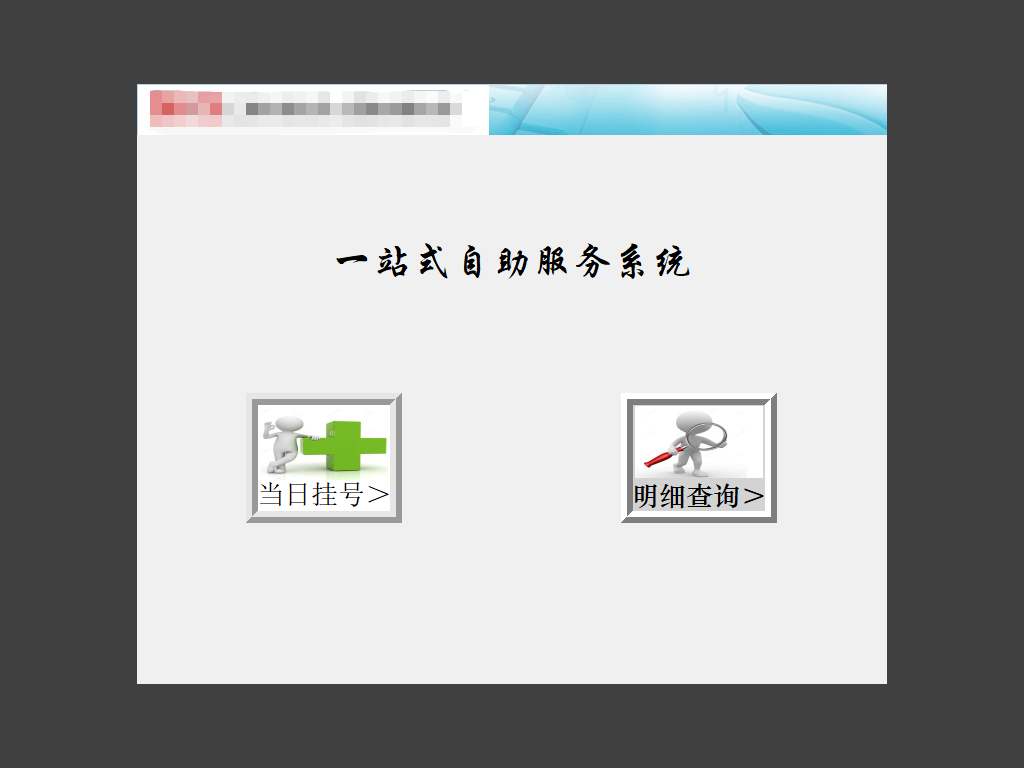
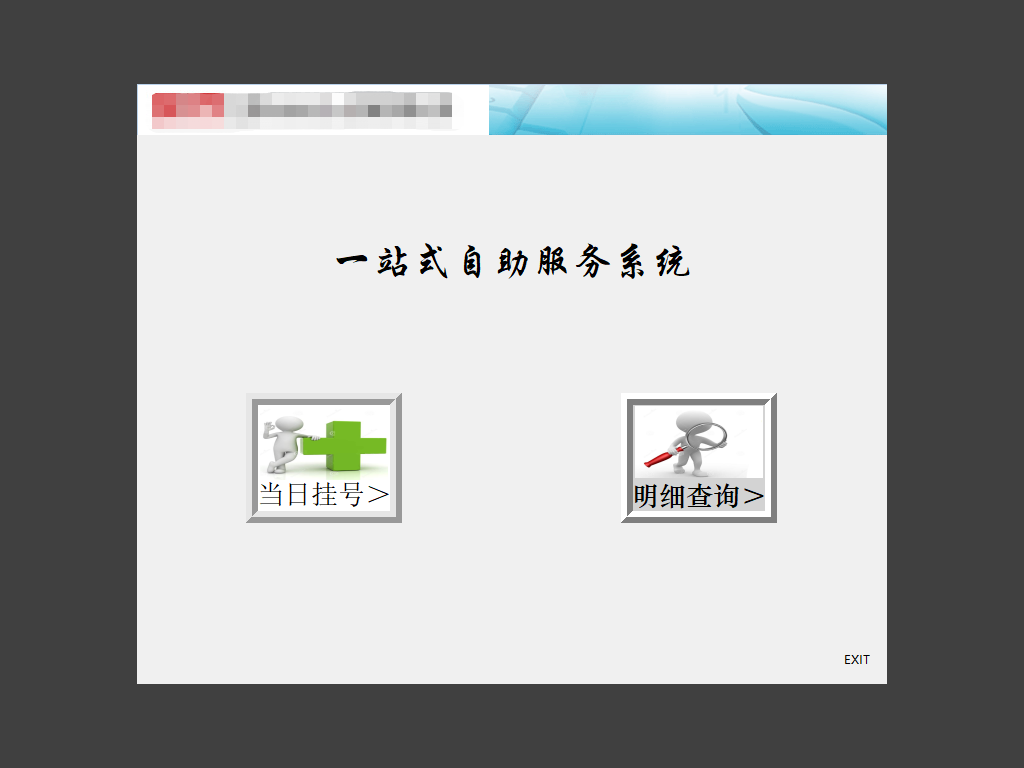
4、从效果图看,我们还得将frm2分成3行2列:
一Label二Label三Button
    logo_photo = PhotoImage(file='logo.png')
    Label(frm2,
          # text="一站式自助服务系统",
          justify=tkinter.CENTER,
          image=logo_photo,
          compound=tkinter.CENTER,  # 关键:设置为背景图片
          # bg="blue",
          # font=("华文行楷", 30),  # 字体和字号
          # fg="white"
          borderwidth=0,
          ).grid(row=0, column=0, columnspan=2)  # 前景色
    Label(frm2, height=6, text='一站式自助服务系统', font=('华文行楷', 30)).grid(row=1, column=0, columnspan=2)

    gh_photo = PhotoImage(file='guahao.png')
    cx_photo = PhotoImage(file="chaxun.png")
    Button(frm2, image=gh_photo, compound='top', text='当日挂号>', font=("华文楷书", 20), relief="ridge", borderwidth=12, width=128, height=102, bg="White", command=registerinterface).grid(row=2, column=0)
    Button(frm2, image=cx_photo, compound='top', text='明细查询>', font=("华文中宋", 20), relief="ridge", borderwidth=12, width=128, height=102, bg='#D3D3D3', command=inquiryinterface).grid(row=2, column=1)  # 按钮
如图:
5、再加个隐形的“退出”按钮吧:
因为在全屏状态下只能从任务管理器关闭略显麻烦。
Button(frm2, width=8, height=2, text='EXIT', fg='white', borderwidth=0, command=root.destroy).grid(row=3, column=1, pady=114, sticky=E+S)
如图:
上图的“EXIT”只有在鼠标点击时才会出来呦~~
搞定,溜了溜了。