前端学习之jQuery
一、 jQuery是什么?
<1> jQuery由美国人John Resig创建,至今已吸引了来自世界各地的众多 javascript高手加入其team。
<2>jQuery是继prototype之后又一个优秀的Javascript框架。其宗旨是——WRITE LESS,DO MORE!
<3>它是轻量级的js库(压缩后只有21k) ,这是其它的js库所不及的,它兼容CSS3,还兼容各种浏览器
<4>jQuery是一个快速的,简洁的javaScript库,使用户能更方便地处理HTMLdocuments、events、实现动画效果,并且方便地为网站提供AJAX交互。
<5>jQuery还有一个比较大的优势是,它的文档说明很全,而且各种应用也说得很详细,同时还有许多成熟的插件可供选择
点击下载:jQuery 插件库下载地址
二、 什么是jQuery对象?
jQuery 对象就是通过jQuery包装DOM对象后产生的对象。jQuery 对象是 jQuery 独有的. 如果一个对象是 jQuery 对象, 那么它就可以使用 jQuery 里的方法: $(“#test”).html();
$("#test").html()
       //意思是指:获取ID为test的元素内的html代码。其中html()是jQuery里的方法

       // 这段代码等同于用DOM实现代码: document.getElementById(" test ").innerHTML;

       //虽然jQuery对象是包装DOM对象后产生的,但是jQuery无法使用DOM对象的任何方法,同理DOM对象也不能使用jQuery里的方法.乱使用会报错

       //约定:如果获取的是 jQuery 对象, 那么要在变量前面加上$.

var $variable = jQuery 对象
var variable = DOM 对象

$variable[0]:jquery对象转为dom对象      $("#msg").html(); $("#msg")[0].innerHTML
jquery的基础语法:$(selector).action()
三、寻找元素(选择器和筛选器)
3.1 选择器
3.1.1 基本选择器
$("*")
$("#id")
$(".class")
$("element")
$(".class,p,div")
3.1.2 层级选择器
$(".outer div")  //后代选择器 所有后代
$(".outer>div")   //子代选择器 直接关系的子代
$(".outer+div")   //向下毗邻选择器 必须向下紧挨着的兄弟
$(".outer~div")  //向下兄弟选择器 必须是向下的兄弟 不必毗邻
3.1.3 基本筛选器
$("li:first")  //第一个li标签
$("li:last")  //最后一个li标签
$("li:eq(2)")  //从0开始 eq(0) 是第一个
$("li:even")  //所有的偶数行 第0 2 4 ...行
$("li:odd")  //所有的奇数行 第1 3 5 ... 行
$("li:gt(1)")  //选择大于该行之后的所有行 从第2行之后开始
$("li:lt(1)")  //选择小鱼该行之前的所有行
3.1.4 属性选择器
$('[id="div1"]')
$('["alex="sb"][id]')
3.1.5 表单选择器
$("[type='text']")----->$(":text") 注意只适用于input标签 : $("input:checked")
实例之左侧菜单
实例之tab切换
3.2 筛选器
3.2.1 过滤筛选器
$("li:eq(3)").css("color","red");
$("li").eq(2).css("color","red");   //推荐使用第二种方法
$("li").first().css("color","red");
$("li").last().css("color","red");
3.2.2 查找筛选器(重要!!!)4类必记
$(".outer").next().css("color","blue");  //下面一个
$(".outer").nextAll().css("color","blue");   //下面所有
$(".outer").nextUntil(".li555").css("color","blue"); //选择下面的一个区间 两边开区间

$("outer").prev().css("color","blue");   //前一个
$("outer").prevAll().css("color","blue");    //前一个及所有
$("outer").prevUntil("li222").css("color","blue");  //前面的一个区间 两边开区间

console.log($(".outer .inner p").parent().html());    //找到父亲
$(".inner").parents().css("color","blue");   //找到父亲及父亲的所有兄弟
$(".li222").parentUntil(".outer").css("color","red");
    $(".outer").siblings().css("color","red");   //所有兄弟(除掉自己)
练习:收缩左侧菜单栏
效果:
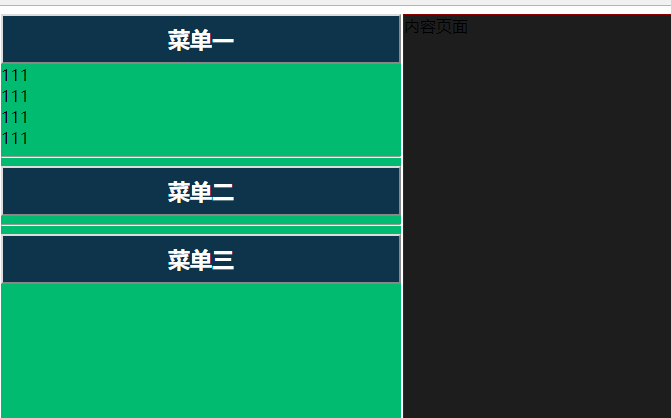
代码:


<!DOCTYPE html>
<html lang="en">
<head>
    <meta charset="UTF-8">
    <title>左侧菜单栏练习</title>
    <style>
        .outer{ 100%;height: 1080px}
        .content{
            display: inline-block;
             69%;
            height: 100%;
            margin-left: 2px;
            background-color: #1E1E1F;
            border: 1px solid darkred;
        }
        .menu-box{
            float: left;
             30%;
            height: 100%;
            background-color: #00bc6f;
        }
        .menu .title{
             400px;
            background-color: #0d354b;
            color: white;
            font-size: 22px;
            font-weight: 700;
            height: 50px;
        }
        .hide{display: none}
    </style>
</head>
<body>
<div class="outer">
    <div class="menu-box">
        <div class="menu box1">
            <button class="title" onclick="expand_menu(this)">菜单一</button>
            <div class="conn">
                <div>111</div>
                <div>111</div>
                <div>111</div>
                <div>111</div>
            </div>
        </div>
        <hr/>
        <div class="menu box2">
            <button class="title" onclick="expand_menu(this)">菜单二</button>
            <div class="conn hide">
                <div>222</div>
                <div>222</div>
                <div>222</div>
                <div>222</div>
            </div>
        </div>
        <hr/>
        <div class="menu box3">
            <button class="title" onclick="expand_menu(this)">菜单三</button>
            <div class="conn hide">
                <div>333</div>
                <div>333</div>
                <div>333</div>
                <div>333</div>
            </div>
        </div>
    </div>
    <div class="content">内容页面</div>
</div>
<script src="jquery-3.3.1.js"></script>
<script>
    function expand_menu(self){
        $(self).next().removeClass("hide");
        $(self).parent().siblings().children(".conn").addClass("hide")
    }

</script>
</body>
</html>
四 、操作元素(属性,css,文档处理)
.hasClass() 方法
//$("div").hasClass("div1") 判断一个标签中是否有某个class属性
console.log($("div").hasClass("div1"));    //true
4.1 属性操作
--------------------------属性
$("").attr();
$("").removeAttr();
$("").prop();
$("").removeProp();
HTML标签:
<div class="div1" id="dd1" con="connect"></div>
<input type="checkbox" checked="checked">是否选择
<input type="checkbox">是否选择
练习:
// --------------------------属性
    // $("").attr();   //重要! attr()中一个参数 提取属性,两个参数是替换
    // $("").removeAttr();
    // $("").prop();   //重要! prop中一个参数 提取属性,两个参数是替换
    // $("").removeProp();
    // ---------------------------
    // $("").css("color","red")
    //attr 不能找到input ->checkbox 是否是checked,prop能检测出checked 且返回true
    // console.log($("[type='checkbox']:first").attr("checked"));
    // console.log($("[type='checkbox']:last").attr("checked"))
    // console.log($(":checkbox:first").prop("checked"))
    // console.log($(":checkbox:last").prop("checked"))
    //attr 能找到标签固有的属性 如class id属性 也能找到自定义的属性 如con
    //prop 只能找到标签固有的属性
    console.log($("div").attr("class"))     //div1
    console.log($("div").attr("id"))        //dd1
    console.log($("div").attr("con"))       //connect
    console.log($("div").prop("class"))     //div1
    console.log($("div").prop("id"))        //dd1
    console.log($("div").prop("con"))       //undefined
--------------------------CSS类
$("").addClass(class|fn)
$("").removeClass([class|fn])
HTML标签:
<span id="aaa">
    spanspanspan
    <p class="ip1">spspspsp</p>
</span>
练习:
// --------------------------CSS类
    // $("").addClass(class|fn)    //添加 class属性
    // $("").removeClass([class|fn])
    console.log($("#aaa").addClass("bcbcbc").hasClass("bcbcbc"))    //true
    console.log($("#aaa p").removeClass("ip1").hasClass("ip1"))     //false
--------------------------HTML代码/文本/值
$("").html([val|fn])     //获取HTML标签,参数是标签则替换
$("").text([val|fn])     //只获取内容
HTML标签:
<input type="text" value="1234">
<div class="vava" value="111222">添加css样式</div>
练习:
console.log($("#aaa").html())
    $("#aaa").html("<h1>hello h1</h1>")
    console.log($("#aaa").text())
    // $("").val([val|fn|arr])  //获取标签中有value固有属性的 取出value值 如input select option 表单标签都有
    console.log($(":text").val())
    console.log($(".vava").val())   //div 标签固有属性中没有 value
    console.log($(":text").val(6789))
---------------------------
$("").css("color","red")
$("#vava").css({"color":"red","background-color":"gray"})
注意:
<input id="chk1" type="checkbox" />是否可见
<input id="chk2" type="checkbox" checked="checked" />是否可见


<script>

//对于HTML元素本身就带有的固有属性,在处理时,使用prop方法。
//对于HTML元素我们自己自定义的DOM属性,在处理时,使用attr方法。
//像checkbox,radio和select这样的元素,选中属性对应“checked”和“selected”,这些也属于固有属性,因此
//需要使用prop方法去操作才能获得正确的结果。


//    $("#chk1").attr("checked")
//    undefined
//    $("#chk1").prop("checked")
//    false

//  ---------手动选中的时候attr()获得到没有意义的undefined-----------
//    $("#chk1").attr("checked")
//    undefined
//    $("#chk1").prop("checked")
//    true

    console.log($("#chk1").prop("checked"));//false
    console.log($("#chk2").prop("checked"));//true
    console.log($("#chk1").attr("checked"));//undefined
    console.log($("#chk2").attr("checked"));//checked
</script>

attr和prop
实例之全反选
<!DOCTYPE html>
<html lang="en">
<head>
    <meta charset="UTF-8">
    <title>Title</title>
    <script src="jquery-1.11.3.min.js"></script>
    <script>

             function selectall(){

                 $("table :checkbox").prop("checked",true)
             }
             function cancel(){

                 $("table :checkbox").prop("checked",false)
             }

             function reverse(){


                 //                 var idlist=$("table :checkbox")
//                 for(var i=0;i<idlist.length;i++){
//                     var element=idlist[i];
//
//                     var ischecked=$(element).prop("checked")
//                     if (ischecked){
//                         $(element).prop("checked",false)
//                     }
//                     else {
//                         $(element).prop("checked",true)
//                     }
//
//                 }
//    jquery循环的两种方式
                 //方式一
//                 li=[10,20,30,40]
//                 dic={name:"yuan",sex:"male"}
//                 $.each(li,function(i,x){
//                     console.log(i,x)
//                 })

                 //方式二
//                    $("tr").each(function(){
//                        console.log($(this).html())
//                    })


                 $("table :checkbox").each(function(){

                     $(this).prop("checked",!$(this).prop("checked"));

//                     if ($(this).prop("checked")){
//                         $(this).prop("checked",false)
//                     }
//                     else {
//                         $(this).prop("checked",true)
//                     }

                     // 思考:如果用attr方法可以实现吗?


                 });
             }

    </script>
</head>
<body>

     <button onclick="selectall();">全选</button>
     <button onclick="cancel();">取消</button>
     <button onclick="reverse();">反选</button>

     <table border="1">
         <tr>
             <td><input type="checkbox"></td>
             <td>111</td>
         </tr>
         <tr>
             <td><input type="checkbox"></td>
             <td>222</td>
         </tr>
         <tr>
             <td><input type="checkbox"></td>
             <td>333</td>
         </tr>
         <tr>
             <td><input type="checkbox"></td>
             <td>444</td>
         </tr>
     </table>


</body>
</html>
实例之模态对话框
<!DOCTYPE html>
<html lang="en">
<head>
    <meta charset="UTF-8">
    <title>Title</title>
    <style>
        .back{
            background-color: rebeccapurple;
            height: 2000px;
        }

        .shade{
            position: fixed;
            top: 0;
            bottom: 0;
            left:0;
            right: 0;
            background-color: coral;
            opacity: 0.4;
        }

        .hide{
            display: none;
        }

        .models{
            position: fixed;
            top: 50%;
            left: 50%;
            margin-left: -100px;
            margin-top: -100px;
            height: 200px;
             200px;
            background-color: gold;

        }
    </style>
</head>
<body>
<div class="back">
    <input id="ID1" type="button" value="click" onclick="action1(this)">
</div>

<div class="shade hide"></div>
<div class="models hide">
    <input id="ID2" type="button" value="cancel" onclick="action2(this)">
</div>


<script src="jquery-1.11.3.min.js"></script>
<script>

    function action1(self){
        $(self).parent().siblings().removeClass("hide");

    }
    function action2(self){
        //$(self).parent().parent().children(".models,.shade").addClass("hide")

        $(self).parent().addClass("hide").prev().addClass("hide")

    }
</script>
</body>
</html>
4.2 文档处理
//创建一个标签对象
    $("<p>")


//内部插入

    $("").append(content|fn)      ----->$("p").append("<b>Hello</b>");
    $("").appendTo(content)       ----->$("p").appendTo("div");
    $("").prepend(content|fn)     ----->$("p").prepend("<b>Hello</b>");
    $("").prependTo(content)      ----->$("p").prependTo("#foo");

//外部插入

    $("").after(content|fn)       ----->$("p").after("<b>Hello</b>");
    $("").before(content|fn)      ----->$("p").before("<b>Hello</b>");
    $("").insertAfter(content)    ----->$("p").insertAfter("#foo");
    $("").insertBefore(content)   ----->$("p").insertBefore("#foo");

//替换
    $("").replaceWith(content|fn) ----->$("p").replaceWith("<b>Paragraph. </b>");

//删除

    $("").empty()
    $("").remove([expr])

//复制

    $("").clone([Even[,deepEven]])
文档处理小练习:
<!DOCTYPE html>
<html lang="en">
<head>
    <meta charset="UTF-8">
    <title>Title</title>
</head>
<body>
<div class="div1">
    <p>hello ppp</p>
</div>
<div class="div2">
    <button>add</button>
</div>
<script src="jquery-3.3.1.js"></script>
<script>
    $(".div2 button").click(function () {
////内部插入------------------
        //方式一 写死了不推荐使用
        $(".div1").append("<h1>HELLO WORLD!</h1>")
        $(".div1 h1").css("color","red")
        //方式二 推荐 var $ele 注意$ele $与ele之间不能有空格,并且ele不能用括号括起来
        var $ele=$("<h1></h1>")
        $ele.html("HELLO PIG")
        $ele.css("color","red")
        $(".div1").append($ele)
        $ele.appendTo($(".div1"))
        $(".div1").prepend($ele)
        $ele.prependTo($(".div1"))
////外部插入------------------
        $(".div1").after($ele)
        $ele.innerAfter(".div1")
        $(".div1").before($ele)
        $ele.innerBefore(".div1")
////替换-----------------------
        $("p").replaceWith($ele)
////删除与清空-----------------------
        $("p").empty()
        $("p").remove()
////复制-----------------------
        $("p:first").clone().appendTo($(".div1"))

    })
</script>
</body>
</html>
实例之复制样式条
<!DOCTYPE html>
<html lang="en">
<head>
    <meta charset="UTF-8">
    <title>Title</title>
</head>
<body>
    <div class="outer">
        <div class="item">
            <button onclick="add(this)">+</button>
            <input type="text">
        </div>
    </div>
    <script src="jquery-3.3.1.js"></script>
    <script>
        function add(self) {
            var $ele=$(self).parent().clone()
            $ele.children("button").html("-").attr("onclick","delete_item(this)")
            $(".item:first").after($ele)
            // $(".outer").append($ele)
        }
        function delete_item(self) {
            $(self).parent().remove()
        }
    </script>
</body>
</html>
补充:
document.createElement方法的使用
我们在使用createElemen方法t创建一个元素节点的时候,似乎在IE下面怎么写都可以,但切换到FF等其它浏览器却总是会报错。

  比如我们要创建一个input元素,那么在IE下,我们可以有多种写法:

要测试某种情况,请将其它情况注释:

<script type="text/javascript">
//第一种,连同属性一起被创建
var x = document.createElement("<input  type='text' size='30' />");
//第二种,以空标签形式创建
var x = document.createElement("<input  />");
//第三种,以tagName形式创建
var x = document.createElement("input ");

document.body.appendChild(x);
</script>

  以上3种方式在IE中均可以通行,然后再非IE核心的浏览器中(如FF,OP,SF等),前2种写法均会报错,无法正确创建这个input元素。

  标准写法为第3种,放之各浏览器而皆准。

  由于在IE中使用createElement方法创建元素节点时,该元素的属性可以一起被创建,但这在其它浏览器中是行不通的,所以我们还得通过其它的方式来创建其属性。

创建一个带属性的元素节点的标准写法:

<script type="text/javascript">
var x = document.createElement("input");
x.setAttribute("type","text");
x.setAttribute("size","30");

document.body.appendChild(x);
</script>

  增加一个属性就document.setAttribute("attribute","value")一次。

  后来发现其实还可以这样来写:

<script type="text/javascript">
var x = document.createElement("input");
x.type = "text";

document.body.appendChild(x);
</script>

  但使用这种来创建属性,好像并不是素所有的属性都能被创建,比如input的size,value,class等用这种方式就无法创建,至于具体原因我还不大清楚。所以推荐使用前面那种写法。
4.3 css操作
CSS
        $("").css(name|pro|[,val|fn])
    位置
        $("").offset([coordinates])
        $("").position()
        $("").scrollTop([val])
        $("").scrollLeft([val])
    尺寸
        $("").height([val|fn])
        $("").width([val|fn])
        $("").innerHeight()
        $("").innerWidth()
        $("").outerHeight([soptions])
        $("").outerWidth([options])
实例返回顶部
<!DOCTYPE html>
<html lang="en">
<head>
    <meta charset="UTF-8">
    <title>Title</title>
    <style>
        *{
            margin: 0;
            padding: 0;
        }
        .outer{ 100%;height: 100%}
        .item1{
             80%;
            height: 800px;
            background-color: #00bc6f;
            margin: 0 auto 0 auto;
            border: 1px solid darkred;
            overflow: auto;
        }
        .item2{
             80%;
            height: 800px;
            background-color: #bc42a0;
            margin: 0 auto 0 auto;
            border: 1px solid darkblue;
        }
        .item2 button{
            height: 60px;
             90px;
            background-color: #1E1E1F;
            color: white;
            text-align: center;
            line-height: 60px;
            position: relative;
            margin-right: 30px;
            margin-bottom: 30px;
        }
        .returnTop{
            height: 60px;
             90px;
            background-color: #1E1E1F;
            color: white;
            text-align: center;
            line-height: 60px;
            position: fixed;
            right: 30px;
            bottom: 30px;
        }
        .hide{
            display: none;
        }
    </style>
</head>
<body>
<div class="outer">
    <div class="item1">第一部分
    <h1>111111111111111</h1>
    <h1>111111111111111</h1>
    <h1>111111111111111</h1>
    <h1>111111111111111</h1>
    <h1>111111111111111</h1>
    <h1>111111111111111</h1>
    <h1>111111111111111</h1>
    <h1>111111111111111</h1>
    <h1>111111111111111</h1>
    <h1>111111111111111</h1>
    <h1>111111111111111</h1>
    <h1>111111111111111</h1>
    <h1>111111111111111</h1>
    <h1>111111111111111</h1>
    <h1>111111111111111</h1>
    <h1>111111111111111</h1>
    <h1>111111111111111</h1>
    <h1>111111111111111</h1>
    <h1>111111111111111</h1>
    <h1>111111111111111</h1>
    <h1>111111111111111</h1>
    <h1>111111111111111</h1>
    <h1>111111111111111</h1>
    <h1>111111111111111</h1>
    <h1>111111111111111</h1>
    <h1>111111111111111</h1>
    <h1>111111111111111</h1>
    <h1>111111111111111</h1>
    <h1>111111111111111</h1>
    <h1>111111111111111</h1>
    </div>
    <div class="item2">
        第二部分
        <button onclick="item1goTOP()">item1返回顶部</button>
    </div>
    <div class="returnTop hide" onclick="goTOP()">返回顶部</div>
</div>
<script src="jquery-3.3.1.js"></script>
<script>
    //监听事件-->只要鼠标滑轮一动就会触发事件
    window.onscroll=function (){
        // console.log($(window).scrollTop())
        if($(window).scrollTop()>100){
            $(".returnTop").removeClass("hide")
        }else{
            $(".returnTop").addClass("hide")
        }
    }

    function goTOP() {
        $(window).scrollTop(0)
    }
    function item1goTOP() {
        $(".item1").scrollTop(0)
    }
</script>
</body>
</html>
五、事件
事件委托介绍:
JavaScript(jQuery)中的事件委托
一:什么是事件委托?

    事件委托是利用事件冒泡,只指定一个事件处理程序来管理某一类型的所有事件。

二:为什么要用事件委托?

    1.在JavaScript中添加到页面上的事件处理程序的个数直接关系到页面的整体运行性能。为什么呢?因为,每个事件处理函数都是对象,对象会占用内存,内存中的对象越多,性能就越差。此外,必须事先指定所有的事件处理程序而导致的DOM访问次数,会延迟整个页面的交互就绪时间。

    2.对有很多个数据的表格以及很长的列表逐个添加事件,简直就是噩梦。所以事件委托,能极大地提高页面的运行性能,减少开发人员的工作量。
// 页面载入:
    ready(fn)  //当DOM载入就绪可以查询及操纵时绑定一个要执行的函数。
    $(document).ready(function(){}) -----简写方式------> $(function(){})

// 简单的事件绑定方法:
    $("ul li").click(function () {
            alert("hello world")
        });
// 事件绑定--->事件委托:
    $("").on(event,[selector],[data],function)  // 在选择元素上绑定一个或多个事件的事件处理函数。

        //.on 的selector参数是筛选出调用.on方法的dom元素的指定子元素,如:
        //$('ul').on('click', 'li', function(){console.log('click');})
        //(.on 是临时的给ul标签绑定事件,当触发click后再选择给ul下的li标签绑定function事件) 就是筛选出ul下的li给其绑定click事件;

    // [selector]参数的好处:
    //     好处在于.on方法为动态添加的元素也能绑上指定事件;如:

        $('ul li').on('click', function(){console.log('click');})   //的绑定方式和
        $('ul li').bind('click', function(){console.log('click');}) //一样;
        // 我通过js给ul添加了一个li 如:
        $('ul').append('<li>js new li<li>'); //这个新加的li是不会被绑上click事件的

        //但是用$('ul').on('click', 'li', function(){console.log('click');}方式绑定,然后动态添加
        //li:$('ul').append('<li>js new li<li>'); 这个新生成的li被绑上了click事件

    // [data]参数的调用:
         function myHandler(event) {
            alert(event.data.foo);
            }
         $("li").on("click", {foo: "bar"}, myHandler)
事件绑定--->事件委托 概念:
1、事件委托与事件绑定概念
事件绑定:将普通的事件event绑定在DOM节点上,当DOM节点被选中时,将事件与之绑定,方便用户提供相应的操作。
比如:在button按钮上绑定click鼠标事件,在input中绑定focusin焦点事件等等,具体的例如:常常在代码中这样写$('.bn1').click(function(){...})就是普通的事件绑定。
事件委托:是指在事件绑定的基础上补充与扩展事件绑定,具体就是指:通过子节点元素绑定事件来传递给父元素DOM节点(祖先节点)来统一管理其全部后代子元素。
这样遇到需要绑定很多事件的子元素时,就避免了很多麻烦重复绑定事件的工作,提供了访问效率。具体代码 $('要绑定标签的上级标签').on('click','要绑定的标签',function(){...})

在网上有这样的例子:事件委托好比学校门卫收发室代收快递,100个学生快递都到了,不可能都挤到学校大门口去拿快递,这时候就需要门卫快递收发室进行委托代收快递,
  之后一一核实,学生们就可以去领快递了。不会造成拥堵的情况出现,也不会出现拿错了快递等情况,期间如果有新的学生加入到该学校,他也需要拿快递,门卫收发室就核实他的身份,
  同样的一视同仁委托代收他的快递。
https://blog.csdn.net/Mynewclass/article/details/78959785
实例之面板拖动
实例之放大镜
六、动画效果
显示|隐藏|切换
<!DOCTYPE html>
<html lang="en">
<head>
    <meta charset="UTF-8">
    <title>Title</title>
    <script src="jquery-3.3.1.js"></script>
    <style>
        .item h1{
            height: 100px;
             200px;
            background-color: #0d354b;
            color: white;
            font: 25px 700;
            text-align: center;
            line-height: 100px;
        }
    </style>
</head>
<body>
<div class="item">
    <h1>hello world</h1>
</div>
<button onclick="f1()">显示</button>
<button onclick="f2()">隐藏</button>
<button onclick="f3()">切换</button>
<script>
    function f1(){
        $("h1").show()
        // $("h1").show(1000)      //1000ms 之后显示
    }
    function f2(){
        // $("h1").hide()
        $("h1").hide(1000)
    }
    function f3(){
        // $("h1").toggle()
        $("h1").toggle(1000)
    }

</script>
</body>
</html>
滑动
<!DOCTYPE html>
<html lang="en">
<head>
    <meta charset="UTF-8">
    <title>Title</title>
    <script src="jquery-3.3.1.js"></script>
    <style>
        .item h1{
            height: 100px;
             200px;
            background-color: #0d354b;
            color: white;
            font: 25px 700;
            text-align: center;
            line-height: 100px;
        }
    </style>
</head>
<body>
<div class="item">
    <h1>hello world</h1>
</div>
<button onclick="f1()">向下滑动</button>
<button onclick="f2()">向上滑动</button>
<button onclick="f3()">切换</button>
<script>
    function f1(){
        $("h1").slideDown()
        // $("h1").slideDown(1000)      //1000ms 之后向下滑动
    }
    function f2(){
        // $("h1").slideUp()
        $("h1").slideUp(1000)
    }
    function f3(){
        // $("h1").slideToggle()
        $("h1").slideToggle(1000)
    }

</script>
</body>
</html>
淡入淡出
<!DOCTYPE html>
<html lang="en">
<head>
    <meta charset="UTF-8">
    <title>Title</title>
    <script src="jquery-3.3.1.js"></script>
    <style>
        .item h1{
            height: 100px;
             200px;
            background-color: #0d354b;
            color: white;
            font: 25px 700;
            text-align: center;
            line-height: 100px;
        }
    </style>
</head>
<body>
<div class="item">
    <h1>hello world</h1>
</div>
<button onclick="f1()">淡入</button>
<button onclick="f2()">淡出</button>
<button onclick="f3()">切换</button>
<button onclick="f4()">透明度调节</button>
<script>
    function f1(){
        $("h1").fadeIn()
        // $("h1").fadeIn(1000)      //1000ms 之后向下滑动
    }
    function f2(){
        // $("h1").fadeOut()
        $("h1").fadeOut(1000,function () {      //--->1000ms淡出之后触发回调函数
            alert("淡出啦!666")
        })
    }
    function f3(){
        // $("h1").fadeToggle()
        $("h1").fadeToggle(1000)
    }
    function f4(){
        $("h1").fadeTo(1000,0.4)    //1000ms后透明度变为0.4
    }

</script>
</body>
</html>
回调函数(动画效果完成之后触发)
<!DOCTYPE html>
<html lang="en">
<head>
    <meta charset="UTF-8">
    <title>Title</title>
    <script src="jquery-2.1.4.min.js"></script>

</head>
<body>
  <button>hide</button>
  <p>helloworld helloworld helloworld</p>


 <script>
   $("button").click(function(){
       $("p").hide(1000,function(){
           alert($(this).html())
       })

   })
    </script>
</body>
</html>