一、简介
在市面主流的app中,轮播功能是一个非常常见的模块功能,通常作为banner展示所用。实现轮播组件的技术无非两种,一种是使用原生组件进行自定义,另一种就是使用第三方轮子了。有些时候,因为项目紧张,没有时间去自定义,那么就习惯使用性能完善的开源组件了。在RN项目中,github上也提供了很多优秀的开源轮播组件,其中比较牛逼的一个就是react-native-swiper。关于它的详细说明,可以去github上查看。
二、安装
1、npm install xxx
npm i react-native-swiper --save
2、react-native link xxx
react-native link react-native-swiper
三、属性
//------------------------------- 1、基础属性 -----------------------------/

//如果为true,则滚动视图的子级水平排列成行,而不是垂直排列成列。
horizontal?: boolean

//设置为false可禁用连续循环模式。
loop?: boolean

//初始幻灯片的索引号。
index?: number

//设置为true可使左右切换按钮可见。
showsButtons?: boolean

//设置为true启用自动播放模式。
autoplay?: boolean

//用户滑动时触发调用
onIndexChanged?: any


//-------------------------------2、自定义基本样式和内容 -----------------------/

//轮播组件的宽度,如果没有指定默认值,则通过flex启用全屏模式:1。
width?: number

//轮播组件的高度,如果没有指定默认值,则通过flex启用全屏模式:1。
height?: number

//视图样式
style?: ViewStyle

//是否进行预加载
loadMinimal?: boolean

//是否预加载最小的个数
loadMinimalSize?: boolean

//是否显示自定义预加载的样式
loadMinimalLoader?: boolean


//-----------------------------------3、分页---------------------------------/

//设置为true使分页可见。
showsPagination?: boolean

//自定义分页样式
paginationStyle?: ViewStyle

//使用this.state.index / this.state.total / this的三个参数(索引,总计,上下文)控制呈现分页,例如:显示数字而不是点。
renderPagination?: (index: number, total: number, swiper: Swiper) => JSX.Element

//自定义点元素。
dot?: any

//自定义当前点元素
activeDot?: any

//自定义点元素样式。
dotStyle?: ViewStyle

//自定义当前点元素样式。
activeDotStyle?: ViewStyle

//自定义点元素颜色
dotColor?: string

//自定义当前点元素颜色
activeDotColor?: string


//-----------------------------------4、自动播放---------------------------------/

//自动播放过渡之间的延迟时间(秒)。
autoplayTimeout?: number

//循环方向控制。
autoplayDirection?: boolean


//--------------------------------5、控制器按钮------------------------------------/

//设置为true可使控制按钮可见。
buttonWrapperStyle?: any

//自定义下一个按钮。
nextButton?: JSX.Element

//自定义上一个按钮。
prevButton?: JSX.Element


//--------------------------------6、滚动响应------------------------------------/

//开始拖拽时触发该函数
onScrollBeginDrag?: any

//在滚动结束回弹的时候触发该函数
onMomentumScrollEnd?: any

//在滚动结束回弹后触摸时触发该函数
onTouchStartCapture?: any

//触摸开始时触发该函数
onTouchStart?: any

//触摸结束时触发该函数
onTouchEnd?: any

//长时间挂起时触发该调用
onResponderRelease?: any

//--------------------------------7、滚动属性------------------------------------/
//是否支持分页
pagingEnabled?: boolean

//设置true显示水平指示器
showsHorizontalScrollIndicator?: boolean

//设置true显示竖直指示器
showsVerticalScrollIndicator?: boolean

//设置true允许弹性
bounces?: boolean

//是否允许滚动到顶部
scrollsToTop?: boolean

//是否删除裁剪的子视图
removeClippedSubviews?: boolean

//是否自动调节内容偏移
automaticallyAdjustContentInsets?: boolean

//是否支持滚动
scrollEnabled?: boolean
四、示例
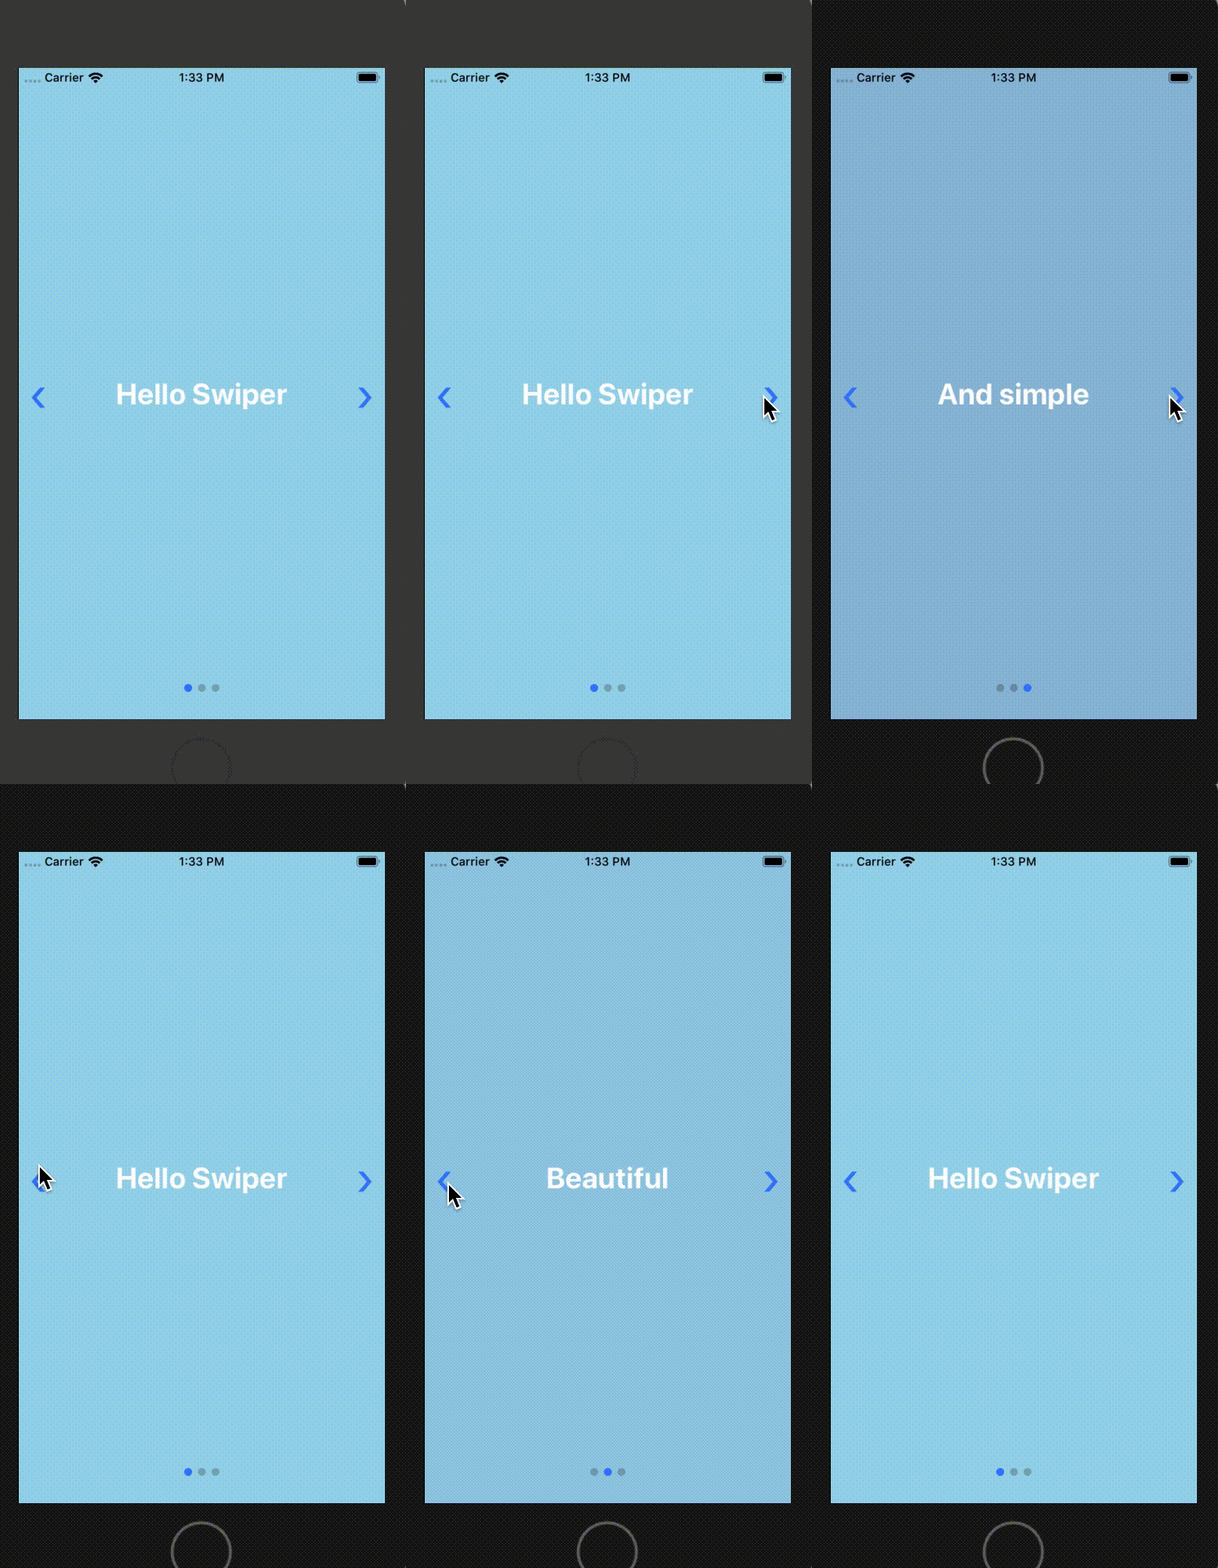
为确保组件正常使用,可以拷贝Github上的组件源码进行验证,示例如下:
/**
 * Sample React Native App
 * https://github.com/facebook/react-native
 * @flow
 */

import React, { Component } from 'react';
import {
    AppRegistry,
    StyleSheet,
    Text,
    View
} from 'react-native';

import Swiper from 'react-native-swiper';

export default class RNApplyComponent extends Component {
    render() {
        return (
            <Swiper style={styles.wrapper} showsButtons={true}>
                <View style={styles.slide1}>
                    <Text style={styles.text}>Hello Swiper</Text>
                </View>
                <View style={styles.slide2}>
                    <Text style={styles.text}>Beautiful</Text>
                </View>
                <View style={styles.slide3}>
                    <Text style={styles.text}>And simple</Text>
                </View>
            </Swiper>
        );
    }
}

const styles = StyleSheet.create({
    wrapper: {

    },
    slide1: {
        flex: 1,
        justifyContent: 'center',
        alignItems: 'center',
        backgroundColor: '#9DD6EB'
    },
    slide2: {
        flex: 1,
        justifyContent: 'center',
        alignItems: 'center',
        backgroundColor: '#97CAE5'
    },
    slide3: {
        flex: 1,
        justifyContent: 'center',
        alignItems: 'center',
        backgroundColor: '#92BBD9'
    },
    text: {
        color: '#fff',
        fontSize: 30,
        fontWeight: 'bold'
    }
});

AppRegistry.registerComponent('RNApplyComponent', () => RNApplyComponent);

五、使用
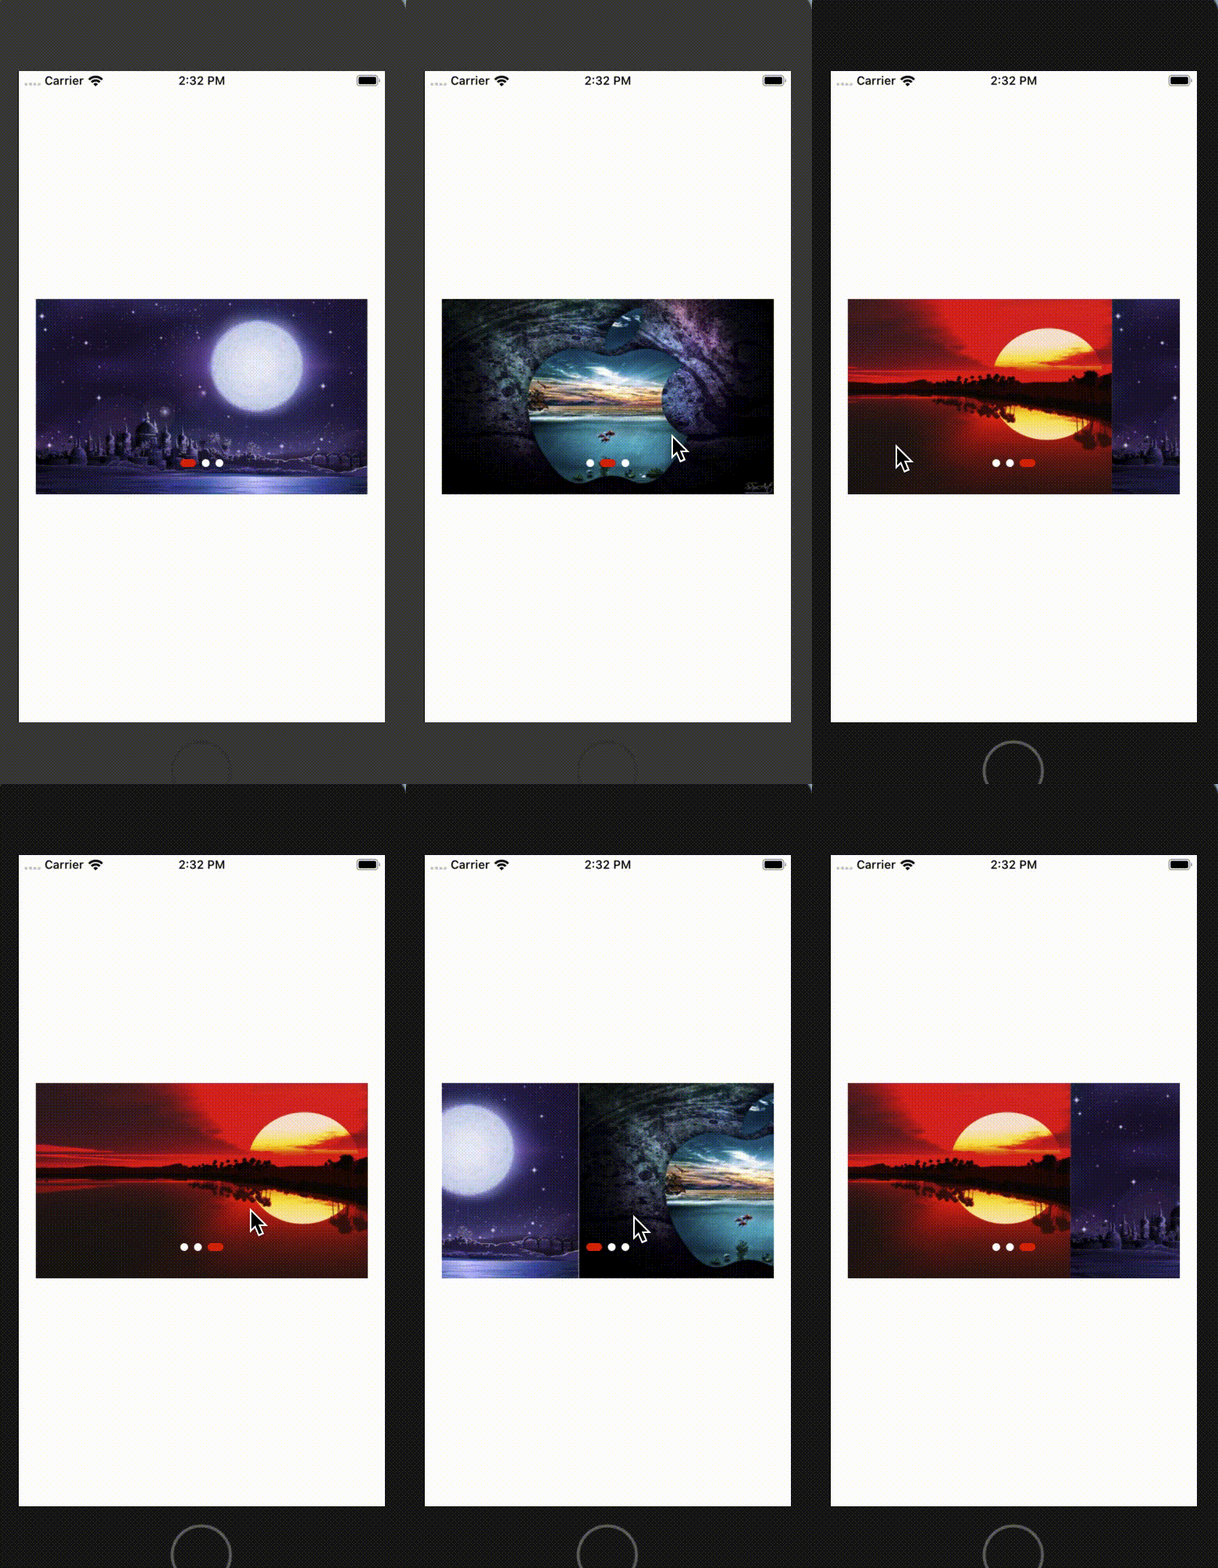
参考官方的案例后,我们就可以根据自己的需求改造UI样式了。我们就按照显示banner的标准来实现一个图片轮播的效果。注意:在这里遇到有一个issue无法解决,就是设置Swiper的height不起作用,暂时没有办法,我就再嵌套了一个父视图解决。如下所示:
/**
 * Sample React Native App
 * https://github.com/facebook/react-native
 * @flow
 */

import React, { Component } from 'react';
import {
    AppRegistry,
    StyleSheet,
    View,
    Image
} from 'react-native';

import Swiper from 'react-native-swiper';

let img1url = "https://ss3.bdstatic.com/70cFv8Sh_Q1YnxGkpoWK1HF6hhy/it/u=3566251348,1114182777&fm=26&gp=0.jpg";
let img2url = "https://ss2.bdstatic.com/70cFvnSh_Q1YnxGkpoWK1HF6hhy/it/u=1365127024,980414404&fm=26&gp=0.jpg";
let img3url = "https://ss3.bdstatic.com/70cFv8Sh_Q1YnxGkpoWK1HF6hhy/it/u=1874734052,880491637&fm=26&gp=0.jpg";

export default class RNApplyComponent extends Component {
    render() {
        return (
            <View style={[styles.container,styles.center]}>
                <View style={[styles.swiper_parent,styles.center]}>
                    <Swiper showsButtons={false}
                            autoplay={true}
                            autoplayTimeout={1}
                            dot={
                                <View
                                    style={{
                                        backgroundColor: 'white',
                                         8,
                                        height: 8,
                                        borderRadius: 4,
                                        marginLeft: 3,
                                        marginRight: 3,
                                        marginTop: 3,
                                        marginBottom: 3
                                    }}
                                />
                            }
                            activeDot={
                                <View
                                    style={{
                                        backgroundColor: 'red',
                                         16,
                                        height: 8,
                                        borderRadius: 4,
                                        marginLeft: 3,
                                        marginRight: 3,
                                        marginTop: 3,
                                        marginBottom: 3
                                    }}
                                />
                            }
                    >
                        <View style={[styles.slide,styles.center]}>
                            <Image style={styles.image} resizeMode="stretch" source={{uri:img1url}}/>
                        </View>
                        <View style={[styles.slide,styles.center]}>
                            <Image style={styles.image} resizeMode="stretch" source={{uri:img2url}}/>
                        </View>
                        <View style={[styles.slide,styles.center]}>
                            <Image style={styles.image} resizeMode="stretch" source={{uri:img3url}}/>
                        </View>
                    </Swiper>
                </View>
            </View>
        );
    }
}

const styles = StyleSheet.create({
    container:{
        flex: 1,
        backgroundColor: '#FFFFFF'
    },
    swiper_parent: {
         340,
        height:200
    },
    slide: {
        flex: 1,
        backgroundColor: 'blue',
    },
    center: {
        justifyContent: 'center',
        alignItems: 'center'
    },
    image: {
        flex: 1,
         340
    }
});

AppRegistry.registerComponent('RNApplyComponent', () => RNApplyComponent);
