Graphics Context Settings (图形上下文设置)
一个图形上下文状态有很多个图形上下文设置构成,这个状态决定了在这个时刻绘画的行为和外观。下面列举了Core Graphics 函数,同时跟着对应的UIKit 提供的封装好的方便的方法:
-
线的粗细和虚线样式
CGContextSetLineWidth, CGContextSetLineDash (and UIBezierPath lineWidth, setLineDash:count:phase:)
-
线末端样式和连接样式
CGContextSetLineCap, CGContextSetLineJoin, CGContextSetMiterLimit (and UIBezierPath lineCapStyle, lineJoinStyle, miterLimit)
-
线颜色和模式
CGContextSetRGBStrokeColor, CGContextSetGrayStrokeColor, CGContextSet- StrokeColorWithColor, CGContextSetStrokePattern (and UIColor setStroke)
-
填充颜色和模式
CGContextSetRGBFillColor, CGContextSetGrayFillColor, CGContextSetFill- ColorWithColor, CGContextSetFillPattern (and UIColor setFill)
-
阴影
CGContextSetShadow, CGContextSetShadowWithColor
-
整体透明度和组合
CGContextSetAlpha, CGContextSetBlendMode
-
反锯齿
CGContextSetShouldAntialias
-
其它额外的设置
-
裁剪区域
在裁剪区域外进行绘制,其实不会真的被绘制
-
转换(或者“CTM”,当前转换矩阵)
可以改变你指定的点在随后的绘制命令中,如何对应到画布的实际空间上。
-
Paths and Shapes (路径和形状)
下面是一些可能会用到的路径绘制命令:
-
当前点的位置
CGContextMoveToPoint
-
描摹一条线
CGContextAddLineToPoint, CGContextAddLines
-
描摹一个矩形
CGContextAddRect, CGContextAddRects
-
描摹一个椭圆或者圆形
CGContextAddEllipseInRect
-
描摹一个圆弧
CGContextAddArcToPoint, CGContextAddArc
-
描摹有一个或者两个控制点的贝塞尔曲线
CGContextAddQuadCurveToPoint, CGContextAddCurveToPoint
-
关闭当前路径
CGContextClosePath 这个会在路径的最后一个点和第一个点之间添加一条线,如果你是打算要填充这个路径,那么不需要调用这个方法,填充操作会自动帮我们完成。
-
描边或者填充当前路径
CGContextStrokePath, CGContextFillPath, CGContextEOFillPath, CGContext- DrawPath. 描边或者填充操作都会清除这个路径。如果你想既描边又填充路径,可以使用CGContextDrawPath。 如果你仅仅先通过 CGContextStrokePath 描边,你就不可能再填充这个路径了,因为这个路径已经被清除了。
当然还有很多其它更方便的函数来创建一个路径,然后描边或者填充:CGContextStrokeLineSegments, CGContextStrokeRect, CGContextStrokeRectWithWidth, CGContextFillRect, CGContextFillRects, CGContextStrokeEllipseInRect, CGContextFillEllipseInRect.
一个路径可以是混合而成的,意味着这个路径由多个独立的块组成。例如,一个路径可以包括两个分开的闭合的形状:一个矩形和一个圆形。 当你在构造一个路径的某个时刻(也就是在描摹出一个路径之后,同时没有描边,填充来清除路径,或者调用 CGContextBeginPath)调用 CGContextMoveToPoint,你提起画笔,然后移动到一个新的位置,接着准备开始一个独立的一块同样的路径。如果你担心之前绘制的路径会被清除,可以调用CGContextBeginPath 来指定你开始一段新的不同的路径,在苹果的很多例子中都会这么做,但是我在实际中通常发现不需要。
为了说明上面路径绘制的命令,我会生成一个向上的箭头,如下图所示。这可能不是创建一个箭头的最好方式,同时我也会故意不使用一个方便的函数,但是过程是清晰的:

// obtain the current graphics context
CGContextRef con = UIGraphicsGetCurrentContext();
// draw a black (by default) vertical line, the shaft of the arrow
CGContextMoveToPoint(con, 100, 100);
CGContextAddLineToPoint(con, 100, 19);
CGContextSetLineWidth(con, 20);
CGContextStrokePath(con);
// draw a red triangle, the point of the arrow
CGContextSetFillColorWithColor(con, [[UIColor redColor] CGColor]);
CGContextMoveToPoint(con, 80, 25);
CGContextAddLineToPoint(con, 100, 0);
CGContextAddLineToPoint(con, 120, 25);

CGContextFillPath(con);
// snip a triangle out of the shaft by drawing in Clear blend mode
CGContextMoveToPoint(con, 90, 101);
CGContextAddLineToPoint(con, 100, 90);
CGContextAddLineToPoint(con, 110, 101);
CGContextSetBlendMode(con, kCGBlendModeClear);
CGContextFillPath(con);
如果你想复用或者分享一个路径,可以把这个路径包装成 CGPath,实际上就是CGPathRef。你也可以创建一个新的CGMutablePathRef ,像CGContext 中的路径构造方法一样,使用不同的CGPath 方法来构造路径,或者你可以使用CGContextCopyPath 来复制图形上下文中当前的路径。还有一些CGPath方法用来基于简单的几何图形来创建一个路径(CGPathCreateWithRect, CGPathCreateWithEllipseInRect)或者基于一个已存在的路径(CGPathCreateCopyByStrokingPath, CGPathCreateCopyByDashing- Path, CGPathCreateCopyByTransformingPath)。
UIKit 中的UIBezierPath封装了CGPath,同样也提供了一些路径构造方法,例如 moveToPoint:, addLineToPoint:, bezierPathWithRect:, bezierPathWithOvalInRect:, addArcWithCenter:radius:startAngle:endAngle:clockwise:, addQuadCurveToPoint:controlPoint:, addCurveToPoint:controlPoint1:controlPoint2:, closePath。同样,UIBezierPath也提供了一个非常有用的方法:bezierPathWithRoundedRect:cornerRadius: —— 仅仅使用Core Graphics 方法来绘制圆角矩形是非常繁琐的。当你调用UIBezierPath 实例方法 fill 或者 stroke (或者 fillWithBlendMode:alpha: 或者 strokeWithBlend- Mode:alpha:)时,当前图形上下文状态会被保存,被封装好的CGPath 路径会变成当前上下文的绘制路径,然后描边或者填充该路径,最后当前上下文会被恢复原来状态。
下面我们使用UIKit 提供的UIBezierPath 来重写上面的箭头:
UIBezierPath* p = [UIBezierPath bezierPath];
[p moveToPoint:CGPointMake(100,100)];
[p addLineToPoint:CGPointMake(100, 19)];
[p setLineWidth:20];
[p stroke];
[[UIColor redColor] set];
[p removeAllPoints];
[p moveToPoint:CGPointMake(80,25)];
[p addLineToPoint:CGPointMake(100, 0)];
[p addLineToPoint:CGPointMake(120, 25)];
[p fill];
[p removeAllPoints];
[p moveToPoint:CGPointMake(90,101)];
[p addLineToPoint:CGPointMake(100, 90)];
[p addLineToPoint:CGPointMake(110, 101)];
[p fillWithBlendMode:kCGBlendModeClear alpha:1.0];
Clipping (裁剪)
路径的另一种使用方式是遮罩某一块区域,防止在未来的绘制中被改变。这种就是裁剪。默认,一个图形上下文的裁剪区域就是整一个图形上下文,你可以在上下文中任意绘制。
裁剪区域是整个上下文的一个功能,任何新的裁剪区域会被应用到现有的裁剪区域,相交而成。如果你应用了自己的裁剪区域,在后面想移除这个裁剪区域的办法就只能把你的处理包含在 CGContextSaveGState和CGContextRestoreGState方法之间。
为了说明这一点,我将使用裁剪重写生成我们原来的箭头符号,而不是使用混合模式在箭头尾部“切出”三角缺口。这样会有些棘手,因为我们想要的不是裁剪三角形内部的区域,而是外面的区域。为了解析这个,我们使用包含超过一个闭合区域的混合路径 —— 一个三角形,以及整个绘制区域(我们可以使用CGContextGetClipBoundingBox 获取)
当填充一个混合路径时,或者使用路径来表示一个裁剪区域时,系统遵循两个准则:
-
非零环绕数规则(Winding rule)
环绕(winding)就是一个路径环绕的方向,分顺时针(正方向)和逆时针(负方向)。在图形学中判断一个点是否在多边形内,若多边形不是自相交的,那么可以简单的判断这个点在多边形内部还是外部;若多边形是自相交的,那么就需要根据非零环绕数规则和奇-偶规则判断。这里推荐一篇文章:http://blog.csdn.net/freshforiphone/article/details/8273023。
-
奇-偶规则(Odd-even Rule)
从任意位置p作一条射线,若与该射线相交的多边形边的数目为奇数,则p是多边形内部点,否则是外部点。
这里我们使用简单的奇-偶规则,所以我们使用CGContextEOClip 来设定裁剪区域,然后绘制箭头:
// obtain the current graphics context
CGContextRef con = UIGraphicsGetCurrentContext();
// punch triangular hole in context clipping region
CGContextMoveToPoint(con, 90, 100);
CGContextAddLineToPoint(con, 100, 90);
CGContextAddLineToPoint(con, 110, 100);
CGContextClosePath(con);
CGContextAddRect(con, CGContextGetClipBoundingBox(con));
CGContextEOClip(con);
// draw the vertical line
CGContextMoveToPoint(con, 100, 100);
CGContextAddLineToPoint(con, 100, 19);
CGContextSetLineWidth(con, 20);
CGContextStrokePath(con);
// draw the red triangle, the point of the arrow
CGContextSetFillColorWithColor(con, [[UIColor redColor] CGColor]);
CGContextMoveToPoint(con, 80, 25);
CGContextAddLineToPoint(con, 100, 0);
CGContextAddLineToPoint(con, 120, 25);
CGContextFillPath(con);
UIBezierPath 的裁剪命令是 usesEvenOddFillRule 和 addClip。
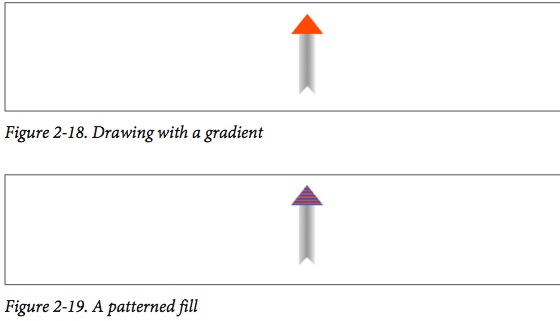
Gradients (渐变)
渐变可以很简单,也可以很负责,这里只讲解简单的。一个简单的渐变是由一个起始点的颜色和一个结束点的颜色,再加上(可选的)一个中间点的颜色值决定,然后就会在上下文中在两个指定的点以线性或者反射形式绘制。
你不能使用渐变来作为路径的填充颜色,但是你可以使用裁剪来规定一个路径形状的渐变。为了说明这一点,我会重画我们的箭头,使用一个线性渐变:
// obtain the current graphics context
CGContextRef con = UIGraphicsGetCurrentContext();
CGContextSaveGState(con);
// punch triangular hole in context clipping region
CGContextMoveToPoint(con, 90, 100);
CGContextAddLineToPoint(con, 100, 90);
CGContextAddLineToPoint(con, 110, 100);
CGContextClosePath(con);
CGContextAddRect(con, CGContextGetClipBoundingBox(con));
CGContextEOClip(con);
// draw the vertical line, add its shape to the clipping region
CGContextMoveToPoint(con, 100, 100);
CGContextAddLineToPoint(con, 100, 19);
CGContextSetLineWidth(con, 20);
CGContextReplacePathWithStrokedPath(con);
CGContextClip(con);
// draw the gradient
CGFloat locs[3] = { 0.0, 0.5, 1.0 };
CGFloat colors[12] = {
    0.3,0.3,0.3,0.8, // starting color, transparent gray
    0.0,0.0,0.0,1.0, // intermediate color, black
    0.3,0.3,0.3,0.8 // ending color, transparent gray
};
CGColorSpaceRef sp = CGColorSpaceCreateDeviceGray();
CGGradientRef grad =
    CGGradientCreateWithColorComponents (sp, colors, locs, 3);
CGContextDrawLinearGradient (
    con, grad, CGPointMake(89,0), CGPointMake(111,0), 0);
CGColorSpaceRelease(sp);
CGGradientRelease(grad);
CGContextRestoreGState(con); // done clipping
// draw the red triangle, the point of the arrow
CGContextSetFillColorWithColor(con, [[UIColor redColor] CGColor]);
CGContextMoveToPoint(con, 80, 25);
CGContextAddLineToPoint(con, 100, 0);
CGContextAddLineToPoint(con, 120, 25);
CGContextFillPath(con);
调用CGContextReplacePathWithStrokedPath 这个方法来防止描边当前的路径。