本例将会编写一个Hello world 小程序来演示Eureka的作用,程序中将会包含服务器、服务提供者以及服务的调用者
1. 构建服务器
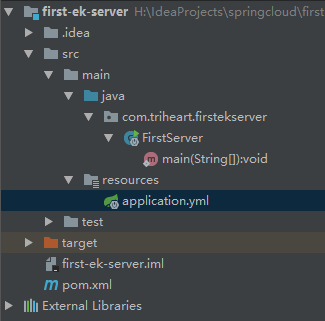
先创建一个名称为first-ek-server的maven项目作为服务器,项目的目录结构如下
在pom.xml文件中添加Spring Cloud的依赖
pom.xml代码清单


 1 <?xml version="1.0" encoding="UTF-8"?>
 2 <project xmlns="http://maven.apache.org/POM/4.0.0"
 3          xmlns:xsi="http://www.w3.org/2001/XMLSchema-instance"
 4          xsi:schemaLocation="http://maven.apache.org/POM/4.0.0 http://maven.apache.org/xsd/maven-4.0.0.xsd">
 5     <modelVersion>4.0.0</modelVersion>
 6
 7     <groupId>com.triheart</groupId>
 8     <artifactId>first-ek-server</artifactId>
 9     <version>1.0-SNAPSHOT</version>
10
11     <dependencies>
12         <dependency>
13             <groupId>org.springframework.cloud</groupId>
14             <artifactId>spring-cloud-starter-eureka-server</artifactId>
15         </dependency>
16     </dependencies>
17
18     <dependencyManagement>
19         <dependencies>
20             <dependency>
21                 <groupId>org.springframework.cloud</groupId>
22                 <artifactId>spring-cloud-dependencies</artifactId>
23                 <version>Dalston.SR1</version>
24                 <type>pom</type>
25                 <scope>import</scope>
26             </dependency>
27         </dependencies>
28     </dependencyManagement>
29
30 </project>
由于引入的spring-cloud-starter-eureka-server会自动引入spring-boot-starter-web依赖,因此只要我们的项目引入该依赖,项目就有了web容器的功能了。接下来我们编写一个启动类来启动我们的Eureka服务器
FirstServer.java
 1 package com.triheart.firstekserver;
 2
 3 import org.springframework.boot.autoconfigure.SpringBootApplication;
 4 import org.springframework.boot.builder.SpringApplicationBuilder;
 5 import org.springframework.cloud.netflix.eureka.server.EnableEurekaServer;
 6
 7 /**
 8  * @author 阿遠
 9  * Date: 2018/8/23
10  * Time: 14:33
11  */
12 @SpringBootApplication
13 @EnableEurekaServer
14 public class FirstServer {
15     public static void main(String[] args) {
16        new SpringApplicationBuilder(FirstServer.class).run(args);
17     }
18 }
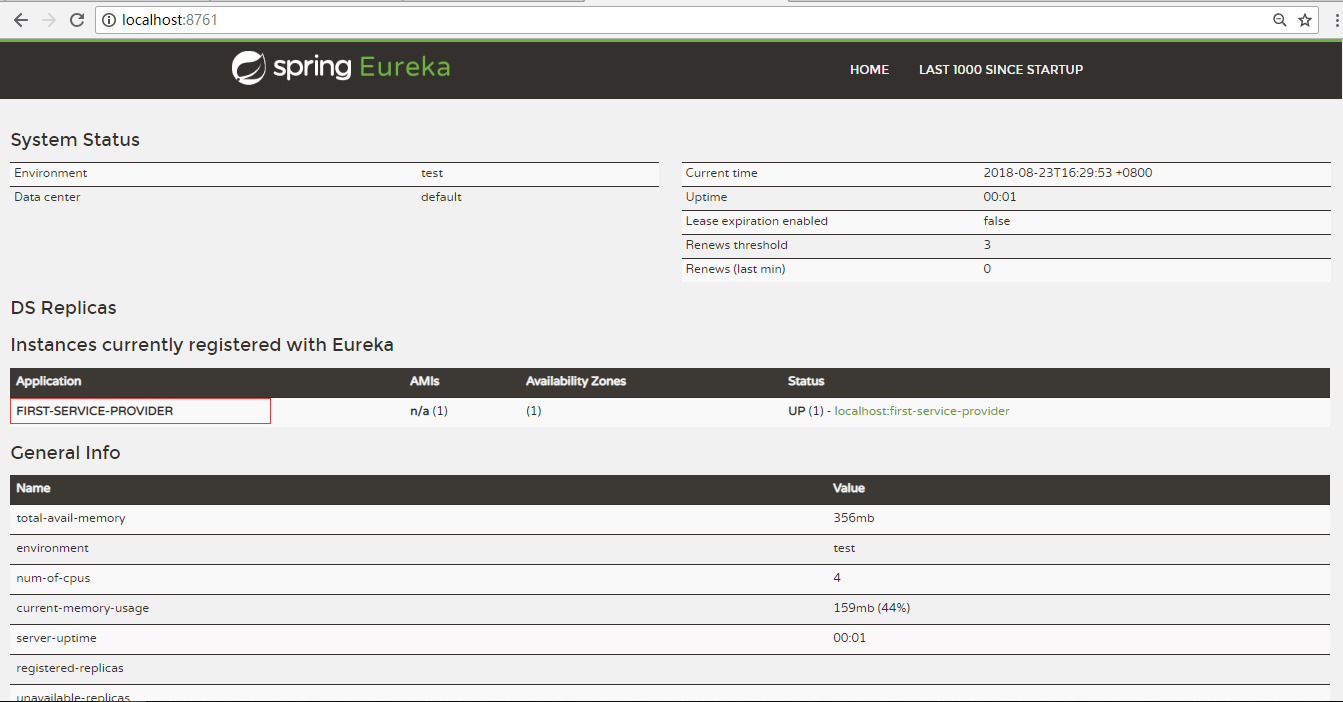
启动类与Spring Boot项目的启动类基本一致,这里加入的@EnableEurekaServer是声明这是一个Eureka的服务器。此时直接运行FirstServer.java的启动类就可以启动Eureka服务器,在这里我们在application.yml文件中将启动端口改为8761,启动成功后的界面如图所示

打开浏览器,输入http://localhost:8761,就可以看到Eureka服务器的控制台。
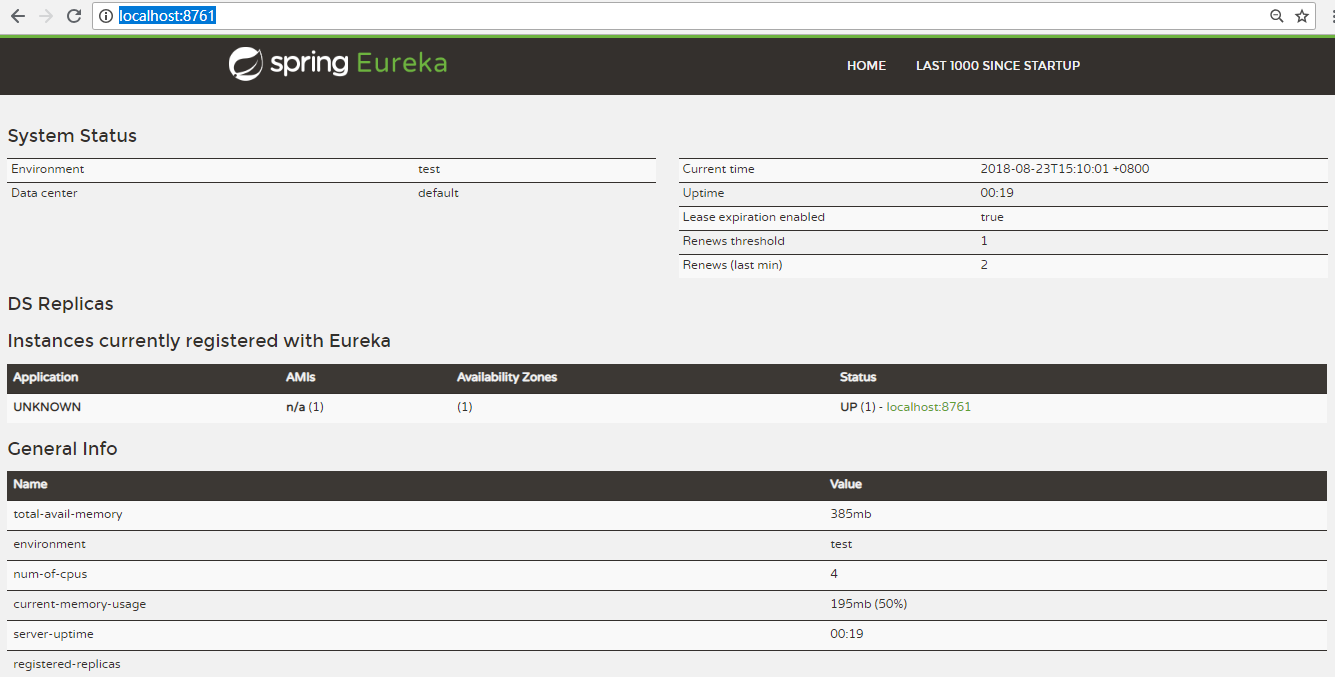
在Eureka控制台的下方,可以看到服务的实例列表,但是我们目前没有注册服务,所以此时服务列表为空,此时看到的UNKNOWN是服务器自己注册的服务。
值得注意的是,我们在启动Eureka服务器的时候,在IDEA的控制台上会看到两个异常信息


这是由于服务器在启动时,服务器会把自己当做一个客户端,去注册Eureka服务器,并且会去Eureka服务器抓取注册信息,他自己本身只是一个服务器,并不是服务器的提供者(客户端),因此我们需要在application.xml文件修改这两个配置阻止服务器注册和抓取信息,修改内容如下
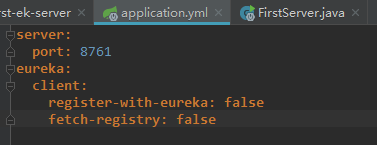
eureka.client.register-with-eureka属性的作用是声明是否将自己的信息注册到Eureka服务器,默认为true,eureka.client.fetch-registy属性则表示是否发哦服务器中抓取信息,默认也是true.我们将其设置为false,再启动服务器就不会出现异常信息。
此时,我们的Eureka服务器已经创建好了,接下来我们就来编写Eureka客户端的服务提供者。
2.编写服务提供者
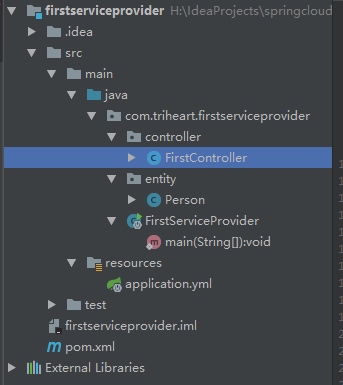
创建一个maven项目作为服务的提供者,项目的目录结构如下
在pom.xml中引入相关的依赖
pom.xml清单
 1 <?xml version="1.0" encoding="UTF-8"?>
 2 <project xmlns="http://maven.apache.org/POM/4.0.0"
 3          xmlns:xsi="http://www.w3.org/2001/XMLSchema-instance"
 4          xsi:schemaLocation="http://maven.apache.org/POM/4.0.0 http://maven.apache.org/xsd/maven-4.0.0.xsd">
 5     <modelVersion>4.0.0</modelVersion>
 6
 7     <groupId>com.triheart</groupId>
 8     <artifactId>first-service-provider</artifactId>
 9     <version>1.0-SNAPSHOT</version>
10
11     <dependencyManagement>
12         <dependencies>
13             <dependency>
14                 <groupId>org.springframework.cloud</groupId>
15                 <artifactId>spring-cloud-dependencies</artifactId>
16                 <version>Dalston.SR1</version>
17                 <type>pom</type>
18                 <scope>import</scope>
19             </dependency>
20         </dependencies>
21     </dependencyManagement>
22
23     <dependencies>
24         <dependency>
25             <groupId>org.springframework.cloud</groupId>
26             <artifactId>spring-cloud-starter-config</artifactId>
27         </dependency>
28         <dependency>
29             <groupId>org.springframework.cloud</groupId>
30             <artifactId>spring-cloud-starter-eureka</artifactId>
31         </dependency>
32     </dependencies>
33
34 </project>
application.xml清单
spring:
  application:
    name: first-service-provider
eureka:
  instance:
    hostname: localhost
  client:
    service-url:
      defaultZone: http://localhost:8761/eureka/
在这里,将应用名称配置为first-service-provider,该服务会被注册到端口为8761的Eureka服务器,也就是上面构建的服务器。此外,还使用eureka.instance.hostname属性来配置该主机的名称。然后我们在编写一个Controller类,并提供最简单的REST服务,先创建一个Person的实体类,用于Controller对象的数据发送和接收。
Person.java的代码清单
 1 package com.triheart.firstserviceprovider.entity;
 2
 3 public class Person {
 4
 5     private Integer id;
 6
 7     private String name;
 8
 9     private Integer age;
10
11     public Person() {
12         super();
13     }
14
15     public Person(Integer id, String name, Integer age) {
16         super();
17         this.id = id;
18         this.name = name;
19         this.age = age;
20     }
21
22     public Integer getId() {
23         return id;
24     }
25
26     public void setId(Integer id) {
27         this.id = id;
28     }
29
30     public String getName() {
31         return name;
32     }
33
34     public void setName(String name) {
35         this.name = name;
36     }
37
38     public Integer getAge() {
39         return age;
40     }
41
42     public void setAge(Integer age) {
43         this.age = age;
44     }
45
46 }
FirstController.java代码清单
package com.triheart.firstserviceprovider.controller;

import com.triheart.firstserviceprovider.entity.Person;
import org.springframework.http.MediaType;
import org.springframework.web.bind.annotation.PathVariable;
import org.springframework.web.bind.annotation.RequestMapping;
import org.springframework.web.bind.annotation.RequestMethod;
import org.springframework.web.bind.annotation.RestController;

/**
 * @author 阿遠
 * Date: 2018/8/23
 * Time: 16:06
 */
@RestController
public class FirstController {

    @RequestMapping(value = "/person/{personId}",method = RequestMethod.GET,produces = MediaType.APPLICATION_JSON_VALUE)
    public Person findPerson(@PathVariable("personId") Integer personId) {
        Person person = new Person(personId, "eureka",30);
        return person;
    }
}
编写启动类FirstServiceProvider.java
FirstServiceProvider.java代码清单
 1 package com.triheart.firstserviceprovider;
 2
 3 import org.springframework.boot.autoconfigure.SpringBootApplication;
 4 import org.springframework.boot.builder.SpringApplicationBuilder;
 5 import org.springframework.cloud.netflix.eureka.EnableEurekaClient;
 6
 7 /**
 8  * @author 阿遠
 9  * Date: 2018/8/23
10  * Time: 15:47
11  */
12 @SpringBootApplication
13 @EnableEurekaClient
14 public class FirstServiceProvider {
15     public static void main(String[] args) {
16         new SpringApplicationBuilder(FirstServiceProvider.class).run(args);
17     }
18 }
在上面的启动类中,使用到了@EnableEurekaClient的注解,声明这是一个Eureka的客户端。配置完成后,我们先启动服务器项目first-ek-server的启动类FirstServer,再运行服务提供者项目first-server-provider的启动类FirstServiceProvider,然后再在浏览器中访问http://localhost:8761/,就可以看到如下所示的服务列表。
在Eureka的控制台的服务列表中我们可以看到first-server-provider这个服务已经被注册进来,而且我们在IDEA的控制台里也可以看到服务被注册的信息。

此时,Eureka服务器和Eureka客户端的服务提供者都已经搞定了,接下来我们就来编写Eureka客户端的服务调用者。
3.编写服务调用者
服务被注册、发布到Eureka服务器后,需要有程序去发现它,并且进行调用。这里所说调用的调用者,是指同样注册到Eureka的客户端,它来调用其他客户端发布的服务。简单地说,就是Eureka的内部调用。同一个服务可能会部署多个实例,调用过程可能会涉及到负载均衡、服务器查找等问题,Netflix的项目已经帮我们解决,并且在Spring Cloud中已经封装了一次,我们仅需编写少量的代码便能实现服务的调用。
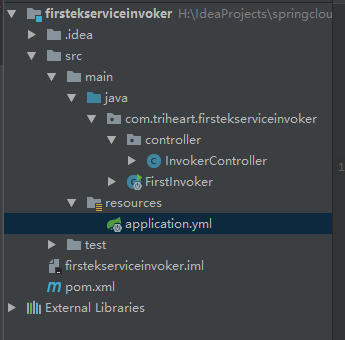
新建一个maven项目,用于做Eureka客户端的服务调用者,目录结构如下
在pom.xml文件中引入相关依赖
pom.xml代码清单
 1 <?xml version="1.0" encoding="UTF-8"?>
 2 <project xmlns="http://maven.apache.org/POM/4.0.0"
 3          xmlns:xsi="http://www.w3.org/2001/XMLSchema-instance"
 4          xsi:schemaLocation="http://maven.apache.org/POM/4.0.0 http://maven.apache.org/xsd/maven-4.0.0.xsd">
 5     <modelVersion>4.0.0</modelVersion>
 6
 7     <groupId>com.triheart</groupId>
 8     <artifactId>first-ek-service-invoker</artifactId>
 9     <version>1.0-SNAPSHOT</version>
10
11     <dependencyManagement>
12         <dependencies>
13             <dependency>
14                 <groupId>org.springframework.cloud</groupId>
15                 <artifactId>spring-cloud-dependencies</artifactId>
16                 <version>Dalston.SR1</version>
17                 <type>pom</type>
18                 <scope>import</scope>
19             </dependency>
20         </dependencies>
21     </dependencyManagement>
22
23     <dependencies>
24         <dependency>
25             <groupId>org.springframework.cloud</groupId>
26             <artifactId>spring-cloud-starter-config</artifactId>
27         </dependency>
28         <dependency>
29             <groupId>org.springframework.cloud</groupId>
30             <artifactId>spring-cloud-starter-eureka</artifactId>
31         </dependency>
32         <dependency>
33             <groupId>org.springframework.cloud</groupId>
34             <artifactId>spring-cloud-starter-ribbon</artifactId>
35         </dependency>
36     </dependencies>
37
38 </project>
建立配置文件application.yml
application.yml代码清单
 1 server:
 2   port: 9000
 3 spring:
 4   application:
 5     name: first-service-invoker
 6 eureka:
 7   instance:
 8     hostname: localhost
 9   client:
10     service-url:
11       defaultZone: http://localhost:8761/eureka/
在这个配置文件中,我们配置了应用名称为first-service-invoker,这个调用者的访问端口为9000,需要注意的是,这个调用本身也可以对外提供服务。与服务的提供者一样,使用eureka的配置,将调用者也注册到first-ek-server上面。接下来我们编写一个控制器,让调用者对外提供一个测试的服务。
创建InvokerController.java控制器
InvokerController.java代码清单
 1 package com.triheart.firstekserviceinvoker.controller;
 2
 3 import com.fasterxml.jackson.databind.annotation.JsonPOJOBuilder;
 4 import org.springframework.cloud.client.loadbalancer.LoadBalanced;
 5 import org.springframework.context.annotation.Bean;
 6 import org.springframework.context.annotation.Configuration;
 7 import org.springframework.http.MediaType;
 8 import org.springframework.web.bind.annotation.RequestMapping;
 9 import org.springframework.web.bind.annotation.RequestMethod;
10 import org.springframework.web.bind.annotation.RestController;
11 import org.springframework.web.client.RestTemplate;
12
13 /**
14  * @author 阿遠
15  * Date: 2018/8/23
16  * Time: 17:56
17  */
18 @RestController
19 @Configuration
20 public class InvokerController {
21
22     @Bean
23     @LoadBalanced
24     public RestTemplate getRestTemplate() {
25         return new RestTemplate();
26     }
27
28     @RequestMapping(value = "/router", method = RequestMethod.GET, produces = MediaType.APPLICATION_JSON_VALUE
29     )
30     public String router() {
31         RestTemplate restTemplate = getRestTemplate();
32         // 根据应用名称调用服务
33         String json = restTemplate.getForObject("hTTP://first-service-provider/person/1", String.class);
34         return json;
35     }
36 }
在控制器中,配置RestTemplate的Bean,RestTemplate本来是spring-web模块下面的类,主要用来调用REST服务。其本身并不具备调用分布式服务的能力,但是RestTemplate的Bean被@LoadBalabced注解修饰后,这个RestTemplate实例就具有了访问分布式服务的能力了。我们在控制器中新建了一个router的测试方法,用来对外发布REST服务,该方法只起到路由的作用,实际上是使用RestTemplate来调用first-ek-service-provider(服务提供者)的服务。调用服务时,仅仅通过服务名称调用。
创建FirstInvoker.java启动类
FirstInvoker.java启动类
 1 package com.triheart.firstekserviceinvoker;
 2
 3 import org.springframework.boot.autoconfigure.SpringBootApplication;
 4 import org.springframework.boot.builder.SpringApplicationBuilder;
 5 import org.springframework.cloud.client.discovery.EnableDiscoveryClient;
 6
 7 /**
 8  * @author 阿遠
 9  * Date: 2018/8/23
10  * Time: 17:51
11  */
12 @SpringBootApplication
13 @EnableDiscoveryClient
14 public class FirstInvoker {
15
16     public static void main(String[] args) {
17         new SpringApplicationBuilder(FirstInvoker.class).run(args);
18     }
19 }
在启动类中,使用了@EnableDiscoveryClient注解来修饰启动类,该注解是的服务的调用者有能力去Eureka中发现服务。需要注意的是,@EnableEurekaClient注解本身已经包含了@EnableDiscoveryClient的功能,也就是说,一个Eureka客户端本身就具有发现服务的能力。
接下来,我们按如下的顺序启动项目
a.启动服务器(first-ek-server)
b.启动服务提供者(first-service-provider)
c.启动服务调用者(first-ek-service-invoker)
启动完成后访问http://localhost:8761/可以看到注册的服务调用者的信息
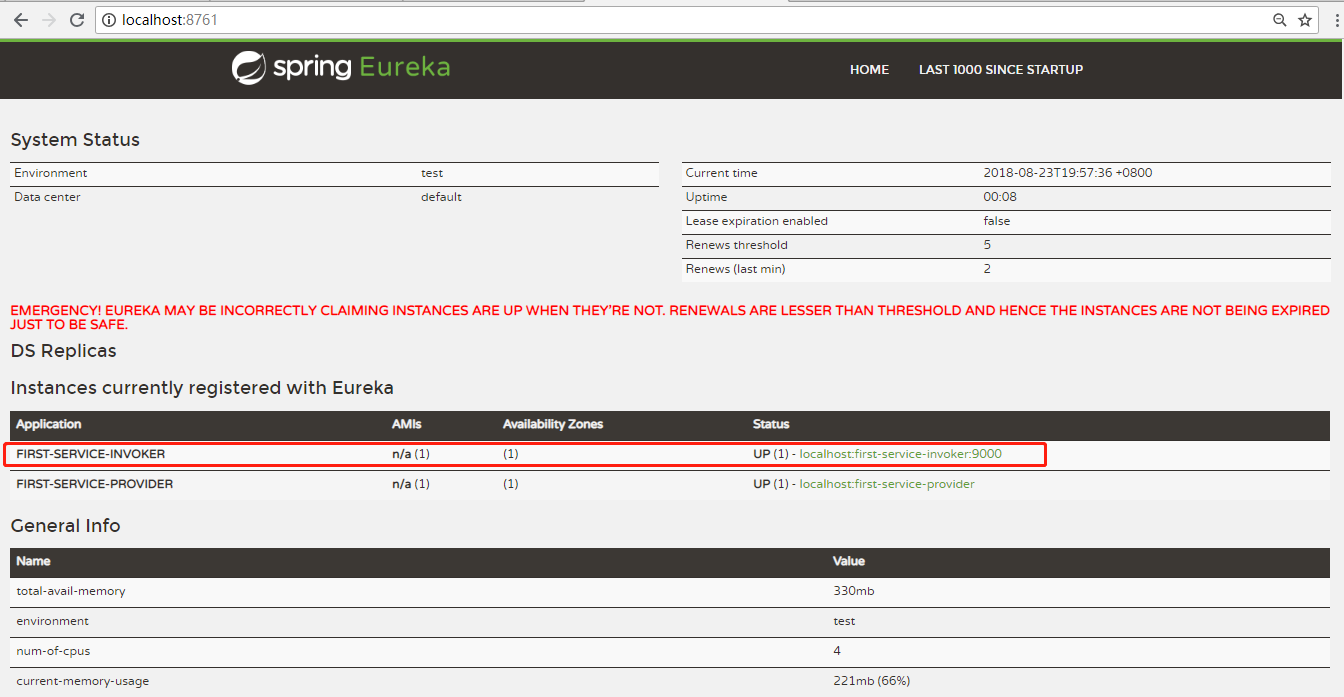
然后我们在浏览器中访问http://localhost:9000/router,可以在浏览器中看到

根据这个输出我们可以知道,Eureka客户端(服务调用者)实际上是调用了服务提供者的/person/1的服务,第一个Eureka应用到此结束。
4.程序结构总结
本案例创建了三个项目,项目结构如图所示
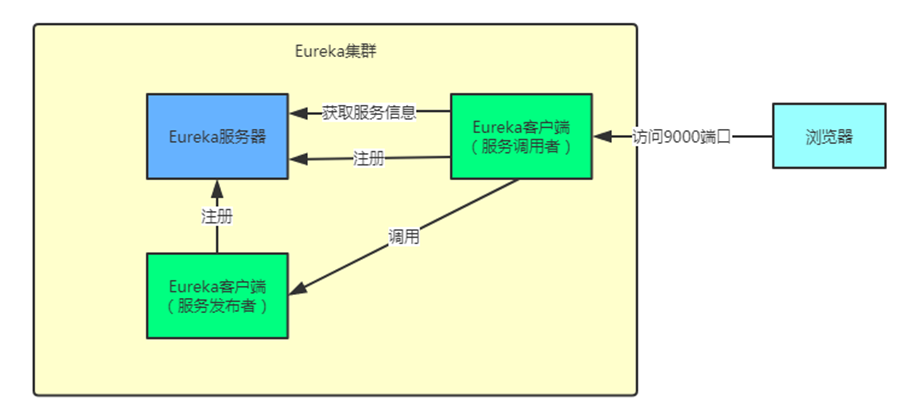
Eureka服务器为本例中的first-ek-server,Eureka客户端(服务发布者)为本例的first-service-provider,Eureka客户端(服务调用者)为本例的first-ek-service-invoker,而用户通过浏览器访问调用者的9000端口的router服务来查找服务提供者的服务并调用,此处的服务调用有点像路由器的角色。