目录
1. 序列化模块
1.1 json和pickle的区别
-
序列化之后的数据类型
json: str pickle: bytes -
适用范围
json:所有的编程语言 pickle:仅限于Python适用 -
可序列化的数据类型
json: int float bool str list tuple dict None pickle: 所有数据类型 -
load方法适用的不同
json:不能连续load,只能一次性拿出所有的数据
pickle:可以连续load,多套数据放在同一个文件中
1.2 json模块
-
json.dumps()和json.loads()
import json test = [1, 4.5, True, '模块', ['b', 'c'], (2, 3), {'name': 'aaron'}, None] # 序列化 result = json.dumps(test) res = json.dumps(test, ensure_ascii=False) print(result, type(result)) print(res, type(res)) # 反序列化 recovery = json.loads(result) print(recovery, type(recovery)) # 输出结果 [1, 4.5, true, "u6a21u5757", ["b", "c"], [2, 3], {"name": "aaron"}, null] <class 'str'> [1, 4.5, true, "模块", ["b", "c"], [2, 3], {"name": "aaron"}, null] <class 'str'> [1, 4.5, True, '模块', ['b', 'c'], [2, 3], {'name': 'aaron'}, None] <class 'list'> ''' 注意: 1.序列化的结果中所有的字符串类型的数据都使用双引号"" 2.序列化之后汉字是使用unicode格式输出的,若想输出直接是汉字,秩序在序列化时多加一个ensure_ascii参数即可。 ''' -
json.dump()和json.load()
import json

test = [1, 4.5, True, '模块', ['b', 'c'], (2, 3), {'name': 'aaron'}, None]

# 将序列化后的数据写入文件中
with open('json.txt', mode='w', encoding='utf-8') as fp:
    json.dump(test, fp, ensure_ascii=False)

# 将文件中的数据反序列化
with open('json.txt', mode='r', encoding='utf-8') as fp:
    result = json.load(fp)
    print(result, type(result))

# 输出结果
[1, 4.5, True, '模块', ['b', 'c'], [2, 3], {'name': 'aaron'}, None] <class 'list'>
1.3 pickle模块
-
pickle.dumps()和pickle.loads()
import pickle test = [1, 4.5, True, '模块', ['b', 'c'], (2, 3), {'name': 'aaron'}, None] # 序列化 result = pickle.dumps(test) print(result, type(result)) # 反序列化 recovery = pickle.loads(result) print(recovery, type(recovery)) # 输出结果 b'x80x03]qx00(Kx01G@x12x00x00x00x00x00x00x88Xx06x00x00x00xe6xa8xa1xe5x9dx97qx01]qx02(Xx01x00x00x00bqx03Xx01x00x00x00cqx04eKx02Kx03x86qx05}qx06Xx04x00x00x00nameqx07Xx05x00x00x00aaronqx08sNe.' <class 'bytes'> [1, 4.5, True, '模块', ['b', 'c'], (2, 3), {'name': 'aaron'}, None] <class 'list'> -
pickle.dump()和pickle.load()
import pickle

test = [1, 4.5, True, '模块', ['b', 'c'], (2, 3), {'name': 'aaron'}, None]

# 将序列化后的数据写入文件中
with open('pickle.txt', mode='wb') as fp:
    pickle.dump(test, fp)
    pickle.dump(test, fp)
    pickle.dump(test, fp)

# 将文件中的数据反序列化
with open('pickle.txt', mode='rb') as fp:
    result = pickle.load(fp)
    print(result, type(result))
    result = pickle.load(fp)
    print(result, type(result))
    result = pickle.load(fp)
    print(result, type(result))

# 输出结果
[1, 4.5, True, '模块', ['b', 'c'], (2, 3), {'name': 'aaron'}, None] <class 'list'>
[1, 4.5, True, '模块', ['b', 'c'], (2, 3), {'name': 'aaron'}, None] <class 'list'>
[1, 4.5, True, '模块', ['b', 'c'], (2, 3), {'name': 'aaron'}, None] <class 'list'>

# 注意:打开文件时要以二进制格式打开。
2. 时间模块
2.1 time模块
# time.time(): 获取当前的本地时间戳(从1970年1月1日零点到现在的秒数)
# time.localtime():通过时间戳获取时间元组(默认当前时间)
# time.ctime(): 通过时间戳获取时间字符串(默认当前时间)
# time.strftime(格式化字符串, [时间元组]):通过时间元组格式化时间字符串(时间元组时可选参数)
# time.strptime(时间字符串, 格式化字符串):通过时间字符串提取出时间元组
# time.sleep():程序睡眠等待
# time.perf_counter():用于计算程序运行的时间


import time

result = time.time()
print(1, result, type(result))

result = time.localtime()
print(2, result, type(result))

result = time.ctime()
print(3, result, type(result))

result = time.strftime('%Y-%m-%d %H:%M:%S', time.localtime())
print(4, result, type(result))

# 注意:两个参数的书写内容必须完全相同
result = time.strptime('2019年11月15日21时41分51秒', '%Y年%m月%d日%H时%M分%S秒')
print(5, result, type(result))

start = time.perf_counter()
time.sleep(5)
end = time.perf_counter()
result = end - start
print(6, result, type(result))

# 输出结结果
1 1573827926.2985218 <class 'float'>
2 time.struct_time(tm_year=2019, tm_mon=11, tm_mday=15, tm_hour=22, tm_min=25, tm_sec=26, tm_wday=4, tm_yday=319, tm_isdst=0) <class 'time.struct_time'>
3 Fri Nov 15 22:25:26 2019 <class 'str'>
4 2019-11-15 22:25:26 <class 'str'>
5 time.struct_time(tm_year=2019, tm_mon=11, tm_mday=15, tm_hour=21, tm_min=41, tm_sec=51, tm_wday=4, tm_yday=319, tm_isdst=-1) <class 'time.struct_time'>
6 5.0000196 <class 'float'>
2.2 datetime模块
# datetime.datetime.now():获取现在本地的时间
# datetime.datetime.utcnow():获取当前的UTC时间
# datetime.datetime.strftime():将datetime.datetime格式的时间转化为指定格式的str
# datetime.datetime.strptime():将str格式的时间转化为datetime.datetime格式的时间
# datetime.timedelta():用作datetime.datetime格式时间的加减运算的参数
# datetime.timezone(datetime.timedelta(hours=n)):获取指定的时区


import datetime

result1 = datetime.datetime.now()
print(1, result1, type(result1))

result2 = datetime.datetime.strftime(result1, '%Y-%m-%d %H:%M:%S')
print(2, result2, type(result2))

result3 = datetime.datetime.strptime(result2, '%Y-%m-%d %H:%M:%S')
print(3, result3, type(result3))

result4 = datetime.datetime.utcnow()
print(4, result4, type(result4))

result5 = datetime.timedelta(days=30, hours=2, minutes=5, seconds=30)
print(5, result5, type(result5))

# 获取与当前UTC时间加上30天2小时5分钟30秒之后的时间
result6 = result4 + result5
print(6, result6, type(result6))

result7 = datetime.timezone(datetime.timedelta(hours=2, minutes=5, seconds=30))
print(7, result7, type(result7))

# 输出结果
1 2019-11-16 11:39:37.096657 <class 'datetime.datetime'>
2 2019-11-16 11:39:37 <class 'str'>
3 2019-11-16 11:39:37 <class 'datetime.datetime'>
4 2019-11-16 03:39:37.120650 <class 'datetime.datetime'>
5 30 days, 2:05:30 <class 'datetime.timedelta'>
6 2019-12-16 05:45:07.120650 <class 'datetime.datetime'>
7 UTC+02:05:30 <class 'datetime.timezone'>
3. random模块
-
random.random()
# 随机获取0~1之间的小数(0 <= x < 1) import random result = random.random() print(result) -
random.randrange()
# 随机获取指定范围内的整数 import random result1 = random.randrange(7) result2 = random.randrange(1, 7) result3 = random.randrange(1, 7, 2) -
random.randint()
- 注意:其指定范围是闭区间
# 随机获取指定范围的整数 import random result = random.randint(1, 6) print(result) -
random.uniform()
# 获取指定范围内的随机小数 import random result = random.uniform(1, 5) print(result) # 注意:return a + (b-a) * self.random() -
random.choice()
# 随机获取指定序列中的任一元素 import random test_list = [1, 3, 5, 7, 9] result = random.choice(test_list) print(result)- 随机生成验证码
import random def create_verify_code(n): ''' 随机生成一个由字母和数字组成的n位验证码 :param n:指定生成二维码的长度 :return:返回生成的验证码 ''' verify_code = '' for item in range(n): # 将ASCII编码转换成对应的字符 up per_cha = chr(random.randrange(65, 91)) lower_cha = chr(random.randrange(97, 123)) number = str(random.randrange(0, 10)) choice_list = [upper_cha, lower_cha, number] verify_code += random.choice(choice_list) return verify_code result1 = create_verify_code(5) result2 = create_verify_code(10) print(result1) print(result2) # 输出结果 V9V7y 1rxX2v0sG2 -
random.sample()
# 随机获取指定序列中的指定个数的元素 import random test_list = [1, 3, 5, 7, 9] result = random.sample(test_list, 2) print(result, type(result)) # 注意:结果存放在一个列表中 -
random.shuffle()
# 随机打乱列表中的值

import random

test_list = [1, 3, 5, 7, 9]
random.shuffle(test_list)

print(test_list)

# 注意:该方法是对原列表本身进行操作,无返回值。
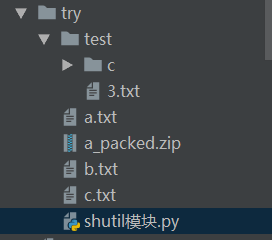
4. shutil模块
# shutil.copy():复制文件的权限和内容
# shutil.move():修改文件名
# shutil.rmtree():删除指定目录下的所有内容
# shutil.make_archive():压缩文件
# shutil.unpack_archive():解压文件

import shutil

shutil.copy('a.txt', 'b.txt')
shutil.move('1.txt', 'c.txt')
path1 = r'C:Python38Scriptsexerciseadvance	rya'
path2 = r'C:Python38Scriptsexerciseadvance	ry	est'
shutil.make_archive('a_packed', 'zip', path1)
shutil.unpack_archive('b_packed.zip', extract_dir=path2)
shutil.rmtree('a')
-
运行shutil模块.py之前

-
运行shutil模块.py之后
5. os模块
-
执行系统命令
# os.system():执行系统命令,将结果直接输出 # os.popen():执行系统命令,可以将结果转换成utf-8的格式输出 import os command = 'date' os.system(command) result = os.popen(command).read() print(result, type(result)) # 输出结果 ��ǰ����: 2019/11/16 ���� ����������: (������) 当前日期: 2019/11/16 周六 输入新日期: (年月日) <class 'str'> -
目录操作
# os.listdir():获取指定目录下的所有文件和文件夹
# os.getcwd():获取当前文件工作所在目录的绝对路径
# os.chdir():将当前文件工作的目录改变为指定的路径下的目录

import os

result = os.listdir(r'C:Python38Scriptsexercise')
print(result, type(result))

result = os.getcwd()
print(result, type(result))

os.chdir(r'C:Python38Scriptsexercise')

result = os.getcwd()
print(result, type(result))

# 输出结果
C:Python38Scriptsexerciseadvance
C:Python38Scriptsexerciseadvance
 <class 'str'>
['.idea', 'advance'] <class 'list'>
C:Python38Scriptsexerciseadvance <class 'str'>
C:Python38Scriptsexercise <class 'str'>
-
文件和文件夹操作
# os.remove():删除文件 # os.mkdir():创建文件夹 # os.rmdir():删除文件夹(只能删除空文件夹) # os.rename():重命名文件(夹) -
os.environ
# os.environ:获取或修改环境变量 import os # 获取环境变量 result1 = os.environ['PATH'] result2 = result1.split(';') print(result2[-3:]) # 增加环境变量 os.environ['PATH'] += r'C:softwaresQQDAUMPotPlayer;' result3 = os.environ['PATH'] result4 = result3.split(';') print(result4[-3:]) os.system('PotPlayerMini.exe') # 输出结果 ['C:\Python27\Scripts\', 'C:\Python27\', ''] ['C:\Python27\', 'C:\softwares\QQ\DAUM\PotPlayer', ''] # 注意:PotPlayerMini.exe是路径C:softwaresQQDAUMPotPlayer下的一个可执行文件;添加的环境变量是临时的,只在改文件执行时有效。 -
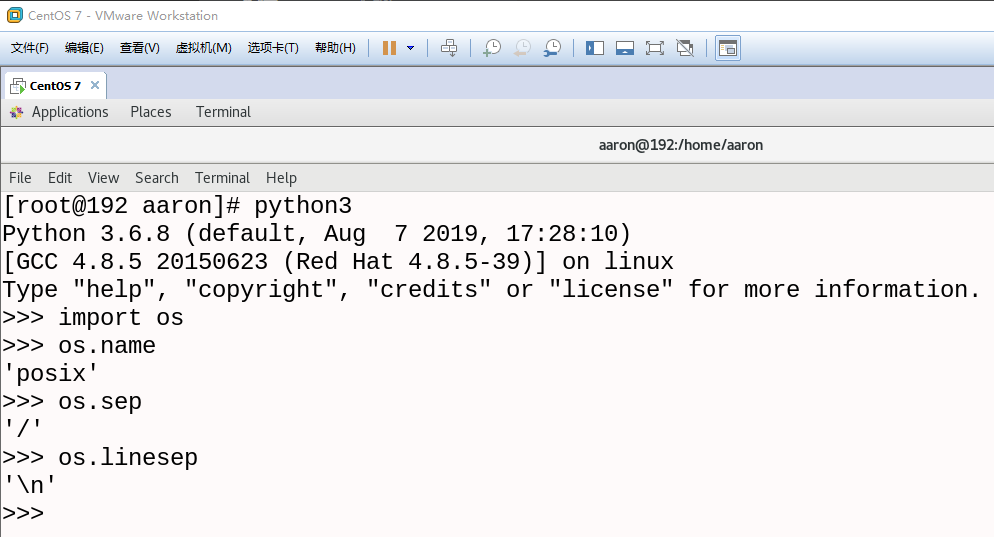
模块属性
# os.name:获取系统标识(Windows:nt Linux&Mac:posix) # os.sep:获取路径分隔符(Windows: Linux&Mac:/) # os.linesep:获取系统的换行符(Windows: 或 Linux&Mac: ) import os result = os.name print(result) result = os.sep print(result) result = os.linesep print(repr(result)) # 输出结果 nt ' '-
Linux下运行结果
-
-
路径操作
- os.path模块
# os.path.abspath():将路径转化为绝对路径 # os.path.basenaem():返回文件名部分 # os.path.dirname():返回路劲部分 # os.path.split():将路径拆分成文件名部分和路劲部分,存放在一个元组中 # os.path.splitext():将路径拆分成后缀和剩余部分,存放在一个元组中 # os.path.join():将多个路径拼接成一个路径(根据系统自动选择拼接的连接符) # os.path.getsize():获取文件大小 # os.path.isdir():判断路径是否是文件夹 # os.path.isfile():判断路径是否是文件 # os.path.exists():判断指定路径是否存在 import os result1 = os.path.abspath('a.txt') print(result1) result2 = os.path.basename(result1) print(result2) result3 = os.path.dirname(result1) print(result3) result4 = os.path.split(result1) print(result4) result5 = os.path.splitext(result1) print(result5) path1 = r'C:dircherry' path2 = r'cdapple.txt' result6 = os.path.join(path1, path2) print(result6) result7 = os.path.getsize('a.txt') print(result7) result8 = os.path.isdir(result3) result9 = os.path.isdir(result1) print(result8, result9) result10 = os.path.isfile(result1) result11 = os.path.isfile(result3) print(result10, result11) result12 = os.path.exists(result1) result13 = os.path.exists(result6) print(result12, result13) # 输出结果 C:Python38Scriptsexerciseadvancea.txt a.txt C:Python38Scriptsexerciseadvance ('C:\Python38\Scripts\exercise\advance', 'a.txt') ('C:\Python38\Scripts\exercise\advance\a', '.txt') C:dircherrycdapple.txt 44 True False True False True False-
求指定文件夹的大小
- os.walk方法
import os def calc_file_size(path): ''' 求指定文件夹的大小 :param path:文件夹的路径 :return:文件夹大小 ''' file_size = 0 for dirpath, dirnames, filenames in os.walk(path): # dirpath:正在查看的目录(该路径下的所有文件夹和子文件夹的路径) # dirnames:此目录下的文件夹 # filenames:此目录下的文件 for i in filenames: item = os.path.join(dirpath, i) print(item) file_size += os.path.getsize(item) return file_size file_path = os.path.abspath('get_size') result = calc_file_size(file_path) print(result) # 输出结果 C:Python38Scriptsexerciseadvanceget_sizefile1.txt C:Python38Scriptsexerciseadvanceget_sizedir1file2.log C:Python38Scriptsexerciseadvanceget_sizedir1file3.log C:Python38Scriptsexerciseadvanceget_sizedir1dir2file4.txt 842- 递归法
import os

def calc_file_size(path):
    '''
    求指定文件夹的大小
    :param path:文件夹的路径
    :return:文件夹大小
    '''

    file_size = 0

    for i in os.listdir(path):
        item = os.path.join(path, i)
        if os.path.isdir(item):
            file_size += calc_file_size(item)
        elif os.path.isfile(item):
            print(item)
            file_size += os.path.getsize(item)

    return file_size


file_path = os.path.abspath('get_size')
result = calc_file_size(file_path)
print(result)

# 输出结果
C:Python38Scriptsexerciseadvanceget_sizedir1dir2file4.txt
C:Python38Scriptsexerciseadvanceget_sizedir1file2.log
C:Python38Scriptsexerciseadvanceget_sizedir1file3.log
C:Python38Scriptsexerciseadvanceget_sizefile1.txt
842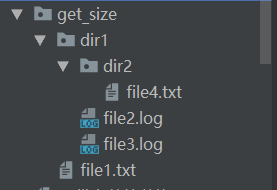

-
注意
两种方法在计算文件夹大小时,方法一是从最外层的文件开始计算的;方法二是从最内层的文件开始计算的。
6. sys模块
-
sys.path
# sys.path:查看可以直接进行导入模块的路径 import sys result = sys.path print(result) # 输出结果 ['C:\Python38\Scripts\exercise\advance', 'C:\Python38\python38.zip', 'C:\Python38\DLLs', 'C:\Python38\lib', 'C:\Python38', 'C:\Python38\lib\site-packages'] -
sys.argv
# sys.argv:获取用户执行脚本时,传入的参数 import sys result = sys.argv print(result) # 输出结果 ['C:\Python38\Scripts\exercise\advance\14sys模块.py', '参数一', '参数二', '参数三']注意:执行脚本时需在命令行窗口进行。

7. logging模块
-
格式一(推荐使用)
import logging # 创建一个logger对象,同时配置其名字和写入日志内容的等级 logger = logging.Logger('Aaron', level=logging.WARNING) # 创建一个文件操作符,包含文件名称,文件的打开格式以及文件的编码方式 file_handler = logging.FileHandler('test.log', mode='a', encoding='utf-8') # 创建一个屏幕操作符(输出内容直接在原来print输出的地方) stream_handler = logging.StreamHandler() # 创建一个格式 fmt = logging.Formatter('%(asctime)s - %(name)s - %(levelname)s - %(module)s :%(message)s') # 给文件操作符设置格式 file_handler.setFormatter(fmt) # 给屏幕操作符设置格式 stream_handler.setFormatter(fmt) # 给logger对象绑定文件操作 logger.addHandler(file_handler) # 给logger对象绑定屏幕操作 logger.addHandler(stream_handler) # 生成日志的内容,等级大于等于之前设置好的日志等级的内容才会写入到日志中 logger.debug('This is debug') logger.info('This is info') logger.warning('This is warning') logger.error('This is error') logger.fatal('This is fatal') # 在日志文件test.log中写入的内容和在操作台显示的内容均为: 2019-11-08 10:07:56,692 - Aaron - WARNING - demo25 :This is warning 2019-11-08 10:07:56,692 - Aaron - ERROR - demo25 :This is error 2019-11-08 10:07:56,692 - Aaron - CRITICAL - demo25 :This is fatal # 注意:写入日志的等级分为五个等级(DEBUG、INFO、WARN=WARNING、ERROR、FATAL=CRITICAL) -
格式二
import logging file_handler = logging.FileHandler('demo.log', mode='a', encoding='utf-8') logging.basicConfig( format='%(asctime)s-%(name)s-%(levelname)s-%(module)s:%(message)s', datefmt='%Y-%m-%d %H:%M:%S', handlers=[file_handler], level=logging.ERROR, ) logging.error('aaron') # 输出日志文件中的内容 2019-11-08 21:08:37-root-ERROR-demo16:aaron # 注意:此格式不能让日志内容同时从控制台输出到屏幕上 -
切分大日志文件
import time
import logging
from logging import handlers

logger = logging.Logger('Alex', level=logging.ERROR)
# 创建一个文件操作符,包含文件名称,文件切分的时间单位和间隔以及文件的编码方式
# 切分的时间单位when可以选择:S(秒)、M(分)、H(时)、D(天)
file_handler = handlers.TimedRotatingFileHandler('split.log',when='S', interval=5, encoding='utf-8')
fmt = logging.Formatter('%(asctime)s-%(name)s-%(levelname)s-%(module)s:%(message)s')
file_handler.setFormatter(fmt)
logger.addHandler(file_handler)

for i in range(1, 100):
    time.sleep(1)
    logger.error(str(i))
8. hashlib模块
8.1 md5算法
- 常规
# update:加密的数据必须是二进制字节流
# hexdigest:加密后的结果是由16进制字符组成的32位长的字符串
# 效率高,相对不复杂,安全性不高

import hashlib

md5 = hashlib.md5()
string = 'This is md5.'.encode('utf-8')
md5.update(string)
result = md5.hexdigest()
print(result, type(result), len(result))

# 输出结果
dd971b434476731b63ca69218a148abf <class 'str'> 32
- 加盐
# 加盐可以有效的防止被撞库,能有效的提高安全性
# 动态加盐:让每次加盐的字符串都不一样可以进一步提高安全性

import hashlib

salt = '20191215'.encode('utf-8')
# 加盐
md5 = hashlib.md5(salt)
string = 'This is md5.'.encode('utf-8')
md5.update(string)
result = md5.hexdigest()
print(result, type(result), len(result))

# 输出结果
27f8fb6f5c87b8792ce1d0c518c37748 <class 'str'> 32
- 文件一致性校验
# 同样的内容,不论是一次进行加密,还是分多次进行加密,只要是用一个对象对其进行加密,加密之后的结果都是一致的。

import hashlib

md5_obj1 = hashlib.md5()
string = 'ThisIsMd5'
md5_obj1.update(string.encode('utf-8'))
result1 = md5_obj1.hexdigest()
print(result1, type(result1), len(result1))

md5_obj2 = hashlib.md5()
md5_obj2.update('This'.encode('utf-8'))
md5_obj2.update('Is'.encode('utf-8'))
md5_obj2.update('Md5'.encode('utf-8'))
result2 = md5_obj2.hexdigest()
print(result2, type(result2), len(result2))

# 输出结果
f77ba977f82c61d05260dfe83a8f4c87 <class 'str'> 32
f77ba977f82c61d05260dfe83a8f4c87 <class 'str'> 32
8.2 sha算法
# update:加密的数据必须是二进制字节流
# hexdigest:加密后的结果是由16进制字符组成的40位长的字符串
# sha算法比md5算法更复杂
# sha n的数字(n)越大,短发越复杂,耗时越久,结果越长,越安全

import hashlib

salt = '20191215'.encode('utf-8')
# 加盐
sha1 = hashlib.sha1(salt)
string = 'This is sha1.'.encode('utf-8')
sha1.update(string)
result = sha1.hexdigest()
print(result, type(result), len(result))

# 输出结果
4ea436e58c991488e824cb1b8e1e18930bdb3ab4 <class 'str'> 40
9. re模块
# re.findall():找到所有满足正则表达式的值,返回一个列表;若未找到满足条件的值,则返回一个空列表
# re.finditer():找到所有满足正则表达式的值,返回一个迭代器,遍历迭代器,得到的结果为对象,通过group可以得到对象的值;若未找到满足条件的值,则返回的迭代器中没有值
# re.search():从左到右找到第一个满足正则表达式的值,返回一个对象,通过group可以得到对象的值;若未找到满足条件的值,则程序报错
# re.match():从左边第一个字符开始寻找满足正则表达式的值,返回一个对象,通过group可以得到对象的值;若未找到满足条件的值,则程序报错
# re.sub():将原字符串中正则表达式匹配到的值特换为指定内容,返回替换完成后的字符串;若未匹配到相应的值,则返回原字符串
# re.subn():将原字符串中正则表达式匹配到的值特换为指定内容,返回一个包含两个元素的元组,第一元素为替换完成后的字符串,第二个元素为匹配到相应值的个数;若未匹配到相应的值,则返回原字符串
# re.compile():将正则表达式编译完成,可以直接用编译得到的结果对指定的字符串进行正则匹配


import re

string = '''This is number 12 and 34.'''

result = re.findall('d', string)
print(result, type(result))

result = re.finditer('d{2}', string)
print('
')
print(result, type(result))
for i in result:
    print(i, type(i))
    print(i.group(), type(i.group()))

result = re.search('is', string)
print('
')
print(result, type(result))
print(result.group(), type(result.group()))

result = re.match('This', string)
print('
')
print(result, type(result))
print(result.group(), type(result.group()))

result = re.sub(' ', '*', string, count=0)
print('
')
print(result, type(result))

result = re.subn(' ', '*', string, count=0)
print('
')
print(result, type(result))

cmp = re.compile('d{2}')
print('
')
print(cmp, type(cmp))
result = cmp.findall(string)
print(result, type(result))

# 输出结果
['1', '2', '3', '4'] <class 'list'>

<callable_iterator object at 0x000002264BE2E940> <class 'callable_iterator'>
<re.Match object; span=(15, 17), match='12'> <class 're.Match'>
12 <class 'str'>
<re.Match object; span=(22, 24), match='34'> <class 're.Match'>
34 <class 'str'>

<re.Match object; span=(2, 4), match='is'> <class 're.Match'>
is <class 'str'>

<re.Match object; span=(0, 4), match='This'> <class 're.Match'>
This <class 'str'>

This*is*number*12*and*34. <class 'str'>

('This*is*number*12*and*34.', 5) <class 'tuple'>

re.compile('\d{2}') <class 're.Pattern'>
['12', '34'] <class 'list'>