知识点:Springboot2.0单元测试和自定义异常处理
1、@SpringBootTest单元测试
1)、引入相关依赖
<!--springboot程序测试依赖,如果是自动创建项目默认添加-->
<dependency>
    <groupId>org.springframework.boot</groupId>
        <artifactId>spring-boot-starter-test</artifactId>
    <scope>test</scope>
</dependency>
2)、使用
@RunWith(SpringRunner.class) //底层用junit SpringJUnit4ClassRunner
@SpringBootTest(classes={XdclassApplication.class})//启动整个springboot工程
public class SpringBootTests { }
3)单元测试注解
a )@Test
b)@Before 在Test前执行
c)@After 在Test后执行
2、SpringBoot测试进阶之MockMvc类的使用和模拟Http请求
1)、增加类注解 @AutoConfigureMockMvc
@SpringBootTest(classes={XdclassApplication.class})
MockMvc相当于Http客户端
2)、相关API
perform:执行一个RequestBuilder请求
andExpect:添加ResultMatcher->MockMvcResultMatchers验证规则
andReturn:最后返回相应的MvcResult->Response
3、SpringBoot2.x个性化启动banner设置和debug日志
简介:自定义应用启动的趣味性日志图标和查看调试日志
1)、启动获取更多信息 java -jar xxx.jar --debug
2)、修改启动的banner信息
a)在类路径下增加一个banner.txt,里面是启动要输出的信息
b)在applicatoin.properties增加banner文件的路径地址spring.banner.location=banner.txt
c)官网地址 https://docs.spring.io/spring-boot/docs/2.1.0.BUILD-SNAPSHOT/reference/htmlsingle/#boot-features-banners
4、SpringBoot2.x配置全局异常
讲解:服务端异常讲解和SpringBoot配置全局异常实战
1)、默认异常测试 int i = 1/0,不友好
2)、异常注解介绍
@ControllerAdvice 如果是返回json数据 则用 RestControllerAdvice,就可以不加 @ResponseBody
//捕获全局异常,处理所有不可知的异常
@ExceptionHandler(value=Exception.class)
5、SpringBoot2.x配置全局异常返回自定义页面
简介:使用SpringBoot自定义异常和错误页面跳转实战
1)、返回自定义异常界面,需要引入thymeleaf依赖
<dependency>
<groupId>org.springframework.boot</groupId>
<artifactId>spring-boot-starter-thymeleaf</artifactId>
</dependency>
2)、resource目录下新建templates,并新建error.html
ModelAndView modelAndView = new ModelAndView();
modelAndView.setViewName("error.html");
modelAndView.addObject("msg", e.getMessage());
return modelAndView;
https://docs.spring.io/spring-boot/docs/2.1.0.BUILD-SNAPSHOT/reference/htmlsingle/#boot-features-error-handling
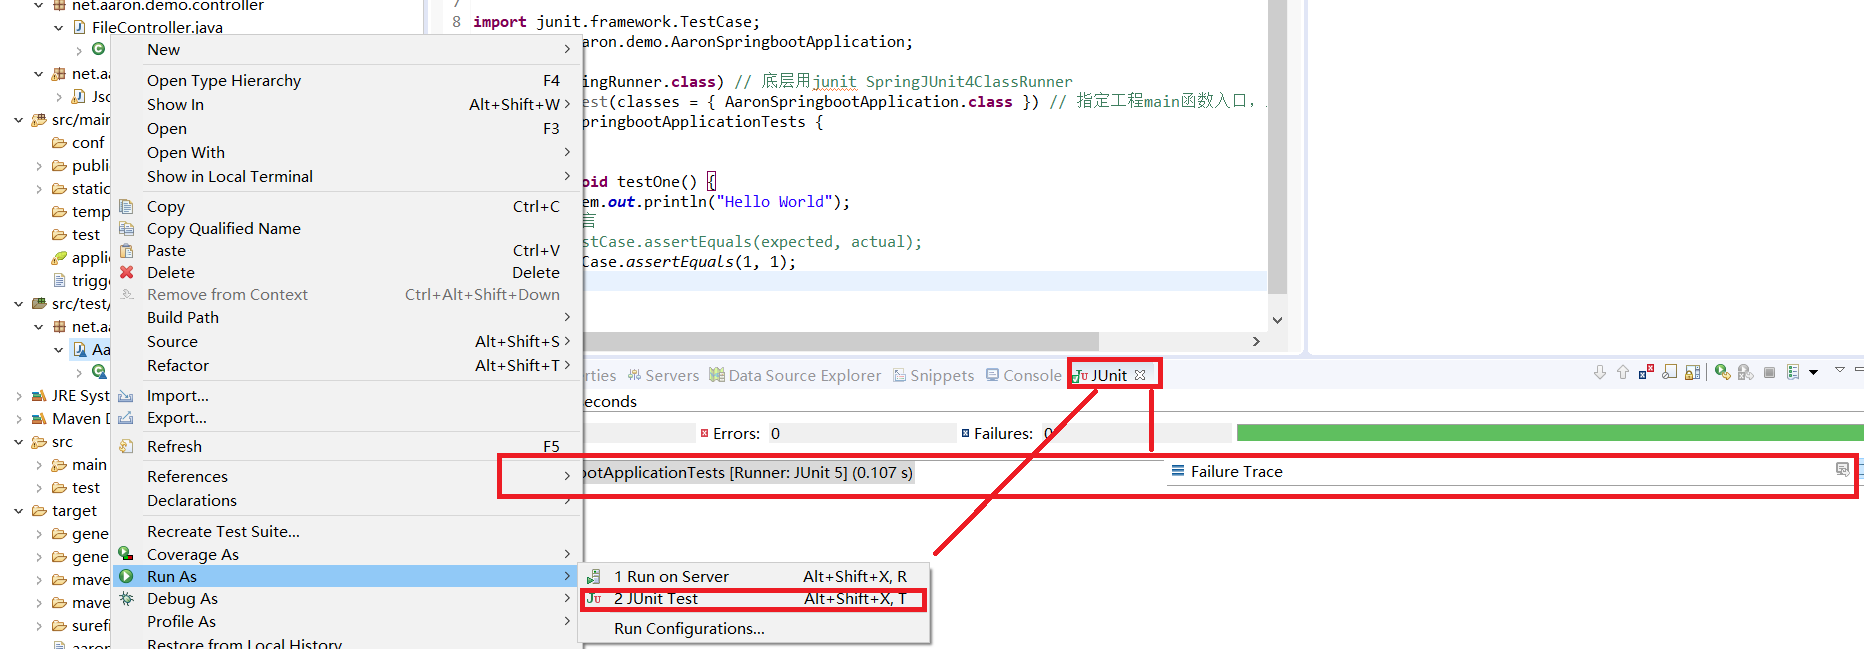
1.新建测试类,引入依赖和注解,采用断言测试:
package net.aaron.demo.aaron_springboot;

import org.junit.jupiter.api.Test;
import org.junit.runner.RunWith;
import org.springframework.boot.test.context.SpringBootTest;
import org.springframework.test.context.junit4.SpringRunner;

import junit.framework.TestCase;
import net.aaron.demo.AaronSpringbootApplication;

@RunWith(SpringRunner.class) // 底层用junit SpringJUnit4ClassRunner
@SpringBootTest(classes = { AaronSpringbootApplication.class }) // 指定工程main函数入口,启动整个springboot工程
class AaronSpringbootApplicationTests {

    @Test
    public void testOne() {
        System.out.println("Hello World");
        //断言
        //TestCase.assertEquals(expected, actual);
        TestCase.assertEquals(1, 1);
    }

}
2.MocMVC测试:
1)创建被测试Controller
package net.aaron.demo.controller;

import java.util.Date;
import java.util.HashMap;
import java.util.Map;


import org.springframework.web.bind.annotation.GetMapping;
import org.springframework.web.bind.annotation.RequestMapping;
import org.springframework.web.bind.annotation.RestController;

import net.aaron.demo.domain.User;

@RestController
public class SampleController {

    @RequestMapping("/test/home")
    public String home() {
        return "aaron";
    }

    @RequestMapping("/test")
    public Map<String,String> testMap(){
        Map<String,String> map = new HashMap<>();
        map.put("name", "aaron");
        return map;
    }


    @GetMapping("/testjson")
    public Object testjson(){
        return new User(111, "abc123", "10001000", new Date());
    }


}
2)创建MockMvc测试类,返回200即OK
package net.aaron.demo.aaron_springboot;

import org.junit.jupiter.api.Test;
import org.junit.runner.RunWith;
import org.springframework.beans.factory.annotation.Autowired;
import org.springframework.boot.test.autoconfigure.web.servlet.AutoConfigureMockMvc;
import org.springframework.boot.test.context.SpringBootTest;
import org.springframework.test.context.junit4.SpringRunner;
import org.springframework.test.web.servlet.MockMvc;
import org.springframework.test.web.servlet.MockMvcBuilder;
import org.springframework.test.web.servlet.MvcResult;
import org.springframework.test.web.servlet.request.MockMvcRequestBuilders;
import org.springframework.test.web.servlet.result.MockMvcResultMatchers;
import org.springframework.test.web.servlet.setup.MockMvcBuilders;

import net.aaron.demo.AaronSpringbootApplication;

@RunWith(SpringRunner.class)
@SpringBootTest(classes = { AaronSpringbootApplication.class })
@AutoConfigureMockMvc
public class MockMvcTestDemo {

    @Autowired
    private MockMvc mockMvc;

    @Test
    public void apiTest() throws Exception {
        //perform 模拟一个request请求
        //andExpect 期望值
        //MockMvcResultMatchers 结果匹配系
        //andReturn 返回request请求结果
        MvcResult mvcResult = mockMvc.perform(MockMvcRequestBuilders.get("/test/home/")).andExpect(MockMvcResultMatchers.status().isOk()).andReturn();
        //获取状态码
        int status = mvcResult.getResponse().getStatus();
        System.out.println(status);
    }


}