三、添加一个精灵
我们先用个简单的方式,把player, projectile, target三个PNG文件拷贝到 D:\Work7\NEWPLUS\TDA_DATA\UserData 目录下,这使其可以在模拟器上直接通过文件路径访问到。Uphone有其资源打包的方式,图片和音乐都可以打包到动态库文件内,这个另外会有教程描述,我们这里先让事情简单化。
![]()
![]()
![]()
关于cocos2d坐标系统的规则,简而言之就是左下角为原点,向上向右按像素递增,这在Wenderlich的原文中有详细描述,我们这里就不再赘述了。直接切入代码
现在我们在HelloWorldScene.cpp里面,找到bool HelloWorld::init()函数,把它替换成下面代码
{
//////////////////////////////
// 1. super init first
if ( !CCLayer::init() )
{
return false;
}
/////////////////////////////
// 2. add a menu item with "X" image, which is clicked to quit the program
// you may modify it.
// add a "close" icon to exit the progress. it's an autorelease object
CCMenuItemImage *pCloseItem = CCMenuItemImage::itemFromNormalImage( "CloseNormal.png",
"CloseSelected.png",
this,
menu_selector(HelloWorld::menuCloseCallback) );
pCloseItem->setPosition( ccp(CCDirector::getSharedDirector()->getWinSize().width - 20, 20) );
// create menu, it's an autorelease object
CCMenu* pMenu = CCMenu::menuWithItems(pCloseItem, NULL);
pMenu->setPosition( CGPointZero );
this->addChild(pMenu);
/////////////////////////////
// 3. add your codes below...
CGSize winSize = CCDirector::getSharedDirector()->getWinSize();
CCSprite *player = CCSprite::spriteWithFile("Player.png",
CGRectMake(0, 0, 27, 40) );
player->setPosition( ccp(player->getContentSize().width/2, winSize.height/2) );
this->addChild(player);
return true;
}
其实我们只修改了 // 3. add your codes below 这段。
cocos2d-x和cocos2d-iphone的接口有细微的差别,不过你一旦习惯了这个差别,写起代码来就会很顺手。
我们抛开添加"X"退出按钮的一段,单纯地看一下这两段init函数的差异.
|
// cpp with cocos2d-x
bool HelloWorld::init() { if ( CCLayer::init() ) { CGSize winSize = CCDirector::getSharedDirector()->getWinSize(); CCSprite *player = CCSprite::spriteWithFile("Player.png", CGRectMake(0, 0, 27, 40) ); player->setPosition( ccp(player->getContentSize().width/2, winSize.height/2) ); this->addChild(player); } return true; } |
// objc with cocos2d-iphone
-(id) init { if( (self=[super init] )) { CGSize winSize = [[CCDirector sharedDirector] winSize]; CCSprite *player = [CCSprite spriteWithFile:@"Player.png" rect:CGRectMake(0, 0, 27, 40) ]; player.position = ccp(player.contentSize.width/2, winSize.height/2); [self addChild:player]; } return self; } |
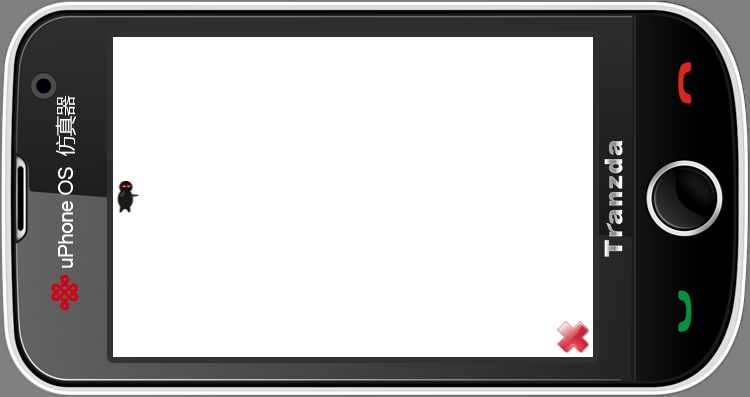
好了,我们编译运行一下,可以看到带头大哥一袭黑衣,很猥琐地躲在黑色背景上,只露出一双杀红了的眼睛。为了游戏性,我们需要把背景颜色改成白的。只要简单地修改,使HelloWorld不是继承CCLayer,而是继承CCColorLayer就行了。
在HelloWorldScene.h中,修改HelloWorld类声明如下。
(左边为cpp代码,也就是读者现在应该使用的,右边为Cocos2dSimpleGame原来使用cocos2d-iphone的objc代码,用以对比参考。本系列后面的行文也都如此)
|
// cpp with cocos2d-x
class HelloWorld : public cocos2d::CCColorLayer |
// objc with cocos2d-iphone
@interface HelloWorld : CCColorLayer |
然后在HelloWorld::init()函数实现中,修改刚开始的
{
return false;
}
变成
{
return false;
}
这里小改了一下逻辑,原版objc里是如果super init成功,就BALA-BALA做后面的工作;我喜欢防御性编程,如果失败则先做出错处理、跳出,然后才继续写正确流程。这么做有两个好处,一是不会写到后面漏掉了错误处理,二是不用做太多层的if嵌套。这个是题外话了。抛开if的逻辑,我们来对比一下这句super init在cpp和objc的区别
|
// cpp with cocos2d-x
if ( CCColorLayer::initWithColor( ccc4(255,255,255,255) ) |
// objc with cocos2d-iphone
if ( self = [super initWithColor:ccc4(255,255,255,255)] ) |
编译后运行,你就可以看到带头大哥孤独地站在白色背景上了,寂寞得泪流满面
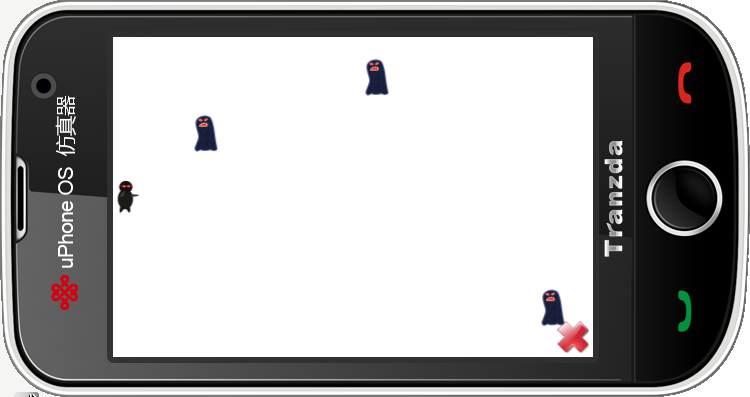
四、移动目标
有了带头大哥后,我们就需要添加一些虾兵蟹将让大哥砍。英雄人物一般不喜欢砍木桩,所以我们就用void addTarget()方法在屏幕右边创建一些跑龙套的小兵,让他们以随机速度向左移动。
先到HelloWorldScene.h里添加函数声明 void addTarget(); 然后回到HelloWorldScene.cpp里实现函数
|
// cpp with cocos2d-x
void HelloWorld::addTarget() { CCSprite *target = CCSprite::spriteWithFile("Target.png", CGRectMake(0,0,27,40) ); // Determine where to spawn the target along the Y axis CGSize winSize = CCDirector::getSharedDirector()->getWinSize(); int minY = target->getContentSize().height/2; int maxY = winSize.height - target->getContentSize().height/2; int rangeY = maxY - minY; srand( TimGetTicks() ); int actualY = ( rand() % rangeY ) + minY; // Create the target slightly off-screen along the right edge, // and along a random position along the Y axis as calculated target->setPosition( ccp(winSize.width + (target->getContentSize().width/2), actualY) ); this->addChild(target); // Determine speed of the target int minDuration = (int)2.0; int maxDuration = (int)4.0; int rangeDuration = maxDuration - minDuration; srand( TimGetTicks() ); int actualDuration = ( rand() % rangeDuration ) + minDuration; // Create the actions CCFiniteTimeAction* actionMove = CCMoveTo::actionWithDuration( (ccTime)actualDuration, ccp(0 - target->getContentSize().width/2, actualY) ); CCFiniteTimeAction* actionMoveDone = CCCallFuncN::actionWithTarget( this, callfuncN_selector(HelloWorld::spriteMoveFinished)); target->runAction( CCSequence::actions(actionMove, actionMoveDone, NULL) ); } |
// objc with cocos2d-iphone
-(void)addTarget { CCSprite *target = [CCSprite spriteWithFile:@"Target.png" rect:CGRectMake(0, 0, 27, 40)]; // Determine where to spawn the target along the Y axis CGSize winSize = [[CCDirector sharedDirector] winSize]; int minY = target.contentSize.height/2; int maxY = winSize.height - target.contentSize.height/2; int rangeY = maxY - minY; int actualY = (arc4random() % rangeY) + minY; // Create the target slightly off-screen along the right edge, // and along a random position along the Y axis as calculated target.position = ccp(winSize.width + (target.contentSize.width/2), actualY); [self addChild:target]; // Determine speed of the target int minDuration = 2.0; int maxDuration = 4.0; int rangeDuration = maxDuration - minDuration; int actualDuration = (arc4random() % rangeDuration) + minDuration; // Create the actions id actionMove = [CCMoveTo actionWithDuration:actualDuration position:ccp(-target.contentSize.width/2, actualY)]; id actionMoveDone = [CCCallFuncN actionWithTarget:self selector:@selector(spriteMoveFinished:)]; [target runAction:[CCSequence actions:actionMove, actionMoveDone, nil]]; } |
这里用callfuncN_selector(HelloWorld::spriteMoveFinished)回调了spriteMoveFinished方法,我们需要实现之。同样别忘记在头文件里加入声明, 然后实现之
|
// cpp with cocos2d-x
void HelloWorld::spriteMoveFinished(CCNode* sender) { CCSprite *sprite = (CCSprite *)sender; this->removeChild(sprite, true); } |
// objc with cocos2d-iphone
-(void)spriteMoveFinished:(id)sender { CCSprite *sprite = (CCSprite *)sender; [self removeChild:sprite cleanup:YES]; } |
有了addTarget后,我们需要定时地调用它。所以在init函数返回前增加这个函数调用
|
// cpp with cocos2d-x
// Call game logic about every second this->schedule( schedule_selector(HelloWorld::gameLogic), 1.0 ); |
// objc with cocos2d-iphone
// Call game logic about every second [self schedule:@selector(gameLogic:) interval:1.0]; |
然后实现gameLogic这个回调函数
|
// cpp with cocos2d-x
void HelloWorld::gameLogic(ccTime dt) { this->addTarget(); } |
// objc with cocos2d-iphone
-(void)gameLogic:(ccTime)dt { [self addTarget]; } |
不要忘记在头文件里增加函数声明,并且应为public函数,否则回调是调用不到的。
编译运行,现在你应该看到小喽啰们张牙舞爪地向大哥扑过来。于是拯救世界、维护人类和平的重任就交给大哥了。
著作权声明:本文由http://www.walzer.cn/原创,欢迎转载分享。请尊重作者劳动,转载时保留该声明和作者博客链接,谢谢!