PostgreSQL is an object-relational database management system developed by the Department of Computer Science at the University of California, Berkeley. It currently has an active contribution to the open source community. Recently, the rankings have continued to advance. In fact, there are a lot of pgsql and design concepts that are better than mysql, such as stability. Stronger; high performance in concurrent concurrent reading and writing; support for rich geometry types and leading position in GIS field; text supports various lengths without distinction; nosql features, support for array and json storage and search, etc. Advantages, pgsql application scenarios are also constantly expanding, the following is a detailed written first step of pgsql entry, that is, first install pgsql to the operating system, the process is as follows:
- Create system user
Create user postgresql and setup password:
useradd postgresql
# here I personally reconmmand set "postgres" as username, it's more convenient afterwards.
# but if you created username like I do, it doesn't matter.
passwd postgresql
# double input password to confirm
Create postgresql data directory via root:
mkdir -p postgresql/data
#change owner of directory tree
chown -R postgresql /postgresql
Switch back to user postgresql
su - postgres
and after switching,
-
Download & Install
Pgsql has many types of packages. For different Linux distributions, there are corresponding compiled packages. The installation is very convenient. In addition, if you can compile the source code for the common Linux platform or install the officially compiled binary package, the installation of the source package is only There is one more compilation step than the binary installation, and the rest are the same, so the installation method here is to install the compiled binary package.
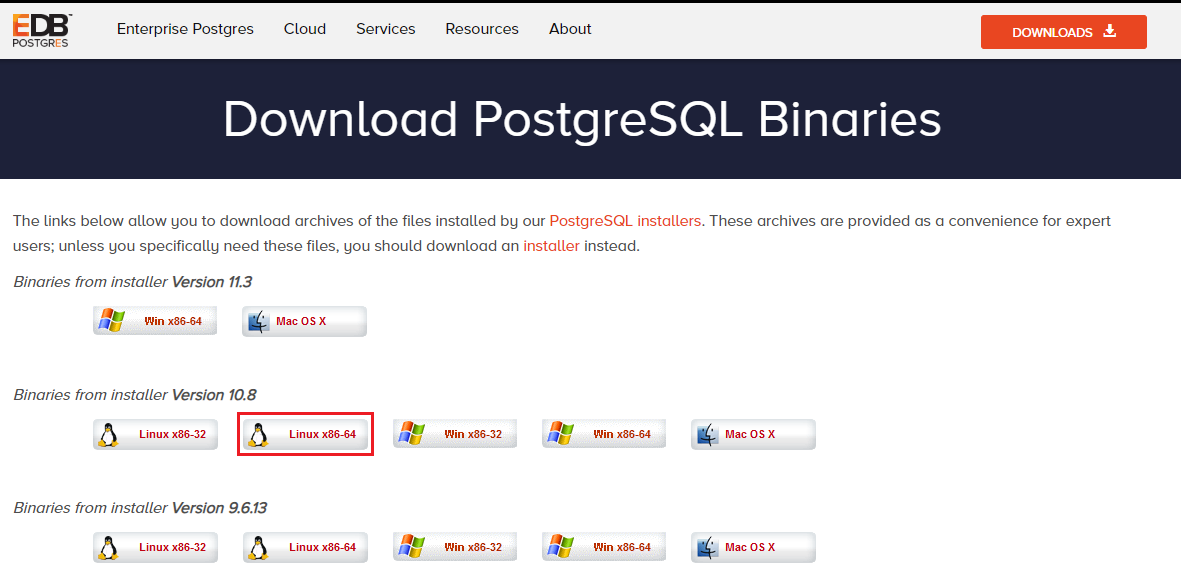
Pgsql official website address: https://www.postgresql.org/, and the download page is: https://www.enterprisedb.com/download-postgresql-binaries, click the Other Linux option under Linux, and then click the tar.gz archive below to download the binary archive.
Or use the PostgreSQL Yum Repositor which will integrate with your normal systems and patch management, and provide automatic updates for all supported versions of PostgreSQL throughout the support lifetime of PostgreSQL. The PostgreSQL Yum Repository currently supports operating systems like Red Hat Enterprise Linux, CentOS, Scientific Linux, Oracle Linux, Fedora*
Note: due to the shorter support cycle on Fedora, all supported versions of PostgreSQL are not available on this platform. We do not recommend using Fedora for server deployments.
I'll talk about it in another blog.
Here I installed via downloaded package. Using linux command to extract tar.gz package
#first change to destination directroy
cd /postgresql
#then move package here
mv /home/postgresql/Desktop/postgresql-10.8-1-linux-x64-binaries.tar.gz .
#then extract package
tar -zxvf postgresql-10.8-1-linux-x64-binaries.tar.gz
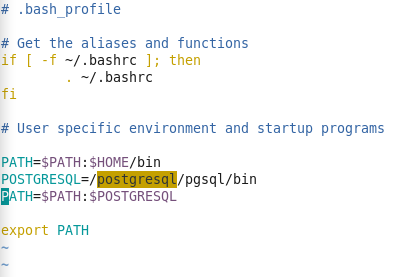
Now you may add environment varibles to user postgresql's .bash_profile and source it.
The next step is to initialize the database, you may refer to the --help to check the usage of initdb command, here -D is followed by data directory.
initdb -D /postgresql/data/
When you see the output like below, it means initialize is successfully completed.
Success. You can now start the database server using:
    /postgresql/pgsql/bin/pg_ctl -D /postgresql/data/ -l logfile start
And following the hint: using command (-D is followed by data directory and -l is followed by its logfile, here we use current location so no path before the logfile)
pg_ctl -D /postgresql/data/ -l logfile start
Here also you can add varible PGDATA=/postgresql/data to .bash_profile as we mentioned above, so that postgresql will try to find PGDATA first, and should it fails to reach its value, only then it throw out an error.
After started up, you may refer to the command ps -ef|grep postgres to check database's processes.
And its default port is 5432, you can use lsof -i -P -n to check if it is open and listening.

Now you can see that pgsql listens to the local host or 127.0.0.1 by default. Currently, it can only be accessed by the local machine. If remote access is not connected, the specific configuration file is postgresql.conf in the data directory, which can be modified. This configuration file to adjust various parameters, such as: listen_addresses can modify the binding address, the default is the local host, the port can modify the listening port number, the default is 5432, MAX_CONNECTIONS can modify the maximum number of client connections, the default is 100, etc. I won’t go into details here.
And if you want to stop the database, you can use the command: pg_ctl -D /postgresql/data/ -l logfile stop
- Now about using database: I shall briefly introduct how to create tables, insert/delete/update/select data
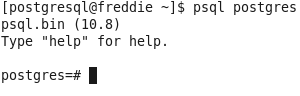
First, login into the database:
./bin/psql -h 127.0.0.1 -d postgres -U postgres -p 5432
here we use psql command, The -h parameter specifies the server address, the default is 127.0.0.1 if not specified;
                                               -d specifies the database selected after the connection, the default is also postgres,
                                               -U specifies the user, the default is the current user,
                                               -p specifies the port number, the default Is "5432",
there are more useful parameters like -c, -t, etc. More options can be found via: ./bin/psql --help
In front of the command prompt is the current database, use l to view the current database list

The default postgres, template0 and 1 libraries are not allowed to operate, create a new database execution: CREATE DATABASE test WITH OWNER=postgres ENCODING='UTF-8'; This creates the database test, and then you can execute the command c test Switch the current database to test, then execute d to view all the tables under the current database:

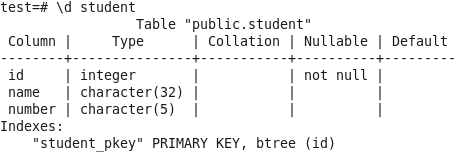
Create a simple data table using command:
CREATE TABLE student (
  id integer NOT NULL,
  name character(32),
  number char(5),
  CONSTRAINT student_pkey PRIMARY KEY (id)
);
And use d student to check new table's info:
Now you may insert one record into the table using:
INSERT INTO student (id, name, number) VALUES (1, 'Adam', '1023');
--check inserted data
select *
from student
where 1=1
and id = 1;
Also you can update and delete this record:
UPDATE STUDENT SET NUMBER = '1024' WHERE ID = 1;
--HERE YOU CAN CHECK AGAIN AND SEE THE CHANGE
DELETE FROM STUDENT WHERE ID = 1;
And at last, you can use q to quit to the system command line.

So much for this blog and I will try to keep it update if there's more to supplement.
Thanks for viewing and good luck on Postgre SQL study!