1.概述
-
在之前的案例中实现了OAuth2 的三种模式,本例将基于上一个示例的SPA客户端实现 授权码模式 授权。
-
授权码模式比隐式模式安全级别更高一点,因为多了一次根据授权码获取access_token的交互。并且IdentityServer4 带有PKCE(Proof Key for Code Exchange) 支持的。
2. 服务端设置
在config 中添加一个新的jsclient
 new Client
            {
                ClientId="js2",
                ClientName="vue js Client",
                RequireConsent=false,
                AllowedGrantTypes= GrantTypes.Code, // 隐式授权码
                ClientSecrets=new[] {new Secret("123456".Sha256()) }, // 授权码模式下必须配置clientsecret
                RedirectUris={"http://localhost:8080/callback"},
                PostLogoutRedirectUris={"http://localhost:8080/logout"},
                AllowedScopes= new List<string>
                {
                    IdentityServerConstants.StandardScopes.OpenId,
                    IdentityServerConstants.StandardScopes.Profile
                }

            }
3. VUE客户端
3.1 在上一个示例基础上修改sso.js,修改内容response_type 为code,添加client_secret
import Oidc from 'oidc-client'

const host = location.origin

const authsServer = 'http://localhost:5010'

const userManager = new Oidc.UserManager({
    authority: authsServer,  // server 地址
    client_id: 'js2',  // client id
    client_secret:'123456',
    post_logout_redirect_uri: `${host}/logout`, // 退出登录
    redirect_uri: `${host}/callback`,
    silent_redirect_uri: `${host}/callback`,
    accessTokenExpiringNotificationTime: 4,  // 超时
    silentRequestTimeout: 2000,  //
    //response_type: 'token id_token',
    response_type:'code',
    scope: 'openid profile',
    filterProtocolClaims: true
})

userManager.events.addUserSignedOut(() => {
    userManager.removeUser().then(() => {
        userManager.signinRedirect().catch(()=>{
            console.error('error wihile logout')
        })
    })

})

export default userManager;
3.2 在客户端受保护的首页添加如下代码,显示user token.
<script>
export default {
  name: 'HelloWorld',
  props: {
    msg: String,
  },
  data: function() {
    return {
      user: {},
    };
  },
  methods: {
    getUser: function() {
      this.$userManager.getUser().then((t) => {
        console.log(t);
        this.user = t;
      });
    },
  },
  mounted(){
    this.getUser()
  }
};
</script>
4. 测试
4.1 浏览器访问localhost:8080 将重定向到localhost:5010 登录页
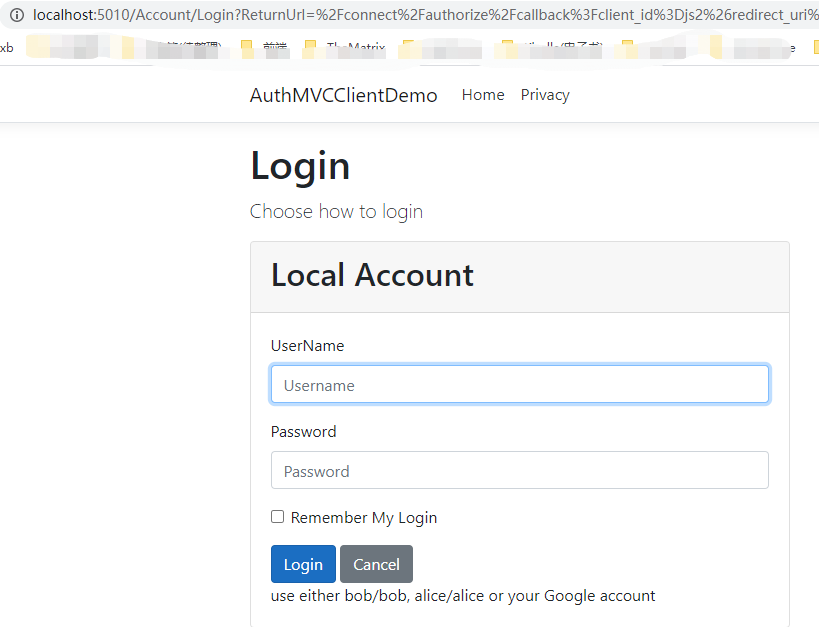
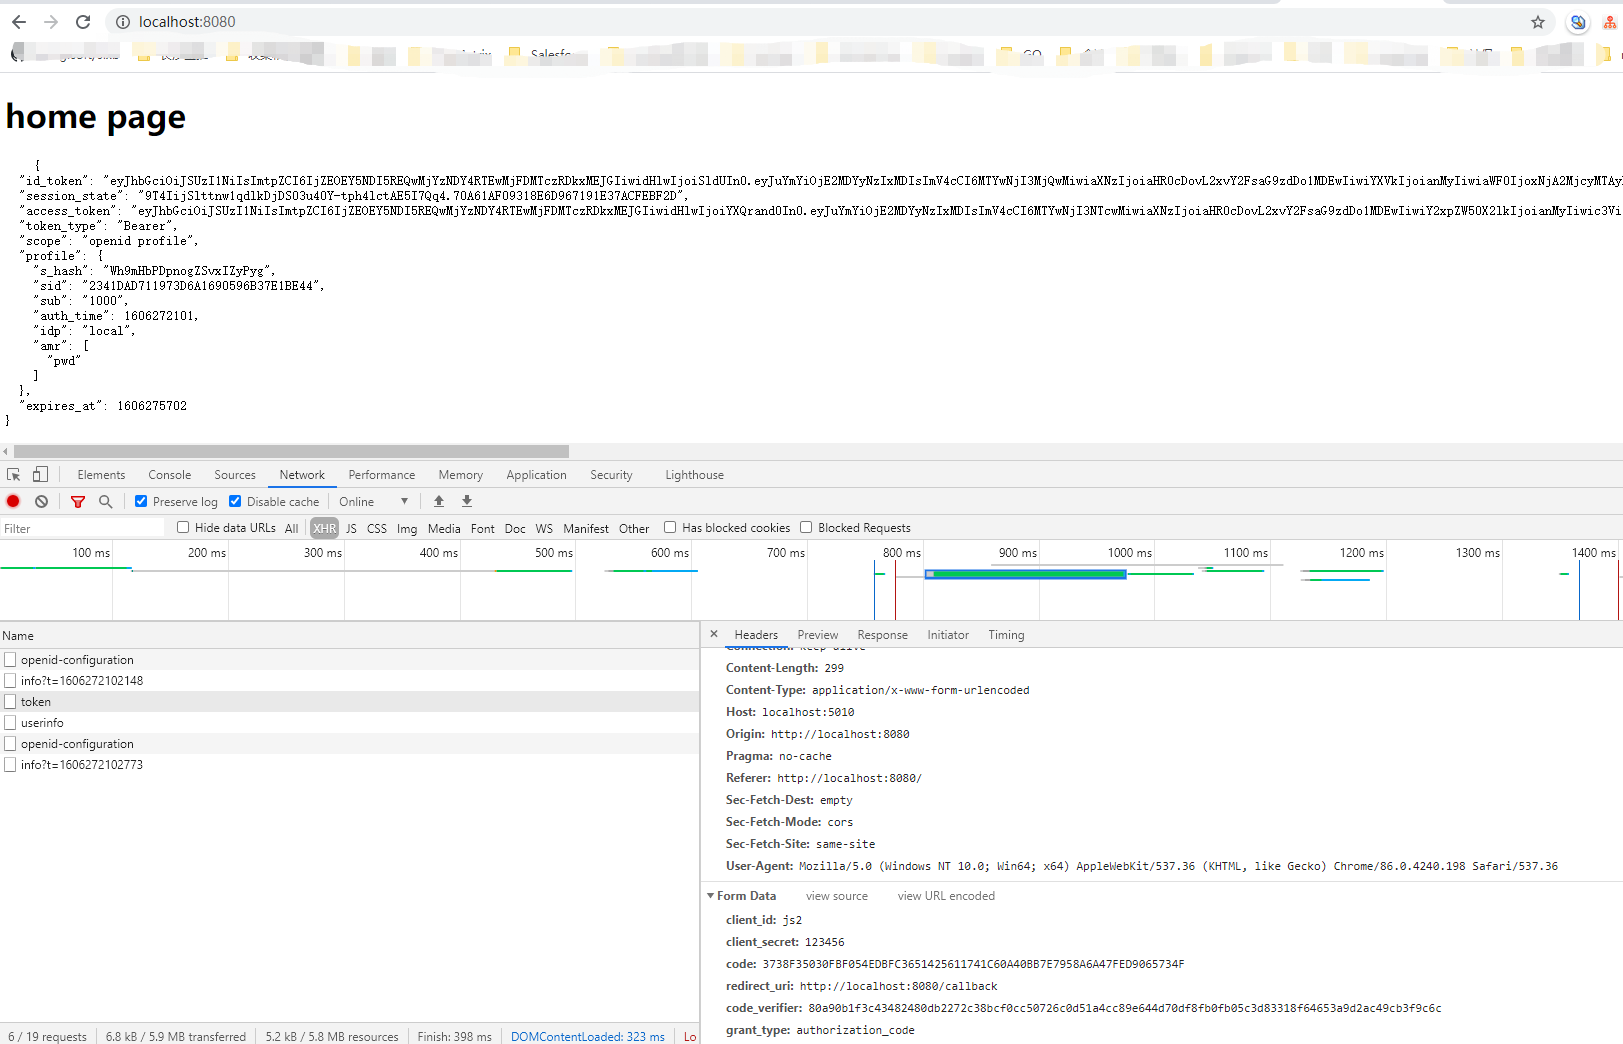
4.2 输入testuser 用户名密码成功登录并重定向回首页
5. 总结
当重定向到localhost:5010 时,url如下:
// 根据授权模式 response_type=code  会带上code_challenge  和 code_challenge_method=S256
http://localhost:5010/Account/Login?ReturnUrl=/connect/authorize/callback?client_id=js2&redirect_uri=http://localhost:8080/callback&response_type=code&scope=openid profile&state=ac4cb57f155c460c8cc72cd50359f230&code_challenge=X2_6yKl8ZcuE5B6pzlsrBnL7fpYrfK8VYVYLnX5W3RQ&code_challenge_method=S256&response_mode=query
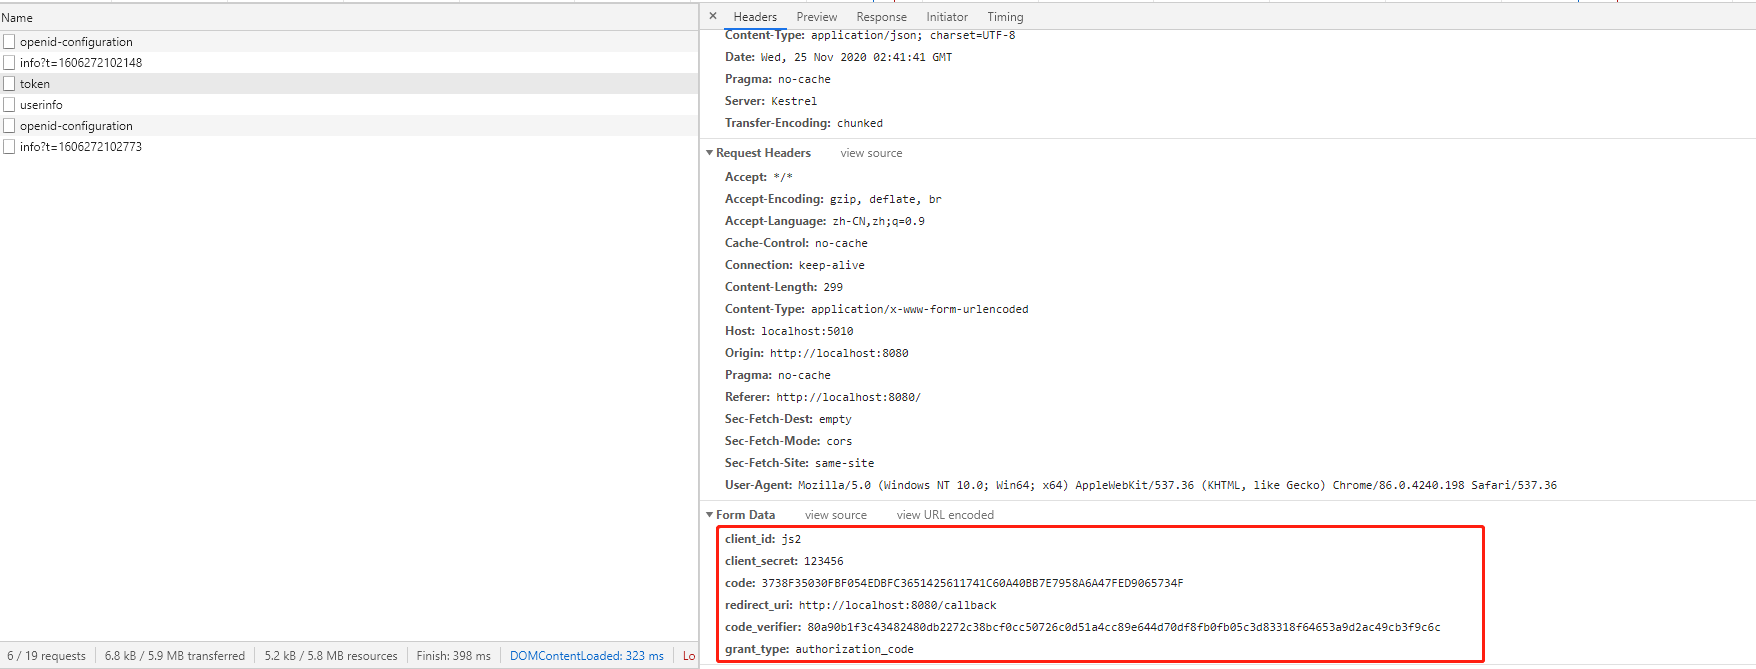
输入用户名密码后客户端会根据拿到的授权码再发起一次根据授权码获取token 的post 请求: