学习Java面前有两座山,一座山叫SSM,一座山叫SSH,跨越了这两座山之后才能感受到这个语言的魅力所在,SSM框架的搭建详细在之前博客已经涉及了,今天来整理SSH框架详细步骤;
生有涯 而 学无涯
搭建步骤有:
- 创建Web Project项目;
- 导入jar包
- 配置web.xml相关信息
- 配置applicationContext.xml相关信息
- 配置JDBC
- 配置Struts.xml
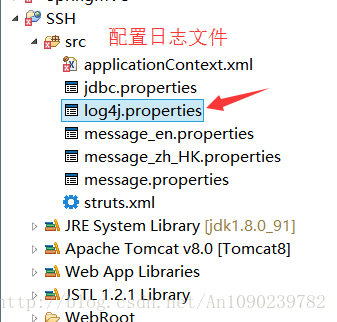
- 配置log4j日志文件
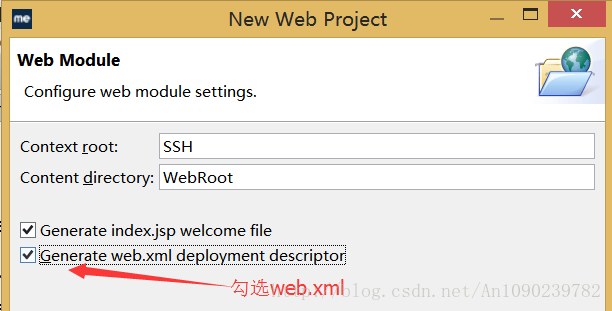
首先,打开你的MyEclipse 2015;创建一个新的Web Project项目;其中选择jdk版本为1.8;Tomcat版本为tomcat8;next–>next 勾选web.xml配置文件,finish;

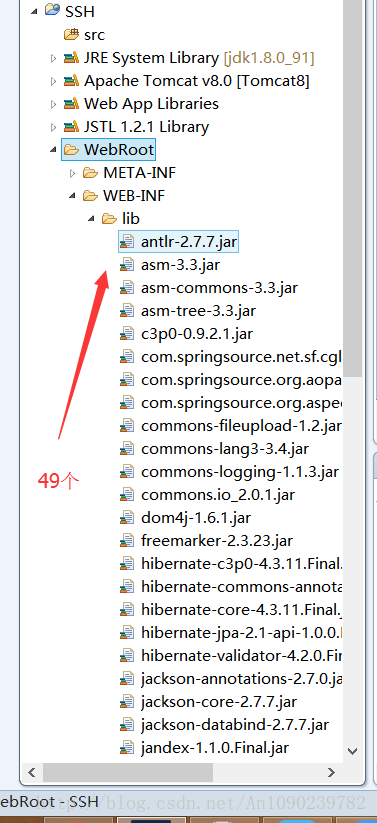
然后需要导入Jar包,将Jar包全部导入至lib文件夹下;(如需Jar包可加QQ:1090239782,可分享与您);
打开web.xml配置Spring,Struts 以及中文乱码解决;该部分直接附上源码:
<?xml version="1.0" encoding="UTF-8"?>
<web-app xmlns:xsi="http://www.w3.org/2001/XMLSchema-instance" xmlns="http://java.sun.com/xml/ns/javaee" xsi:schemaLocation="http://java.sun.com/xml/ns/javaee http://java.sun.com/xml/ns/javaee/web-app_3_0.xsd" id="WebApp_ID" version="3.0">
  <display-name>SSH</display-name>
  <welcome-file-list>
    <welcome-file>index.html</welcome-file>
    <welcome-file>index.htm</welcome-file>
    <welcome-file>index.jsp</welcome-file>
    <welcome-file>default.html</welcome-file>
    <welcome-file>default.htm</welcome-file>
    <welcome-file>default.jsp</welcome-file>
  </welcome-file-list>
  <!-- 配置监听器 -->
    <context-param>
        <!-- 上下文配置路径 -->
        <param-name>contextConfigLocation</param-name>
        <!-- 访问spring配置信息 -->
        <param-value>classpath:applicationContext.xml</param-value>
    </context-param>
    <!-- 配置spring启动listener入口 -->
    <listener>
        <listener-class>org.springframework.web.context.ContextLoaderListener</listener-class>
    </listener>
    <!-- 中文乱码解决 -->
    <filter>
        <filter-name>EncodingFilter</filter-name>
        <filter-class>org.springframework.web.filter.CharacterEncodingFilter</filter-class>
        <init-param>
            <param-name>encoding</param-name>
            <param-value>utf-8</param-value>
        </init-param>
    </filter>
    <filter-mapping>
        <filter-name>EncodingFilter</filter-name>
        <url-pattern>/*</url-pattern>
    </filter-mapping>
    <!-- Struts 2配置信息 -->
    <filter>
        <filter-name>struts2</filter-name>
        <filter-class>org.apache.struts2.dispatcher.filter.StrutsPrepareAndExecuteFilter</filter-class>
    </filter>
      <filter-mapping>
        <filter-name>struts2</filter-name>
        <url-pattern>/*</url-pattern>
      </filter-mapping>
</web-app>
然后,配置application-Context.xml文件,注意Hibernate的版本;
数据源的配置与SSM不同;

配置 application-Context.xml文件中Hibernate的事务处理器及配置文件;附上源码:
<?xml version="1.0" encoding="UTF-8"?>
<beans xmlns="http://www.springframework.org/schema/beans"
    xmlns:xsi="http://www.w3.org/2001/XMLSchema-instance"
    xmlns:p="http://www.springframework.org/schema/p"
    xmlns:aop="http://www.springframework.org/schema/aop"
    xmlns:context="http://www.springframework.org/schema/context"
    xmlns:jee="http://www.springframework.org/schema/jee"
    xmlns:tx="http://www.springframework.org/schema/tx"
    xsi:schemaLocation="
        http://www.springframework.org/schema/aop
        http://www.springframework.org/schema/aop/spring-aop.xsd
        http://www.springframework.org/schema/beans
        http://www.springframework.org/schema/beans/spring-beans.xsd
        http://www.springframework.org/schema/context
        http://www.springframework.org/schema/context/spring-context.xsd
        http://www.springframework.org/schema/jee
        http://www.springframework.org/schema/jee/spring-jee.xsd
        http://www.springframework.org/schema/tx
        http://www.springframework.org/schema/tx/spring-tx.xsd">
    <context:component-scan base-package="com.jredu" />
    <context:property-placeholder location="classpath:jdbc.properties"/>
    <bean id="dataSource"
        class="com.mchange.v2.c3p0.ComboPooledDataSource"
        p:driverClass="${jdbc.driverClassName}"
        p:jdbcUrl="${jdbc.url}"
        p:user="${jdbc.username}"
        p:password="${jdbc.password}"
        p:initialPoolSize="${jdbc.initialSize}"
        p:maxPoolSize="${jdbc.maxActive}"/>
    <bean id="sessionFactory" class="org.springframework.orm.hibernate4.LocalSessionFactoryBean">
        <property name="dataSource" ref="dataSource"/>
        <property name="hibernateProperties">
            <props>
                <prop key="show_sql">true</prop>
                <prop key="hibernate.dialect">org.hibernate.dialect.Oracle10gDialect</prop>
                <prop key="hbm2ddl.auto">update</prop>
                <prop key="hibernate.temp.use_jdbc_metadata_defaults">false</prop>
            </props>
        </property>
        <!-- Hibernate的映射文件 -->
        <property name="mappingLocations">
            <list>
                <value>classpath:com/jredu/entity/*.hbm.xml</value>
            </list>
        </property>

    </bean>
    <!-- 与SSM框架的区别所在 -->
    <bean id="transactionManager"
        class="org.springframework.orm.hibernate4.HibernateTransactionManager">
        <property name="sessionFactory" ref="sessionFactory"/>
    </bean>

    <tx:advice id="txAdvice" transaction-manager="transactionManager">
        <tx:attributes>
            <tx:method name="add*" propagation="REQUIRED" />
            <tx:method name="append*" propagation="REQUIRED" />
            <tx:method name="insert*" propagation="REQUIRED" />
            <tx:method name="save*" propagation="REQUIRED" />
            <tx:method name="update*" propagation="REQUIRED" />
            <tx:method name="modify*" propagation="REQUIRED" />
            <tx:method name="edit*" propagation="REQUIRED" />
            <tx:method name="delete*" propagation="REQUIRED" />
            <tx:method name="remove*" propagation="REQUIRED" />
            <tx:method name="repair" propagation="REQUIRED" />
            <tx:method name="delAndRepair" propagation="REQUIRED" />
            <tx:method name="get*" propagation="SUPPORTS" />
            <tx:method name="find*" propagation="SUPPORTS" />
            <tx:method name="load*" propagation="SUPPORTS" />
            <tx:method name="search*" propagation="SUPPORTS" />
            <tx:method name="datagrid*" propagation="SUPPORTS" />
            <tx:method name="*" propagation="SUPPORTS" />
        </tx:attributes>
    </tx:advice>
    <aop:config>
        <aop:pointcut id="serviceOperation"
            expression="execution(* com.jredu.service.*.*(..))" />
        <aop:advisor advice-ref="txAdvice" pointcut-ref="serviceOperation" />
    </aop:config>
    <!-- 通过Spring来管理Action -->
    <bean id="userAction" class="com.jredu.action.UserAction"></bean>
</beans>
然后,配置JDBC;
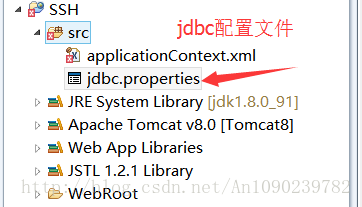
附上源码:
jdbc.driverClassName=oracle.jdbc.driver.OracleDriver
jdbc.url=jdbc:oracle:thin:@localhost:1521:XXXX
jdbc.username=XXXXXXXX
jdbc.password=XXXXXXX
jdbc.initialSize=0
jdbc.maxActive=20
jdbc.maxIdle=20
jdbc.minIdle=1
jdbc.maxWait=60000
配置Struts 配置文件及其国际化配置;
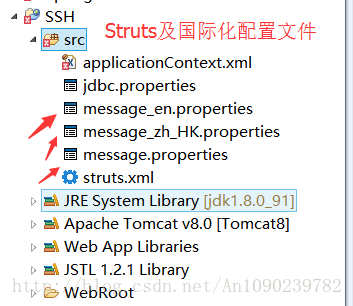
附上Struts配置文件源码:
<?xml version="1.0" encoding="UTF-8" ?>
<!DOCTYPE struts PUBLIC
    "-//Apache Software Foundation//DTD Struts Configuration 2.5//EN"
    "http://struts.apache.org/dtds/struts-2.5.dtd">
<struts>
    <!-- struts默认样式是xhtml -->
    <!-- <constant name="struts.ui.theme" value="simple"/> -->
    <constant name="struts.enable.DynamicMethodInvocation" value="true" />
    <!-- 设置默认资源文件 -->
    <constant name="struts.custom.i18n.resources" value="message_zh_HK"/>
    <!-- 设置编码格式 -->
    <constant name="struts.i18n.encoding" value="UTF-8"/>
    <!-- struts结合spring的配置意思是  Struts2的action由Spring来负责进行实例化  -->
    <constant name="struts.objectFactory" value="spring" />
    <!-- 创建一个default包,继承自Struts2的struts-default包 -->
    <package name="default" namespace="/" extends="struts-default">
    </package>
</struts>
配置log4j 日志文件(log4j.properties)
至此,完整的SSH框架已经搭建完毕,下篇博客,就介绍一个SSH框架完成一个小的登录功能;