1. Collection
1.1 集合知识回顾

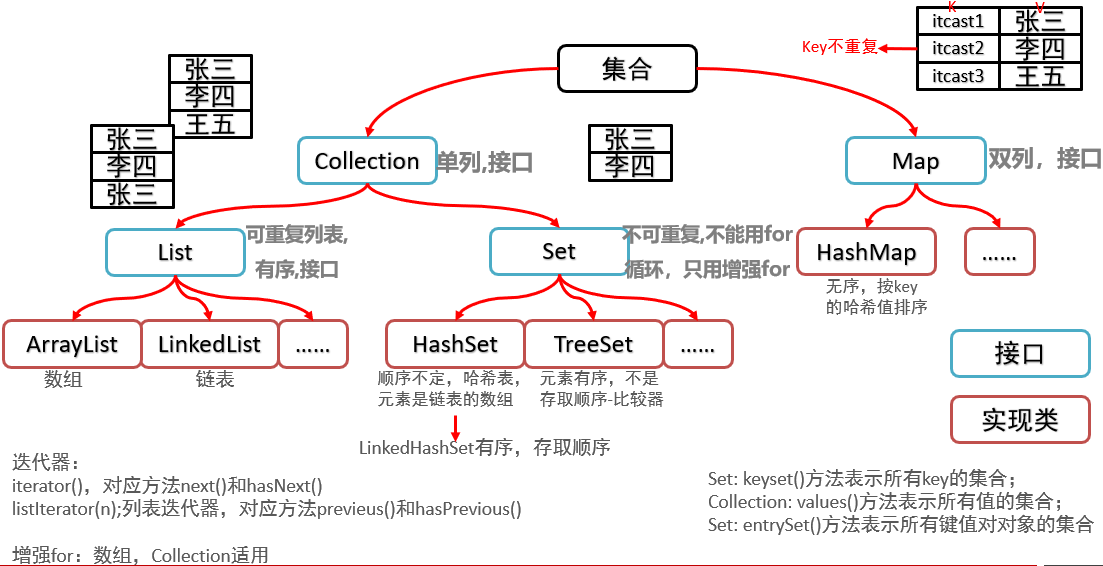
1.2 集合类体系结构
集合存储数据的方式有单列和双列
Collection中还有List(可以存储可重复的数据)和Set(可以存储不可重复的数据)。
有重复的数存储到Set中,重复的数据就会被合一,变成一个。
List,Set和Map接口中还有实现类。
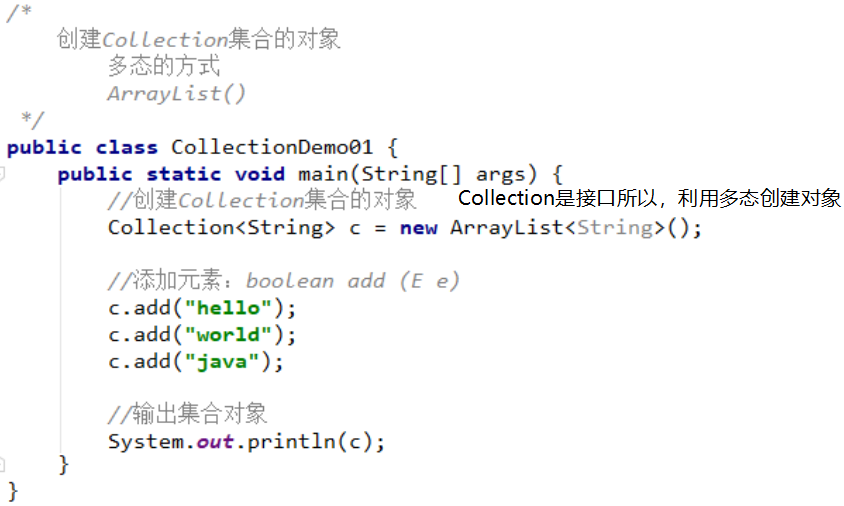
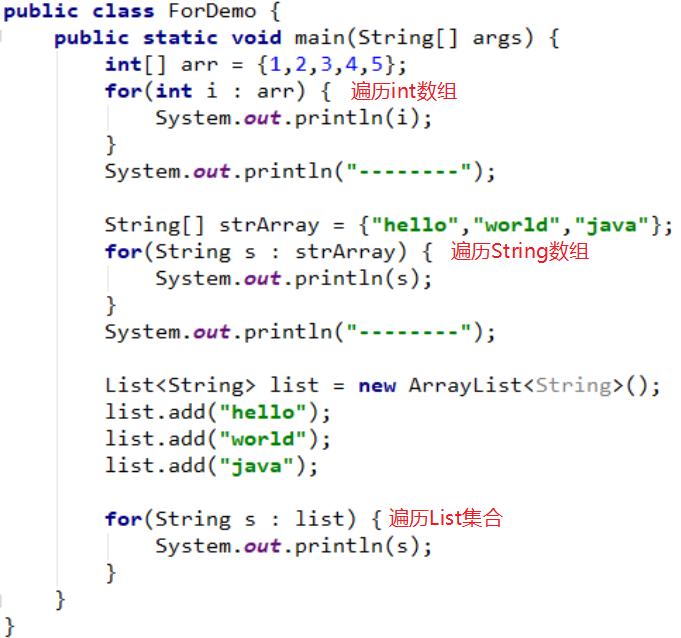
1.3 Collection集合概述和使用

代码示例:
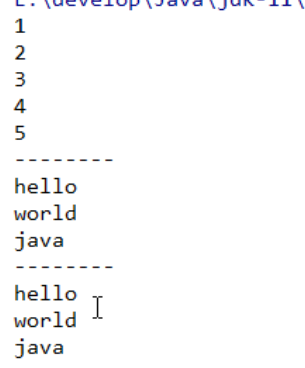
运行结果:
输出的是集合元素,所以ArrayList集合已经重写了toString方法。

1.4 Collection集合常用方法

1.5 Collection集合的遍历 (Iterator)迭代器

代码示例:
创建Iterator迭代器:

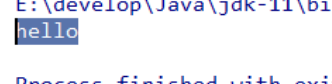
使用next()方法:

运行结果:
返回了第一个集合元素,想要返回集合中多个元素就返回多次
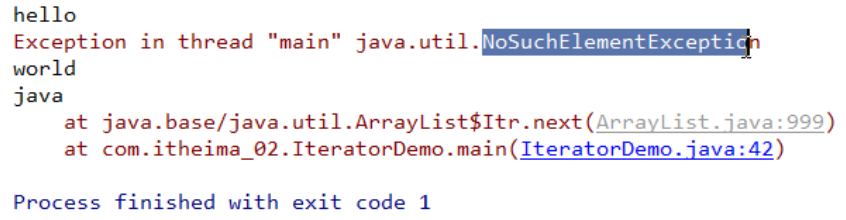
如果这里next元素的次数超过了集合元素的数量那?

运行结果:
运行报错,报了,NoSuchEL ementException:表示被请求的元素不存在,
那怎么解决这样的问题那?向下看
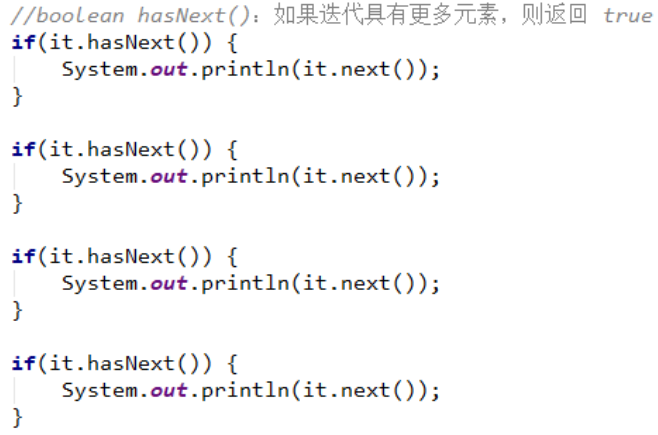
为了防止发生这样的事情,所以要加判断,
hasNext()方法:
如果迭代具有更多的元素则(true)执行,没有则(false)不执行
运行结果:
第四个next方法没有执行,程序也没有报错。

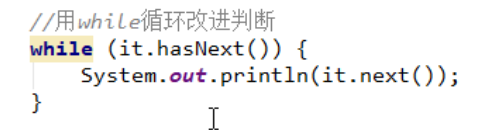
如果集合中有多个元素这样的方式就显的非常的麻烦,但是使用while方法就会非常的便捷
while判断是否为true是则继续循环,不是则退出循环。
运行结果:

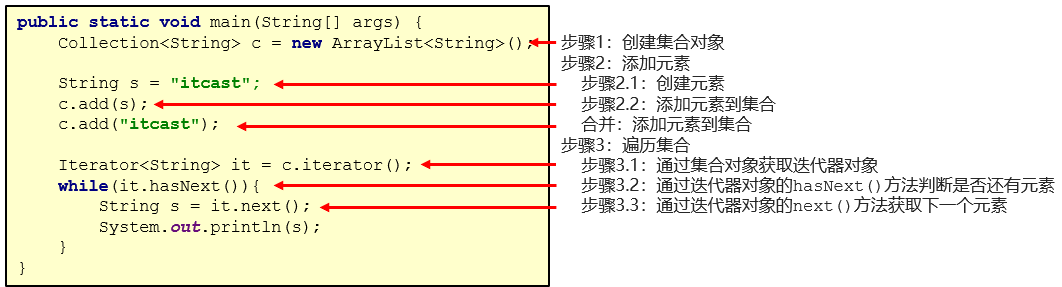
1.6 集合的使用步骤
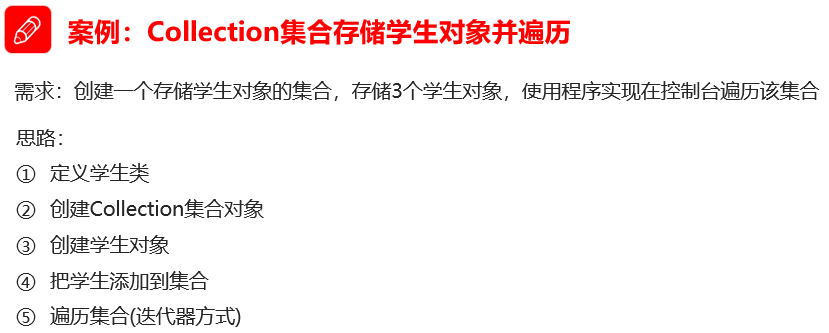
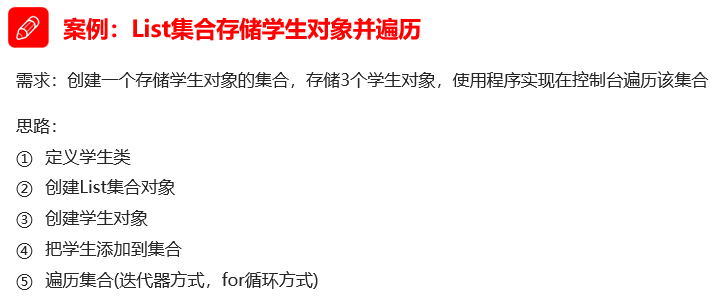
1.7 案例:Collection集合存储学生对象并遍历
public class Students{

    private String name;//成员变量
    private int age;

    //构造方法,若没有定义构造方法,系统会给出一个默认的无参数构造方法
    public Students(){

    }

    private Students(String name){
        this.name = name;
    }

    //定义了构造方法,系统将不再提供默认的构造方法;若要使用无参数构造方法,必须再写一个无参数构造方法
    //推荐的使用方式:无论是否使用,都手工书写无参数构造方法
    public Students(String name,int age){
        this.name = name;
        this.age = age;
    }

    public String getName(){
        return name;
    }

    public void setName(String name){//name是局部变量
        this.name = name;             //this.name中的name是成员变量,另外一个name是局部变量即形参;this代表所在类的对象引用
    }

    public int getAge(){
        return age;
    }

    public void setAge(int age){
        this.age = age;
    }

    public String toString(){
        return name+age;
    }
}
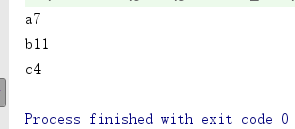
public class StudentsCollection {
    public static void main(String[] args) {
        Collection<Students> c = new ArrayList<Students>();
        Students s1 = new Students("a",7);
        Students s2 = new Students("b",11);
        Students s3 = new Students("c",4);

        c.add(s1);
        c.add(s2);
        c.add(s3);
        Iterator<Students> it = c.iterator();//Iterator迭代器
        while (it.hasNext()){
            Students s = it.next();
            System.out.println(s.toString());
        }
    }
}
运行结果:
2. List
List集合的常用方法
ArrayList的使用
ArrayList
LinkedList常用方法
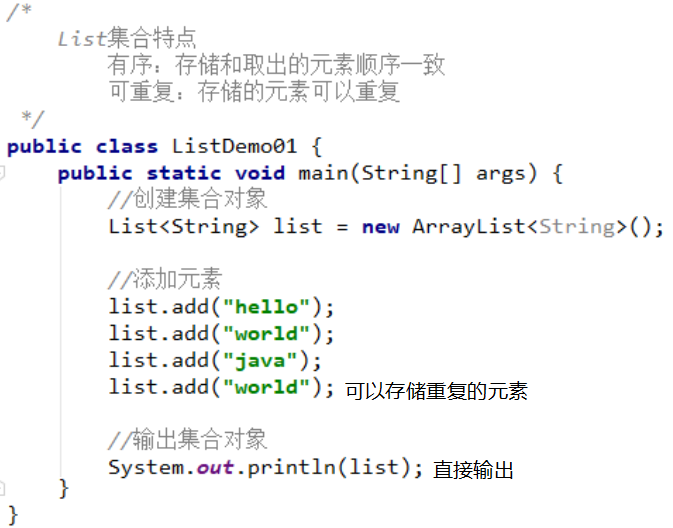
2.1 List集合的概述和特点

代码示例:
运行结果:
输出了重复的元素

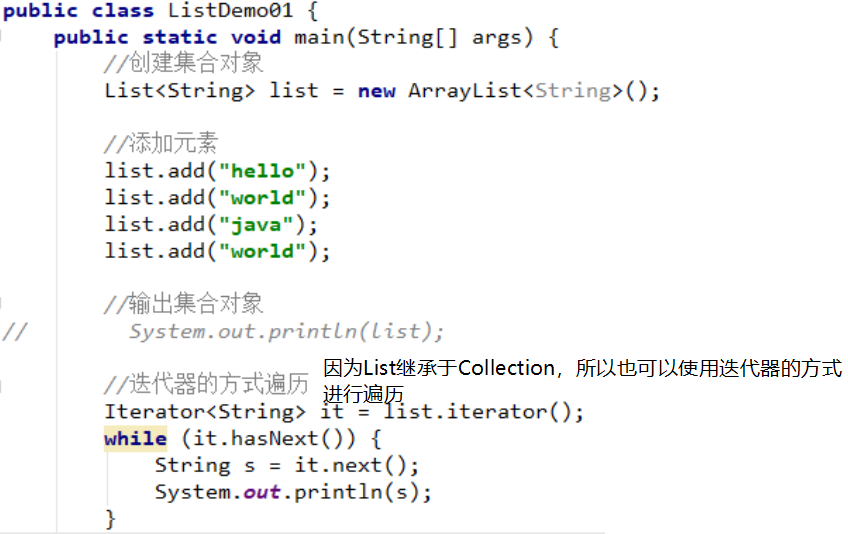
也可以使用迭代器器的方式进行遍历
运行结果:

2.2 List集合特有方法
List特有的方法Collection是没有的,但是List的实现类是有的
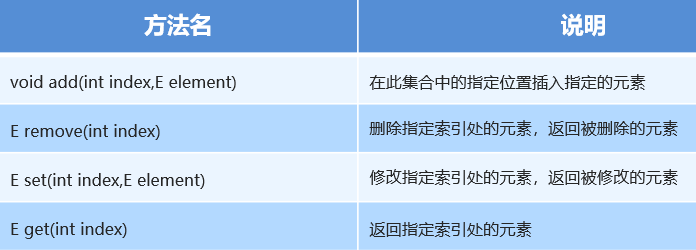
add(int index,E element);//index位置插入指定的元素,index位置及之后位置的值自动往后移一位
void add(E element) 插入元素
int size() 获取集合大小
2.2.1 List集合存储学生对象并遍历
实现:
public class CollectionsArrayListTest {
    public static void main(String[] args) {
        ArrayList<Students> arr=new ArrayList<Students>();
        Students s1 = new Students("a",32);
        Students s2 = new Students("b",44);

        arr.add(0,s2);
        arr.add(1,s1);//和arr.add(0,s2)的顺序不能修改
        arr.add(2,s2);
        //用下面的也可以,两种写法
//        arr.add(s2);
//        arr.add(s1);
//        arr.add(s2);
        //迭代器方式
        Iterator<Students> it = arr.iterator();
        while ((it.hasNext())){
            Students stu = it.next();
            System.out.println(stu.toString());
        }
        //for循环方式
        for(int i=0;i<arr.size();i++){
            Students st = arr.get(i);
            System.out.println(st.toString());
        }
    }
}
运行结果:
b44
a32
b44
2.3 并发修改异常
ArrayList在迭代的时候如果同时对其进行修改就会抛出java.util.ConcurrentModificationException异常
ConcurrentModificationException异常原因和解决方法
Java并发修改异常
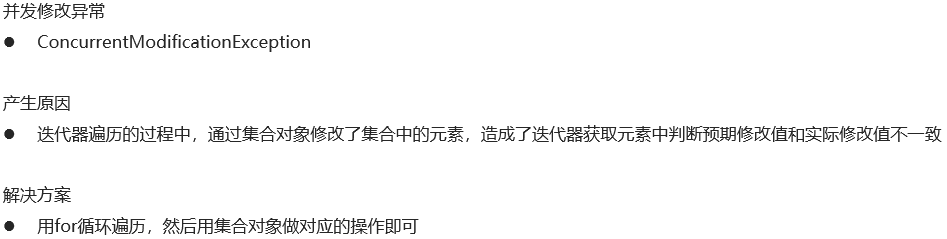
引发并发修改异常的原因是,在迭代器遍历的过程中有两个变量,实际修改值和预期修改中。
如果在迭代的过程中添加或删除一个元素,就会导致实际修改中的变化,在底层源码中如果这两个变量不相等的话就会有引发并发修改异常。
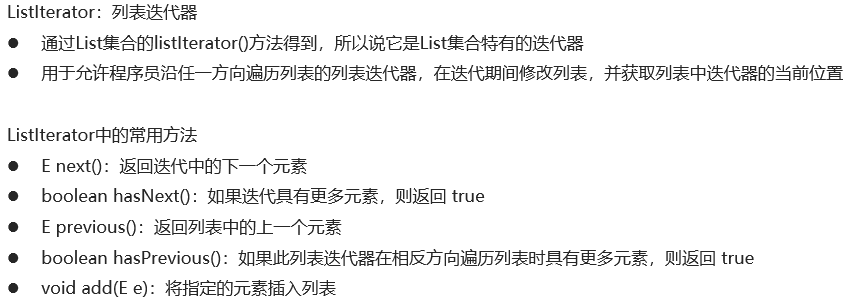
2.4 Listlterator
ListIterator列表迭代器有2个方法:
listIterator()指向list开始处
listIterator(n)指向索引列表n的元素处
代码示例:
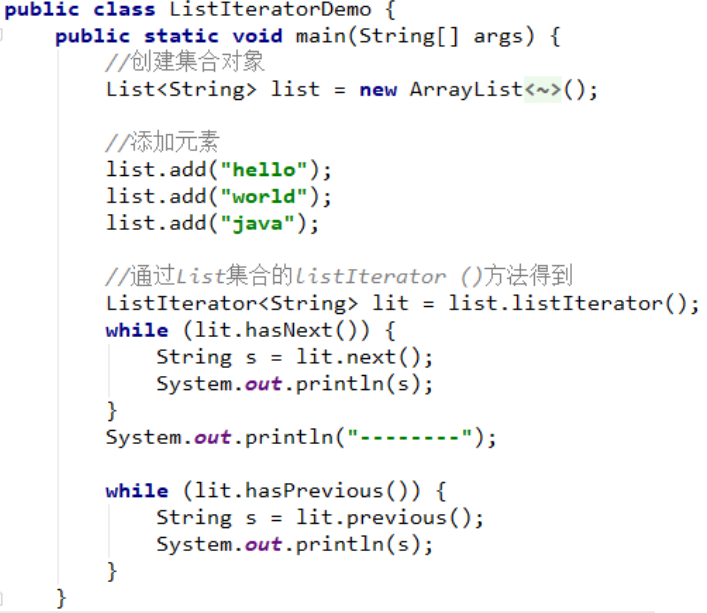
     ListIterator<String> ls = list1.listIterator(list.size());
        while (ls.hasPrevious()){
            String s = ls.previous();
            System.out.println(s);//输出hello world java
        }
运行结果:

ListLIterator中最常用的方法就是add了

运行结果:
在迭代的过程中,使用ListLIterator的add添加元素不会报错并发修改异常,
因为,我们使用的是列表迭代器在添加元素,在Listlterator底层代码中,已经将实际修改值赋值给了预期修改值。

2.5 增强for循环

代码示例:
运行结果:
和使用while和for循环没有区别
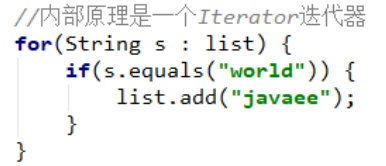
其内部原理是一个Iterator迭代器,怎么证明那?
Iterator迭代器,如果在迭代的过程中修改集合就会引发并发修改异常
运行结果:
代码证明增强for循环内不的确是一个Iterator迭代器

2.6 数据结构

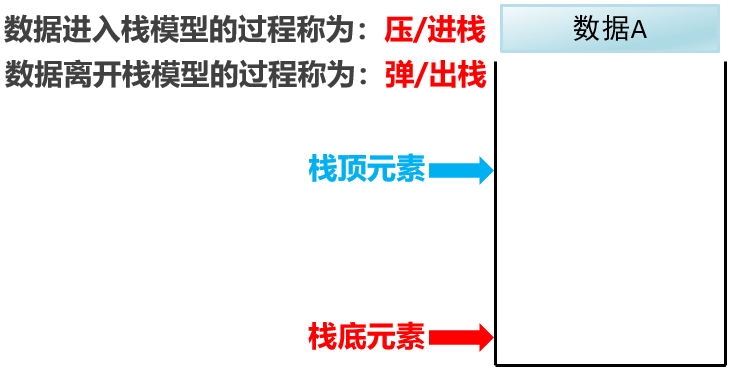
2.7 常见数据结构之栈
这一个容器(栈),一端是开口(栈顶)一段是封闭(栈底)
还有数据A B C D

演示数据存入这个栈和取出的过程:
数据进入栈模型的过程:
从栈顶进去:压/进栈
从ABCD的顺序进栈

数据全部从栈顶进去
栈中数据最顶端的是栈顶元素,最低端的是栈底元素

数据离开栈模型的过程:
数据离开栈模型的顺序是从栈顶元素开始:弹/出栈
从DBCA的吮吸出栈

一直到栈底元素
- 总结:
进栈是从ABCD这样的顺序进入的,出栈是从DCBA这样的顺序离开的。
可见栈是一种先进后处的模型,因为它只有一段是开口的,它只能从开口进,从开口处。

2.8 常见数据结构之队列
这一个容器(队列),一段是开口(后端),一段是开头(前端),还有数据ABCD

演示数据ABCD进队列和出队列的过程
进入队列过程:
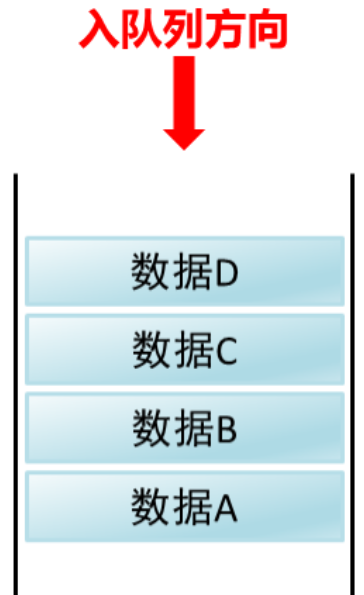
数据从后端进入:入队列
从ABCD的顺序入队列
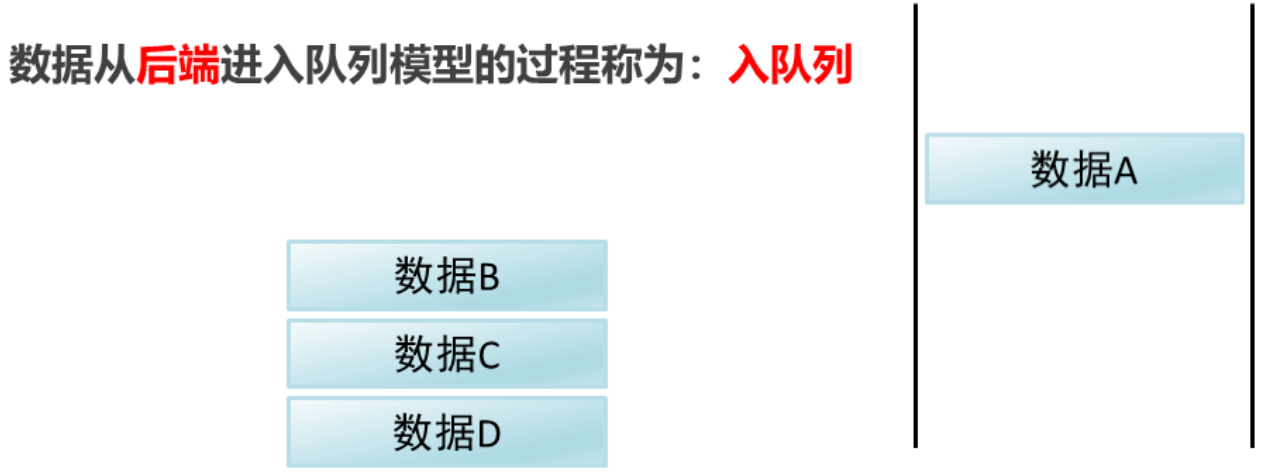
数据全部都是从后端进入队列

数据从后端进入队列的过程,叫做入列方向
数据离开
从前端离开:出队列

按照ABCD的顺序从前端出列
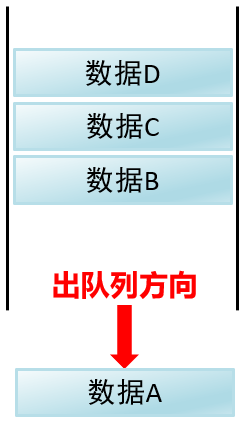
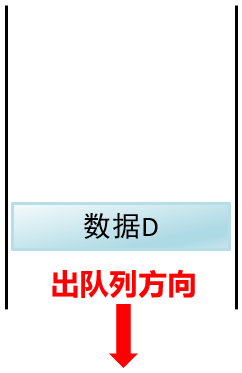
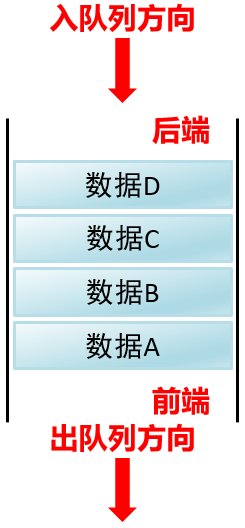
**总结:**队列的入队列和出队列都是从ABCD开始的,所以可以得出队列是一种先进先出的模型
2.9 常见数据结构之数组

2.10 常见数据结构之链表
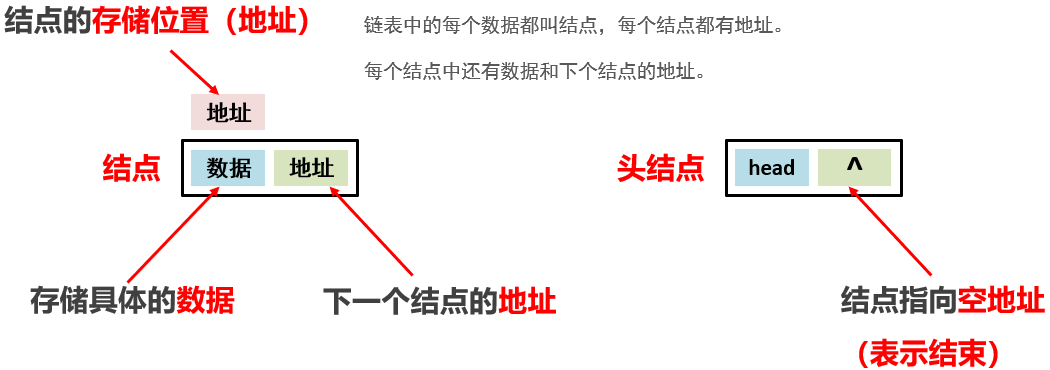
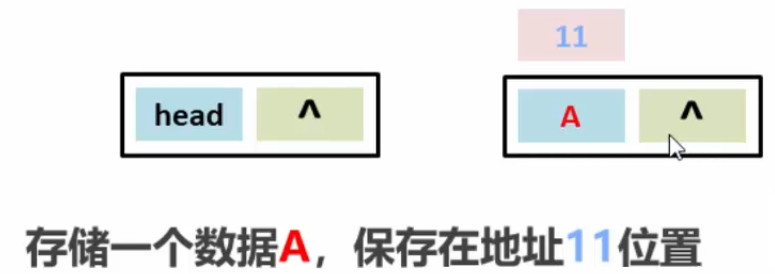
现在有一个头结点,没有连接上地址,它是空的。

在地址11的位置上,存储数据A
如果想将头结点和数据A连接起来,就需要将头结点的地址改为数据A的地址,这样就将两个结点连接了起来。

再连接数据C和D也是一样的,将地址值改为下一个数据的地址值。

如果想在结点AC之间添加一个数据B
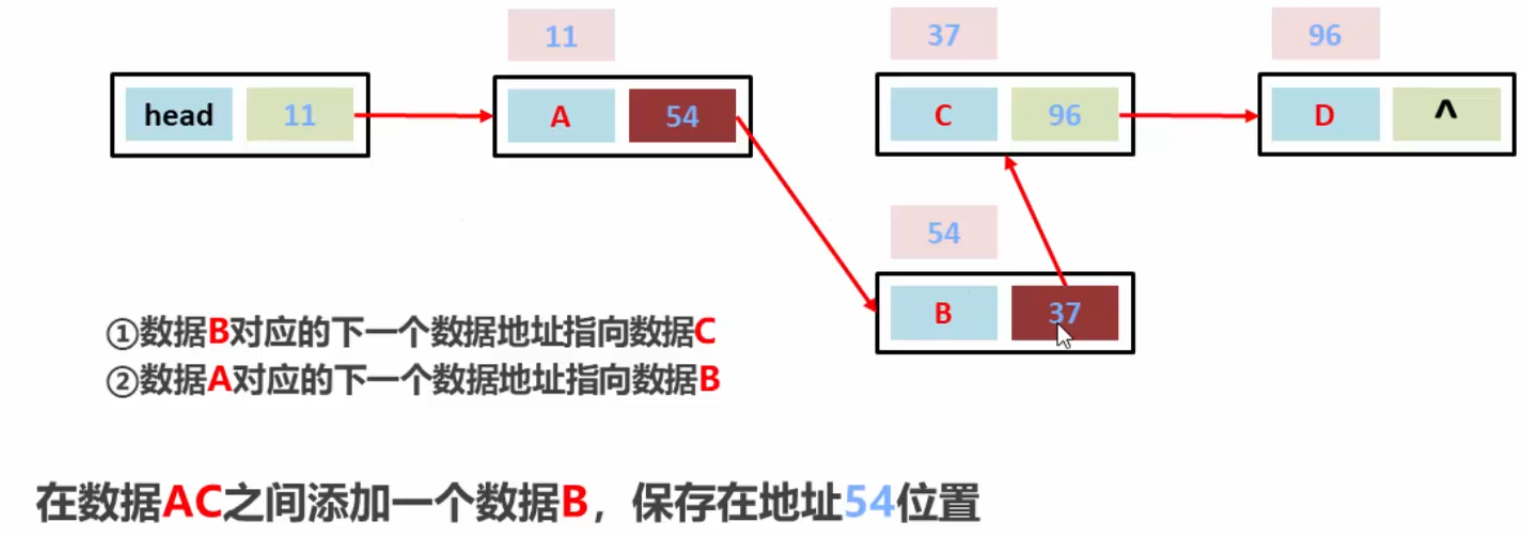
删除数据BD之间的数据C
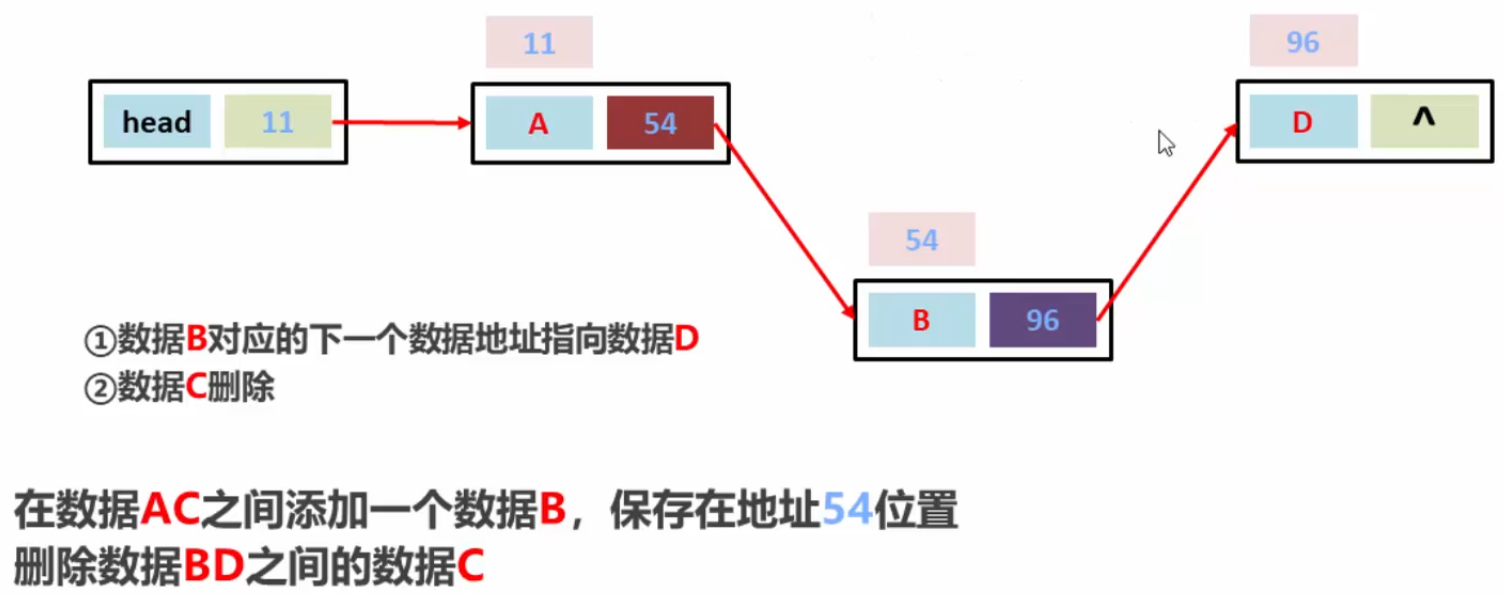
总结:
链表查询数据必须从头开始查起,所以它是一种查询慢的模型。
但是是一种增删快的模型。

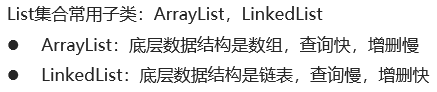
2.11 List集合子类特点
不同需求使用的List集合子类也是不一样的。
ArrayList和LinkedList的使用是一样的,因为它们都是List集合的子类。
2.12 LinkedList集合的特有功能
add(Element e) 插入元素

public class LinkedListTest {
    public static void main(String[] args) {
        LinkedList<String> li = new LinkedList<>();
        li.add("hello");
        li.addFirst("a");
        li.addLast("d");
        li.add("g");
        for (String s : li){
            System.out.println(s);//a hello d g
        }

        System.out.println(li.getFirst());//a
        System.out.println(li.getLast());//g
        System.out.println(li.get(1));//hello

        li.removeFirst();
        li.removeLast();
        li.remove(1);
        System.out.println(li.size());//1
        li.remove("hello");
        System.out.println(li.size());//0
    }
}
2.13 总结
ArrayList和LinkedList总结
ArrayList源码分析
LinkedList源码分析
3. Set
3.1 Set集合的概述和特点
没有索引,所以输出的顺序和添加的顺序是不一样的。

代码示例:
存储Set元素并遍历,
不支持普通for循环遍历,但是可以用增强for循环和迭代器的方法。

运行结果:
输出的顺序和我们add的顺序是不一样的,是因为,HashSet对集合的迭代顺序不作任何保证,
而且并没有输出添加的第二个“word”,是因为Set集合不支持重复元素。
3.2 哈希值
equals为true,则hashCode一定相同;
hashCode相同,equals(Object o)不一定相同,因为equals默认比较的是内存地址,最好重写

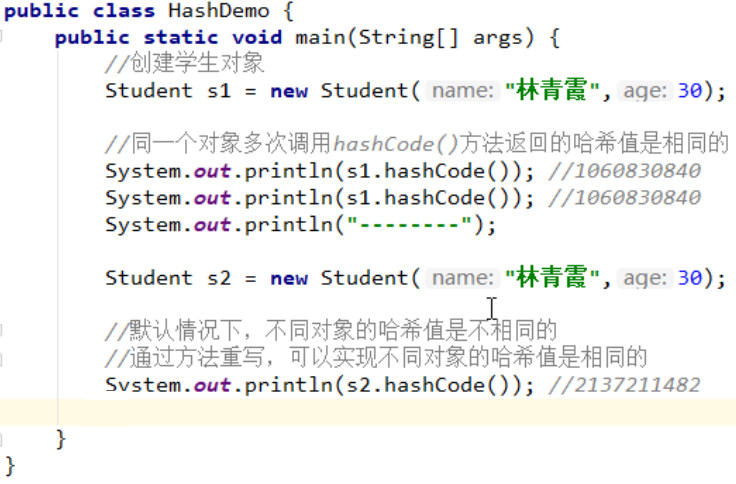
代码示例:
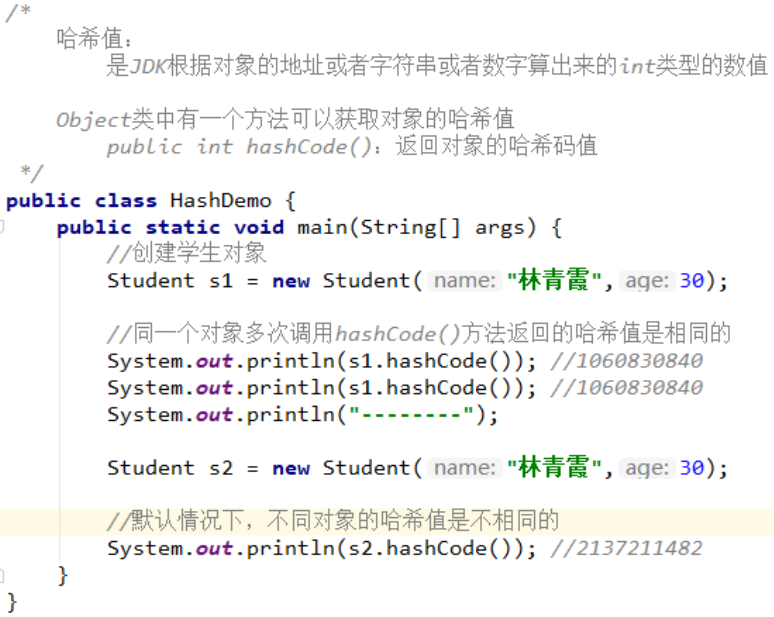
运行结果:

默认情况下,不同对象的哈希值是不同的,但是重写hashCode方法就不一样了
在对象中重写hashCode方法

运行测试类
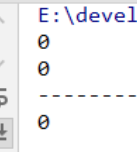
运行结果:
都是0
字母字符串的哈希值是不一样的,但是一样的字母字符串的哈希值是一样的。
汉字的字符串的哈希值是一样的,因为它重写了hashCode方法。

运行结果:

3.3 HashSet集合概述和特点

代码示例:

运行结果:
存储的顺序不是这样的,可见HashSet对集合的迭代顺序不作任何保证,也就是说不保证存储和取出的元素顺序一致

再添加一次world

运行结果:
world只出现了一次,可见HashSet由于是Set集合,所以是不包含重复元素的集合
3.4 HashSet集合保证元素唯一性源码分析
HashSet集合添加一个元素的过程
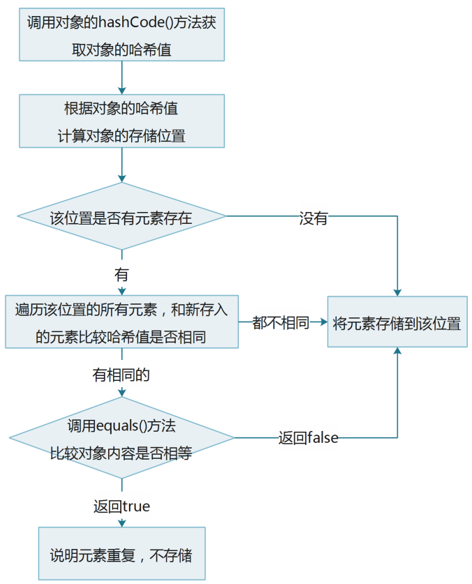
结论:HashSet是更具hashCode()和equals()方法来判断元素是否重复的

代码分析:
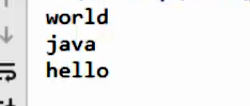
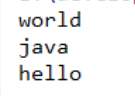
public class HashSetDemo {

    public static void main(String[] args) {
        // 创建集合对象
        HashSet<String> hs = new HashSet<String>();
        // 添加元素
        hs.add("hello");
        hs.add("world");
        hs.add("java");

        hs.add("world");
        // 遍历
        for (String s : hs) {
            System.out.println(s);
        }
    }

}
运行结果:
没有输出添加的第二个world

HashSet保证了元素的唯一性,导致我们添加第二个world的时候没有执行,
所以查看源码是怎么判断的。
    // 创建HashSet集合对象
    HashSet<String> hs = new HashSet<String>();

    // 调用add方法,添加元素
    hs.add("hello");
    hs.add("world");
    hs.add("java");
    hs.add("world");
--------------------------------------------------------
add方法的源码:
    public boolean add(E e) { //e就是添加的元素
        return map.put(e, PRESENT)==null; //将e作为第一个元素
        //返回put方法
    }

put方法:
    public V put(K key, V value) { //key就是e,也就是添加的元素
        return putVal(hash(key), key, value, false, true);
        //返回putVal方法之前,先调用了hash方法
    }

hash方法:
    static final int hash(Object key) { //key是添加的元素
        int h;
        return (key == null) ? 0 : (h = key.hashCode()) ^ (h >>> 16); //根据添加元素的hashCode方法得到哈希值
        //返回得到添加元素的哈希值
    }

putVal方法:
    //hash值和元素的hashCode方法相关
    //元素的哈希值作为第一个参数hash,添加的元素作为第二个元素key
    final V putVal(int hash, K key, V value, boolean onlyIfAbsent,boolean evict) {
            Node<K,V>[] tab; Node<K,V> p; int n, i; //哈希表其实是一个数组,Node表示为节点,所以表示元素为节点的数组
            //如果哈希表未初始化,就对其进行初始化。
            if ((tab = table) == null || (n = tab.length) == 0)
                n = (tab = resize()).length;
            ///根据对象的哈希值计算对象的存储位置,如果该位置没有元素,就存储元素。
            if ((p = tab[i = (n - 1) & hash]) == null)
                tab[i] = newNode(hash, key, value, null);
            else {
                Node<K,V> e; K k;
                /*
                    存入的元素和以前的元素比较哈希值
                        如果哈希值不同,会继续向下执行,把元素添加到集合
                        如果哈希值相同,会调用对象的equals()方法比较
                            如果返回false,会继续向下执行,把元素添加到集合
                            如果返回true,说明元素重复,不存储
                */
                if (p.hash == hash &&
                    ((k = p.key) == key || (key != null && key.equals(k))))
                    e = p;
                else if (p instanceof TreeNode)
                    e = ((TreeNode<K,V>)p).putTreeVal(this, tab, hash, key, value);
                else {
                    for (int binCount = 0; ; ++binCount) {
                        if ((e = p.next) == null) {
                            p.next = newNode(hash, key, value, null);
                            if (binCount >= TREEIFY_THRESHOLD - 1) // -1 for 1st
                                treeifyBin(tab, hash);
                            break;
                        }
                        if (e.hash == hash &&
                            ((k = e.key) == key || (key != null && key.equals(k))))
                            break;
                        p = e;
                    }
                }
                if (e != null) { // existing mapping for key
                    V oldValue = e.value;
                    if (!onlyIfAbsent || oldValue == null)
                        e.value = value;
                    afterNodeAccess(e);
                    return oldValue;
                }
            }
            ++modCount;
            if (++size > threshold)
                resize();
            afterNodeInsertion(evict);
            return null;
        }
3.5 常见数据结构之哈希表

哈希表在采用数组和链表实现时,是怎么保证数据唯一性的:
添加元素,首先计算它的哈希值,链表默认的长度为16

对16取余,余数是多少就存入哪个位置
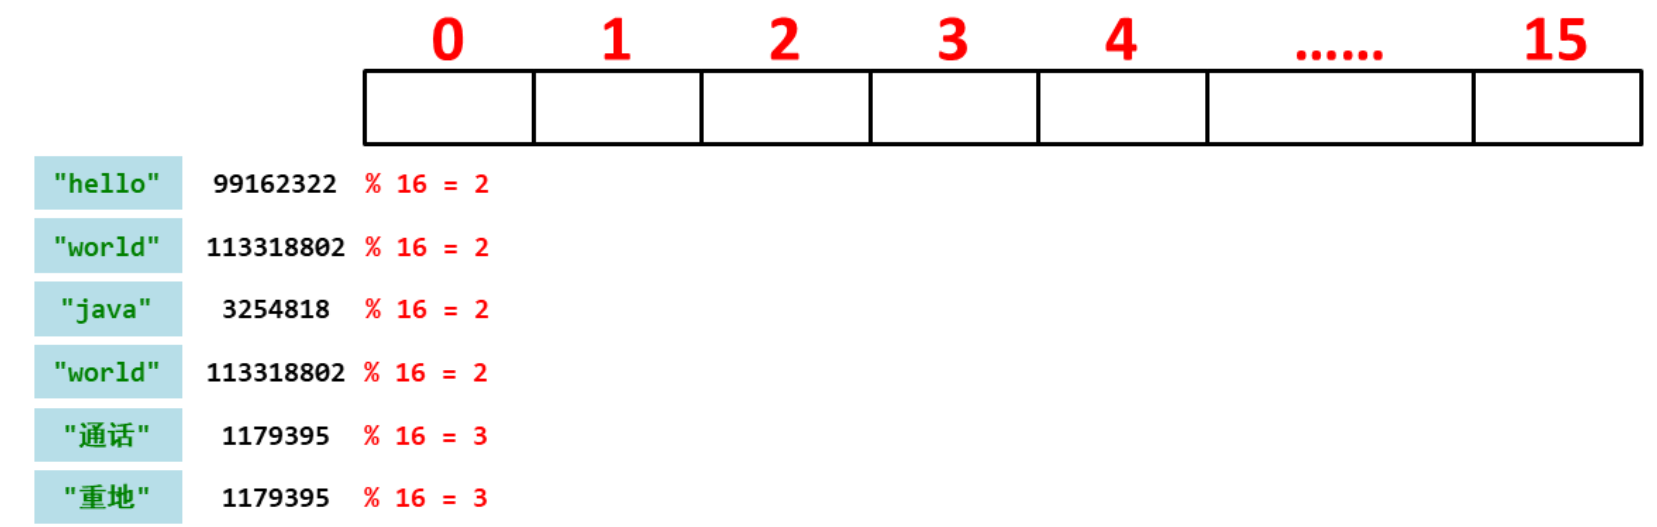
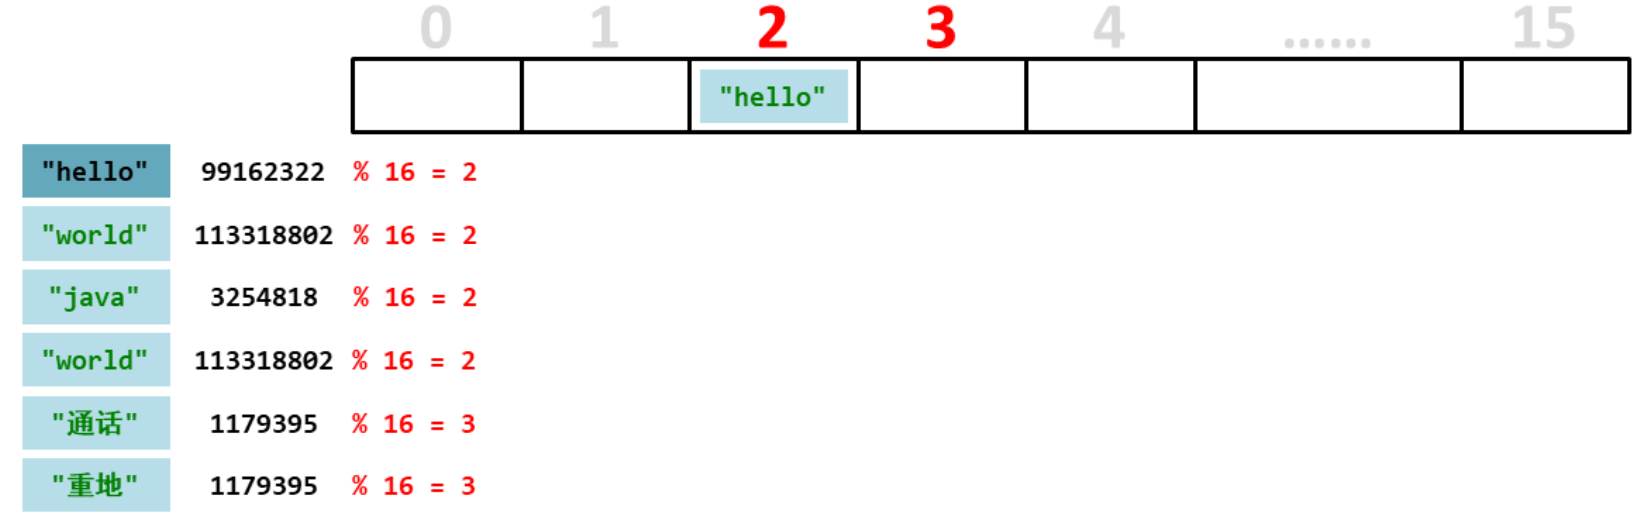
第一个元素“hello”,计算出余数是2,而2的位置是没有元素的,所以直接存储到2的位置
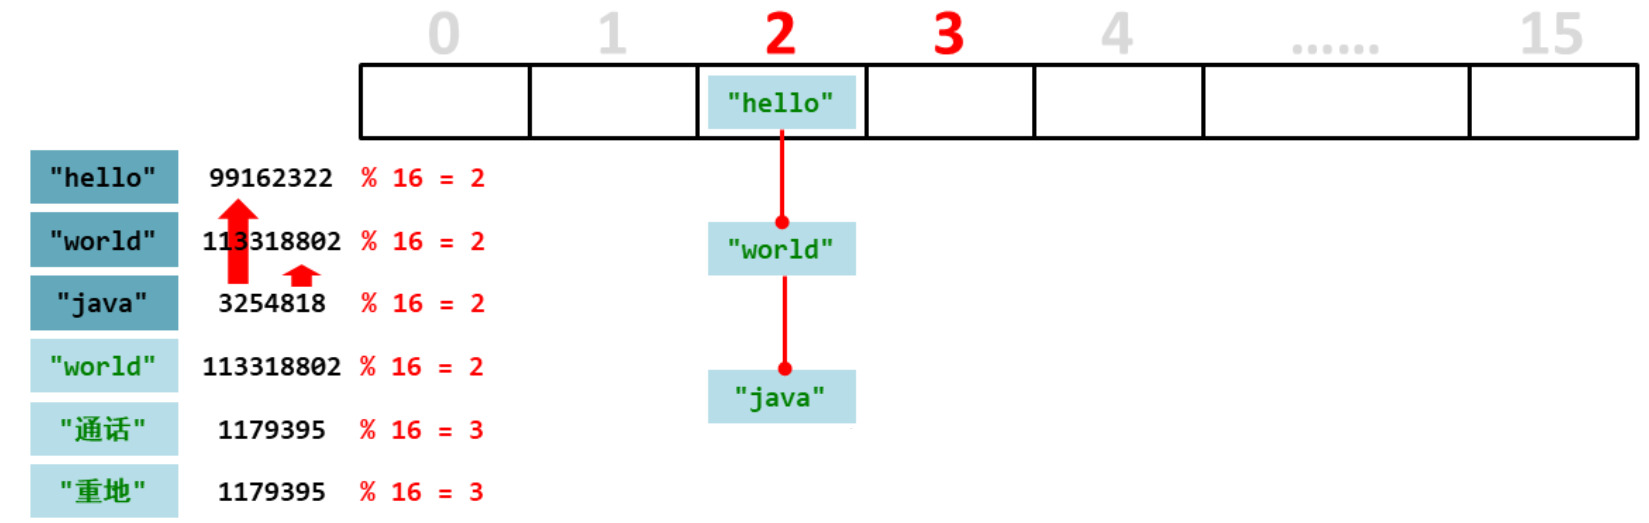
第二个元素“world”,第二个元素的余数也是2,余数相同的话就先比较哈希值,如果不相同就可以存储到2的位置。

第三个元素“java”,它和存入的每一个数据都比较哈希值,不一样就存储到2。
第四个元素“world”,和每个元素进行哈希值比较,发现第二个元素“world”哈希值相同,就比较内容,而内容也一样,说明是一个相同的元素,就不存储了。

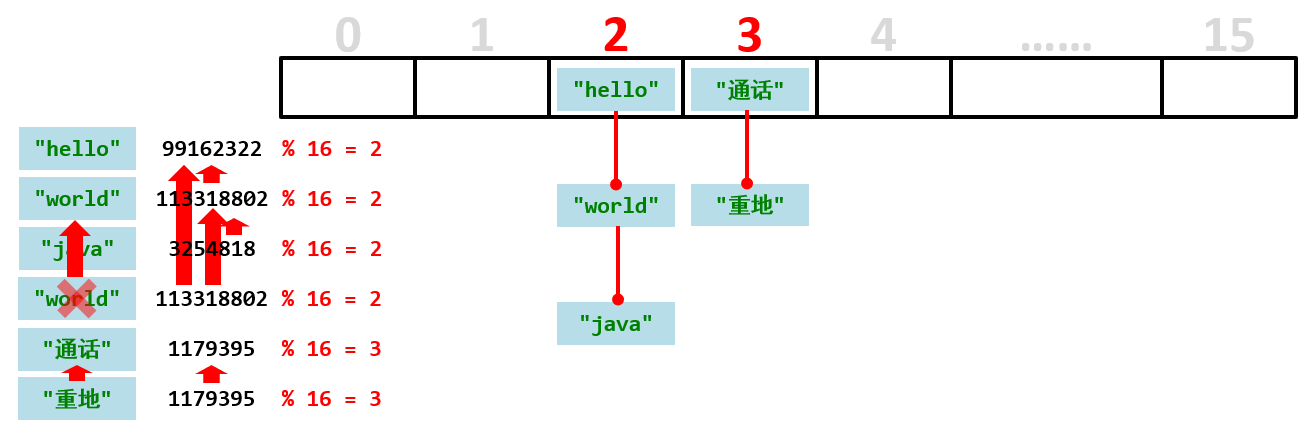
总结:添加元素先根据添加元素的是哈希值取元素总个数的余数,计算出每个元素要存储的位置。然后就对号入座,如果位置没有元素就直接添入元素,如果位置上有有元素就比较全部元素的哈希值,如果有哈希值一样的,就比较内容,如果内容也一样,所以这个元素是重复的元素就不存储了。
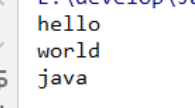
3.6 LinkedHashSet集合概述和特点

代码示例:
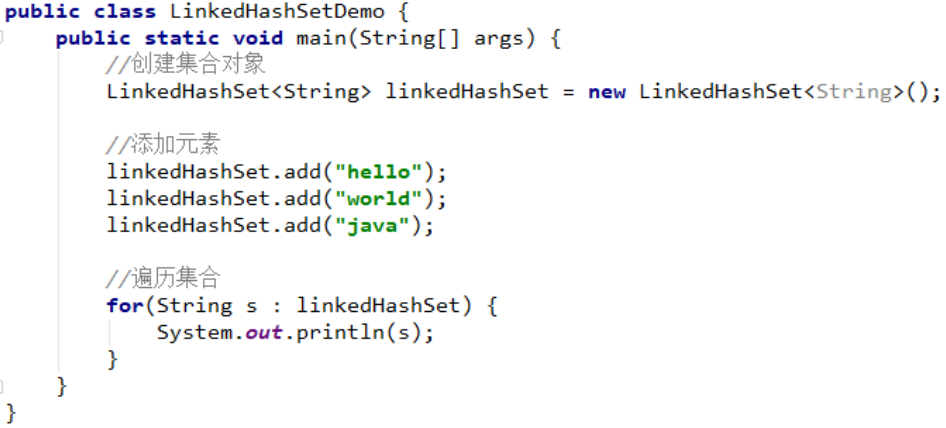
运行结果:
运行结果和存储顺序是一样的,可见由链表保证元素有序,也就是说元素的存储和取出顺序是一致的
再加入一个相同的元素

运行结果:
并没有添加的相同的元素,可见由哈希表保证元素唯一, 也就是说没有重复的元素

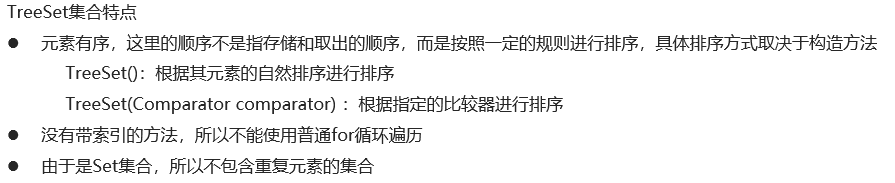
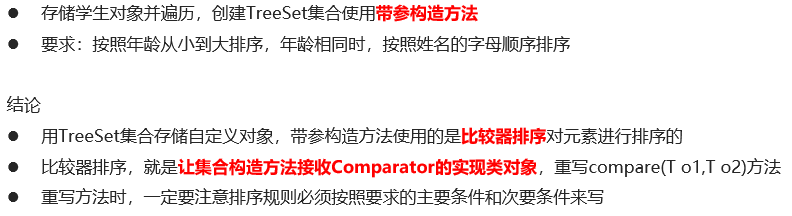
3.7 TreeSet集合概述和特点
代码示例:
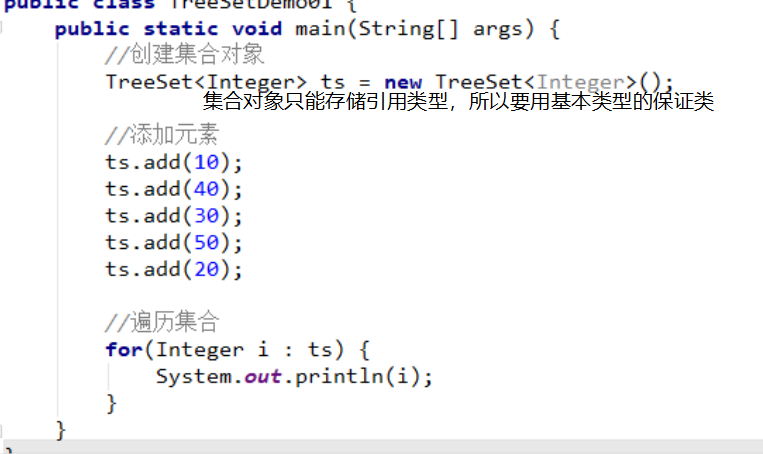
运行结果:
运行结果和存储顺序是不一样的,但是是按照从小到大的顺序排列的,这就叫自然顺序。
再添加一个相同的元素

运行结果:
运行结果并没有相同的类型,可见TreeSet集合由于是Set集合也是不包含重复元素的。

3.8 自然排序Comparable的使用

代码示例:
创建学生类:
public class Student {
    private String name;
    private int age;

    public Student() {
        super();
    }

    public Student(String name, int age) {
        super();
        this.name = name;
        this.age = age;
    }

    public String getName() {
        return name;
    }

    public void setName(String name) {
        this.name = name;
    }

    public int getAge() {
        return age;
    }

    public void setAge(int age) {
        this.age = age;
    }

}
创建测试类:
public class StudentTest {

    public static void main(String[] args) {
        // 创建TreeSet集合对象
        TreeSet<Student> tree = new TreeSet<Student>();

        // 创建学生对象
        Student s1 = new Student("wuyanzhu", 30);
        Student s2 = new Student("lingshuhao", 21);
        Student s3 = new Student("kebi", 40);

        // 把学生添加到集合
        tree.add(s1);
        tree.add(s2);
        tree.add(s3);

        // 遍历集合
        for (Student student : tree) {
            System.out.println(student.getName() + "~" + student.getAge());
        }
    }
}
运行结果:
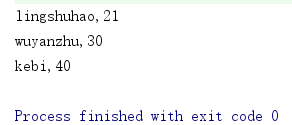
运行结果并没有自然排序还发生了错误,
报错Class Cast Exception类转换异常,是因为Student类是不可以进行比较的,想让Student类可以进行比较就必须实现自然排序Comparable接口,重写它的compareTo方法。

重写Student类:
实现Comparable类并重写它的成员方法
public class Student implements Comparable<Student> {
    private String name;
    private int age;

    public Student() {
        super();
    }

    public Student(String name, int age) {
        super();
        this.name = name;
        this.age = age;
    }

    public String getName() {
        return name;
    }

    public void setName(String name) {
        this.name = name;
    }

    public int getAge() {
        return age;
    }

    public void setAge(int age) {
        this.age = age;
    }

    @Override
    public int compareTo(Student s) {
        return 0;
    }

}
运行结果:
这次没有报错,但是只输出了一个类

将compareTo的返回值改为1
    @Override
    public int compareTo(Student s) {
        return 1;
    }
运行结果:
按照我们添加的顺序输出

如果将compareTo的返回值改为-1那?
    @Override
    public int compareTo(Student s) {
        return -1;
    }
运行结果:
改为-1就会按照我们添加顺序的倒序输出
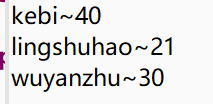
修改Student类的排序为年龄为从小到大排序
    @Override
    public int compareTo(Student s) {
        int num = this.age - s.age;
        return num;
    }
但是,如果我们存储的是一个年龄相同名字不同的学生的话就会存储不了,所以Student还要继续优化
    @Override
    public int compareTo(Student s) {
        //int num = s.age - this.age;  倒序排序
        int num = this.age - s.age;     //正序排序
        //年龄相同就按照姓名排序,因为String已经重写了compareTo方法所以可以直接使用
        int num2 = num == 0 ? this.name.compareTo(s.name) : num;
        return num2;
    }
运行结果:
- 规则:
compareTo方法,
返回是的0,就会认为是重复元素,不添加
返回的是正整数(1)就不交换位置,
返回的是一个负整数(-1)就交换位置,交换位置后继续和上一个对象比较。
- 自然排序:
this在后边比较对象在前面,就是从大到小排序,
this在前边比较对象在后面,就是从小到大排序。

Comparable是让需要排序的对象实现它的接口方法,而Comparator(看3.9)不需要让对象实现接口,只需要实现它的内部匿名类就行。
3.9 比较器排序Comparator的使用
代码示例:
创建一个学生类:
public class Student {
    private String name;
    private int age;

    public Student() {
        super();
    }

    public Student(String name, int age) {
        super();
        this.name = name;
        this.age = age;
    }

    public String getName() {
        return name;
    }

    public void setName(String name) {
        this.name = name;
    }

    public int getAge() {
        return age;
    }

    public void setAge(int age) {
        this.age = age;
    }
}
测试类:
public class StudentTest {

    public static void main(String[] args) {
        // 创建TreeSet集合
        // 使用带参构造方法,而Comparator是一个接口,那么其实就是使用它的实现类,那么这个完全你可以使用匿名内部类。
        // new Comparator<>(),然后重写它的compare方法。
     // Students不需要做处理
        TreeSet<Student> tree = new TreeSet<Student>(new Comparator<Student>() {

            @Override
            // s1是调用(this)对象,s2是比较对象
            // 也可以比作,s1就是Comparable中的this,而s2就是比较对象
            public int compare(Student s1, Student s2) {
                // Comparator中的规则和Comparable也是一样的
                int num = s1.getAge() - s2.getAge(); // 升序排序
                int num2 = num == 0 ? s1.getName().compareTo(s2.getName()) : num;
                return num2;
            }
        });
        // 创建学生对象
        Student s7 = new Student("zhangsan", 15);
        Student s6 = new Student("xiaohong", 18);
        Student s2 = new Student("lingshuhao", 21);
        Student s1 = new Student("wuyanzhu", 30);
        Student s3 = new Student("kebi", 40);
        Student s5 = new Student("xiangming", 42);

        // 吧学生添加到集合
        tree.add(s1);// 30
        tree.add(s2);// 21
        tree.add(s3);// 40
        tree.add(s5);// 42
        tree.add(s6);// 18
        tree.add(s7);// 15

        // 遍历集合
        for (Student student : tree) {
            System.out.println(student.getName() + "~" + student.getAge());
        }
    }
}

3.10 案例
3.10.1 成绩排序
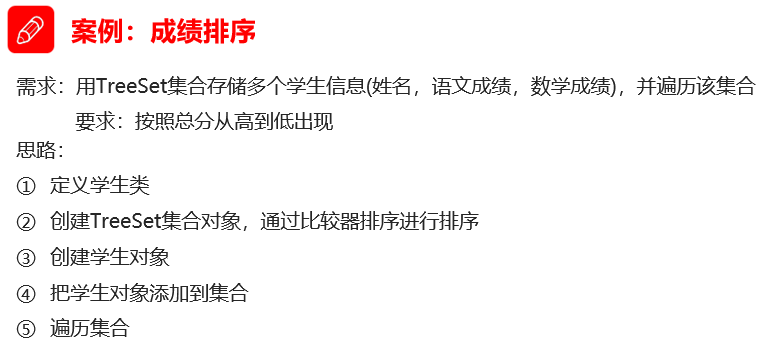
public class Students{

    private String name;//成员变量
    private int chinese;
    private int math;

    public Students(){

    }

    public Students(String name,int chinese,int math){
        this.name=name;
        this.chinese=chinese;
        this.math=math;
    }

    public String getName(){
        return name;
    }

    public void setName(String name){//name是局部变量
        this.name = name;             //this.name中的name是成员变量,另外一个name是局部变量即形参;this代表所在类的对象引用
    }

    public int getAge(){
        return age;
    }

    public void setAge(int age){
        this.age = age;
    }

    public int getChinese(){
        return chinese;
    }

    public void setChinese(){
        this.chinese = chinese;
    }

    public int getMath(){
        return math;
    }

    public void setMath(){
        this.math = math;
    }

    public int getSum(){
        return this.chinese+this.math;
    }

}
public class StudentsTreeSet {
    public static void main(String[] args) {
        TreeSet<Students> tr = new TreeSet<>(new Comparator<Students>() {
            @Override
            public int compare(Students o1, Students o2) {
                int num = o2.getSum() - o1.getSum();
                return num;
            }
        });

        Students st1 = new Students("a",97,67);
        Students st2 = new Students("c",57,77);
        Students st3 = new Students("d",87,70);

        tr.add(st1);
        tr.add(st2);
        tr.add(st3);
        for(Students s: tr){
            System.out.println(s.getName()+"++"+s.getChinese()+"++"+s.getMath());
        }
    }
}
运行结果:

3.10.2 不重复的随机数
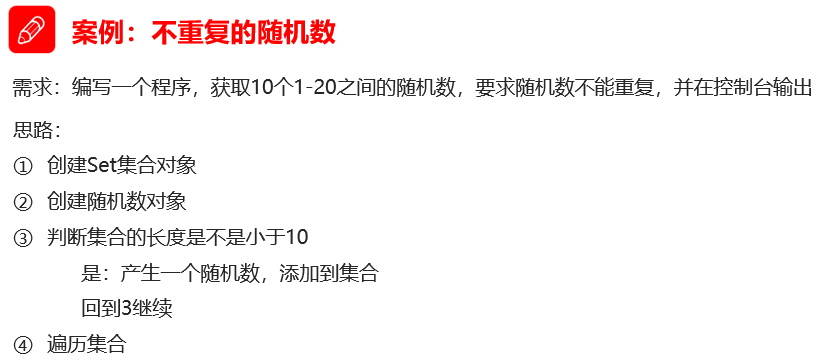
public class RandomSet {
    public static void main(String[] args) {
        Random random = new Random();
        HashSet<Integer> ts = new HashSet<>();
        while (ts.size()<10){
            int num = random.nextInt(20)+1;
            ts.add(num);
        }
        for(Integer i : ts){
            System.out.println(i);
        }
    }
}
运行结果:
4. 泛型
4.1 泛型概述
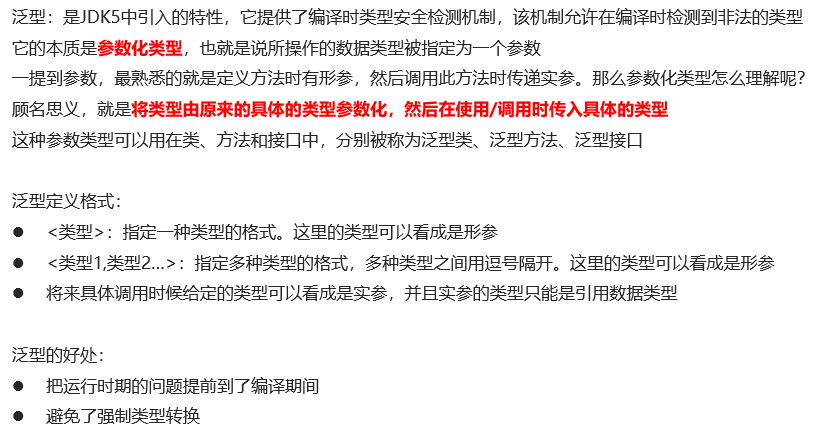
代码示例:
没有使用泛型
public class FanXing {

    public static void main(String[] args) {
        // 创建集合对象
        List list = new ArrayList();

        // 添加元素,这里添加的是String类型的元素
        list.add("hello"); //这里其实是一个object类型
        list.add("world");
        list.add("java");

        // 遍历集合
        Iterator it = list.iterator();
        while (it.hasNext()) {
            //因为是一个object类型,所以我们要进行强制类型转换
            String s = (String) it.next();
            System.out.println(s);
        }
    }

}
运行结果:
可以看到不加泛型也可以正常输出,但是要转换类型。
使用泛型
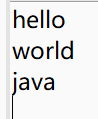
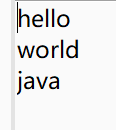
public class FanXing {

    public static void main(String[] args) {
        // 创建集合对象
        //添加String类型的泛型
        List<String> list = new ArrayList<String>();

        // 添加元素
        list.add("hello");
        list.add("world");
        list.add("java");

        // 遍历集合
        //迭代器也添加String类型的泛型
        Iterator<String> it = list.iterator();
        while (it.hasNext()) {
            //添加泛型后,就不用类型转换了,直接将值赋值给String类型的参数,然后输出。
            String s = it.next();
            System.out.println(s);
        }
    }

}
运行结果:
添加泛型可以省去类型转换的麻烦
添加泛型后,如果添加的类型和泛型不符合,就会在编译期间报错,不会等到运行的时候再报错。
如果想添加不同的类型,可以添加不同类型的泛型,使用逗号隔开。

4.2 泛型类

使用泛型类:
创建学生类:
//使用泛型格式
public class Generic<T> {

    private T t;

    public T getT() {
        return t;
    }

    public void setT(T t) {
        this.t = t;
    }

}
测试类:
public class GenericDemo {

    public static void main(String[] args) {

        // 创建泛型类对象,这里将泛型类的指定泛型设置为String。
        Generic<String> g1 = new Generic<String>();
        // 添加元素
        g1.setT("林青霞");
        System.out.println(g1.getT());

        // 创建泛型类对象,这里将泛型类的指定泛型设置为Integer。
        Generic<Integer> g2 = new Generic<Integer>();
        // 添加元素
        g2.setT(20);
        System.out.println(g2.getT());

        // 创建泛型类对象,这里将泛型类的指定泛型设置为Boolean。
        Generic<Boolean> g3 = new Generic<Boolean>();
        // 添加元素
        g3.setT(true);
        System.out.println(g3.getT());
    }

}
运行结果:

使用了泛型类后,我们只用了一个类,就是添加了多种类型的元素。
如果不使用泛型,那么就要创建多个类才能实现此效果。
4.3 泛型方法

创建一个普通类,类中创建一个泛型方法
public class Generic {
    //按照泛型方法格式创建
    public <T> void show(T t) {
        System.out.println(t);
    }
}
测试类:
public class GenericDemo {

    public static void main(String[] args) {
        // 创建类对象
        Generic g1 = new Generic();

        // 调用泛型类
        g1.show("林青霞");
        g1.show(30);
        g1.show(true);
    }
}
运行结果:

总结:使用泛型方法,只需要一个方法就可以实现多个类型的输出。
4.4 泛型接口

代码示例:
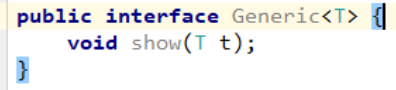
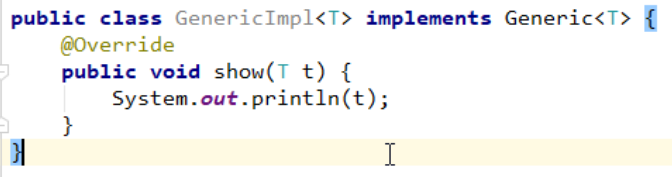
创建一个泛型接口
按照泛型接口的格式创建
由于接口不能直接实例化,所以要创建一个它的实现类
实现类格式:修饰符 class 类名<类型> implements 接口<类型>
在类名和要实现的接口后面添加泛型即可。
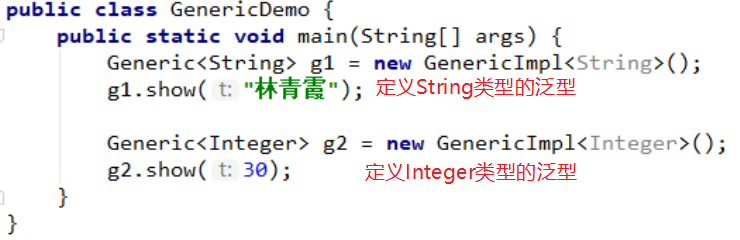
测试类:
使用多态的格式创建对象,添加不同的类型。
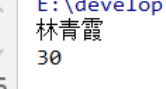
运行结果:
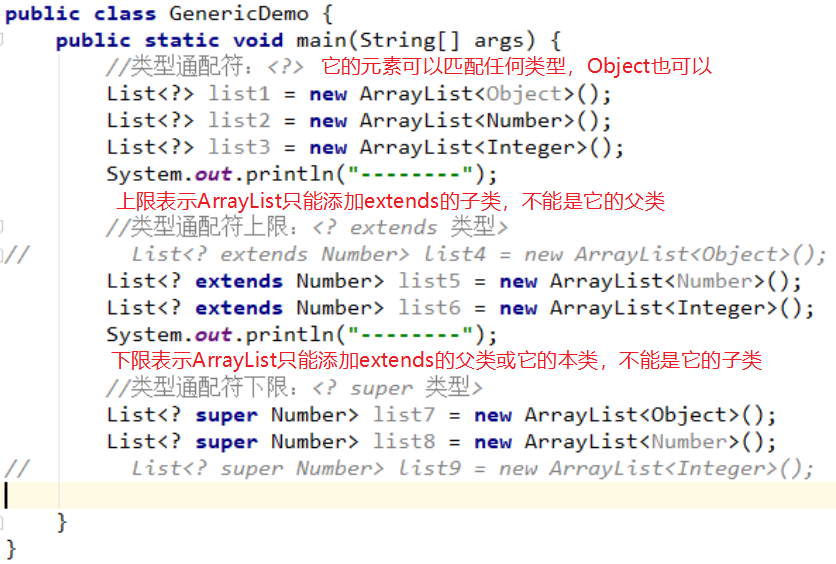
4.5 类型通配符

代码示例:
4.6 可变参数

代码示例:
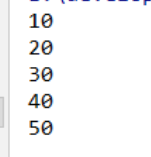
public class Args {
    //按照可变参数格式创建方法
    public static int sum(int... is) {
        /*
            由于可变参数其实是一个数组,所以这完全可以使用增强for循环的方式计算元素之和。
        */
        //创建一个变量接受元素之和
        int num = 0;

        for (int i : is) {
            //每循环一次就是相加一次
            num += i;
        }
        //返回元素之和
        return num;

    }

    public static void main(String[] args) {
        //添加元素并输出
        System.out.println(sum(10, 20, 30));
        System.out.println(sum(10, 20, 30, 40));
        System.out.println(sum(10, 20, 30, 40, 50));
        System.out.println(sum(10, 20, 30, 40, 50, 60));
    }

}
运行结果:
总结:使用可变参数,创建一个方法就是可以完成好多个数据的相加。
如果不使用可变参数的话,就会变的麻烦,相加几个元素是固定好的,不能够任意的添加元素。
4.7 可变参数的使用
5. Map
5.1 Map集合的概述和使用

HashMap无顺序,按key的hashCode值进行数组排序
代码示例:
public class Map {

    public static void main(String[] args) {
        // 创建Map集合的对象,多态的方式,具体的实现类HashMap。
        java.util.Map<String, String> map = new HashMap<String, String>();

        // V put (K key, V value) 将指定的值与该映射中的指定键相关联
        map.put("001", "林青霞");
        map.put("002", "王祖贤");
        map.put("003", "张曼玉");

        // 输出集合对象,可以直接输出
        System.out.println(map);
    }

}
运行结果:

如果添加键Key类型相同的元素会是什么样的?
public class Map {

    public static void main(String[] args) {
        // 创建集合对象
        java.util.Map<String, String> map = new HashMap<String, String>();

        // V put (K key, V value) 将指定的值与该映射中的指定键相关联
        map.put("001", "林青霞");
        map.put("002", "王祖贤");
        map.put("003", "张曼玉");
        map.put("003", "柳岩");//添加相同的键Key类型的元素

        // 输出集合对象,可以直接输出
        System.out.println(map);
    }

}
运行结果:
添加相同的Key会将已有的Key的值给覆盖,也就是修改了Key的值。

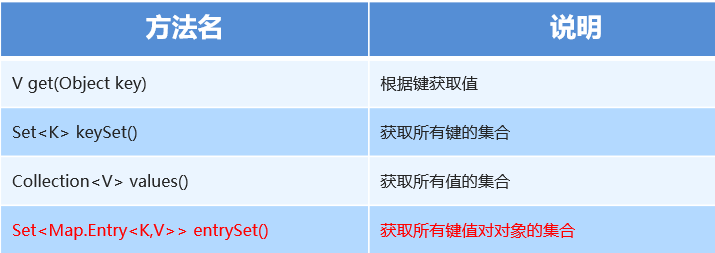
5.2 Map集合的成员方法

5.3 Map集合的获取功能-成员方法
代码示例:
public class Map1 {

    public static void main(String[] args) {
        // 创建集合Map集合对象
        Map<String, String> map = new HashMap<String, String>();

        // 添加键值对
        map.put("小明", "12");
        map.put("小红", "13");
        map.put("张三", "20");

        // V get(Object key) 根据键获取值
        System.out.println(map.get("小明"));
        System.out.println(map.get("小蓝"));
        System.out.println("----------------------------------");

        // Set<K> keySet() 获取所有键的集合
        // 因为返回的是一个Set集合,所以要使用Set集合来接收
        Set<String> set = map.keySet();
        // 遍历Set集合
        for (String string : set) {
            System.out.println(string);
        }
        System.out.println("----------------------------------");

        // Collection<V> values() 获取所有值的集合
        // 因为返回的是一个Collection集合,所以要使用Collection集合来接收
        Collection<String> collection = map.values();
        // 遍历Collection集合
        for (String string : collection) {
            System.out.println(string);
        }

    }

}
运行结果:

5.4 Map集合的遍历(方式1)键找值

代码示例:
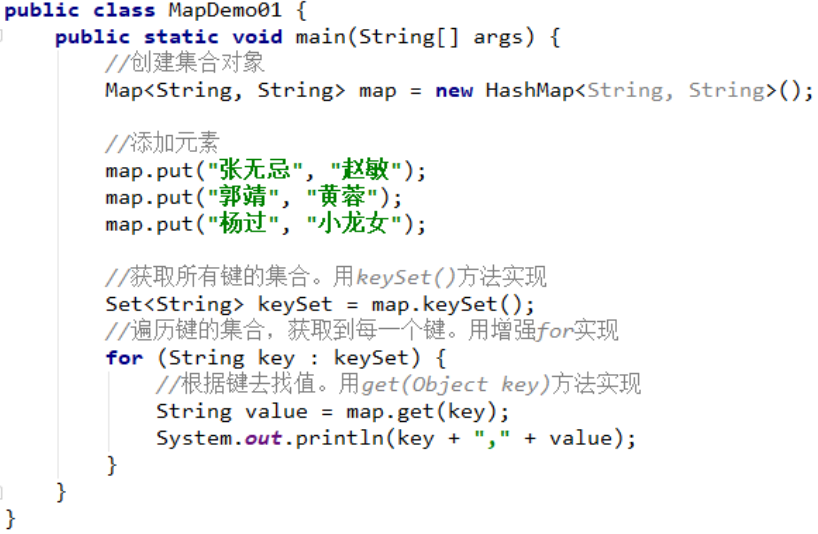
运行结果:

5.5 Map集合的遍历(方式2)键值对对象找键和值

代码示例:

运行结果:
5.6 练习1,HashMap集合存储学生对象并遍历
需求:
![]()
思路:
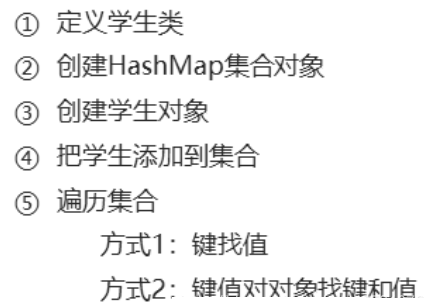
创建Student类:
public class Student {
    private String name;
    private Integer age;

    public Student() {
        super();
    }

    public Student(String name, Integer age) {
        super();
        this.name = name;
        this.age = age;
    }

    public String getName() {
        return name;
    }

    public void setName(String name) {
        this.name = name;
    }

    public Integer getAge() {
        return age;
    }

    public void setAge(Integer age) {
        this.age = age;
    }

}
创建测试类:
public class StudentTest {

    public static void main(String[] args) {
        // 创建HashMap对象,将Student放入值的位置
        HashMap<String, Student> hashMap = new HashMap<String, Student>();

        // 创建学生对象
        Student s1 = new Student("小明", 13);
        Student s2 = new Student("小红", 15);
        Student s3 = new Student("小蓝", 11);

        // 将学生对象添加到HashMap集合
        hashMap.put("001", s1);
        hashMap.put("002", s2);
        hashMap.put("003", s3);

        // 方法一:键值对对象找键和值
        Set<String> keySet = hashMap.keySet();
        for (String key : keySet) {
            Student student = hashMap.get(key);
            System.out.println(student.getName() + "," + student.getAge());
        }

        // 方法二:
        Set<Entry<String, Student>> entrySet = hashMap.entrySet();
        for (Entry<String, Student> entry : entrySet) {
            String key = entry.getKey();
            Student value = entry.getValue();
            System.out.println(key + "," + value.getName() + "," + value.getAge());
        }
    }

}
运行结果:

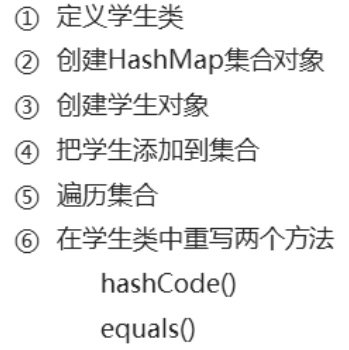
5.7 练习2,将练习1改进
需求:

思路:
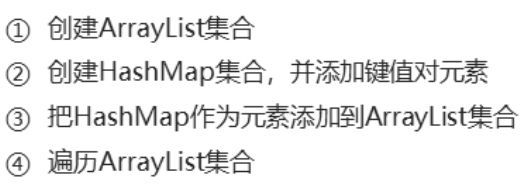
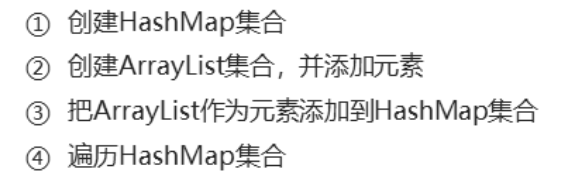
5.8 练习3,ArrayList集合存储HashMap元素并遍历
需求:
![]()
思路:
代码示例:
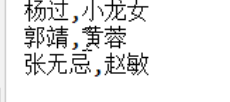
public class ArrayListDemo {
    public static void main(String[] args) {
        // 创建ArrayList集合
        ArrayList<HashMap<String, String>> arrayList = new ArrayList<HashMap<String, String>>();

        // 创建HashMap集合,并添加键值对
        HashMap<String, String> hashMap1 = new HashMap<String, String>();
        hashMap1.put("孙策", "小乔");
        hashMap1.put("周瑜", "大乔");
        // 把HashMap做为元素添加到ArrayList集合
        arrayList.add(hashMap1);

        // 创建HashMap集合,并添加键值对
        HashMap<String, String> hashMap2 = new HashMap<String, String>();
        hashMap1.put("郭靖", "黄蓉");
        hashMap1.put("杨过", "小龙女");
        // 把HashMap做为元素添加到ArrayList集合
        arrayList.add(hashMap2);

        // 创建HashMap集合,并添加键值对
        HashMap<String, String> hashMap3 = new HashMap<String, String>();
        hashMap1.put("令狐冲", "任盈盈");
        hashMap1.put("林平之", "岳灵珊");
        // 把HashMap做为元素添加到ArrayList集合
        arrayList.add(hashMap3);

        // 遍历ArrayList集合
        for (HashMap<String, String> hashMap : arrayList) {
            //遍历HashMap集合
            Set<String> keySet = hashMap.keySet();
            for (String key : keySet) {
                String value = hashMap.get(key);
                System.out.println(key + "," + value);
            }
        }

    }
}
总结:ArrayList集合存储HashMap,正常使用即可,只不过遍历的时候需要嵌套遍历。
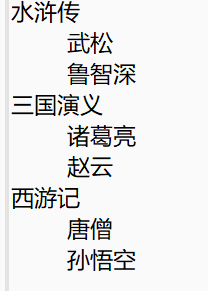
5.9 练习4,HashMap集合存储ArrayList元素并遍历
需求:

思路:
代码示例:
public class HashMapDemo {
    public static void main(String[] args) {
        // 创建HashMap集合
        HashMap<String, ArrayList<String>> hashMap = new HashMap<String, ArrayList<String>>();

        // 创建ArrayList,并添加元素
        ArrayList<String> arrayList1 = new ArrayList<String>();
        arrayList1.add("诸葛亮");
        arrayList1.add("赵云");
        hashMap.put("三国演义", arrayList1);

        // 创建ArrayList,并添加元素
        ArrayList<String> arrayList2 = new ArrayList<String>();
        arrayList2.add("唐僧");
        arrayList2.add("孙悟空");
        hashMap.put("西游记", arrayList2);
        // 创建ArrayList,并添加元素

        ArrayList<String> arrayList3 = new ArrayList<String>();
        arrayList3.add("武松");
        arrayList3.add("鲁智深");
        hashMap.put("水浒传", arrayList3);

        // 遍历HashMap集合
        Set<String> keySet = hashMap.keySet();
        for (String key : keySet) {
            System.out.println(key);
            ArrayList<String> value = hashMap.get(key);
            //遍历ArrayList
            for (String s : value) {
                System.out.println("	" + s);
            }
        }

    }
}
运行结果:
keySet取出的Key的顺序是不一样的,因为Set集合没有索引,所以输出的顺序也不一样的。
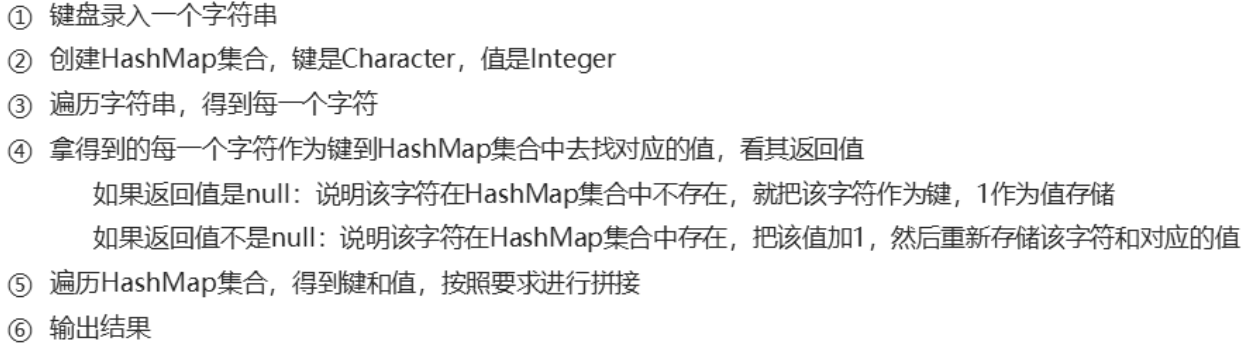
5.10 练习5,统计字符串中每个字符出现的次数
需求:

分析:

思路:
代码示例:
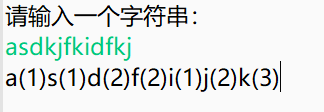
public class HashMapDemo {
    public static void main(String[] args) {

        // 键盘录入一个字符串
        Scanner sc = new Scanner(System.in);
        System.out.println("请输入一个字符串:");
        String line = sc.nextLine();

        // 创建HashMap集合,
        HashMap<Character, Integer> hashMap = new HashMap<Character, Integer>();

        // 遍历字符串得到每一个字符
        for (int i = 0; i < line.length(); i++) {
            char key = line.charAt(i);

            // 拿得到的每一个字符作为键到HashMap集合中去找对应的值,看其返回值
            Integer value = hashMap.get(key);

            if (value == null) {
                // 如果返回值是nuil:说明该字符在HashMap集合中不存在,就把该字符作为键,1作为值存储
                hashMap.put(key, 1);
            } else {
                // 如果返回值不是null:说明该字符在HashMap集合中存在,把该值加1,然后重新存储该字符和对应的值
                value++;
                hashMap.put(key, value);
            }
        }

        // 遍历HashMap集合,得到键和值,按照要求进行拼接
        StringBuilder sb = new StringBuilder();

        Set<Character> keySet = hashMap.keySet();
        for (Character key : keySet) {
            Integer value = hashMap.get(key);
            sb.append(key).append("(").append(value).append(")");
        }

        // 将StringBuilder转换为String
        String s = sb.toString();

        // 输出结果
        System.out.println(s);
    }
}
for (int i = 0; i < str.length(); i++) {
    char s = str.charAt(i);
    if(hashMap.containsKey(s)){
        Integer num = hashMap.get(s);
        hashMap.put(s,num+1);
    }else {
        hashMap.put(s,1);
    }
}
运行结果:
这个输出的结果顺序完全是乱套的,因为HashMap的底层是Hash,而Hash是没有顺序的。
想要顺序就将HashMap改为TerrMap,Terr是会让输出结果改为自然顺序的。
将HashMap改为TerrMap,别的代码不动
        // 创建HashMap集合,
        //HashMap<Character, Integer> hashMap = new HashMap<Character, Integer>();
        TreeMap<Character, Integer> hashMap = new TreeMap<Character, Integer>();
运行结果:
输出结果进行了自然排序

6. Collections
6.1 Collections(对集合操作的工具类)概述和使用
public static <T extends Comparable<? super T>> void sort(List<T> list):按升序排序,T要实现Comparable<T>并重写compareTo方法。
sort(List<T> list,Comparator<? super T> c)方法

代码示例:

运行结果:

使用sort方法,将指定的列表按升序排序

运行结果:

使用reverse方法,反转指定列表中元素的顺序

运行结果:

使用shuffle方法,使用默认的随机源随机排列指定的列表

运行结果:
运行第一次

运行第二次
每次输出结果的顺序都是不一样的

ArrayList存储学生对象并排序
代码示例:
创建学生类:
public class Student {
    private String name;
    private Integer age;

    public Student() {
        super();
    }

    public Student(String name, Integer age) {
        super();
        this.name = name;
        this.age = age;
    }

    public String getName() {
        return name;
    }

    public void setName(String name) {
        this.name = name;
    }

    public Integer getAge() {
        return age;
    }

    public void setAge(Integer age) {
        this.age = age;
    }
}
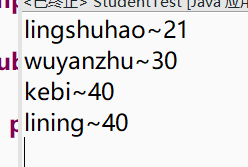
public class StudentDemo {
    public static void main(String[] args) {
        // 创建ArrayList对象
        ArrayList<Student> arrayList = new ArrayList<Student>();

        // 创建学生对象并添加元素
        Student student1 = new Student("linqingxia", 30);
        Student student2 = new Student("zhangmanyu", 35);
        Student student3 = new Student("wangzuxian", 33);
        Student student4 = new Student("liuyan", 33);

        // 把学生添加到集合
        arrayList.add(student1);
        arrayList.add(student2);
        arrayList.add(student3);
        arrayList.add(student4);

        // 使用Collections的sort方法对ArrayList集合排序,这里使用的是指定的根据指定的比较器(Comparator)排序(详细查看API文档),实现它的内部隐藏类
        //这里也可以使用Comparable比较器
        Collections.sort(arrayList, new Comparator<Student>() {
            @Override
            public int compare(Student o1, Student o2) {
                // 按照年龄从小到大排序,年龄相同时,按照妊名的字母顺序排序
                int num1 = o1.getAge() - o2.getAge();
                int num2 = num1 == 0 ? o1.getName().compareTo(o2.getName()) : num1;
                return num2;
            }
        });

        // 遍历集合并输出
        for (Student student : arrayList) {
            System.out.println(student.getName() + "," + student.getAge());
        }

    }
}
运行结果:
