前言:有个朋友非常喜欢MaterialDesignToolkit控件,而且好多开源框架都用这个风格,确实比较省事写。关键点:可以和MahApps.Metro完全兼容,之前做的完全不收影响,那么我们就要尝试一下。
第一步:按照MaterialDesign依赖包,在AIStudio.Wpf.Home工程下安装。
 还要安装MaterialDesignThemes.MahApps包,这个是兼容MahApps主题的。
第二步:改变App.Xaml中引用的资源
<Application.Resources>
      <ResourceDictionary>
          <ResourceDictionary.MergedDictionaries>
              <!--<ResourceDictionary Source="pack://application:,,,/MahApps.Metro;component/Styles/Controls.xaml" />
              <ResourceDictionary Source="pack://application:,,,/MahApps.Metro;component/Styles/Fonts.xaml" />
              <ResourceDictionary Source="pack://application:,,,/MahApps.Metro;component/Styles/Themes/Light.Blue.xaml" />

              --><!-- Dragablz MahApps Design --><!--
              <ResourceDictionary Source="pack://application:,,,/Dragablz;component/Themes/MahApps.xaml"/>-->

              <materialDesign:MahAppsBundledTheme BaseTheme="Inherit" PrimaryColor="DeepPurple" SecondaryColor="Purple"/>
              <!-- MahApps -->
              <ResourceDictionary Source="pack://application:,,,/MahApps.Metro;component/Styles/Controls.xaml" />
              <ResourceDictionary Source="pack://application:,,,/MahApps.Metro;component/Styles/Fonts.xaml" />
              <!-- Material Design -->
              <ResourceDictionary Source="pack://application:,,,/MaterialDesignThemes.Wpf;component/Themes/MaterialDesignTheme.Defaults.xaml" />
              <!-- Material Design: MahApps Compatibility -->
              <ResourceDictionary Source="pack://application:,,,/MaterialDesignThemes.MahApps;component/Themes/MaterialDesignTheme.MahApps.Defaults.xaml"/>
              <!-- Dragablz Material Design -->
              <ResourceDictionary Source="pack://application:,,,/Dragablz;component/Themes/materialdesign.xaml"/>

          </ResourceDictionary.MergedDictionaries>
      </ResourceDictionary>
  </Application.Resources>
因为Dragablz也切到了Material风格,所以Style="{StaticResource MaterialDesignTabablzControlStyle}"也改一下。
 <dragablz:TabablzControl Grid.Row="1" prism:RegionManager.RegionName="MainContentRegion"
                              ShowDefaultCloseButton="True"
                              ClosingItemCallback="{Binding ClosingTabItemHandler}"
                              Style="{StaticResource MaterialDesignTabablzControlStyle}" >
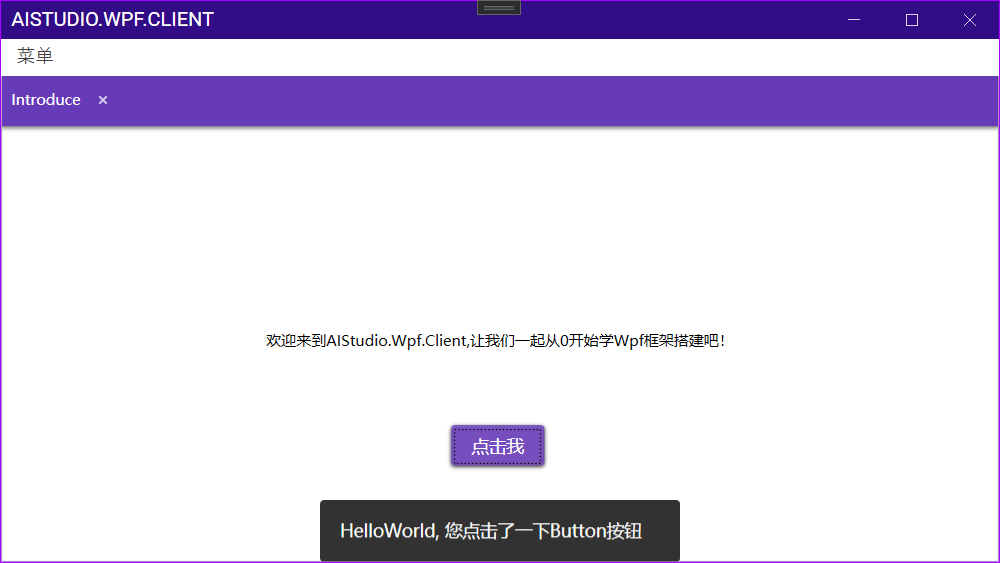
好了,可以运行了。 
 好看点吧。
好看点吧。
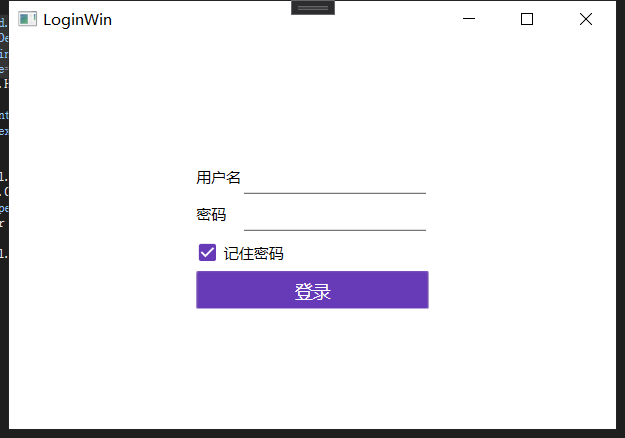
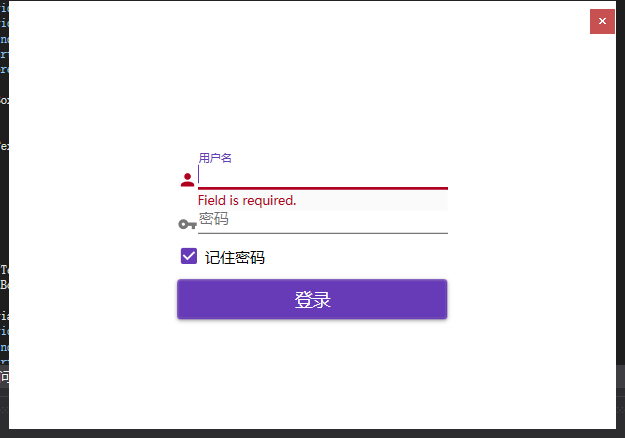
第三步:美化下LoginWin,直接使用MaterialDesign的Demo样式
<UserControl x:Class="AIStudio.Wpf.Client.Views.LoginView"
             xmlns="http://schemas.microsoft.com/winfx/2006/xaml/presentation"
             xmlns:x="http://schemas.microsoft.com/winfx/2006/xaml"
             xmlns:mc="http://schemas.openxmlformats.org/markup-compatibility/2006"
             xmlns:d="http://schemas.microsoft.com/expression/blend/2008"
             xmlns:core="clr-namespace:AIStudio.Core"
             xmlns:local="clr-namespace:AIStudio.Wpf.Client.Views"
             xmlns:materialDesign="http://materialdesigninxaml.net/winfx/xaml/themes"
             xmlns:domain="clr-namespace:MaterialDesignDemo.Domain"
             xmlns:prism="http://prismlibrary.com/"
             prism:ViewModelLocator.AutoWireViewModel="True"
             mc:Ignorable="d"
             d:DesignHeight="450" d:DesignWidth="800">
    <Grid>
        <Grid x:Name="LoginGrid" HorizontalAlignment="Center" VerticalAlignment="Center">
            <Grid.RowDefinitions>
                <RowDefinition Height="Auto"/>
                <RowDefinition Height="Auto"/>
                <RowDefinition Height="35"/>
                <RowDefinition Height="35"/>
            </Grid.RowDefinitions>
            <Grid.ColumnDefinitions>
                <ColumnDefinition Width="Auto"></ColumnDefinition>
                <ColumnDefinition Width="200"></ColumnDefinition>
            </Grid.ColumnDefinitions>

            <materialDesign:PackIcon
                Grid.Row="0"
                Grid.Column="0"
                Kind="Account"
                VerticalAlignment="Bottom"
                Foreground="{Binding ElementName=NameTextBox, Path=BorderBrush}"/>

            <TextBox Grid.Row="0" Grid.Column="1" x:Name="NameTextBox"
                    materialDesign:HintAssist.Hint="用户名"
                    Style="{StaticResource MaterialDesignFloatingHintTextBox}">
                <TextBox.Text>
                    <Binding
                        Path="UserName"
                        UpdateSourceTrigger="PropertyChanged">
                        <Binding.ValidationRules>
                            <domain:NotEmptyValidationRule ValidatesOnTargetUpdated="True" />
                        </Binding.ValidationRules>
                    </Binding>
                </TextBox.Text>
            </TextBox>

            <materialDesign:PackIcon
                Grid.Row="1"
                Kind="Key"
                VerticalAlignment="Bottom"
                Foreground="{Binding ElementName=FloatingPasswordBox, Path=BorderBrush}"/>

            <PasswordBox Grid.Row="1" Grid.Column="1" core:PasswordBoxHelper.Password="{Binding Password,Mode=TwoWay}"
                    x:Name="FloatingPasswordBox"
                    materialDesign:HintAssist.Hint="密码"
                    materialDesign:HintAssist.Foreground="Green"
                    materialDesign:TextFieldAssist.UnderlineBrush="Green"
                    Style="{StaticResource MaterialDesignFloatingHintPasswordBox}"/>


            <CheckBox Grid.Row="2" Grid.ColumnSpan="2" Content="记住密码" VerticalAlignment="Center" IsChecked="{Binding IsRmembered}" />
            <Button Grid.Row="3" Grid.ColumnSpan="2" Content="登录" Command="{Binding LoginCommand}" CommandParameter="{Binding RelativeSource={RelativeSource Mode=FindAncestor,AncestorType={x:Type Window}}}" IsDefault="True" />
        </Grid>
    </Grid>
</UserControl>

第四步:将MaterialDesign的DialogHost作为主内容容器。

第五步:将MainWindow中的内容移动到AIStudio.Wpf.Home的MainView中,MainWindowViewModel的内容移动到MainViewModel中,相关内容请下载源码。
 (不在启动工程做太多业务的逻辑) 主窗口就变得很简洁
<mah:MetroWindow  x:Class="AIStudio.Wpf.Client.MainWindow"
      xmlns="http://schemas.microsoft.com/winfx/2006/xaml/presentation"
      xmlns:x="http://schemas.microsoft.com/winfx/2006/xaml"
      xmlns:d="http://schemas.microsoft.com/expression/blend/2008"
      xmlns:mc="http://schemas.openxmlformats.org/markup-compatibility/2006"
      xmlns:local="clr-namespace:AIStudio.Wpf.Client"
      xmlns:mah="http://metro.mahapps.com/winfx/xaml/controls"
      xmlns:view="clr-namespace:AIStudio.Wpf.Home.Views;assembly=AIStudio.Wpf.Home"
      mc:Ignorable="d"
      WindowStartupLocation="CenterScreen"
      Title="AIStudio.Wpf.Client" Height="450" Width="800">
  <Grid>
      <view:MainView/>
  </Grid>
</mah:MetroWindow>
第六步:将MaterialDesign的Snackbar作为提示框,在DrawerHost添加<materialDesign:Snackbar x:Name="MainSnackbar" MessageQueue="{materialDesign:MessageQueue}" Grid.Row="1"/>
 并赋值给静态变量,以便别的地方能引用。
public partial class MainView : UserControl
{
    public static Snackbar Snackbar = new();
    public MainView()
    {
        InitializeComponent();

        Snackbar = MainSnackbar;
    }
}
使用的地方:
private void Click()
{
    //MessageBox.Show("HelloWorld, 您点击了一下Button按钮");
    MainView.Snackbar.MessageQueue?.Enqueue("HelloWorld, 您点击了一下Button按钮");
}

好了,本章就这些内容吧。(随着内容的发展,经常会调整内容的位置,以便适应框架)
下一章:接入Api数据,实现用户菜单根据接口来。
源码地址:https://gitee.com/akwkevin/aistudio.-wpf.-client.-stepby-step
每一章都有自己的Tag,按照链接进去直接下载就是本章内容。
另外推荐一下我的Wpf客户端框架:https://gitee.com/akwkevin/aistudio.-wpf.-aclient