指令系统:
所谓指令系统,大家可以联想咱们的cmd命令行工具,只要我输入一条正确的指令,系统就开始干活了。
在vue中,指令系统,设置一些命令之后,来操作我们的数据属性,并展示到我们的DOM上。
1. v-if v-else-if v-else
2. v-show
一般来说,
v-if有更高的切换开销,而v-show有更高的初始渲染开销。因此,如果需要非常频繁地切换,则使用v-show较好;如果在运行时条件很少改变,则使用v-if较好。
3. v-bind 简写为 :
4. v-on 简写为 :@
5. v-for
6. v-html
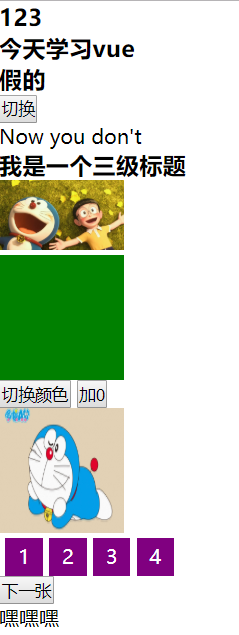
<!DOCTYPE html>
<html>
<head>
    <title></title>
    <style type="text/css">
        *{padding: 0; margin: 0;}
        .box{width: 100px;height: 100px;background-color: red;}
        .box2{background-color: green;}
        .lunbo ul{width: 180px; overflow: hidden; list-style: none;}
        .lunbo ul li{float: left; width: 30px; height: 30px; background-color: purple; margin-left: 5px; line-height: 30px; text-align: center;
            color: white;}
    </style>
</head>
<body>

<div id="app">
    <!-- 插值语法 react{}  angular{{}}  {% %}  <%= %> -->
    <!-- 除了 if else -->
    <h3>{{123}}</h3>
    <h3>{{msg}}</h3>
    <h3>{{1>2?"真的":"假的"}}</h3>

    <div v-if = 'show'>哈哈哈哈</div>

    <!-- <button v-on:click = 'clickHandler' >切换</button> -->

    <button @click = 'clickHandler' >切换</button>

    <div v-if="Math.random() > 0.5">
          Now you see me
    </div>
    <div v-else>
          Now you don't
    </div>

    <h3 v-show='iShow' v-bind:title="title">我是一个三级标题</h3>

    <img v-bind:src="imgSrc" :title="time" width="100px;height100px;">

    <!--
        v-bind:      简便写法   :
        v-on:click   简便写法   @click
     -->

    <div class="box" :class="{box2:isGreen,box3:isYellow}"></div>

    <button @click='changeColor'>切换颜色</button>

    <button @click='count+=1'>加{{count}}</button>

    <!--
         声明式的指令
          命令式的
     -->

     <div class='lunbo'>
         <img :src="currentSrc" @mouseenter='closeTimer' @mouseleave='openTimer' width="100" height="100">
         <ul>
             <li v-for = "(item,index) in imgArr" @click='currentHandler(item)'>{{index+1}}</li>
         </ul>
     </div>

     <button @click='nextImg'>下一张</button>

     <div v-html="str"></div>
</div>


<script type="text/javascript" src="./vue.js"></script>

<script type="text/javascript">

    // vue的实例化对象

    // MVVM  model view viewmodel

    // MTV model template view

    // 指令系统 v-*

    // 核心思想概念: 数据驱动视图 ,双向的数据绑定


    var app = new Vue({
        el: "#app",
        data: {
            msg:"今天学习vue",
            msg2:"今天学习vue2",
            show:false,
            iShow:true,
            title:"哈哈哈",
            imgSrc:"./5.jpg",
            time: `页面加载于${new Date().toLocaleString()}`,
            isGreen:true,
            isYellow:true,
            count:0,
            imgArr:[
                {id:1,src:'./1.jpg'},
                {id:2,src:'./2.jpg'},
                {id:3,src:'./3.jpg'},
                {id:4,src:'./4.jpg'}
            ],
            currentSrc:"./1.jpg",
            currntIndex:0,
            timer:null,
            str:"<p>嘿嘿嘿</p>"
        },
        created(){
            // 加载dom之前
            // 开启定时器
            // 获取cookie session 提前获取出来
            this.timer = setInterval(this.nextImg,2000)
        },
        methods:{
            clickHandler(){
                this.show = !this.show;
            },
            changeColor(){
                this.isGreen = !this.isGreen
            },
            currentHandler(item){
                this.currentSrc = item.src
            },
            nextImg(){
                if (this.currntIndex == this.imgArr.length-1){
                    this.currntIndex=-1
                }
                this.currntIndex++
                this.currentSrc = this.imgArr[this.currntIndex].src
            },
            closeTimer(){
                clearInterval(this.timer)
            },
            openTimer(){
                this.timer = setInterval(this.nextImg,2000)
            }

        }

    })

    // 直接取操作dom 但是不介意这样用!,应该使用vue对dom操作
    console.log(app)
    console.log(app.$el)
    console.log(app.$data.msg)
    console.log(app.msg)
    console.log(app.msg2)

</script>


</body>
</html>

<!-- 找相关资料
    开发者网络

    上一张;

 -->