一 开始
1 全局安装脚手架
npm install -g create-react-app
这有个坑,就是在window下安装一直会报错,报错信息如下:
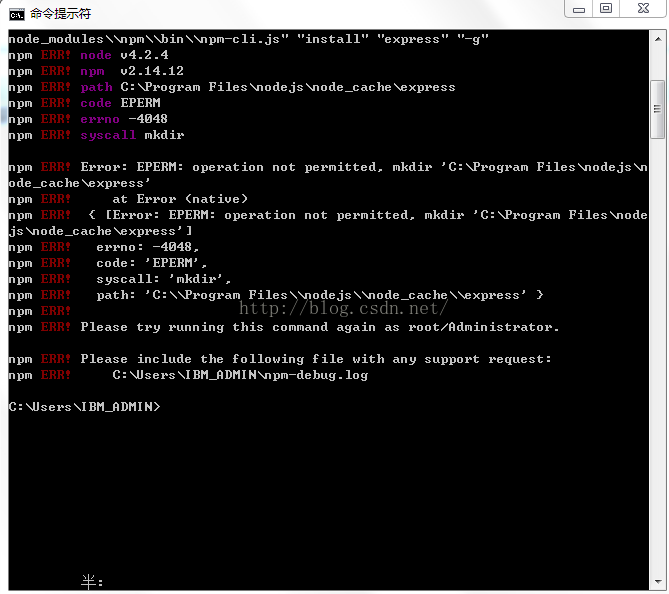
解决办法:在开始菜单栏里打开cmd的时,右击选择“以管理员身份运行”。然后再在打开的cmd里运动install就没问题了。
2 通过脚手架搭建项目
create-react-app <项目名称>
3 开始项目
cd <项目名>
npm run start
二、 查看项目 package.json 信息
1 package.json 一览
{
  ......
  "homepage": ".",
  "dependencies": {
    "react": "^16.4.0",
    "react-dom": "^16.4.0",
    "react-scripts": "1.1.4"
  },
  "scripts": {
    "start": "react-scripts start",
    "build": "react-scripts build",
    "test": "react-scripts test --env=jsdom",
    "eject": "react-scripts eject"
  }
}
2 可用命令说明:
- 首先说明:通过npm run 执行下面命令实际上是运行 node_modules/react-srcipt/script 下对应的脚本文件;
- npm run start: 开始项目,运行项目后可通过
http://localhost:3000访问项目; - npm run build: 项目打包,在生产环境中编译代码,并放在build目录中;所有代码将被正确打包,并进行优化、压缩同时使用hash重命名文件;执行该命令前需要在 package.json 中新增条配置
"homepage": "."(上面配置文件已给出), 同时build后的项目需要在服务器下才能访问;否则打开的将是空白页面; - npm run test: 交互监视模式下启动测试运行程序;
- npm run eject: 将隐藏的配置导出;需要知道的是create-react-app脚手架本质上是使用react-scripts进行配置项目,所有配置文件信息都被隐藏起来(node_modules/react-scripts);当需要手动修改扩展webpack配置时有时就需要将隐藏的配置暴露出来;特别需要注意的是该操作是一个单向操作,一旦使用eject,那么就不能恢复了(再次将配置隐藏);
三、 自动生成的项目目录以及文件解析:
- node_modules : 项目依赖包目录;
- public: 公共目录,该目录下的文件都不会被webpack进行加载、解析、打包;通过npm run build进行打包时该项目下的所有文件将会直接被复制到build目录下;
- favicon.ico : 是网站图标[可替换删除]
- index.html: 页面模板,webpack打包后将输出文件引入到该模板内;补充:index.html中通过环境变量
%PUBLIC_URL%来指向public目录路径; - manifest.json: PWA将应用添加至桌面的功能的实现依赖于 manifest.json 。通过manifest.json 文件可以对图标、名称等信息进行配置。
- src: 是源码目录该目录下除了index.js App.test.js registerServiceWorker.js 文件具有一定意义其余文件都是演示使用可直接删除
- index.js: 是整个项目的入口文件;
- App.test.js: 测试单元演示文件,暂时并不知道干嘛用;可以直接删除;
- registerServiceWorker.js: service worker 是在后台运行的一个线程,可以用来处理离线缓存、消息推送、后台自动更新等任务;registerServiceWorker就是为react项目注册了一个service worker,用来做资源的缓存,这样你下次访问时,就可以更快的获取资源。而且因为资源被缓存,所以即使在离线的情况下也可以访问应用(此时使用的资源是之前缓存的资源)。注意,registerServiceWorker注册的service worker 只在生产环境中生效,并且该功能只有在https下才能有效果;
- .gitignore: 该文件是github过滤文件配置
- README.md: 该文件是github描述文件
- package.json: 定义了项目所需要的各种模块,以及项目的配置信息(比如名称、版本、许可证等元数据)。部分依赖模块被隐藏;
- yarn.lock:每次通过yarm添加依赖或者更新包版本时 yarn都会把相关版本信息写入yarn.lock文件;npm也有类似功能,npm 也可以生成一个锁文件,就是使用上没有yarn方便
四 create-react-app 扩展webpack的方法
Create React App(以下简称 CRA)是创建 React 应用的一个脚手架,它与其他脚手架不同的一个地方就是将一些复杂工具(比如 webpack)的配置封装了起来,让使用者不用关心这些工具的具体配置,从而降低了工具的使用难度。但是对于一些熟悉 webpack 的开发者来说,他们可能想对 webpack 配置做一些修改,这个时候应该怎么办呢?我们可以通过项目eject来进行
使用 CRA 创建完项目以后,项目在package.json里面提供了这样一个命令:
{
...
"scripts": {
"eject": "react-scripts eject"
},
...
}
执行完这个命令——yarn run eject后会将封装在 CRA 中的配置全部反编译到当前项目,这样用户就可以完全取得 webpack 文件的控制权,想怎么修改就怎么修改了。
踩坑) 使用create-react-app命令创建一个react项目,运行npm run eject生成配置文件,报了下面的错:
Remove untracked files, stash or commit any changes, and try again.
npm ERR! code ELIFECYCLE
npm ERR! errno 1
npm ERR! test@0.1.0 eject: `react-scripts eject`
npm ERR! Exit status 1
npm ERR!
npm ERR! Failed at the test@0.1.0 eject script.
npm ERR! This is probably not a problem with npm. There is likely additional logging output above.

npm ERR! A complete log of this run can be found in:
npm ERR!     C:UserslenovoAppDataRoaming
pm-cache\_logs2018-11-01T04_03_50_129Z-debug.log
主要问题是脚手架添加.gitgnore文件,但是却没有本地仓库,按照以下顺序就可以正常使用
create-react-app test
cd test
git init
git add .
git commit -m 'Saving before ejecting'
npm run eject
五 添加对 less 的支持
安装依赖
npm install less-loader less -dev
通过npm run eject暴露出配置时候,webpack配置文件只有webpack.config.js,
但没有webpack.config.dev.js和webpack.config.prod.js,查看网上各种解决办法后,发现是因为create-react-app官方脚手架升级了。
这里我们就在webpack.config.js配置less。
方法:
//找到此位置
// style files regexes
const cssRegex = /.css$/;
const cssModuleRegex = /.module.css$/;
const sassRegex = /.(scss|sass)$/;
const sassModuleRegex = /.module.(scss|sass)$/;

//在此添加如下两个常量
const lessRegex =/.less$/;
const lessModuleRegex=/.module.less$/;

// This is the production and development configuration.
// It is focused on developer experience, fast rebuilds, and a minimal bundle
//找到此位置
 {
              test: cssRegex,
              exclude: cssModuleRegex,
              use: getStyleLoaders({
                importLoaders: 1,
                sourceMap: isEnvProduction && shouldUseSourceMap,
              }),
              // Don't consider CSS imports dead code even if the
              // containing package claims to have no side effects.
              // Remove this when webpack adds a warning or an error for this.
              // See https://github.com/webpack/webpack/issues/6571
              sideEffects: true,
            },
            // Adds support for CSS Modules (https://github.com/css-modules/css-modules)
            // using the extension .module.css
            {
              test: cssModuleRegex,
              use: getStyleLoaders({
                importLoaders: 1,
                sourceMap: isEnvProduction && shouldUseSourceMap,
                modules: true,
                getLocalIdent: getCSSModuleLocalIdent,
              }),
            },

//在这之后仿照上面添加如下代码
            {
              test: lessRegex,
              exclude: lessModuleRegex,
              use: getStyleLoaders({
                importLoaders: 2,
                sourceMap: isEnvProduction && shouldUseSourceMap,
              }),
              sideEffects: true,
            },
            {
              test: lessModuleRegex,
              use: getStyleLoaders({
                importLoaders: 2,
                modules: true,
                getLocalIdent: getCSSModuleLocalIdent,
                sourceMap: isEnvProduction && shouldUseSourceMap,
              }),
            },
配置变了之后要重新启动,不然无法看到效果。
六 在 create-react-app 中使用antd-mobile
1 安装
npm install antd-mobile --save
2 使用
入口页面 (html 或 模板) 相关设置:
引入 FastClick 并且设置 html
meta(更多参考 #576)引入 Promise 的 fallback 支持 (部分安卓手机不支持 Promise)
<!DOCTYPE html>
<html>
<head>
  <!-- set `maximum-scale` for some compatibility issues -->
  <meta name="viewport" content="width=device-width, initial-scale=1, maximum-scale=1, minimum-scale=1, user-scalable=no" />
  <script src="https://as.alipayobjects.com/g/component/fastclick/1.0.6/fastclick.js"></script>
  <script>
    if ('addEventListener' in document) {
      document.addEventListener('DOMContentLoaded', function() {
        FastClick.attach(document.body);
      }, false);
    }
    if(!window.Promise) {
      document.writeln('<script src="https://as.alipayobjects.com/g/component/es6-promise/3.2.2/es6-promise.min.js"'+'>'+'<'+'/'+'script>');
    }
  </script>
</head>
<body></body>
</html>
3 按需加载:
使用 babel-plugin-import(推荐)。
npm install babel-plugin-import --save-dev
在package.json中添加如下代码:
  "plugins": [
      [
        "import",
        {
          "libraryName": "antd-mobile",
          "libraryDirectory": "es",
          "style": "css"
        }
      ]
   ]
然后只需从 antd-mobile 引入模块即可,无需单独引入样式。
// babel-plugin-import 会帮助你加载 JS 和 CSS
import { DatePicker } from 'antd-mobile';
七 实现对修饰器的支持: 实现对 babel 插件的使用
["@babel/plugin-proposal-decorators", {"legacy": true}] 修改为 ["transform-decorators-legacy"]修改package.json
"babel": {"plugins": [
+   ["@babel/plugin-proposal-decorators", {"legacy": true}]
  ]
},
八 eslint 配置
- 通过修改 package.json 文件添加对 eslint 的扩展配置
...
"eslintConfig": {
  // 默认继承 脚手架自带的 eslint 配置
  "extends": "react-app",
  // 在这里扩展新增配置
  "rules":{
     // 设置规则,具体看官网用户指南下的规则文档
     "eqeqeq": "off"
  }
 }
-
参考文档:https://juejin.im/post/5b20a3546fb9a01e312833d5
https://www.jianshu.com/p/fa79cbfa6c6c
https://blog.csdn.net/qq_36709020/article/details/80275602
https://blog.csdn.net/qq_42190134/article/details/88528852
https://ant.design/docs/react/use-with-create-react-app-cn