ASPNET SignalR是为ASP.NET开发人员提供的一个库,可以简化开发人员将实时Web功能添加到应用程序的过程.实时Web功能是指这样一种功能:当所连接的客户端变得可用时服务器代码可以立即向其推送内容,而不是让服务器等待客户端请求的新数据.
这里将重现官网,广播聊天的程序
1.添加signalr程序集,打开nuget程序包控制台,输入如下命令:
>install-package microsoft.aspnet.signalr
2.修改Startup.cs ->Configuration方法,如下
     public void Configuration(IAppBuilder app)
        {
            //模仿站点配置
            HttpConfiguration config = new HttpConfiguration();
            //添加站点路由
            config.Routes.MapHttpRoute(
                name: "DefaultApi",
                routeTemplate: "api/{controller}/{action}/{id}", //这里为了类MVC特别加入了{action}
                defaults: new { id = RouteParameter.Optional });
            app.MapSignalR();//添加
            app.UseWebApi(config);
        }
3.新建类ChatHub.cs添加如下代码:
using Microsoft.AspNet.SignalR;
using System;
using System.Collections.Generic;
using System.Linq;
using System.Text;
using System.Threading.Tasks;

namespace TestProgram
{
   public class ChatHub:Hub
    {
        public void Send(string name,string message)
        {
            Clients.All.broadcastMessage(name, message);
        }
    }
}
4.修改Index.html如下:
<!doctype html>
<html>
<head>
<title>signalr simple chat</title>
<style type="text/css">
.container {
background-color: #99ccff;
border: thick solid #808080;
padding: 20px;
margin: 20px;
}
</style>
</head>
<body>
<div class="container">
<input type="text" id="message" />
<input type="button" id="sendmessage" value="send" />
<input type="hidden" id="displayname" />
<ul id="discussion"></ul>
</div>
<!--script references. -->
<!--reference the jquery library. -->
<script src="getresource?filename=scripts/jquery-1.6.4.min.js"></script>
<!--reference the signalr library. -->
<script src="getresource?filename=scripts/jquery.signalr-2.2.2.min.js"></script>
<!--reference the autogenerated signalr hub script. -->
<!--这个js是SignalR动态生成的,可以直接访问-->
<script src="/signalr/hubs"></script>
<!--add script to update the page and send messages.-->
<script type="text/javascript">
$(function () {
// declare a proxy to reference the hub.
var chat = $.connection.chatHub;
// create a function that the hub can call to broadcast messages.
chat.client.broadcastmessage = function (name, message) {
// html encode display name and message.
var encodedname = $('<div />').text(name).html();
var encodedmsg = $('<div />').text(message).html();
// add the message to the page.
$('#discussion').append('<li><strong>' + encodedname
+ '</strong>: ' + encodedmsg + '</li>');
};
// get the user name and store it to prepend to messages.
$('#displayname').val(prompt('enter your name:', ''));
// set initial focus to message input box.
$('#message').focus();
// start the connection.
$.connection.hub.start().done(function () {
$('#sendmessage').click(function () {
// call the send method on the hub.
chat.server.send($('#displayname').val(), $('#message').val());
// clear text box and reset focus for next comment.
$('#message').val('').focus();
});
});
});
</script>
</body>
</html>
此时,项目结构如下:

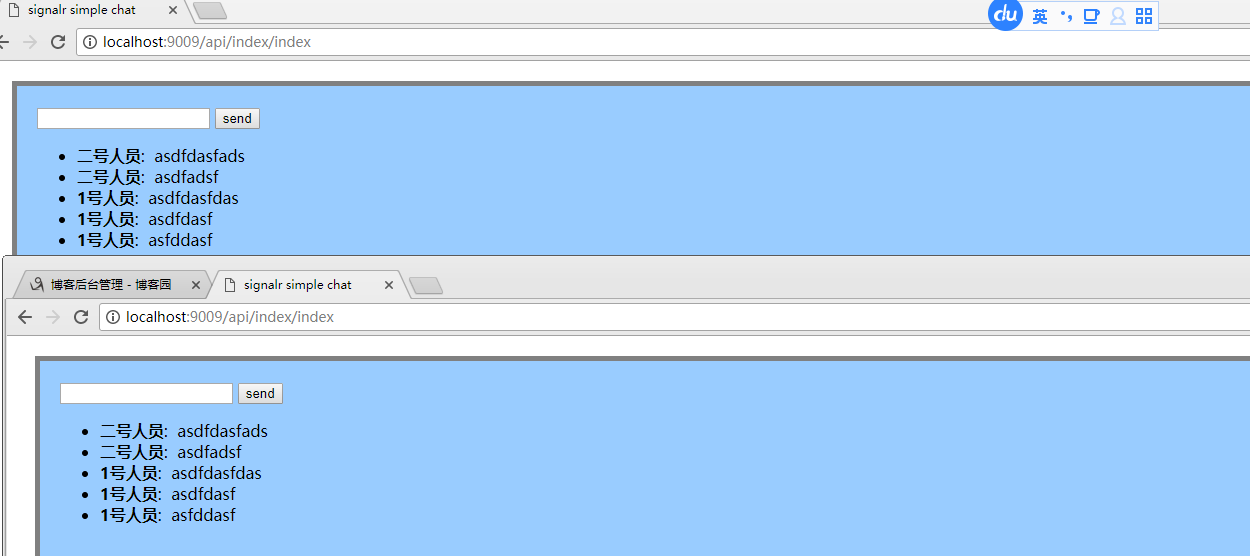
5.打开浏览器,新建两个标签,输入:http://localhost:9009/index/index,按照提示,操作:

两个标签页可以互相实时通讯,实现了客户端到服务端,服务端到所有客户端的调用(RPC 远程过程调用),由于SignalR采用的是长连接webSocket所以,实时性很高!