####
安装scrapy
安装:pip install scrapy
####
创建scrapy项目
进入你要创建项目的目录下来,在命令窗口,输入命令:scrapy startproject scrapy_demo1
###
生成一个爬虫,
进入爬虫项目的根目录,然后执行命令,scrapy genspider spider1 baidu.com
注意最后有一个域名,这个就是你要爬取的网站的域名,
为什么要生成爬虫的时候给一个域名,因为防止爬取的时候爬到别的网站上去了,
#####
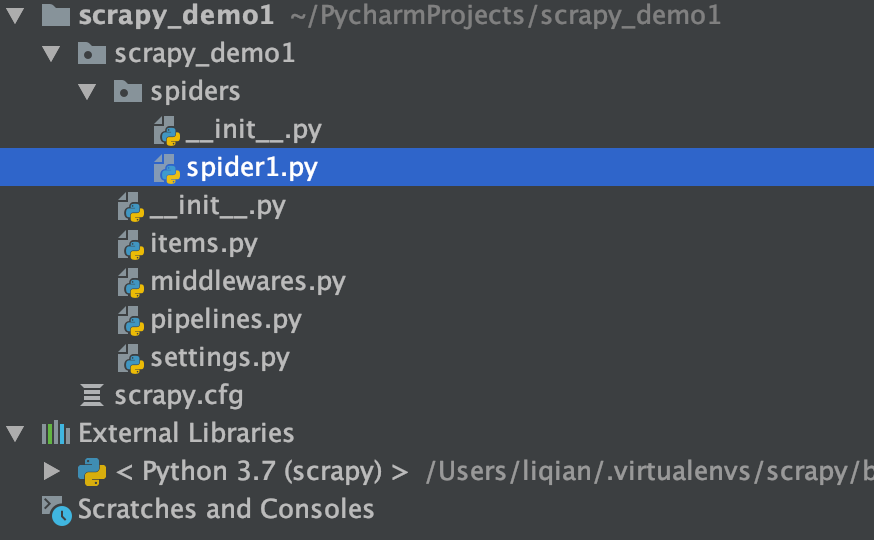
项目目录解释
上面的操作结果
######
解释这个目录结构
1,spider就是写爬虫的
2,iterms,定义了字段
3,middlewares,中间件
4,pipeline,就是处理保存数据的
5,setting就是配置文件,
6,scrapy.cfg,这是文件指定了配置文件的位置,
####
编写第一个爬虫
import scrapy


class Spider1Spider(scrapy.Spider):
    name = 'spider1'
    allowed_domains = ['sina.com.cn']
    start_urls = ['https://news.sina.com.cn/']

    def parse(self, response):
        print(response.text)


if __name__ == '__main__':
    from scrapy import cmdline
    cmdline.execute("scrapy crawl spider1 --nolog".split())
##
注意,使用response的方法和requests是一样的,
####
运行爬虫
命令:
scrapy crawl itcast 后面跟的是爬虫的名字
scrapy crawl 爬虫名字 --nolog
会打印很多的日志,可以把日志关闭,在setting文件里面,加上这一句:LOG_LEVEL = "WARNING"
启动爬虫run.py
from scrapy import cmdline
cmdline.execute("scrapy crawl lagou".split())
####
爬虫内部方法的使用:
import scrapy


class Spider1Spider(scrapy.Spider):
    name = 'spider1'
    allowed_domains = ['sina.com.cn']
    start_urls = ['https://news.sina.com.cn/']

    def parse(self, response):
        # print(response.text)
        # print(dir(response))

        # print(dir(response.xpath('//div[@id = "syncad_1"]//a/text()')))
        # print(response.xpath('//div[@id = "syncad_1"]//a/text()'))  # 这是返回一个选择器列表
        # print(response.xpath('//div[@id = "syncad_1"]//a/text()').extract())   # 这是返回一个列表
        # print(response.xpath('//div[@id = "syncad_1"]//a/text()').extract_first())  # 这是返回列表的第一个值,
        # print(response.xpath('//div[@id = "syncad_1"]//a/text()').get())
        ret = response.xpath('//div[@id = "syncad_1"]//a')
        for i in ret:
            # print(i.xpath('./text()').extract_first())
            # print(i.attrib['href'])
            # print(i.xpath('./@href').extract_first())
            yield {
                "text": i.xpath('./text()').extract_first(),
                "href": i.xpath('./@href').extract_first()
            }


if __name__ == '__main__':
    from scrapy import cmdline
    cmdline.execute("scrapy crawl spider1 --nolog".split())
####
1,yield item ---这个yield一定要是一个requests,或者baseitem,或者字典,或者none,不能是一个列表,现在就是返回的一个字典
2,把item传递到pipeline里面,使用yield,使用生成器,减少内存占用
3,注意,这个parse方法不能动,
####
开启pipeline,处理数据
开启pipeline,爬虫里面的yield item才可以传递到pipeline里面
settings里面设置打开
ITEM_PIPELINES = {
   'myspider.pipelines.MyspiderPipeline': 300,  后面的这个值是权重,有多个时候,先经过权重低的,
  'myspider.pipelines.MyspiderPipeline1': 301,
}
1,可以有多个处理的pipeline
2,权重值越小,优先级越高,
3,如果有多个pipeline,必须要都加入setting里面,
###
对应的pipeline
class ScrapyDemo1Pipeline:
    def process_item(self, item, spider):
        print(item)
        item["hello"] = "world"
        print(dir(spider))
        print(spider.name)
        print("--------")
        return item

class MyspiderPipeline1:
    def process_item(self, item, spider):
        print(item)
        return item
###
1,这个process_item 方法的名字不能动,必须要这个名字,这是专门来接收spider返回的内容的,
2,这个return一定要有,因为需要传递到后面一个process里面,
3,记住,这个pipeline是所有的爬虫公用的,那怎么区分这个进来的爬虫,可以使用spider.name来识别,
####
logging使用
首先是在setting中设置使用log
scrapy中使用logging

#settings中设置
LOG_LEVEL=“WARNING”
LOG_FILE="./a.log"  #设置日志保存的位置,设置会后终端不会显示日志内容
然后可以使用一个logger文件封装,这样是使用一个单例模式,不会每次都生成一个logger,
普通项目中使用logging
具体参数信息:https://www.cnblogs.com/bjdxy/archive/2013/04/12/3016820.html

#a.py文件

import logging
#level: 设置日志级别,默认为logging.WARNING
logging.basicConfig(level=logging.INFO,
                    format=
                        #日志的时间
                        '%(asctime)s'
                        #日志级别名称 : 当前行号
                        ' %(levelname)s [%(filename)s : %(lineno)d ]'
                        #日志信息
                        ' : %(message)s'
                        #指定时间格式
                        , datefmt='[%Y/%m/%d %H:%M:%S]')
#实例化logging,显示当前运行文件的名字,不写不会显示运行文件的目录
logging=logging.getLogger(__name__)

if __name__ == '__main__':
    #日志级别打印信息
    logging.info("this is a info log")


b.py文件使用a.py文件的logging(日志)

#b.py文件

from a import logging #导入a.py中的实例logging

if __name__ == '__main__':
#warning级别大于info也可以打印,debug级别小于info,不可以打印
logger.warning("this is log b")

日志级别:

debug   #调试
info     #正常信息
warning  #警告
error   #错误
如果设置日志级别为info,warning级别比info大,warning也可以打印,debug比info小不可以打印
如果设置日志级别为warning,info和debug都比warning小,不可以打印
####
####