前两天是五一小长假,而每次假期都想着如何如何刻苦一番,往往是自作多情。。
当然这次是有小病在身,多个借口吧。
一有病就蔫的不行。。。要锻炼了啊,脚估计也差不多了,游泳试试吧这周。
这次学习Smarty引擎。
一、视图引擎简介
帮助用户实现MVC中View的开发。
(可以理解为View的模板
--好的视图引擎
贴近html;
语法简单易懂;
良好的缓存机制;
拓展性良好;
网络资源多
(所以先学习已有的视图引擎)
--知名的
Smarty,PHPLIB
二、Smarty简介
提供了逻辑和外在内容的分离(PHP程序员和美工工作的分离;
然后直接官网或者github下载就好;

其中,demo就是官方给的例子,据说挺不错的;
libs里面是我们要引入的文件,如下:
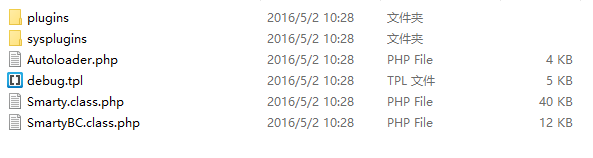
Smarty.class.php就是实例化要用到的;plugins是插件,可以自己写写放进来用;
三、Smarty的引入、配置与实例制作
1、引入与实例化
首先,还是我个人的环境,前面说过:PHP5.4(忘记了)+Zend+wampserver
创建项目,把demo和libs的东西都放进来

然后在index.php中进行代码编写;
参考Smarty.class.php的代码规范,我写了个人的表头
 1 <?php
 2 /**
 3  * Project: MVCSmartyTry
 4  * File: index.php
 5  *
 6  * This file is the test file of using Smarty.
 7  *
 8  * @copyright Andy Liang
 9  * @author Andy Liang
10  * @package   Smarty
11  * @version   3.1.30-dev
12  */
然后就是简单的引入和实例化
 1 namespace MVCSmartyindex;
 2 /**
 3  * Require the main file of Smarty
 4  */
 5 require 'Smarty.class.php';
 6
 7 /**
 8  * Instantiation of Smarty
 9  */
10 $smarty=new Smarty();
注意,实例化的时候可以去看下.class.php中具体的类名什么的;然后require和include的选择也不再赘述,上文说过;
一般来说实例化感觉都是没有最后那个反斜杠的,可能是Zend的毛病,我再查查看吧。
2、配置相关
这个特殊的类,搞了一大堆属性和方法,网上有很多配置教程,这里提几个常用的东西;
尤其是两个方法:display和assign
 1 /**
 2  * Configuration of Smarty
 3  * Especially five configs & two functions
 4  */
 5 $smarty->left_delimiter = "{";
 6 $smarty->right_delimiter = "}";
 7 //其实看源码会发现:和源码中配置的是一样的;
 8 //然后还有就是templates模板文件存放地址
 9 //templates_c模板编译生成的文件
10 //这两个是protected或者private
11 //这个版本的Smarty中这些设定的修改都是有方法的
12 //比如setTemplateDir,好像是这个
13 //总之多看源码
14 $smarty->cache_lifetime = 120;
15
16 /**
17  * The most frequently-used methods.
18  */
19 $smarty->assign('articleTitle', '文章标题');
20 $smarty->display('./templates/test.tpl');
assign就是个赋值,但是是在模板中的赋值;
display,顾名思义就是展示了;
给你看demo
<?php
/**
 * Example Application
 *
 * @package Example-application
 */

require '../Smarty.class.php';

$smarty = new Smarty;

//$smarty->force_compile = true;
$smarty->debugging = true;
$smarty->caching = true;
$smarty->cache_lifetime = 120;

$smarty->assign("Name", "Fred Irving Johnathan Bradley Peppergill", true);
$smarty->assign("FirstName", array("John", "Mary", "James", "Henry"));
$smarty->assign("LastName", array("Doe", "Smith", "Johnson", "Case"));
$smarty->assign("Class", array(array("A", "B", "C", "D"), array("E", "F", "G", "H"), array("I", "J", "K", "L"),
                               array("M", "N", "O", "P")));

$smarty->assign("contacts", array(array("phone" => "1", "fax" => "2", "cell" => "3"),
                                  array("phone" => "555-4444", "fax" => "555-3333", "cell" => "760-1234")));

$smarty->assign("option_values", array("NY", "NE", "KS", "IA", "OK", "TX"));
$smarty->assign("option_output", array("New York", "Nebraska", "Kansas", "Iowa", "Oklahoma", "Texas"));
$smarty->assign("option_selected", "NE");

$smarty->display('index.tpl');
3、Demo学习
---------明天更,看bibel去了----------