摘要:在Linux环境下可以通过V4L2接口及ioctl相关函数直接在底层调用摄像头设备,进行摄像头控制及图像预览和捕获,但是该方法相对比较复杂;Qt5.0版本新增了QMultimedia模块提供了更为方便的编程支持,该模块主要涵盖视频、音频、收音机以及摄像头等功能支持,提供了非常多的QML类型和C++类用以处理多媒体内容,Qt 5将Qt Multimedia模块放在了核心模块中,因此它支持所有主要平台,这些类需要在 pro 文件中添加 QT += multimedia.
平台环境:Qt5.0.2,Qt Creator(ubuntu系统),笔记本自带摄像头.
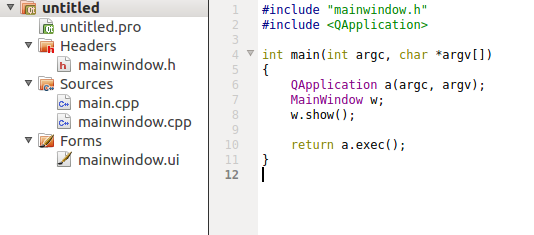
Step1:用Qt creator新建Qt Widgets Application工程
按照提示下一步即可创建模板工程,如图,并修改.pro文件添加 QT +=multimedia,QT+=multimediawidgets项
Step2:双击mainwindow.ui启动qt designer可视化布局界面
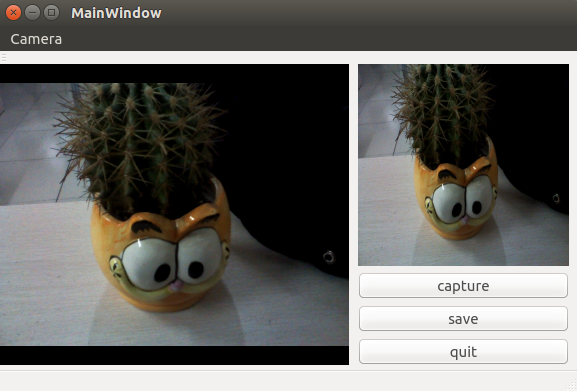
首先在布局左侧放置一个Horizental Layout控件,修改对象名为ImageView,用于图像预览显示;再在右侧放一个Vertical Layout 控件,依次在其中放置一个label和三个Push Button,修改label的对象名为ImageCapture,用于显示捕获的图像,修改按钮的显示名称及对象名分别为buttonCapture, buttonSave, buttonQuit,拖动控件到合适的布局,如图

Step3:修改mainwindow.h
源码如下


#ifndef MAINWINDOW_H
#define MAINWINDOW_H

#include <QMainWindow>
#include <QCamera>
#include <QCameraViewfinder>
#include <QCameraImageCapture>
#include <QFileDialog>


namespace Ui {
class MainWindow;
}

class QCamera;
class QCameraViewfinder;
class QCameraImageCapture;

class MainWindow : public QMainWindow
{
Q_OBJECT

public:
explicit MainWindow(QWidget *parent = 0);
~MainWindow();

private slots:
void captureImage();
void displayImage(int,QImage);
void saveImage();

private:
Ui::MainWindow *ui;

QCamera *camera;
QCameraViewfinder *viewfinder;
QCameraImageCapture *imageCapture;
};

#endif // MAINWINDOW_H
Step4:修改mainwindow.cpp
源码如下
#include "mainwindow.h"
#include "ui_mainwindow.h"

MainWindow::MainWindow(QWidget *parent) :
QMainWindow(parent),
ui(new Ui::MainWindow)
{
ui->setupUi(this);

camera=new QCamera(this);
viewfinder=new QCameraViewfinder(this);
imageCapture=new QCameraImageCapture(camera);

ui->ImageView->addWidget(viewfinder);
ui->ImageCapture->setScaledContents(true);

camera->setViewfinder(viewfinder);
camera->start();

connect(imageCapture, SIGNAL(imageCaptured(int,QImage)), this, SLOT(displayImage(int,QImage)));

connect(ui->buttonCapture, SIGNAL(clicked()), this, SLOT(captureImage()));
connect(ui->buttonSave, SIGNAL(clicked()), this, SLOT(saveImage()));
connect(ui->buttonQuit, SIGNAL(clicked()), qApp, SLOT(quit()));
}

MainWindow::~MainWindow()
{
delete ui;
}

void MainWindow::captureImage()
{
ui->statusBar->showMessage(tr("capturing..."), 1000);
imageCapture->capture();
}

void MainWindow::displayImage(int , QImage image)
{
ui->ImageCapture->setPixmap(QPixmap::fromImage(image));

ui->statusBar->showMessage(tr("capture OK!"), 5000);
}

void MainWindow::saveImage()
{
QString fileName=QFileDialog::getSaveFileName(this, tr("save file"), QDir::homePath(), tr("jpegfile(*.jpg)"));
if(fileName.isEmpty()) {
ui->statusBar->showMessage(tr("save cancel"), 5000);
return;
}
const QPixmap* pixmap=ui->ImageCapture->pixmap();
if(pixmap) {
pixmap->save(fileName);
ui->statusBar->showMessage(tr("save OK"), 5000);
}
}
Step5:编译工程效果如下
总结:QCamera类封装了很多底层操作,为了更进一步地了解Linux下摄像头的调用机制,我将在后续探讨V4L2及ioctl操作摄像头的机理。