我从开始学微信小程序到最后完全写完这个小程序耗时四天,可以说开发难度非常之低,门槛也非常低,之前从来没接触过微信小程序,重新写下开发记录。
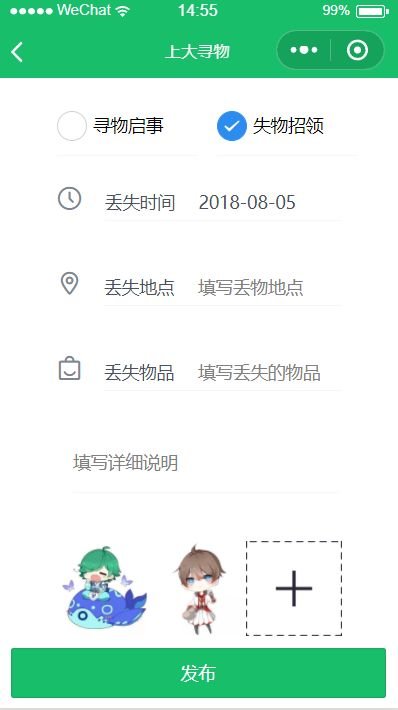
先放图:

1.前端开发
前端我用到了iview的ui框架,因为微信小程序的原生ui库并不是那么美观,然后我也是业余的嘛,就用iview的也不为过吧。
我基本是每个页面都写一个具体的内容的,开发的不是很纯粹,因为项目比较小,一般是要写个components的,当时才入门,不懂vue,后来懂了,也用来开发了很多东西。
微信小程序的前端只需要写四个文件,json配置文件、wxml文件(类似html)、wxss布局文件(类似css)、js文件(类似vue),我就只贴一个页面的代码
<view class='container'>
  <view class="content" wx:for="{{arr}}" wx:key="{{item.id}}">
    <i-card title="{{item.nickName}}" thumb="{{item.avatarUrl ? item.avatarUrl:'../../images/default.jpg'}}">
      <view slot="extra">
        <block wx:if="{{item.type=='寻物启事'}}">
          <view><i-icon type="clock" size="22" />丢失时间:{{item.time}}</view>
          <view><i-icon type="coordinates" size="22" />丢失地点:{{item.place}}</view>
          <view><i-icon type="commodity" size="22" />丢失类型:{{item.types}}</view>
        </block>
        <block wx:elif="{{item.type=='失物招领'}}">
          <view><i-icon type="clock" size="22" />发现时间:{{item.time}}</view>
          <view><i-icon type="coordinates" size="22" />发现地点:{{item.place}}</view>
          <view><i-icon type="commodity" size="22" />发现类型:{{item.types}}</view>
        </block>
      </view>
      <view slot="content">
        <view class="tp">#{{item.type}}</view>
      <view>{{item.content}}</view>
      <view class="content image" wx:if="{{item.pic1}}">
      <view wx:if="{{item.pic1}}"><image src="{{item.pic1}}"></image></view>
      <view wx:if="{{item.pic2}}"><image src="{{item.pic2}}"></image></view>
      <view wx:if="{{item.pic3}}"><image src="{{item.pic3}}"></image></view>
      </view>
      </view>

      <view slot="footer">发布时间:{{item.postTime}}</view>
      <view slot="footer">找回状态:{{item.state}}
      <view class="btn" >
          <button type="primary" size="mini" class="btn1" wx:if="{{item.state=='未找回'}}" bindtap='changeState' id="{{item.id}}">确认找回</button>
          <button type='warn' size="mini" class="btn2" bindtap='deletePost' id="{{item.id}}">删除信息</button>
      </view>
      </view>
    </i-card>
  </view>
</view>
.container{
   100%;
}
.content{
  margin-top: 10px;
  margin-bottom: 20px;
   100%;
  overflow: hidden;
}
.tp{
  color: #2b85e4;
  margin-bottom: 10px;
}
image{
   33.33%;
  height: 200rpx;
  float: left;
}
.content.image{
 100%;
height: 200rpx;
}
.btn1{
  float: left;
  margin-top: 10px;
  margin-bottom: 15px;
}
.btn2{
  float:right;
  margin-top: 10px;
  margin-bottom: 15px;
}
.btn{
   100%;
}
{
  "usingComponents":{
    "i-card":"../../iView/card/index",
    "i-icon":"../../iView/icon/index"
  },
  "enablePullDownRefresh":true
}
const utils=require("../../utils/util.js")
const app=getApp()
Page({
  data: {
    arr:null
  },

  /**
   * 生命周期函数--监听页面加载
   */
  onLoad: function (options) {
    this.loadData()
  },
  loadData:function(){
    var openId = app.globalData.userInfo.openId
    utils.showMypost(openId).then((data) => {
      this.setData({
        arr: data
      })
    })
  },
  onPullDownRefresh: function () {
    var openId = app.globalData.userInfo.openId
    wx.showNavigationBarLoading()
    utils.showMypost(openId).then((data)=>{
      this.setData({
        arr:data
      })
      setTimeout(function () {
        // complete
        wx.hideNavigationBarLoading() //完成停止加载
        wx.stopPullDownRefresh() //停止下拉刷新
      }, 1500)
    })
  },
  changeState:function(e){
    var id=e.target.id
    utils.changePoststate(id).then((res)=>{
      if(res){
        var data = this.data.arr
        app.globalData.changed=true
        for(let i=0;i<data.length;i++){
          if(data[i].id==id){
            data[i].state="已找回"
            break
          }
        }
        this.setData({
          arr:data
        })
      }

    })
  },
  deletePost:function(e){
    const id = e.target.id
    utils.deletePost(id).then((res)=>{
      var data=this.data.arr
      app.globalData.changed = true
      for(let i=0;i<data.length;i++){
        if(data[i].id==id){
          data.splice(i,1)
          break
        }
      }
      this.setData({
        arr:data
      })
    })
  },
  onShow:function(){

    if (!app.globalData.isBind) {
      wx.showModal({
        title: '绑定账号提示',
        content: '检测到您没有绑定上海大学一卡通账号,不绑定会影响程序相应的功能,建议您前往绑定,绑定后不再弹出此信息',
        confirmText: "绑定",
        success: function (res) {
          if (res) {
            wx.navigateTo({
              url: '../login/index',
            })
          }
        }
      })
    }
    if(app.globalData.mychanged){
      this.loadData()
      app.globalData.mychanged=false
    }
  }

})
逻辑跟vue差不多
2.后端开发
后端貌似直接下载的微信官方的nodejs例子,在此基础上进行了修改。
先在routes里面配置好
/**
 * ajax 服务路由集合
 */
const router = require('koa-router')({
    prefix: '/weapp'
})
const controllers = require('../controllers')

// 从 sdk 中取出中间件
// 这里展示如何使用 Koa 中间件完成登录态的颁发与验证
const { auth: { authorizationMiddleware, validationMiddleware } } = require('../qcloud')

// --- 登录与授权 Demo --- //
// 登录接口
router.get('/login', authorizationMiddleware, controllers.login)
// 用户信息接口(可以用来验证登录态)
router.get('/user', validationMiddleware, controllers.user)

// --- 图片上传 Demo --- //
// 图片上传接口,小程序端可以直接将 url 填入 wx.uploadFile 中
router.post('/upload', controllers.upload)

// --- 信道服务接口 Demo --- //
// GET  用来响应请求信道地址的
//router.get('/tunnel', controllers.tunnel.get)
// POST 用来处理信道传递过来的消息
//router.post('/tunnel', controllers.tunnel.post)

// --- 客服消息接口 Demo --- //
// GET  用来响应小程序后台配置时发送的验证请求
//router.get('/message', controllers.message.get)
router.get('/showAllpost',controllers.show.showAllpost)
// POST 用来处理微信转发过来的客服消息
//router.post('/message', controllers.message.post)
router.post('/showMypost',controllers.show.showMypost)
router.post('/changePoststate',controllers.show.changePoststate)
router.post('/deletePost',controllers.show.deletePost)
router.post('/addPost',controllers.show.addPost)
router.post('/userDetail',controllers.shuUser.userDetail)
router.post('/bind',controllers.shuUser.bind)
router.post('/checkBind',controllers.shuUser.checkBind)
router.get('/test',controllers.show.test)
module.exports = router
controller其中之一
const {mysql}=require('../qcloud')

async function showAllpost(ctx,next){
    try{
        const posts=await mysql('posts').select('*').orderBy('id','desc')
            ctx.state.data=posts
    }catch(e){
        ctx.state.code=-1
    }
}
async function showMypost(ctx,next){
    try{
        const openId=ctx.request.body.openId
        if(openId){
            const myposts=await mysql('posts').whereRaw('openId=?',[openId]).orderBy('id','desc')
            ctx.state.data=myposts
        }else{
            ctx.state.code=-1
        }
    }catch(e){
        ctx.state.code=-1
    }

}
async function changePoststate(ctx,next){
    try{
        const id=ctx.request.body.id
        if(id){
            const result=await mysql("posts").whereRaw("id=?",[id]).update({
                state:"已找回"
            })
            ctx.state.data=result
        }else{
            ctx.state.code=-1
        }
    }catch(e){
        ctx.state.code=-1
    }
}
async function deletePost(ctx,next){
    try{
        const id=ctx.request.body.id
        var result = await mysql("posts").whereRaw("id=?",[id]).del()
        if(result==''){
            ctx.state.data=false
        }else{
            ctx.state.data=true
        }
    }catch(e){
        ctx.state.code=-1
    }
}
async function addPost(ctx,next){
    const {openId,nickName,type,time,place,types,state,postTime,content,pic1,pic2,pic3,avatarUrl}=ctx.request.body
    try{
        var result=await mysql("posts").insert({openId,nickName,type,time,place,types,state,postTime,content,pic1,pic2,pic3,avatarUrl})
        ctx.state.data=result
    }catch(e){
        ctx.state.code=-1
    }
}
async function test(ctx,next){

    const result=await mysql("users").select().limit(1).whereRaw("openId=?",['oz6aG5HHsfn3M8rhdn3eJtTs6xPY'])
    ctx.state.data=result
}
module.exports={
    showAllpost,showMypost,changePoststate,deletePost,addPost,test
}
大致是这样吧。