一、部署ingress-nginx
获取最新更新以及文章用到的软件包,请移步点击:查看更新
rancher默认使用ingress暴露UI到集群外部供用户访问,所以需要自行部署ingress-controller,以部署ingress-nginx-controller为例。
1、安装helm
version=v3.3.1
#从华为开源镜像站下载
curl -LO curl -LO https://repo.huaweicloud.com/helm/v3.1.0/helm-v3.1.0-linux-amd64.tar.gz
tar -zxvf  helm-v3.1.0-linux-amd64.tar.gz
mv linux-amd64/helm /usr/local/bin/helm && rm -rf linux-amd64
添加ingress-nginx helm repo
helm repo add ingress-nginx https://kubernetes.github.io/ingress-nginx
使用helm部署ingress-nginx,默认镜像为gcr.io,可自行在dockerhub搜索镜像替换:
helm install ingress-nginx
  --namespace ingress-nginx
  --create-namespace
  --set controller.image.repository=lizhenliang/nginx-ingress-controller
  --set controller.image.tag=0.30.0
  --set controller.image.digest=null
  --set controller.service.type=NodePort
  ingress-nginx/ingress-nginx
确认ingress-nginx就绪
[root@k8s-master2 ~]# kubectl -n ingress-nginx get pods
NAME                                       READY   STATUS    RESTARTS   AGE
ingress-nginx-controller-98bc9c78c-gpklh   1/1     Running   0          45m
[root@k8s-master2 ~]# kubectl -n ingress-nginx get svc
NAME                                 TYPE        CLUSTER-IP   EXTERNAL-IP   PORT(S)                      AGE
ingress-nginx-controller             NodePort    10.0.0.98    <none>        80:30381/TCP,443:32527/TCP   45m
ingress-nginx-controller-admission   ClusterIP   10.0.0.47    <none>        443/TCP                      45m
2、部署rancher容器平台
参考:https://rancher.com/docs/rancher/v2.x/en/installation/install-rancher-on-k8s/
添加rancher helm chart
helm repo add rancher-latest https://releases.rancher.com/server-charts/latest
安装cert-manager
kubectl apply --validate=false -f https://github.com/jetstack/cert-manager/releases/download/v0.15.0/cert-manager.crds.yaml

helm repo add jetstack https://charts.jetstack.io
helm repo update

helm install cert-manager
--namespace cert-manager
--create-namespace
--version v0.15.0
jetstack/cert-manager
部署rancher,注意hostname必须为dns域名形式。
helm install rancher
--namespace cattle-system
--create-namespace
--set hostname=rancher.bbdops.com
--version 2.5.1
rancher-latest/rancher

修改域名:
删除老的ranher
helm list -n cattle-system
helm delete  rancher-webhook -n cattle-system
helm delete  rancher-n cattle-system
再去创建
查看创建的资源
[root@k8s-master2 ~]# kubectl get pods -A -o wide
NAMESPACE                 NAME                                         READY   STATUS              RESTARTS   AGE    IP                NODE          NOMINATED NODE   READINESS GATES
cattle-system             helm-operation-45x2l                         1/2     Error               0          15m    10.244.36.69      k8s-node1     <none>           <none>
cattle-system             helm-operation-7cr5c                         2/2     Running             0          76s    10.244.224.7      k8s-master2   <none>           <none>
cattle-system             helm-operation-cwbl4                         0/2     Completed           0          12m    10.244.224.6      k8s-master2   <none>           <none>
cattle-system             helm-operation-l5tlm                         0/2     Completed           0          11m    10.244.107.199    k8s-node3     <none>           <none>
cattle-system             helm-operation-n6t87                         0/2     Completed           0          12m    10.244.107.198    k8s-node3     <none>           <none>
cattle-system             helm-operation-npdhj                         0/2     Completed           0          14m    10.244.107.197    k8s-node3     <none>           <none>
cattle-system             helm-operation-tq8hl                         2/2     Running             0          9s     10.244.107.202    k8s-node3     <none>           <none>
cattle-system             helm-operation-vg45m                         0/2     Completed           0          16s    10.244.36.70      k8s-node1     <none>           <none>
cattle-system             helm-operation-zlm7b                         0/2     Completed           0          13m    10.244.224.5      k8s-master2   <none>           <none>
cattle-system             rancher-7797675cb7-hqw8n                     1/1     Running             3          26m    10.244.224.4      k8s-master2   <none>           <none>
cattle-system             rancher-7797675cb7-w58nw                     1/1     Running             2          26m    10.244.159.131    k8s-master1   <none>           <none>
cattle-system             rancher-7797675cb7-x24jm                     1/1     Running             2          26m    10.244.169.131    k8s-node2     <none>           <none>
cattle-system             rancher-webhook-6f69f5fd94-qkhg8             1/1     Running             0          12m    10.244.159.133    k8s-master1   <none>           <none>
cattle-system             rancher-webhook-b5b7b76c4-wrrcz              0/1     ContainerCreating   0          73s    <none>            k8s-node3     <none>           <none>
cert-manager              cert-manager-86b8b4f4b7-v5clv                1/1     Running             3          36m    10.244.224.3      k8s-master2   <none>           <none>
cert-manager              cert-manager-cainjector-7f6686b94-whmsn      1/1     Running             5          36m    10.244.107.195    k8s-node3     <none>           <none>
cert-manager              cert-manager-webhook-66d786db8c-jfz7g        1/1     Running             0          36m    10.244.107.196    k8s-node3     <none>           <none>
fleet-system              fleet-agent-64d854c5b-jh4tf                  1/1     Running             0          11m    10.244.107.200    k8s-node3     <none>           <none>
fleet-system              fleet-controller-5db6bcbb9-5tz6f             1/1     Running             0          14m    10.244.169.132    k8s-node2     <none>           <none>
fleet-system              fleet-controller-ccc95b8cd-xq28r             0/1     ContainerCreating   0          6s     <none>            k8s-node1     <none>           <none>
fleet-system              gitjob-5997858b9c-tp6kz                      0/1     ContainerCreating   0          6s     <none>            k8s-master1   <none>           <none>
fleet-system              gitjob-68cbf8459-bcbgt                       1/1     Running             0          14m    10.244.159.132    k8s-master1   <none>           <none>
ingress-nginx             ingress-nginx-controller-98bc9c78c-gpklh     1/1     Running             0          47m    10.244.159.130    k8s-master1   <none>           <none>
kube-system               calico-kube-controllers-97769f7c7-4h8sp      1/1     Running             1          165m   10.244.224.2      k8s-master2   <none>           <none>
kube-system               calico-node-29f2b                            1/1     Running             1          165m   192.168.112.112   k8s-node1     <none>           <none>
kube-system               calico-node-854tr                            1/1     Running             1          165m   192.168.112.114   k8s-node3     <none>           <none>
kube-system               calico-node-n4b54                            1/1     Running             1          165m   192.168.112.113   k8s-node2     <none>           <none>
kube-system               calico-node-qdcc9                            1/1     Running             1          165m   192.168.112.110   k8s-master1   <none>           <none>
kube-system               calico-node-zf6gt                            1/1     Running             1          165m   192.168.112.111   k8s-master2   <none>           <none>
kube-system               coredns-6cc56c94bd-hdzmb                     1/1     Running             1          160m   10.244.169.130    k8s-node2     <none>           <none>
kubernetes-dashboard      dashboard-metrics-scraper-7b59f7d4df-plg6v   1/1     Running             1          163m   10.244.36.67      k8s-node1     <none>           <none>
kubernetes-dashboard      kubernetes-dashboard-5dbf55bd9d-kq4sw        1/1     Running             1          163m   10.244.36.68      k8s-node1     <none>           <none>
rancher-operator-system   rancher-operator-6659bbb889-88fz6            1/1     Running             0          12m    10.244.169.133    k8s-node2     <none>           <none>
查看rancher自带的ingress
[root@k8s-master2 ~]# kubectl -n cattle-system get ingress
NAME      CLASS    HOSTS                ADDRESS     PORTS     AGE
rancher   <none>   rancher.bbdops.com   10.0.0.98   80, 443   26m
查看ingress controller 暴露的nodeport类型service
[root@k8s-master2 ~]# kubectl -n ingress-nginx get svc
NAME                                 TYPE        CLUSTER-IP   EXTERNAL-IP   PORT(S)                      AGE
ingress-nginx-controller             NodePort    10.0.0.98    <none>        80:30381/TCP,443:32527/TCP   48m
ingress-nginx-controller-admission   ClusterIP   10.0.0.47    <none>        443/TCP                      48m
windows本地修改hosts,添加域名解析,由于是nodeport,地址为任意节点IP即可。
C:WindowsSystem32driversetchosts
192.168.112.110 rancher.bbdops.com
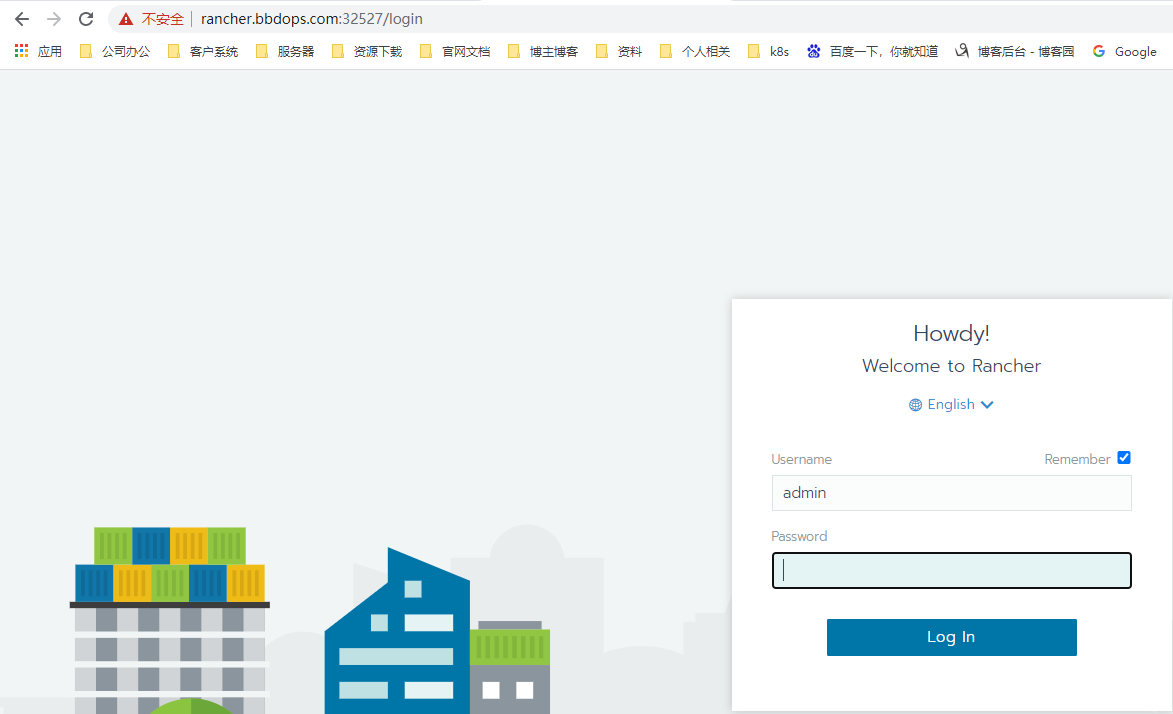
浏览器登录rancher UI
https://rancher.bbdops.com:32527
首先修改密码,然后选择直接使用现有集群:
3、删除更新
[root@k8s-master1 ~]# helm list -n cattle-system
NAME               NAMESPACE        REVISION    UPDATED                                    STATUS      CHART                            APP VERSION
rancher            cattle-system    1           2021-04-12 05:35:35.715062637 -0400 EDT    deployed    rancher-2.5.1                    v2.5.1
rancher-webhook    cattle-system    1           2021-04-12 10:00:18.825402952 +0000 UTC    deployed    rancher-webhook-0.1.0-beta900    0.1.0-beta9
[root@k8s-master1 ~]# helm delete rancher rancher-webhook -n cattle-system
release "rancher" uninstalled
release "rancher-webhook" uninstalled
二、安装本地仓库(docker私有仓库服务器上)
1、修改配置文件
harbor私有仓库下载地址:https://github.com/goharbor/harbor/releases/tag/

wget https://github.com/goharbor/harbor/releases/download/v1.9.2/harbor-offline-installer-v1.9.2.tgz
tar -zxf harbor-offline-installer-v1.9.2.tgz -C /opt/
cd /opt/
mv harbor harbor-1.9.2
ln -s /opt/harbor-1.9.2 /opt/harbor  #方便版本管理

编辑harbor配置文件:
vim /opt/harbor/harbor.yml
hostname: harbor.od.com #这里添加的是我们开始在hdss7-11的自建dns上添加的域名解析
port: 180 #避免和nginx端口冲突
data_volume: /data/harbor
location: /data/harbor/logs
创建数据目录和日志目录
mkdir -p /data/harbor/logs
2、接下来安装docker-compose
Docker Compose是 docker 提供的一个命令行工具,用来定义和运行由多个容器组成的应用。使用 compose,我们可以通过 YAML 文件声明式的定义应用程序的各个服务,并由单个命令完成应用的创建和启动。
yum install docker-compose -y   #根据网络情况不同,可能需要一些时间,也可以下载下来放到/usr/local/bin/下,给个执行权限就行
执行harbor脚本:
sh /opt/harbor/install.sh #根据网络情况不同,可能需要一些时间
cd /opt/harbor
docker-compose ps

3、编辑nginx配置文件
vi /etc/nginx/conf.d/harbor.bbdops.com.conf
server {
    listen       80;
    server_name  harbor.bbdops.com;

    client_max_body_size 4000m;

    location / {
        proxy_pass http://127.0.0.1:180;
    }
}
启动nginx并设置开机启动:

systemctl start nginx
systemctl enable nginx

试着访问harbor,使用宿主机浏览器打开harbor.od.com,如果访问不了,检查dns是否是10.4.7.11,也就是部署bind服务的服务器IP,也可以做host解析:harbor.od.com
默认账号:admin
默认密码:Harbor12345
登录后创建一个新的仓库,一会测试用
4、私有仓库推镜像
docker pull nginx:1.7.9
docker login harbor.od.com
docker tag 84581e99d807 harbor.od.com/public/nginx:v1.7.9
docker push harbor.od.com/public/nginx:v1.7.9
5、重启harbor命令
docker-compose down   关闭
cd /opt/harbor
./prepare                      更新配置文件
docker-compose up -d   启动
6、修改每台上的/etc/docker/daemon.json文件
{"registry-mirrors": ["https://b9pmyelo.mirror.aliyuncs.com"]
}
7、hosts文件做解析
cat /etc/hosts
127.0.0.1   localhost localhost.localdomain localhost4 localhost4.localdomain4
::1         localhost localhost.localdomain localhost6 localhost6.localdomain6
192.168.112.110  k8s-master1   harbor.bbdops.com
192.168.112.111  k8s-master2   dashboard.bbdops.com
192.168.112.112  k8s-node1     rancher.bbdops.com
192.168.112.113  k8s-node2
192.168.112.114  k8s-node3
192.168.112.115  k8s-node4
8、删除harbor记得删除harbor创建的网卡,否则同一套k8s再去安装会引起网络插件报错
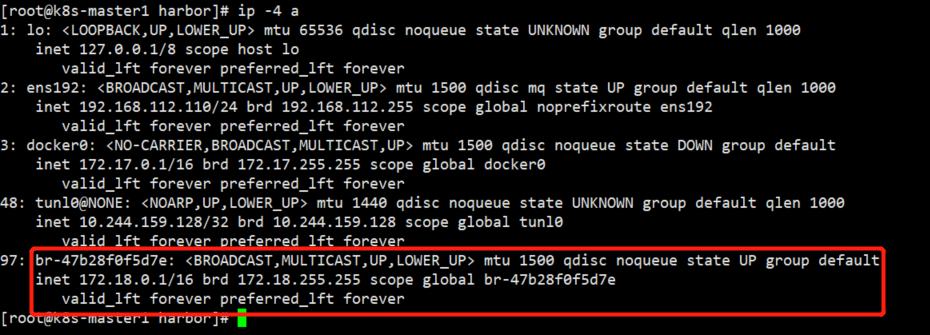
docker network ls                             查看docker网络
docker network rm harbor_harbor               删除占用ip的网桥
三、docker远程登录https的harbor
1、部署harbor
echo -n "192.168.112.110 harbor.bbdops.com" >> /etc/hosts
2、配置文件如下,把http给禁止了
cat harbor.yml
# Configuration file of Harbor

# The IP address or hostname to access admin UI and registry service.
# DO NOT use localhost or 127.0.0.1, because Harbor needs to be accessed by external clients.
hostname: harbor.bbdops.com

# http related config
#http:
  # port for http, default is 80. If https enabled, this port will redirect to https port
#  port: 80

# https related config
https:
  # https port for harbor, default is 443
  port: 443
  # The path of cert and key files for nginx
  certificate: /opt/harbor/ssl/harbor.bbdops.com.pem
  private_key: /opt/harbor/ssl/harbor.bbdops.com-key.pem

# # Uncomment following will enable tls communication between all harbor components
# internal_tls:
#   # set enabled to true means internal tls is enabled
#   enabled: true
#   # put your cert and key files on dir
#   dir: /etc/harbor/tls/internal

# Uncomment external_url if you want to enable external proxy
# And when it enabled the hostname will no longer used
# external_url: https://reg.mydomain.com:8433

# The initial password of Harbor admin
# It only works in first time to install harbor
# Remember Change the admin password from UI after launching Harbor.
harbor_admin_password: Harbor12345

# Harbor DB configuration
database:
  # The password for the root user of Harbor DB. Change this before any production use.
  password: root123
  # The maximum number of connections in the idle connection pool. If it <=0, no idle connections are retained.
  max_idle_conns: 50
  # The maximum number of open connections to the database. If it <= 0, then there is no limit on the number of open connections.
  # Note: the default number of connections is 100 for postgres.
  max_open_conns: 100

# The default data volume
data_volume: /data/harbor

# Harbor Storage settings by default is using /data dir on local filesystem
# Uncomment storage_service setting If you want to using external storage
# storage_service:
#   # ca_bundle is the path to the custom root ca certificate, which will be injected into the truststore
#   # of registry's and chart repository's containers.  This is usually needed when the user hosts a internal storage with self signed certificate.
#   ca_bundle:

#   # storage backend, default is filesystem, options include filesystem, azure, gcs, s3, swift and oss
#   # for more info about this configuration please refer https://docs.docker.com/registry/configuration/
#   filesystem:
#     maxthreads: 100
#   # set disable to true when you want to disable registry redirect
#   redirect:
#     disabled: false

# Clair configuration
clair:
  # The interval of clair updaters, the unit is hour, set to 0 to disable the updaters.
  updaters_interval: 12

# Trivy configuration
trivy:
  # ignoreUnfixed The flag to display only fixed vulnerabilities
  ignore_unfixed: false
  # skipUpdate The flag to enable or disable Trivy DB downloads from GitHub
  #
  # You might want to enable this flag in test or CI/CD environments to avoid GitHub rate limiting issues.
  # If the flag is enabled you have to manually download the `trivy.db` file and mount it in the
  # /home/scanner/.cache/trivy/db/trivy.db path.
  skip_update: false
  #
  # insecure The flag to skip verifying registry certificate
  insecure: false
  # github_token The GitHub access token to download Trivy DB
  #
  # Trivy DB contains vulnerability information from NVD, Red Hat, and many other upstream vulnerability databases.
  # It is downloaded by Trivy from the GitHub release page https://github.com/aquasecurity/trivy-db/releases and cached
  # in the local file system (/home/scanner/.cache/trivy/db/trivy.db). In addition, the database contains the update
  # timestamp so Trivy can detect whether it should download a newer version from the Internet or use the cached one.
  # Currently, the database is updated every 12 hours and published as a new release to GitHub.
  #
  # Anonymous downloads from GitHub are subject to the limit of 60 requests per hour. Normally such rate limit is enough
  # for production operations. If, for any reason, it's not enough, you could increase the rate limit to 5000
  # requests per hour by specifying the GitHub access token. For more details on GitHub rate limiting please consult
  # https://developer.github.com/v3/#rate-limiting
  #
  # You can create a GitHub token by following the instuctions in
  # https://help.github.com/en/github/authenticating-to-github/creating-a-personal-access-token-for-the-command-line
  #
  # github_token: xxx

jobservice:
  # Maximum number of job workers in job service
  max_job_workers: 10

notification:
  # Maximum retry count for webhook job
  webhook_job_max_retry: 10

chart:
  # Change the value of absolute_url to enabled can enable absolute url in chart
  absolute_url: disabled

# Log configurations
log:
  # options are debug, info, warning, error, fatal
  level: info
  # configs for logs in local storage
  local:
    # Log files are rotated log_rotate_count times before being removed. If count is 0, old versions are removed rather than rotated.
    rotate_count: 50
    # Log files are rotated only if they grow bigger than log_rotate_size bytes. If size is followed by k, the size is assumed to be in kilobytes.
    # If the M is used, the size is in megabytes, and if G is used, the size is in gigabytes. So size 100, size 100k, size 100M and size 100G
    # are all valid.
    rotate_size: 200M
    # The directory on your host that store log
    location: /var/log/harbor

  # Uncomment following lines to enable external syslog endpoint.
  # external_endpoint:
  #   # protocol used to transmit log to external endpoint, options is tcp or udp
  #   protocol: tcp
  #   # The host of external endpoint
  #   host: localhost
  #   # Port of external endpoint
  #   port: 5140

#This attribute is for migrator to detect the version of the .cfg file, DO NOT MODIFY!
_version: 2.0.0

# Uncomment external_database if using external database.
# external_database:
#   harbor:
#     host: harbor_db_host
#     port: harbor_db_port
#     db_name: harbor_db_name
#     username: harbor_db_username
#     password: harbor_db_password
#     ssl_mode: disable
#     max_idle_conns: 2
#     max_open_conns: 0
#   clair:
#     host: clair_db_host
#     port: clair_db_port
#     db_name: clair_db_name
#     username: clair_db_username
#     password: clair_db_password
#     ssl_mode: disable
#   notary_signer:
#     host: notary_signer_db_host
#     port: notary_signer_db_port
#     db_name: notary_signer_db_name
#     username: notary_signer_db_username
#     password: notary_signer_db_password
#     ssl_mode: disable
#   notary_server:
#     host: notary_server_db_host
#     port: notary_server_db_port
#     db_name: notary_server_db_name
#     username: notary_server_db_username
#     password: notary_server_db_password
#     ssl_mode: disable

# Uncomment external_redis if using external Redis server
# external_redis:
#   host: redis
#   port: 6379
#   password:
#   # db_index 0 is for core, it's unchangeable
#   registry_db_index: 1
#   jobservice_db_index: 2
#   chartmuseum_db_index: 3
#   clair_db_index: 4
#   trivy_db_index: 5
#   idle_timeout_seconds: 30

# Uncomment uaa for trusting the certificate of uaa instance that is hosted via self-signed cert.
# uaa:
#   ca_file: /path/to/ca

# Global proxy
# Config http proxy for components, e.g. http://my.proxy.com:3128
# Components doesn't need to connect to each others via http proxy.
# Remove component from `components` array if want disable proxy
# for it. If you want use proxy for replication, MUST enable proxy
# for core and jobservice, and set `http_proxy` and `https_proxy`.
# Add domain to the `no_proxy` field, when you want disable proxy
# for some special registry.
proxy:
  http_proxy:
  https_proxy:
  no_proxy:
  components:
    - core
    - jobservice
    - clair
    - trivy
3、创建https证书
cat > ca-config.json <<EOF
{
  "signing": {
    "default": {
      "expiry": "87600h"
    },
    "profiles": {
      "kubernetes": {
         "expiry": "87600h",
         "usages": [
            "signing",
            "key encipherment",
            "server auth",
            "client auth"
        ]
      }
    }
  }
}
EOF

cat > ca-csr.json <<EOF
{
    "CN": "kubernetes",
    "key": {
        "algo": "rsa",
        "size": 2048
    },
    "names": [
        {
            "C": "CN",
            "L": "Beijing",
            "ST": "Beijing"
        }
    ]
}
EOF

cfssl gencert -initca ca-csr.json | cfssljson -bare ca -

cat > harbor.bbdops.com-csr.json <<EOF
{
  "CN": "www.hsops.com",
  "hosts": [],
  "key": {
    "algo": "rsa",
    "size": 2048
  },
  "names": [
    {
      "C": "CN",
      "L": "BeiJing",
      "ST": "BeiJing"
    }
  ]
}
EOF

cfssl gencert -ca=ca.pem -ca-key=ca-key.pem -config=ca-config.json -profile=kubernetes harbor.bbdops.com-csr.json | cfssljson -bare harbor.bbdops.com

证书完成如下:
[root@www harbor]# ll
总用量 36
-rw-r--r-- 1 root root  294 3月   4 13:53 ca-config.json
-rw-r--r-- 1 root root  960 3月   4 13:53 ca.csr
-rw-r--r-- 1 root root  212 3月   4 13:53 ca-csr.json
-rw------- 1 root root 1679 3月   4 13:53 ca-key.pem
-rw-r--r-- 1 root root 1273 3月   4 13:53 ca.pem
-rw-r--r-- 1 root root  964 3月   4 13:56 harbor.bbdops.com.csr
-rw-r--r-- 1 root root  186 3月   4 13:54 harbor.bbdops.com-csr.json
-rw------- 1 root root 1675 3月   4 13:56 harbor.bbdops.com-key.pem
-rw-r--r-- 1 root root 1314 3月   4 13:56 harbor.bbdops.com.pem
启动
/usr/local/harbor
./prepare   重新生成配置文件,将证书写进去
./install

####启动harbor
docker-compose up -d

####完全清除
docker-compose down -v
在192.168.112.111上创建目录如下
mkdir -p /etc/docker/certs.d/harbor.bbdops.com/
scp ca.pem  root@192.168.112.111:/etc/docker/certs.d/harbor.bbdops.com/
mv ca.pem ca.crt
登录
docker login -uadmin -pHarbor12345 harbor.bbdops.com