一,为什么要使用多模块?
1,结构更清晰,方便管理
如果只是一个小项目当然没有问题,
但如果功能越增越多则管理越来越复杂,
多模块可以使项目中模块间的结构分离
2,把项目划分成多个模块后,
能够方便模块的复用
例如:web/api/管理后台
都会用到一些数据表,
对数据表的封装(mapper)会是都需要复用的模块
3,减少各个模块对不必要功能的依赖,
4,不同的模块可以由不同的工程师来维护,
避免重要的代码被经验不足的工程师改动受影响
说明:刘宏缔的架构森林是一个专注架构的博客,地址:https://www.cnblogs.com/architectforest
对应的源码可以访问这里获取: https://github.com/liuhongdi/
说明:作者:刘宏缔 邮箱: 371125307@qq.com
二,演示项目的相关信息
1,项目地址:
https://github.com/liuhongdi/multimodule
2,项目说明:
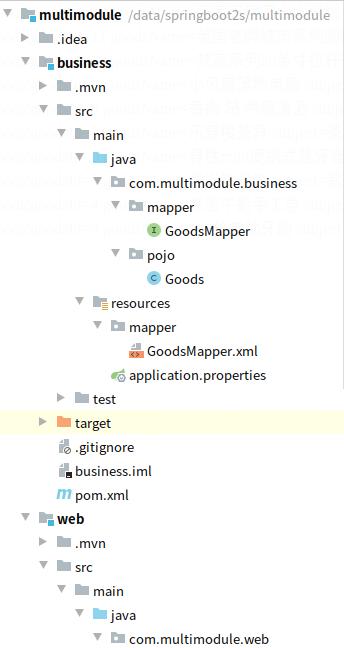
我们创建两个子模块:
business模块: pojo/mapper这些功能都在这个模块中
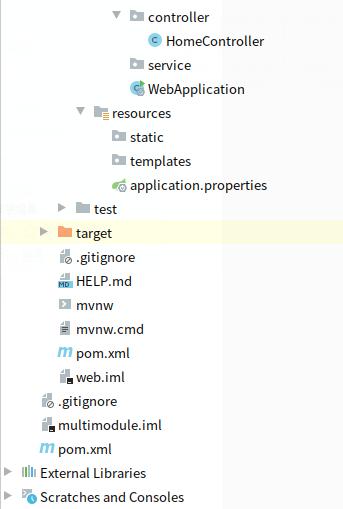
web模块: controller/service等功能在这个模块中
3,项目结构:如图:
三,创建一个空的父项目
1,新建一个空项目:
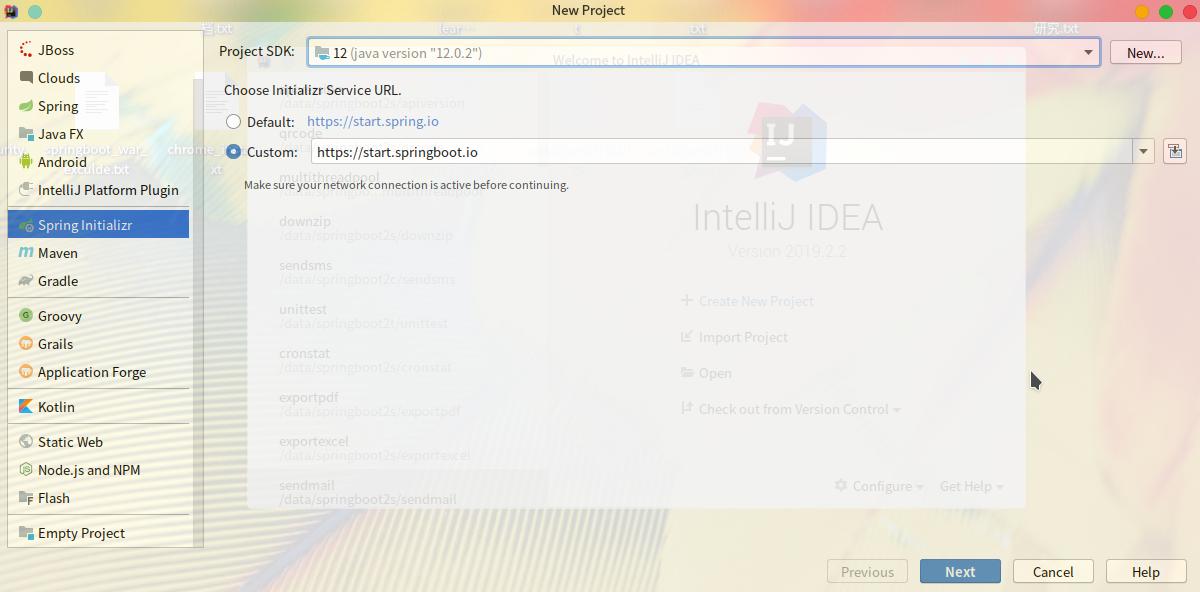
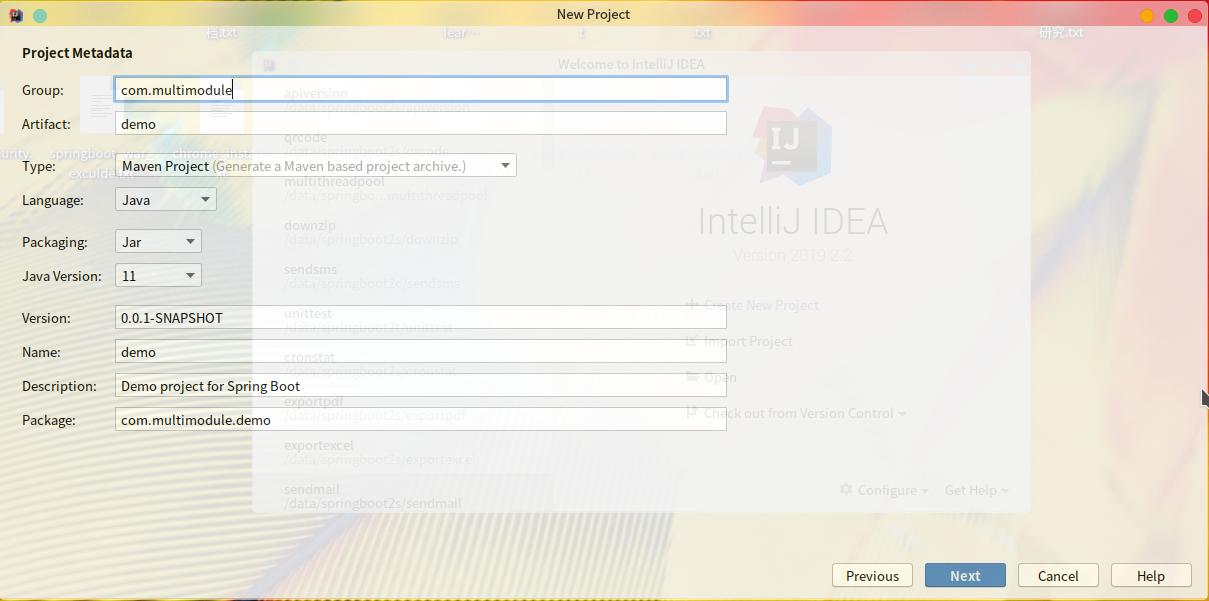
说明:项目group为:com.multimodule
artifact用: demo

依赖保持为空,点next
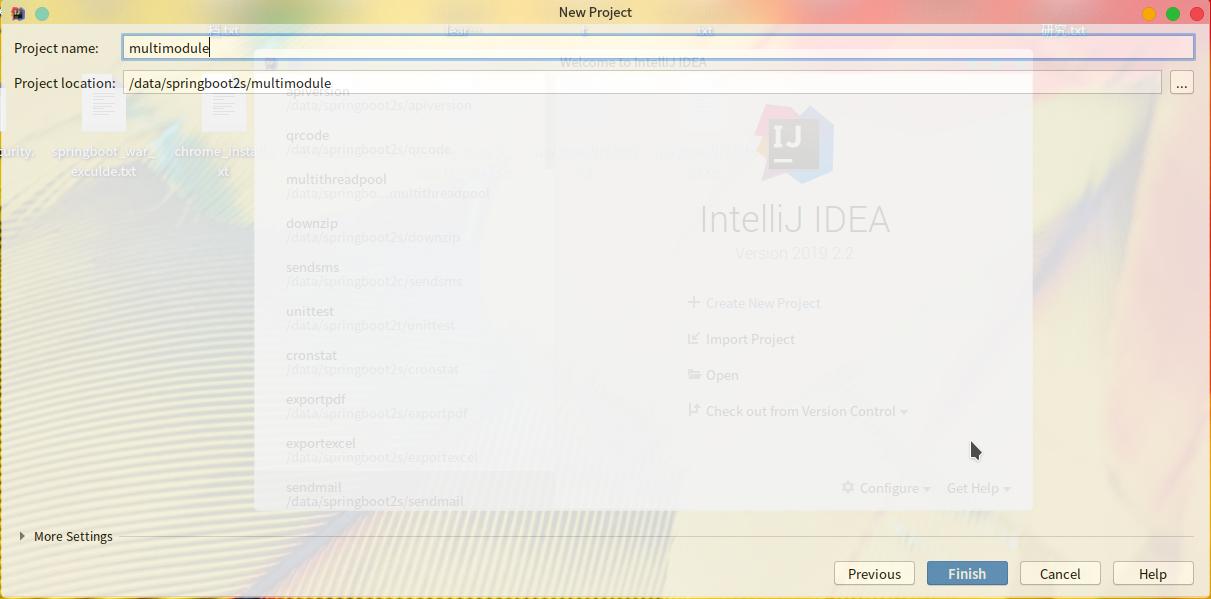
指定位置后点 finish
2,修改pom.xml
增加一行:
<packaging>pom</packaging>
说明:表示使用打包时使用maven的分模块管理打包
新增module
    <modules>
        <module>business</module>
        <module>web</module>
    </modules>
删除pom.xml中的build这个tag
删除pom.xml中的dependencies这个tag
说明:目的是各个module各自添加自己的依赖
附:最终的pom.xml:
<?xml version="1.0" encoding="UTF-8"?>
<project xmlns="http://maven.apache.org/POM/4.0.0" xmlns:xsi="http://www.w3.org/2001/XMLSchema-instance"
    xsi:schemaLocation="http://maven.apache.org/POM/4.0.0 https://maven.apache.org/xsd/maven-4.0.0.xsd">
    <modelVersion>4.0.0</modelVersion>
    <parent>
        <groupId>org.springframework.boot</groupId>
        <artifactId>spring-boot-starter-parent</artifactId>
        <version>2.3.2.RELEASE</version>
        <relativePath/> <!-- lookup parent from repository -->
    </parent>
    <groupId>com.multimodule</groupId>
    <artifactId>demo</artifactId>
    <version>0.0.1-SNAPSHOT</version>
    <name>demo</name>
    <description>Demo project for Spring Boot</description>
    <packaging>pom</packaging>

    <modules>
        <module>business</module>
        <module>web</module>
    </modules>

    <properties>
        <java.version>11</java.version>
    </properties>

</project>
3,因为父项目不需要实现其他功能,
我们删除不需要用到的文件
(不删除也不影响使用):
删除src目录
删除mvnw
删除mvnw.cmd
删除help.md
删除.mvn
四,创建子项目business:
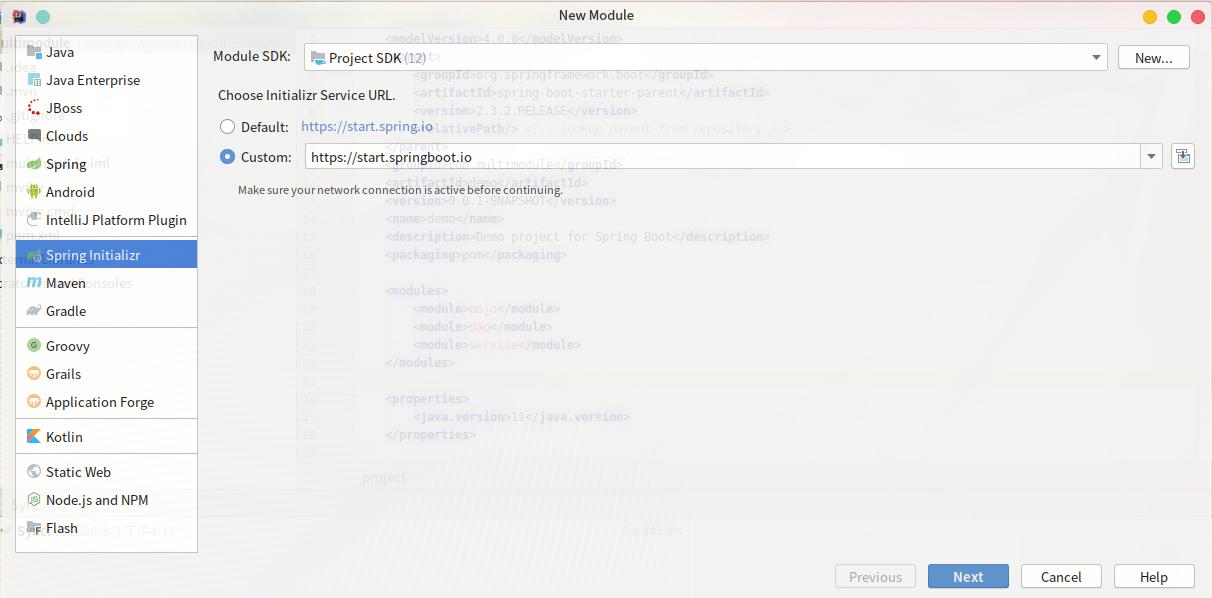
1,创建模块
在父项目上右击->new->module

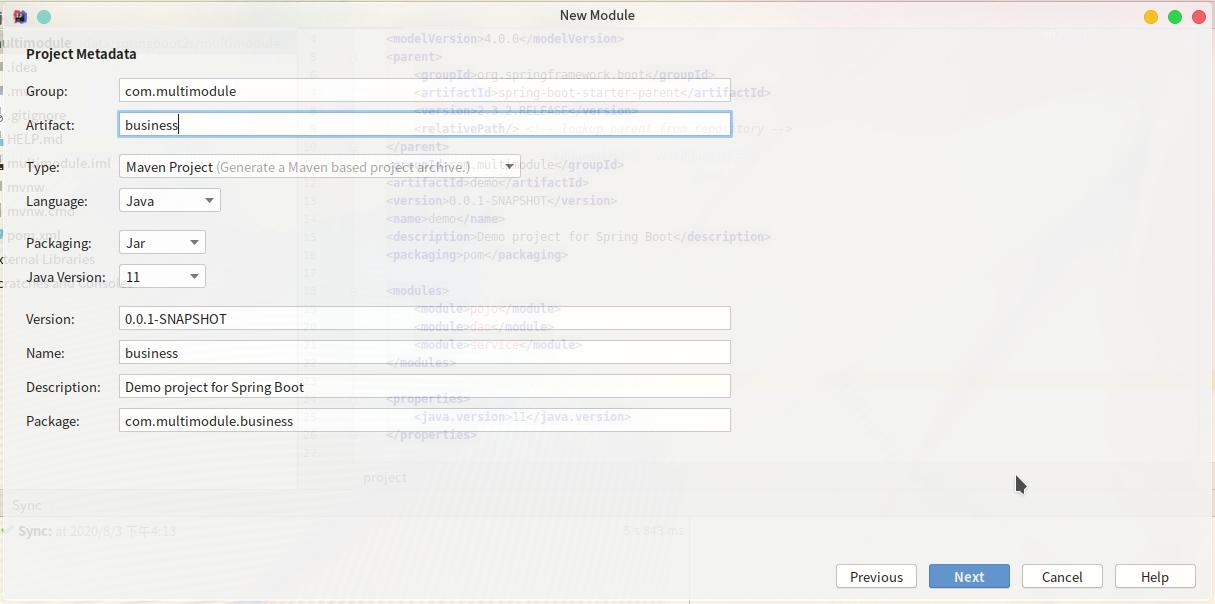
artifact命名为business

依赖选择页面,保留为空,点next
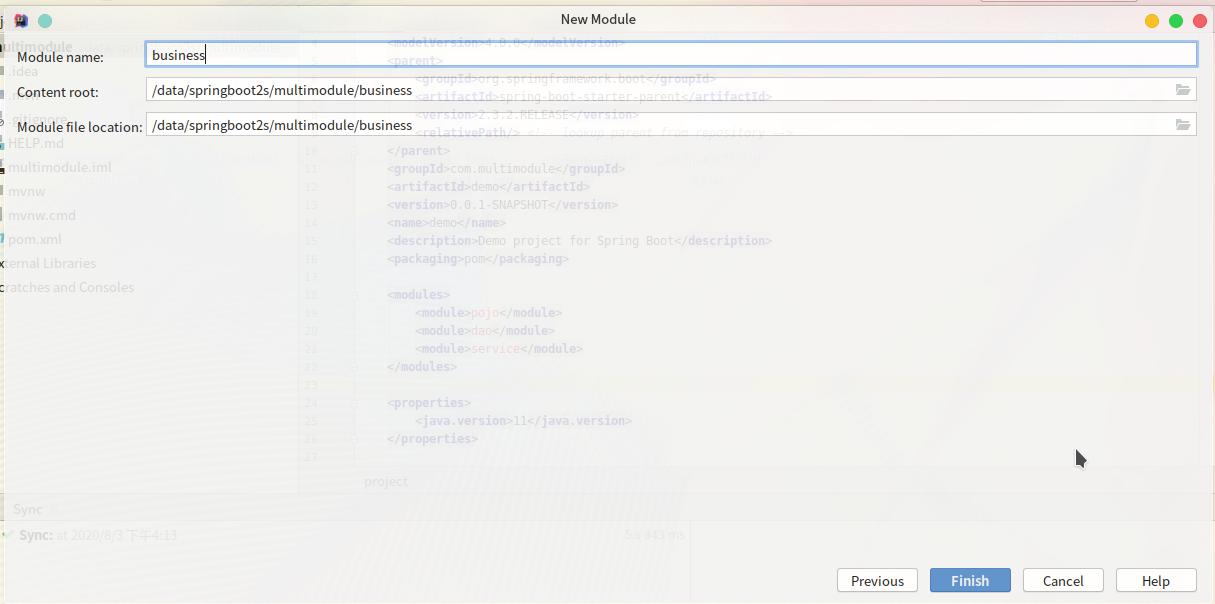
模块名字和目录,使用business,点finish
2,配置pom.xml
因为business不会被直接运行,
所以我们删除它的 build这个tag
修改parent的值:
    <parent>
        <groupId>com.multimodule</groupId>
        <artifactId>demo</artifactId>
        <version>0.0.1-SNAPSHOT</version>
    </parent>
groupId,artifactId,version这三项信息,就用父项目的信息即可
3,删除启动文件
这个模块不需要单独启动
所以删除:src/main/java/com.multimodule.business/BusinessApplication.java
五,创建子模块web:
1,创建web模块
在父项目上右击->new->module
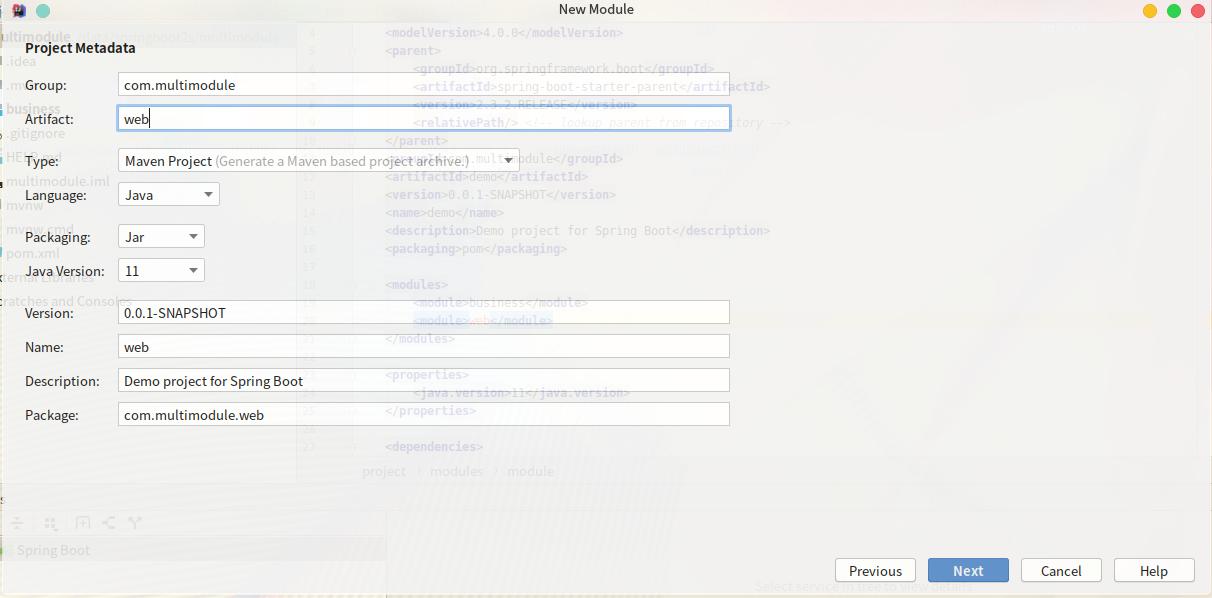
group命名为 com.multimodule,
artifact命名为:web
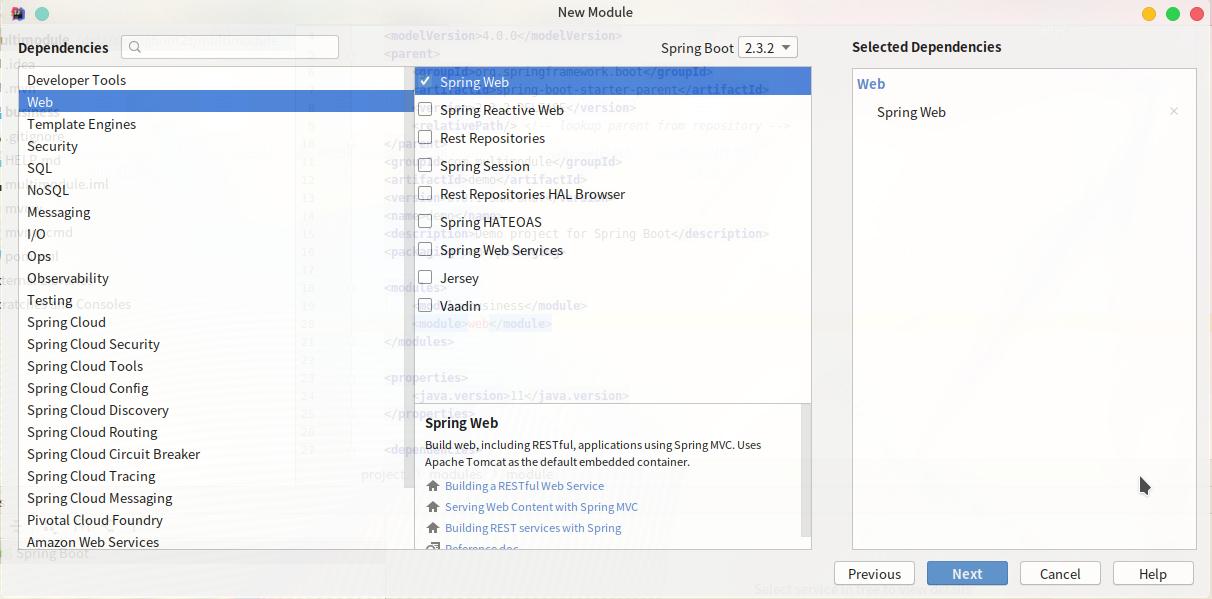
依赖选中spring web,因为此模块需要独立运行
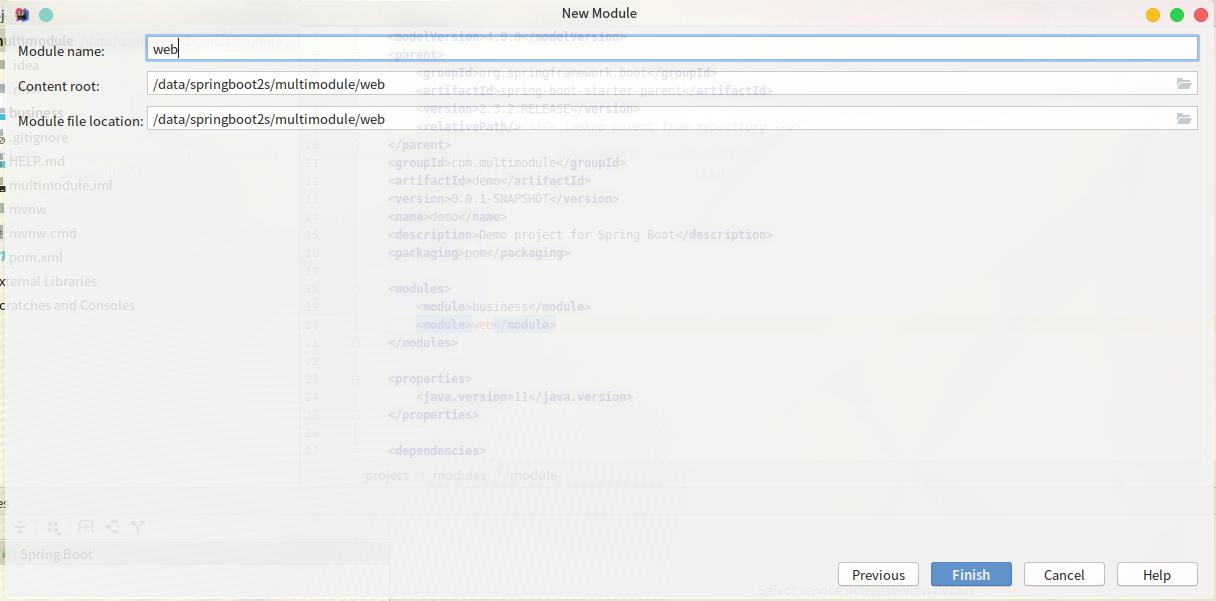
名字和位置命名为web,点finish
2,配置pom.xml
这个模块会直接运行,所以不删除build项
修改parent的值,值用父项目的相关信息即可:
    <parent>
        <groupId>com.multimodule</groupId>
        <artifactId>demo</artifactId>
        <version>0.0.1-SNAPSHOT</version>
    </parent>
增加对business模块的依赖
        <dependency>
            <groupId>com.multimodule</groupId>
            <artifactId>business</artifactId>
            <version>0.0.1-SNAPSHOT</version>
            <scope>compile</scope>
        </dependency>
3,启动文件不可删除,
因为此模块需要直接运行
六,配置文件说明:
1,web模块/application.properties
#error
server.error.include-stacktrace=always
#errorlog
logging.level.org.springframework.web=trace

#mysql
spring.datasource.url=jdbc:mysql://localhost:3306/store?characterEncoding=utf8&useSSL=false
spring.datasource.username=root
spring.datasource.password=lhddemo
spring.datasource.driver-class-name=com.mysql.cj.jdbc.Driver

#mybatis
mybatis.mapper-locations=classpath:/mapper/*Mapper.xml
mybatis.type-aliases-package=com.example.demo.mapper
mybatis.configuration.log-impl=org.apache.ibatis.logging.stdout.StdOutImpl
2,创建数据表的sql:
CREATE TABLE `goods` (
 `goodsId` int(11) NOT NULL AUTO_INCREMENT COMMENT 'id',
 `goodsName` varchar(500) CHARACTER SET utf8mb4 COLLATE utf8mb4_0900_ai_ci NOT NULL DEFAULT '' COMMENT 'name',
 `subject` varchar(200) NOT NULL DEFAULT '' COMMENT '标题',
 `price` decimal(15,2) NOT NULL DEFAULT '0.00' COMMENT '价格',
 `stock` int(11) NOT NULL DEFAULT '0' COMMENT 'stock',
 PRIMARY KEY (`goodsId`)
) ENGINE=InnoDB AUTO_INCREMENT=0 DEFAULT CHARSET=utf8mb4 COLLATE=utf8mb4_0900_ai_ci COMMENT='商品表'
七,java代码说明:
1,business模块/Goods.java
public class Goods {
    //商品id
    Long goodsId;
    public Long getGoodsId() {
        return this.goodsId;
    }
    public void setGoodsId(Long goodsId) {
        this.goodsId = goodsId;
    }

    //商品名称
    private String goodsName;
    public String getGoodsName() {
        return this.goodsName;
    }
    public void setGoodsName(String goodsName) {
        this.goodsName = goodsName;
    }

    //商品标题
    private String subject;
    public String getSubject() {
        return this.subject;
    }
    public void setSubject(String subject) {
        this.subject = subject;
    }

    //商品价格
    private BigDecimal price;
    public BigDecimal getPrice() {
        return this.price;
    }
    public void setPrice(BigDecimal price) {
        this.price = price;
    }

    //库存
    int stock;
    public int getStock() {
        return this.stock;
    }
    public void setStock(int stock) {
        this.stock = stock;
    }

    public String toString(){
        return " Goods:goodsId=" + goodsId +" goodsName=" + goodsName+" subject=" + subject+" price=" + price+" stock=" + stock;
    }
}
2,business模块/GoodsMapper.java
@Repository
@Mapper
public interface GoodsMapper {
    //get all goods
    List<Goods> selectAllGoods();
}
3,business模块/GoodsMapper.xml
<?xml version="1.0" encoding="UTF-8" ?>
<!DOCTYPE mapper
        PUBLIC "-//mybatis.org//DTD Mapper 3.0//EN"
        "http://mybatis.org/dtd/mybatis-3-mapper.dtd">
<mapper namespace="com.multimodule.business.mapper.GoodsMapper">
    <select id="selectAllGoods" resultType="com.multimodule.business.pojo.Goods">
        select * from goods order by goodsId desc
    </select>
</mapper>
4,web模块/HomeController.java
@RestController
@RequestMapping("/home")
public class HomeController {

    @Resource
    private GoodsMapper goodsMapper;

    //打印数据库中所有的商品
    @GetMapping("/home")
    public String all() {
        List<Goods> goodsList = goodsMapper.selectAllGoods();
        String retStr = "";
        for (Goods goodsOne : goodsList) {
            String oneStr = goodsOne.toString()+"<br/>";
            //i++;
            retStr += oneStr;
        }
        return retStr;
    }
}
八,测试运行
1,启动:
注意此时需要在web模块的启动文件:WebApplication上右键->选择: Run WebApplication
2,访问:
http://127.0.0.1:8080/home/home
输出如图:
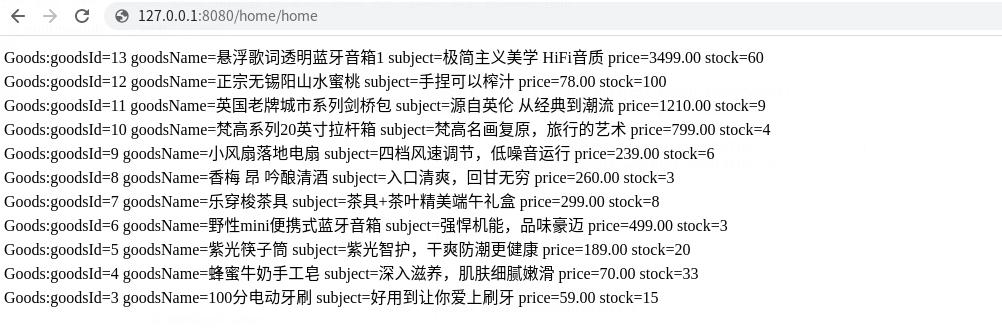
有数据返回,表示正常运行
九,查看spring boot版本:
  .   ____          _            __ _ _
 /\ / ___'_ __ _ _(_)_ __  __ _
( ( )\___ | '_ | '_| | '_ / _` |
 \/  ___)| |_)| | | | | || (_| |  ) ) ) )
  '  |____| .__|_| |_|_| |_\__, | / / / /
 =========|_|==============|___/=/_/_/_/
 :: Spring Boot ::        (v2.3.2.RELEASE)