最新教程下载:http://www.armbbs.cn/forum.php?mod=viewthread&tid=93255
第12章 STM32F429的HAL库框架设计学习
通过本章节,主要是想让大家对HAL库程序设计的基本套路有个了解,防止踩坑。
12.1 初学者重要提示
12.2 HAL库的配置文件
12.3 HAL库的时间基准
12.4 HAL库的启动流程
12.5 HAL库初始化外设
12.6 HAL库的中断处理思路
12.7 HAL库的DMA处理思路
12.8 总结
12.1 初学者重要提示
- 学习使用HAL库前,有必要对他们的基本设计框架有所了解,然后深入学习,效果更好。
- 为了方便调用,HAL库为各种外设基本都配了三套API,查询,中断和DMA。
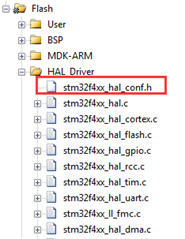
12.2 HAL库的配置文件
HAL库有一个专门的配置文件叫stm32f4xx_hal_conf.h,这个文件里面有一个很重要的参数,就是HSE_VALUE,大家所设计板子使用的实际晶振大小一定要与这个数值一致。比如V6的外置晶振是8MHz,那么这里就务必配置宏定义为:
#define HSE_VALUE ((uint32_t)8000000)
完整的代码如下:
1.    /* ########################## Module Selection ############################## */
2.    /**
3.      * @brief This is the list of modules to be used in the HAL driver
4.      */
5.    #define HAL_MODULE_ENABLED
6.    #define HAL_ADC_MODULE_ENABLED
7.    #define HAL_CAN_MODULE_ENABLED
8.    #define HAL_HCD_MODULE_ENABLED
9.
10.    /* 省略未写 */
11.
12.    /* ########################## HSE/HSI Values adaptation ##################### */
13.    /**
14.      * @brief Adjust the value of External High Speed oscillator (HSE) used in your application.
15.      *        This value is used by the RCC HAL module to compute the system frequency
16.      *        (when HSE is used as system clock source, directly or through the PLL).
17.      */
18.    #if !defined  (HSE_VALUE)
19.      #define HSE_VALUE    (8000000U) /*!< Value of the External oscillator in Hz */
20.    #endif /* HSE_VALUE */
21.
22.    #if !defined  (HSE_STARTUP_TIMEOUT)
23.      #define HSE_STARTUP_TIMEOUT    (100U)   /*!< Time out for HSE start up, in ms */
24.    #endif /* HSE_STARTUP_TIMEOUT */
25.
26.    /**
27.      * @brief Internal High Speed oscillator (HSI) value.
28.      *        This value is used by the RCC HAL module to compute the system frequency
29.      *        (when HSI is used as system clock source, directly or through the PLL).
30.      */
31.    #if !defined  (HSI_VALUE)
32.      #define HSI_VALUE    (16000000U) /*!< Value of the Internal oscillator in Hz*/
33.    #endif /* HSI_VALUE */
34.
35.    /**
36.      * @brief Internal Low Speed oscillator (LSI) value.
37.      */
38.    #if !defined  (LSI_VALUE)
39.     #define LSI_VALUE  (32000U)
40.    #endif /* LSI_VALUE */                      /*!< Value of the Internal Low Speed oscillator in Hz
41.                                                 The real value may vary depending on the variations
42.                                                 in voltage and temperature.  */
43.    /**
44.      * @brief External Low Speed oscillator (LSE) value.
45.      */
46.    #if !defined  (LSE_VALUE)
47.     #define LSE_VALUE  (32768U)    /*!< Value of the External Low Speed oscillator in Hz */
48.    #endif /* LSE_VALUE */
49.
50.    #if !defined  (LSE_STARTUP_TIMEOUT)
51.      #define LSE_STARTUP_TIMEOUT    (5000U)   /*!< Time out for LSE start up, in ms */
52.    #endif /* LSE_STARTUP_TIMEOUT */
53.
54.    /**
55.      * @brief External clock source for I2S peripheral
56.      *        This value is used by the I2S HAL module to compute the I2S clock source
57.      *        frequency, this source is inserted directly through I2S_CKIN pad.
58.      */
59.    #if !defined  (EXTERNAL_CLOCK_VALUE)
60.      #define EXTERNAL_CLOCK_VALUE    (12288000U) /*!< Value of the External oscillator in Hz*/
61.    #endif /* EXTERNAL_CLOCK_VALUE */
62.
63.    /* Tip: To avoid modifying this file each time you need to use different HSE,
64.       ===  you can define the HSE value in your toolchain compiler preprocessor. */
65.
66.    /* ########################### System Configuration ######################### */
67.    /**
68.      * @brief This is the HAL system configuration section
69.      */
70.    #define  VDD_VALUE                    (3300U) /*!< Value of VDD in mv */
71.    #define  TICK_INT_PRIORITY            (0x0FU) /*!< tick interrupt priority */
72.    #define  USE_RTOS                     0U
73.    #define  PREFETCH_ENABLE              1U
74.    #define  INSTRUCTION_CACHE_ENABLE     1U
75.    #define  DATA_CACHE_ENABLE            1U
76.
77.    #define  USE_HAL_ADC_REGISTER_CALLBACKS         0U /* ADC register callback disabled       */
78.    #define  USE_HAL_CAN_REGISTER_CALLBACKS         0U /* CAN register callback disabled       */
79.    #define  USE_HAL_CEC_REGISTER_CALLBACKS         0U /* CEC register callback disabled       */
80.    /* 省略未写 */
81.    #define  USE_HAL_UART_REGISTER_CALLBACKS        0U /* UART register callback disabled      */
82.    #define  USE_HAL_USART_REGISTER_CALLBACKS       0U /* USART register callback disabled     */
83.    #define  USE_HAL_WWDG_REGISTER_CALLBACKS        0U /* WWDG register callback disabled      */
84.
85.    /* ########################## Assert Selection ############################## */
86.    /**
87.      * @brief Uncomment the line below to expanse the "assert_param" macro in the
88.      *        HAL drivers code
89.      */
90.    /* #define USE_FULL_ASSERT    1U */
91.
92.    /* ################## Ethernet peripheral configuration ##################### */
93.
94.    /* Section 1 : Ethernet peripheral configuration */
95.
96.    /* MAC ADDRESS: MAC_ADDR0:MAC_ADDR1:MAC_ADDR2:MAC_ADDR3:MAC_ADDR4:MAC_ADDR5 */
97.    #define MAC_ADDR0   2U
98.    #define MAC_ADDR1   0U
99.    #define MAC_ADDR2   0U
100.    #define MAC_ADDR3   0U
101.    #define MAC_ADDR4   0U
102.    #define MAC_ADDR5   0U
103.
104.    /* Definition of the Ethernet driver buffers size and count */
105.    #define ETH_RX_BUF_SIZE                ETH_MAX_PACKET_SIZE /* buffer size for receive               */
106.    #define ETH_TX_BUF_SIZE                ETH_MAX_PACKET_SIZE /* buffer size for transmit              */
107.    #define ETH_RXBUFNB                    (4U)       /* 4 Rx buffers of size ETH_RX_BUF_SIZE  */
108.    #define ETH_TXBUFNB                    (4U)       /* 4 Tx buffers of size ETH_TX_BUF_SIZE  */
109.
110.    /* Section 2: PHY configuration section */
111.
112.    /* DP83848 PHY Address*/
113.    #define DP83848_PHY_ADDRESS             0x01U
114.    /* PHY Reset delay these values are based on a 1 ms Systick interrupt*/
115.    #define PHY_RESET_DELAY                 (0x000000FFU)
116.    /* PHY Configuration delay */
117.    #define PHY_CONFIG_DELAY                (0x00000FFFU)
118.
119.    #define PHY_READ_TO                     (0x0000FFFFU)
120.    #define PHY_WRITE_TO                    (0x0000FFFFU)
121.
122.    /* Section 3: Common PHY Registers */
123.
124.    #define PHY_BCR                         ((uint16_t)0x00)    /*!< Transceiver Basic Control Register   */
125.    #define PHY_BSR                         ((uint16_t)0x01)    /*!< Transceiver Basic Status Register    */
126.
127.    #define PHY_RESET                       ((uint16_t)0x8000)  /*!< PHY Reset */
128.    #define PHY_LOOPBACK                    ((uint16_t)0x4000)  /*!< Select loop-back mode */
129.    #define PHY_FULLDUPLEX_100M             ((uint16_t)0x2100)  /*!< Set the full-duplex mode at 100 Mb/s */
130.    #define PHY_HALFDUPLEX_100M             ((uint16_t)0x2000)  /*!< Set the half-duplex mode at 100 Mb/s */
131.    #define PHY_FULLDUPLEX_10M              ((uint16_t)0x0100)  /*!< Set the full-duplex mode at 10 Mb/s  */
132.    #define PHY_HALFDUPLEX_10M              ((uint16_t)0x0000)  /*!< Set the half-duplex mode at 10 Mb/s  */
133.    #define PHY_AUTONEGOTIATION             ((uint16_t)0x1000)  /*!< Enable auto-negotiation function     */
134.    #define PHY_RESTART_AUTONEGOTIATION     ((uint16_t)0x0200)  /*!< Restart auto-negotiation function    */
135.    #define PHY_POWERDOWN                   ((uint16_t)0x0800)  /*!< Select the power down mode           */
136.    #define PHY_ISOLATE                     ((uint16_t)0x0400)  /*!< Isolate PHY from MII                 */
137.
138.    #define PHY_AUTONEGO_COMPLETE           ((uint16_t)0x0020)  /*!< Auto-Negotiation process completed   */
139.    #define PHY_LINKED_STATUS               ((uint16_t)0x0004)  /*!< Valid link established               */
140.    #define PHY_JABBER_DETECTION            ((uint16_t)0x0002)  /*!< Jabber condition detected            */
141.
142.    /* Section 4: Extended PHY Registers */
143.
144.    #define PHY_SR             ((uint16_t)0x10)    /*!< PHY status register Offset                      */
145.    #define PHY_MICR           ((uint16_t)0x11)    /*!< MII Interrupt Control Register                  */
146.    #define PHY_MISR           ((uint16_t)0x12)    /*!< MII Interrupt Status and Misc. Control Register */
147.
148.    #define PHY_LINK_STATUS     ((uint16_t)0x0001)  /*!< PHY Link mask                                   */
149.    #define PHY_SPEED_STATUS    ((uint16_t)0x0002)  /*!< PHY Speed mask                                  */
150.    #define PHY_DUPLEX_STATUS   ((uint16_t)0x0004)  /*!< PHY Duplex mask                                 */
151.
152.    #define PHY_MICR_INT_EN      ((uint16_t)0x0002)  /*!< PHY Enable interrupts                           */
153.    #define PHY_MICR_INT_OE      ((uint16_t)0x0001)  /*!< PHY Enable output interrupt events              */
154.
155.    #define PHY_MISR_LINK_INT_EN  ((uint16_t)0x0020)  /*!< Enable Interrupt on change of link status       */
156.    #define PHY_LINK_INTERRUPT    ((uint16_t)0x2000)  /*!< PHY link status interrupt mask                  */
157.
158.    /* ################## SPI peripheral configuration ########################## */
159.
160.    /* CRC FEATURE: Use to activate CRC feature inside HAL SPI Driver
161.    * Activated: CRC code is present inside driver
162.    * Deactivated: CRC code cleaned from driver
163.    */
164.
165.    #define USE_SPI_CRC                     1U
166.
167.    /* Includes ------------------------------------------------------------------*/
168.    /**
169.      * @brief Include module's header file
170.      */
171.
172.    #ifdef HAL_RCC_MODULE_ENABLED
173.      #include "stm32f4xx_hal_rcc.h"
174.    #endif /* HAL_RCC_MODULE_ENABLED */
175.
176.    #ifdef HAL_GPIO_MODULE_ENABLED
177.      #include "stm32f4xx_hal_gpio.h"
178.    #endif /* HAL_GPIO_MODULE_ENABLED */
179.
180.    /* 省略未写 */
181.
182.    #ifdef HAL_HCD_MODULE_ENABLED
183.     #include "stm32f4xx_hal_hcd.h"
184.    #endif /* HAL_HCD_MODULE_ENABLED */
185.
186.    /* Exported macro ------------------------------------------------------------*/
187.    #ifdef  USE_FULL_ASSERT
188.    /**
189.      * @brief  The assert_param macro is used for function's parameters check.
190.      * @param  expr: If expr is false, it calls assert_failed function
191.      *         which reports the name of the source file and the source
192.      *         line number of the call that failed.
193.      *         If expr is true, it returns no value.
194.      * @retval None
195.      */
196.      #define assert_param(expr) ((expr) ? (void)0 : assert_failed((uint8_t *)__FILE__, __LINE__))
197.    /* Exported functions ------------------------------------------------------- */
198.      void assert_failed(uint8_t* file, uint32_t line);
199.    #else
200.      #define assert_param(expr) ((void)0U)
201.    #endif /* USE_FULL_ASSERT */
除了HSE_VALUE,下面几个也要作为了解:
- 第71行,滴答定时器的优先级设置。这个优先级的设置至关重要。因为HAL库中各个外设驱动里面的延迟实现是基于此文件提供的时间基准。
如果在中断服务程序里面调用基于此时间基准的延迟函数HAL_Delay要特别注意,因为这个函数的时间基准是基于滴答定时器或者其他通用定时器实现,实现方式是滴答定时器或者其他通用定时器里面对变量计数。如此以来,结果是显而易见的,如果其他中断服务程序调用了此函数,且中断优先级高于滴答定时器,会导致滴答定时器中断服务程序一直得不到执行,从而卡死在里面。所以滴答定时器的中断优先级一定要比他们高。
另外这个时间基准既可以使用滴答定时器实现也可以使用通用的定时器实现,默认情况下是用的滴答定时器。
- 第72行,当前HAL库还不支持RTOS方式。
- 第187行,用于使能断言功能,在HAL库的API里面都有用到,用来判断函数形参是否有效。默认情况下是关闭的。
- 第198行,使能断言功能后,实际对应的代码位置。这里没有对函数
void assert_failed(uint8_t* file, uint32_t line)做具体实现,大家可以根据自己的需求去实现,这里提供一个参考:
/*
    ST库函数使用了C编译器的断言功能,如果定义了USE_FULL_ASSERT,那么所有的ST库函数将检查函数形参
    是否正确。如果不正确将调用 assert_failed() 函数,这个函数是一个死循环,便于用户检查代码。

    关键字 __LINE__ 表示源代码行号。
    关键字__FILE__表示源代码文件名。

    断言功能使能后将增大代码大小,推荐用户仅在调试时使能,在正式发布软件是禁止。

    用户可以选择是否使能ST固件库的断言供能。使能断言的方法有两种:
    (1) 在C编译器的预定义宏选项中定义USE_FULL_ASSERT。
    (2) 在本文件取消"#define USE_FULL_ASSERT    1"行的注释。
*/

/*
*********************************************************************************************************
*    函 数 名: assert_failed
*    形    参:file : 源代码文件名称。关键字__FILE__表示源代码文件名。
*              line :代码行号。关键字 __LINE__ 表示源代码行号
*    返 回 值: 无
*********************************************************************************************************
*/
void assert_failed(uint8_t* file, uint32_t line)
{
    /*
        用户可以添加自己的代码报告源代码文件名和代码行号,比如将错误文件和行号打印到串口
        printf("Wrong parameters value: file %s on line %d
", file, line) */
    */

    /* 这是一个死循环,断言失败时程序会在此处死机,以便于用户查错 */
    while (1)
    {
    }
}
12.3 HAL库的时间基准
为了方便各种外设延迟的实现,HAL库专门搞了一个时间基准,默认来源是滴答定时器,也可以通过重定向使用其他定时器实现。相关函数全部集中在stm32f4xx_hal.c文件里面实现,关于这些函数在本教程的第16章有详细讲解。
12.4 HAL库的启动流程
这里通过V6板子初始化流程做个说明:
1.    /*
2.    ******************************************************************************************************
3.    *    函 数 名: bsp_Init
4.    *    功能说明: 初始化所有的硬件设备。该函数配置CPU寄存器和外设的寄存器并初始化一些全局变量。
5.    *              只需要调用一次
6.    *    形    参:无
7.    *    返 回 值: 无
8.    ******************************************************************************************************
9.    */
10.    void bsp_Init(void)
11.    {
12.        /*
13.           STM32H429 HAL 库初始化,此时系统用的还是F429自带的16MHz,HSI时钟:
14.           - 调用函数HAL_InitTick,初始化滴答时钟中断1ms。
15.           - 设置NVIV优先级分组为4。
16.         */
17.        HAL_Init();
18.
19.        /*
20.           配置系统时钟到168MHz
21.           - 切换使用HSE。
22.           - 此函数会更新全局变量SystemCoreClock,并重新配置HAL_InitTick。
23.        */
24.        SystemClock_Config();
25.
26.        /*
27.           Event Recorder:
28.           - 可用于代码执行时间测量,MDK5.25及其以上版本才支持,IAR不支持。
29.           - 默认不开启,如果要使能此选项,务必看V6开发板用户手册第8章
30.        */
31.    #if Enable_EventRecorder == 1
32.        /* 初始化EventRecorder并开启 */
33.        EventRecorderInitialize(EventRecordAll, 1U);
34.        EventRecorderStart();
35.    #endif
36.
37.        bsp_InitKey();        /* 按键初始化,要放在滴答定时器之前,因为按钮检测是通过滴答定时器扫描 */
38.        bsp_InitTimer();      /* 初始化滴答定时器 */
39.        bsp_InitUart();    /* 初始化串口 */
40.        bsp_InitExtIO();   /* 初始化扩展IO */
41.        bsp_InitLed();        /* 初始化LED */
42.    }
- 第17行,调用函数HAL_Init时,系统依然使用的16MHz HSI时钟,这点要特别注意。此函数会调用函数HAL_InitTick,初始化滴答时钟中断1ms,并设置NVIV优先级分组为4。
这里就隐含了一个知识点,就是它会开启滴答定时器中断,如果用户也要使用滴答定时器中断,此问题就要引起注意,我们的bsp_timer.C文件解决办法如下:
/*
*********************************************************************************************************
*    函 数 名: SysTick_Handler
*    功能说明: 系统嘀嗒定时器中断服务程序。启动文件中引用了该函数。
*    形    参:  无
*    返 回 值: 无
*********************************************************************************************************
*/
void SysTick_Handler(void)
{
    HAL_IncTick();    /* ST HAL库的滴答定时中断服务程序 */

    if (g_ucEnableSystickISR == 0) /* 做了一个变量标志,调用了函数bsp_InitTimer才置位此变量 */
    {
        return;
    }

    SysTick_ISR();    /* 安富莱bsp库的滴答定时中断服务程序 */
}
- 第30行,通过此函数切换HSI到外部高速时钟HSE,并配置系统时钟到168MHz。调用这个函数会更新全局变量SystemCoreClock,并重新配置HAL_InitTick。
- 前面几步执行完毕后就可以初始化外设了。
12.5 HAL库初始化外设
HAL库为外设初始化提供了一套框架,这里以串口为例进行说明,调用函数HAL_UART_Init初始化串口,此函数就会调用HAL_UART_MspInit,这个函数是弱定义的,在stm32f4xx_hal_uart.c文件里面:
/**
  * @brief Initialize the UART MSP.
  * @param huart: UART handle.
  * @retval None
  */
__weak void HAL_UART_MspInit(UART_HandleTypeDef *huart)
{
  /* Prevent unused argument(s) compilation warning */
  UNUSED(huart);

  /* NOTE : This function should not be modified, when the callback is needed,
            the HAL_UART_MspInit can be implemented in the user file
   */
}
如果要初始化,直接将此函数在其它源文件里面实现即可,如果用到了中断和DMA,也是直接在这里填写。
void HAL_UART_MspInit(UART_HandleTypeDef* huart)
{
    GPIO_InitTypeDef GPIO_InitStruct = {0};

    if(huart->Instance==USART1)
    {
        __HAL_RCC_USART1_CLK_ENABLE();

        __HAL_RCC_GPIOB_CLK_ENABLE();

        GPIO_InitStruct.Pin = GPIO_PIN_7;
        GPIO_InitStruct.Mode = GPIO_MODE_AF_PP;
        GPIO_InitStruct.Pull = GPIO_NOPULL;
        GPIO_InitStruct.Speed = GPIO_SPEED_FREQ_LOW;
        GPIO_InitStruct.Alternate = GPIO_AF7_USART1;
        HAL_GPIO_Init(GPIOB, &GPIO_InitStruct);

        GPIO_InitStruct.Pin = GPIO_PIN_14;
        GPIO_InitStruct.Mode = GPIO_MODE_AF_PP;
        GPIO_InitStruct.Pull = GPIO_NOPULL;
        GPIO_InitStruct.Speed = GPIO_SPEED_FREQ_LOW;
        GPIO_InitStruct.Alternate = GPIO_AF4_USART1;
        HAL_GPIO_Init(GPIOB, &GPIO_InitStruct);
    }
    else if(huart->Instance==USART2)
    {
        __HAL_RCC_USART2_CLK_ENABLE();

        __HAL_RCC_GPIOD_CLK_ENABLE();
        __HAL_RCC_GPIOA_CLK_ENABLE();

        GPIO_InitStruct.Pin = GPIO_PIN_6;
        GPIO_InitStruct.Mode = GPIO_MODE_AF_PP;
        GPIO_InitStruct.Pull = GPIO_NOPULL;
        GPIO_InitStruct.Speed = GPIO_SPEED_FREQ_LOW;
        GPIO_InitStruct.Alternate = GPIO_AF7_USART2;
        HAL_GPIO_Init(GPIOD, &GPIO_InitStruct);

        GPIO_InitStruct.Pin = GPIO_PIN_2;
        GPIO_InitStruct.Mode = GPIO_MODE_AF_PP;
        GPIO_InitStruct.Pull = GPIO_NOPULL;
        GPIO_InitStruct.Speed = GPIO_SPEED_FREQ_LOW;
        GPIO_InitStruct.Alternate = GPIO_AF7_USART2;
        HAL_GPIO_Init(GPIOA, &GPIO_InitStruct);
    }
}
由于所有串口都是通过函数HAL_UART_Init做初始化,所以函数HAL_UART_MspInit也是共用的。因此需要大家在这个里面区分是配置的哪个串口。
12.6 HAL库的中断处理思路
为了加强对中断的管理,HAL库也为各种外设中断也配套一个函数,比如串口就是函数HAL_UART_IRQHandler。
void USART1_IRQHandler(void)
{
    /* USER CODE BEGIN USART1_IRQn 0 */
         此处可以添加用户代码
    /* USER CODE END USART1_IRQn 0 */

     /* 参数是串口句柄 */
    HAL_UART_IRQHandler(&huart1);

    /* USER CODE BEGIN USART1_IRQn 1 */
         此处可以添加用户代码
    /* USER CODE END USART1_IRQn 1 */
}
那么问题来了,如果要实现功能,用户的应用程序怎么写入中断?用户可以直接在函数HAL_UART_IRQHandler的前面或者后面添加新代码,也可以直接在HAL_UART_IRQHandler调用的各种回调函数里面执行,这些回调都是弱定义的,方便用户直接在其它文件里面重定义(下面回调主要是用于串口DMA时调用的):
HAL_UART_TxHalfCpltCallback()
HAL_UART_TxCpltCallback()
HAL_UART_RxHalfCpltCallback()
HAL_UART_RxCpltCallback()
HAL_UART_ErrorCallback()
12.7 HAL库的DMA处理思路
为了方便各种外设直接启动DMA,HAL库专门为支持DMA操作的外设都提供了对应的DMA函数,比如串口的:
HAL_UART_Transmit_DMA()
HAL_UART_Receive_DMA()
HAL_UART_DMAPause()
HAL_UART_DMAResume()
HAL_UART_DMAStop()
这里特别注意一点,针对外设的DMA函数基本都有开启中断,如果用户使能此外设的NVIC,使用中务必别忘了写DMA的中断服务程序,比如使用DMA1_Stream1:
void DMA1_Stream1_IRQHandler(void)
{
    /* USER CODE BEGIN USART1_IRQn 0 */
         此处可以添加用户代码
    /* USER CODE END USART1_IRQn 0 */

      /* 参数是DMA句柄 */
     HAL_DMA_IRQHandler(&hdma_usart1_tx);

    /* USER CODE BEGIN USART1_IRQn 1 */
         此处可以添加用户代码
    /* USER CODE END USART1_IRQn 1 */
}
如果要在DMA传输完成,半传输完成等中断里面执行功能,也是通过HAL_DMA_IRQHandler调用的各种回调函数里面实现,这些回调都是弱定义的,方便用户直接在其它文件里面重定义:
HAL_UART_TxHalfCpltCallback()
HAL_UART_TxCpltCallback()
HAL_UART_RxHalfCpltCallback()
HAL_UART_RxCpltCallback()
12.8 总结
先从整体框架上把握HAL库,然后具体外设具体学习,后面做应用会得心应手些。