1 学习页面查询课程计划
1.1 需求分析
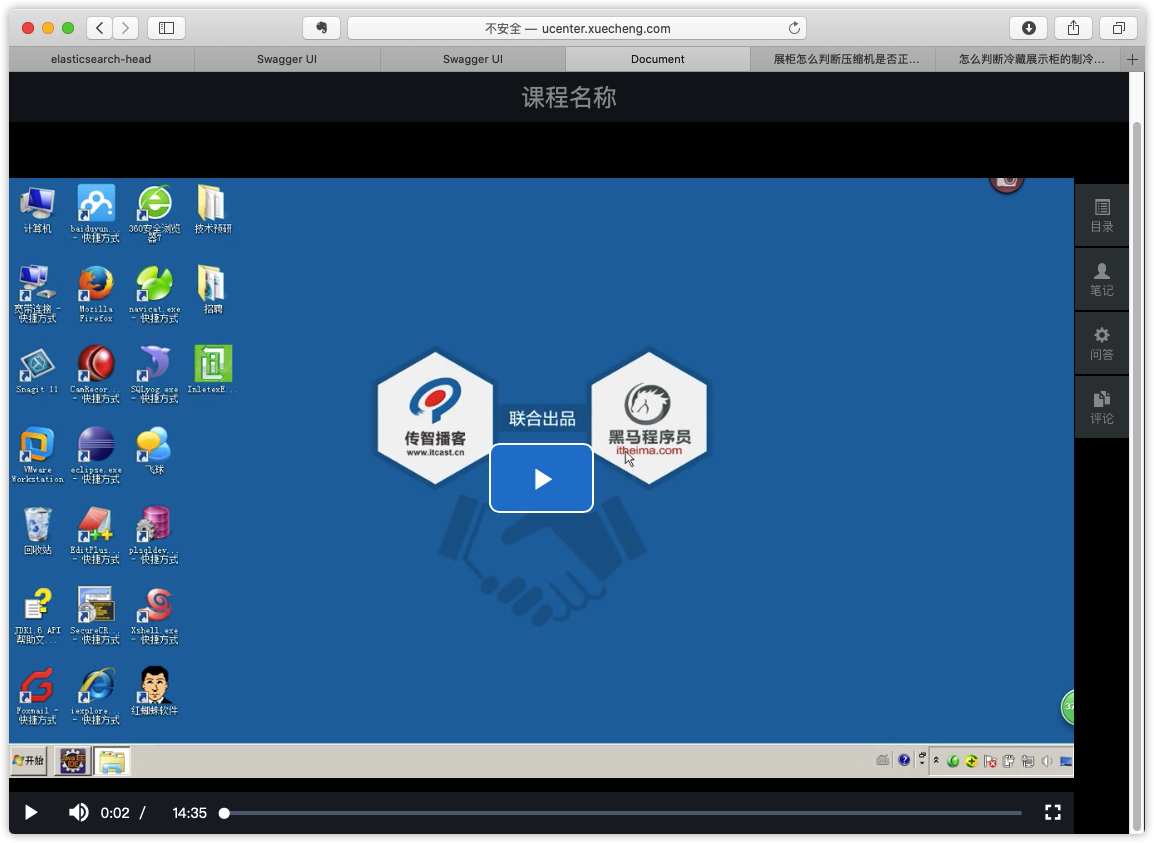
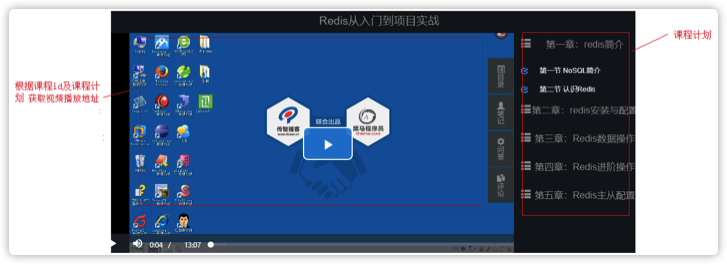
到目前为止,我们已可以编辑课程计划信息并上传课程视频,下一步我们要实现在线学习页面动态读取章节对应的 视频并进行播放。在线学习页面所需要的信息有两类:一类是课程计划信息、一类是课程学习信息(视频地址、学 习进度等),如下图:
在线学习集成媒资管理的需求如下:
1、在线学习页面显示课程计划
2、点击课程计划播放该课程计划对应的视频
本章节实现学习页面动态显示课程计划,进入不同课程的学习页面右侧动态显示当前课程的课程计划。
1.2 Api接口
课程计划信息从哪里获取?
目前课程计划信息在课程管理数据库和ES索引库中存在,考虑性能要求,课程发布后对课程的查询统一从ES索引库中查询。
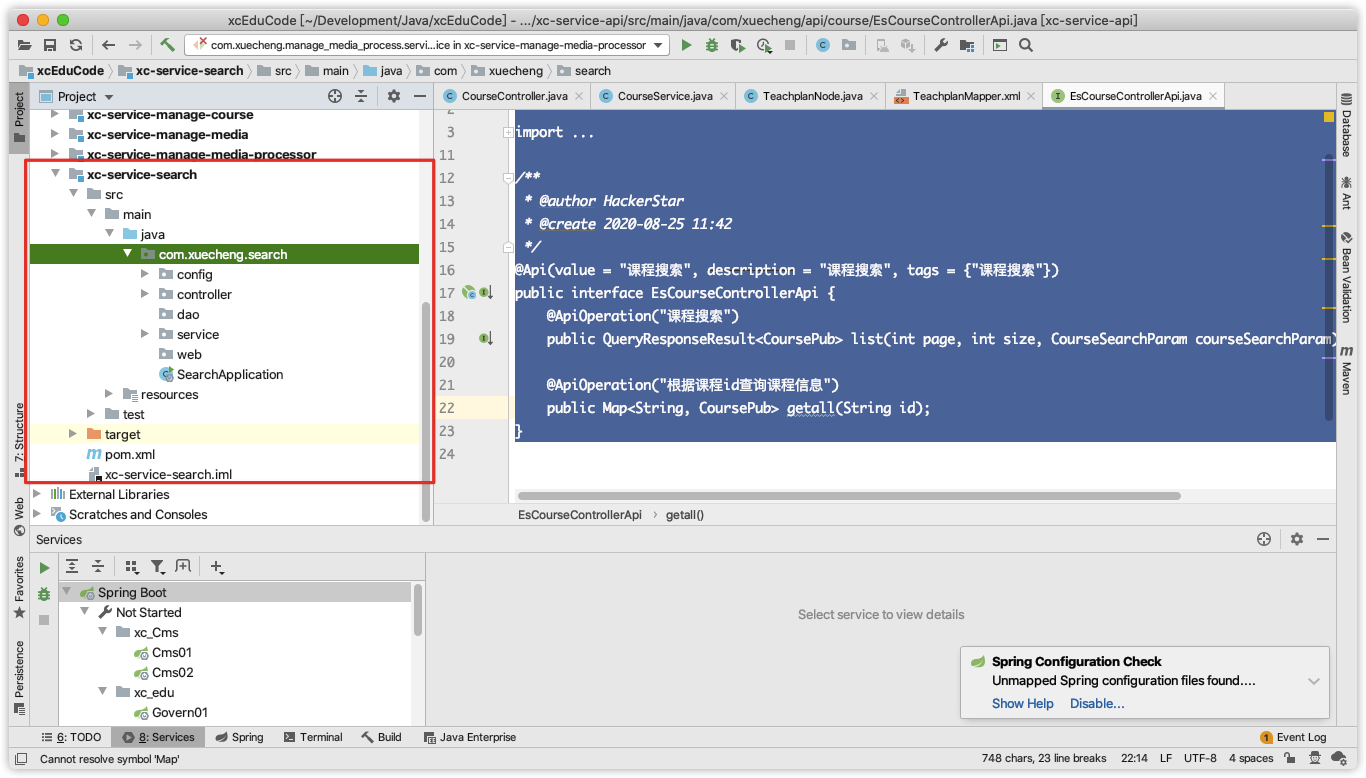
前端通过请求搜索服务获取课程信息,需要单独在搜索服务中定义课程信息查询接口。
本接口接收课程id,查询课程所有信息返回给前端。
package com.xuecheng.api.course;
import com.xuecheng.framework.domain.course.CoursePub;
import com.xuecheng.framework.domain.search.CourseSearchParam;
import com.xuecheng.framework.model.response.QueryResponseResult;
import io.swagger.annotations.Api;
import io.swagger.annotations.ApiOperation;
import java.io.IOException;
import java.util.Map;
/**
* @author HackerStar
* @create 2020-08-25 11:42
*/
@Api(value = "课程搜索", description = "课程搜索", tags = {"课程搜索"})
public interface EsCourseControllerApi {
@ApiOperation("课程搜索")
public QueryResponseResult<CoursePub> list(int page, int size, CourseSearchParam courseSearchParam) throws IOException;
@ApiOperation("根据课程id查询课程信息")
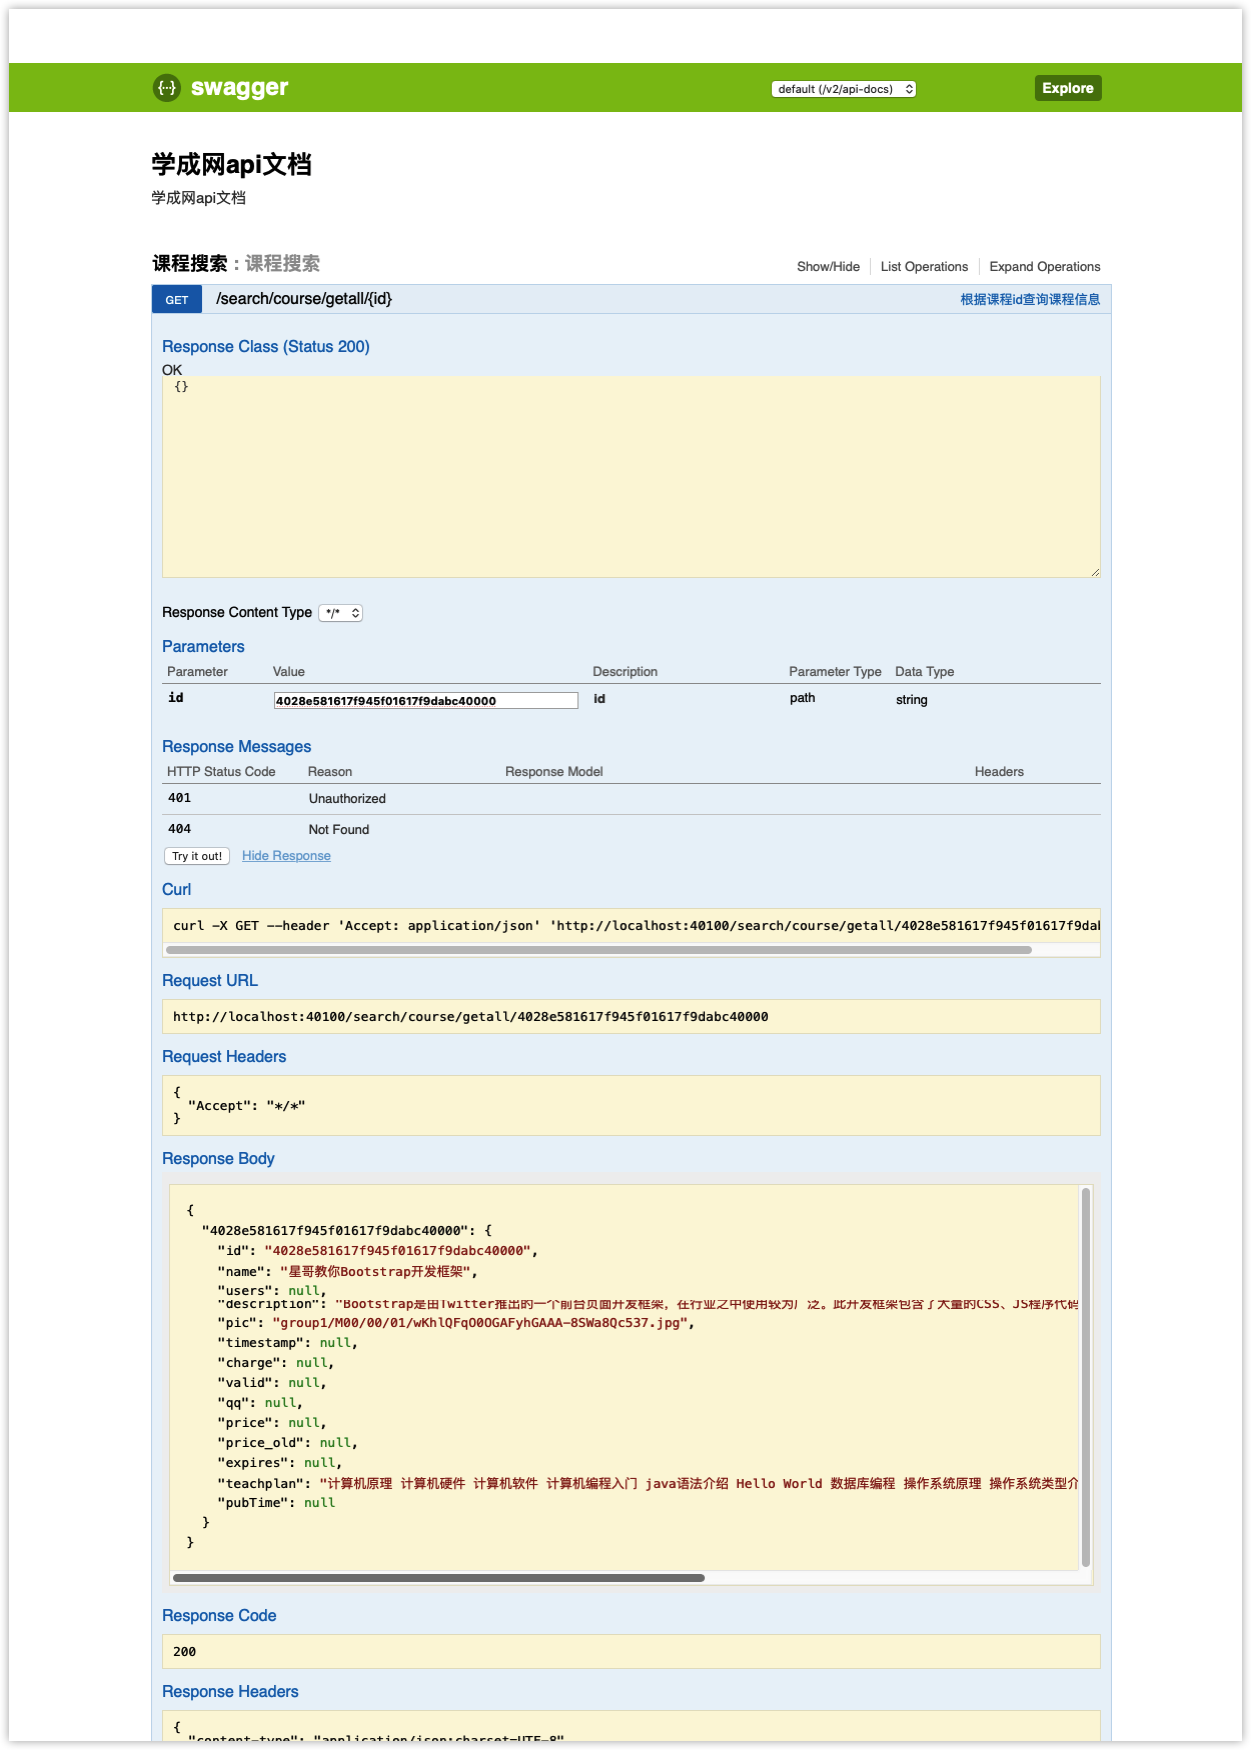
public Map<String, CoursePub> getall(String id);
}
返回的课程信息为json结构:key为课程id,value为课程内容。

1.3 服务端开发
在搜索服务中开发查询课程信息接口。
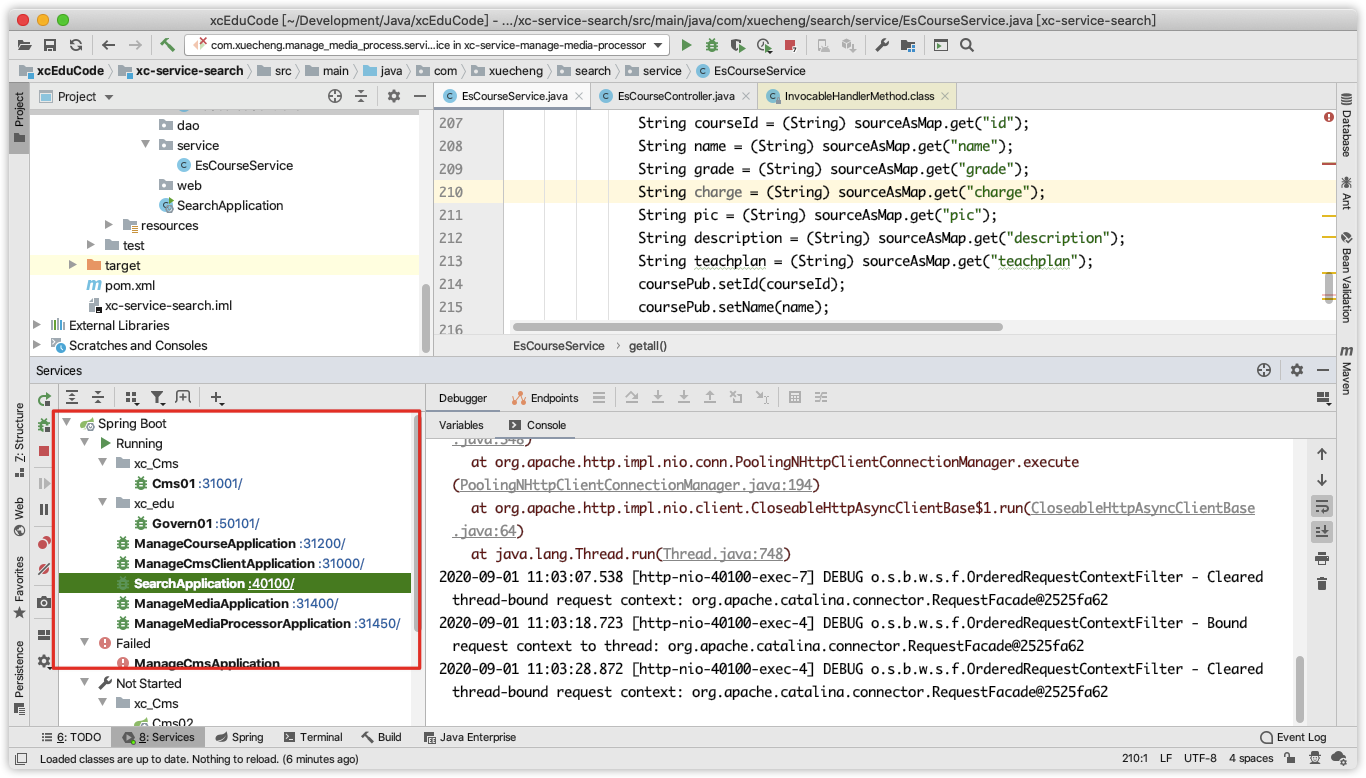
1.3.1 Service
在搜索服务中增加查询课程信息接口的service
public Map<String, CoursePub> getall(String id) {
        //设置索引库
        SearchRequest searchRequest = new SearchRequest(index);
        //指定type
        searchRequest.types(type);
        //定义SearchSourceBuilder
        SearchSourceBuilder searchSourceBuilder = new SearchSourceBuilder();
        //设置使用termQuery
        searchSourceBuilder.query(QueryBuilders.termQuery("id",id));
        //过虑源字段,不用设置源字段,取出所有字段
//        searchSourceBuilder.fetchSource()
        searchRequest.source(searchSourceBuilder);
        //最终要返回的课程信息

        Map<String,CoursePub> map = new HashMap<>();
        try {
            SearchResponse search = restHighLevelClient.search(searchRequest);
            SearchHits hits = search.getHits();
            SearchHit[] searchHits = hits.getHits();
            for(SearchHit hit:searchHits){
                CoursePub coursePub = new CoursePub();
                //获取源文档的内容
                Map<String, Object> sourceAsMap = hit.getSourceAsMap();
                //课程id
                String courseId = (String) sourceAsMap.get("id");
                String name = (String) sourceAsMap.get("name");
                String grade = (String) sourceAsMap.get("grade");
                String charge = (String) sourceAsMap.get("charge");
                String pic = (String) sourceAsMap.get("pic");
                String description = (String) sourceAsMap.get("description");
                String teachplan = (String) sourceAsMap.get("teachplan");
                coursePub.setId(courseId);
                coursePub.setName(name);
                coursePub.setPic(pic);
                coursePub.setGrade(grade);
                coursePub.setTeachplan(teachplan);
                coursePub.setDescription(description);
                map.put(courseId,coursePub);
            }
        } catch (IOException e) {
            e.printStackTrace();
        }


        return map;
    }
1.3.2 Controller
 		@Override
    @GetMapping("/getall/{id}")
    public Map<String, CoursePub> getall(@PathVariable("id") String id) {
        return esCourseService.getall(id);
    }
1.3.3 测试
使用swagger-ui或postman测试查询课程信息接口。
1.4 前端开发
1.4.1 配置虚拟主机
学习中心的二级域名为ucenter.xuecheng.com,我们在nginx中配置ucenter虚拟主机。
		#前端 ucenter
    upstream ucenter_server_pool{
        server 127.0.0.1:13000 weight=10;
    }

    #学成网用户中心
    server {
        listen 80;
        server_name ucenter.xuecheng.com;

        #个人中心
        location / {
            proxy_pass http://ucenter_server_pool;
        }

    }
之前已经配置过了
在学习中心要调用搜索的API,使用Nginx解决代理,如下图:

配置搜索Api代理路径:
	#后台搜索(公开api)
	upstream search_server_pool{
		server 127.0.0.1:40100 weight=10;
	}
	#后端搜索服务
		location /openapi/search/ {
			proxy_pass http://search_server_pool/search/;
		}
nginx配置完整代码:
#定义Nginx运行的用户和用户组
#user  nobody;

#nginx进程数,建议设置为等于CPU总核心数。
worker_processes  1;

#全局错误日志定义类型,[ debug | info | notice | warn | error | crit ]
#error_log  logs/error.log;
#error_log  logs/error.log  notice;
#error_log  logs/error.log  info;

#进程文件
#pid        logs/nginx.pid;

#工作模式与连接数上限
events {
    #单个进程最大连接数(最大连接数=连接数*进程数)
    worker_connections  1024;
}

#设定http服务器
http {
    #文件扩展名与文件类型映射表
    include       mime.types;
    #默认文件类型
    default_type  application/octet-stream;

    #log_format  main  '$remote_addr - $remote_user [$time_local] "$request" '
    #                  '$status $body_bytes_sent "$http_referer" '
    #                  '"$http_user_agent" "$http_x_forwarded_for"';

    #access_log  logs/access.log  main;

    #开启高效文件传输模式,sendfile指令指定nginx是否调用sendfile函数来输出文件,对于普通应用设为 on,如果用来进行下载等应用磁盘IO重负载应用,可设置为off,以平衡磁盘与网络I/O处理速度,降低系统的负载。注意:如果图片显示不正常把这个改 成off。
    sendfile        on;

    #防止网络阻塞
    #tcp_nopush     on;


    #长连接超时时间,单位是秒
    #keepalive_timeout  0;
    keepalive_timeout  65;

    #开启gzip压缩输出
    #gzip  on;

    #cms页面预览
    upstream cms_server_pool{
        server 127.0.0.1:31001 weight=10;
    }

    #图片服务
    upstream img_server_pool{
		server 10.211.55.13:80 weight=10;
	}

    #静态资源服务
    upstream static_server_pool{
        server 127.0.0.1:91 weight=10;
    }

    #前端动态门户
    upstream dynamic_portal_server_pool{
		server 127.0.0.1:10000 weight=10;
	}

	#后台搜索(公开api)
	upstream search_server_pool{
		server 127.0.0.1:40100 weight=10;
	}

	#媒体服务
	upstream video_server_pool{
		server 127.0.0.1:90 weight=10;
	}

    #前端 ucenter
    upstream ucenter_server_pool{
        server 127.0.0.1:13000 weight=10;
    }

	#学成网媒体服务代理
	map $http_origin $origin_list{
		default http://www.xuecheng.com;
		"~http://www.xuecheng.com" http://www.xuecheng.com;
		"~http://ucenter.xuecheng.com" http://ucenter.xuecheng.com;
	}

    #学成网用户中心
    server {
        listen 80;
        server_name ucenter.xuecheng.com;

        #个人中心
        location / {
            proxy_pass http://ucenter_server_pool;
        }

        #后端搜索服务
        location /openapi/search/ {
            proxy_pass http://search_server_pool/search/;
        }

    }

	#学成网媒体服务代理
	server {
		listen 80;
		server_name video.xuecheng.com;

		location /video {
			 proxy_pass http://video_server_pool;
             add_header Access‐Control‐Allow‐Origin $origin_list;
             add_header Access‐Control‐Allow‐Credentials true;
             add_header Access‐Control‐Allow‐Methods GET;
			 #add_header Access‐Control‐Allow‐Origin *;
		}
	}

	#学成网媒体服务
	server {
		listen	90;
		server_name localhost;

		#视频目录
		location /video{
			alias /Users/XinxingWang/Development/Java/video/hls;
		}
	}

	#学成网图片服务
	server {
		listen 80;
		server_name img.xuecheng.com;
		#个人中心
		location /group1 {
			proxy_pass http://img_server_pool;
		}
	}

    #虚拟主机的配置
    server {
        #监听端口
        listen       80;

        #域名可以有多个,用空格隔开
        server_name  www.xuecheng.com;

        #默认编码
        #charset utf-8;

        #定义本虚拟主机的访问日志
        #access_log  logs/host.access.log  main;

		ssi on;
		ssi_silent_errors on;

		#前端门户课程搜索
		location ^~ /course/search {
			proxy_pass http://dynamic_portal_server_pool;
		}

		#分类信息
		location /static/category/ {
			proxy_pass http://static_server_pool;
		}

        #静态资源,包括系统所需要的图片,js、css等静态资源
		location /static/img/ {
  	  		alias /Users/XinxingWang/Development/WebstormProjects/scEdu/scEduUI/xc-ui-pc-static-portal/img/;
		}
		location /static/css/ {
 			  alias /Users/XinxingWang/Development/WebstormProjects/scEdu/scEduUI/xc-ui-pc-static-portal/css/;
		}
		location /static/js/ {
  		  alias /Users/XinxingWang/Development/WebstormProjects/scEdu/scEduUI/xc-ui-pc-static-portal/js/;
		}
		location /static/plugins/ {
   		  alias /Users/XinxingWang/Development/WebstormProjects/scEdu/scEduUI/xc-ui-pc-static-portal/plugins/;
 		   add_header Access‐Control‐Allow‐Origin http://ucenter.xuecheng.com;
   			 add_header Access‐Control‐Allow‐Credentials true;
   			 add_header Access‐Control‐Allow‐Methods GET;
		}

        location /static/company/ {
          proxy_pass http://static_server_pool;
        }
        location /static/teacher/ {
         proxy_pass http://static_server_pool;
        }
        location /static/stat/ {
         proxy_pass http://static_server_pool;
        }
        location /course/detail/ {
         proxy_pass http://static_server_pool;
        }

		location / {
		  alias	/Users/XinxingWang/Development/WebstormProjects/scEdu/scEduUI/xc-ui-pc-static-portal/;
		  index index.html;
        }

        #页面预览
        location /cms/preview/ {
            proxy_pass http://cms_server_pool/cms/preview/;
        }

        #开发环境webpack定时加载此文件
        location ^~ /__webpack_hmr/ {
            proxy_pass http://dynamic_portal_server_pool/__webpack_hmr/;
        }

       #开发环境nuxt访问_nuxt
        location ^~ /_nuxt/ {
            proxy_pass http://dynamic_portal_server_pool/_nuxt/;
        }
    }

#学成网静态资源
server {

	listen 91;
	server_name localhost;

	#公司信息
    location /static/company/ {
		alias /Users/XinxingWang/Development/WebstormProjects/scEdu/static/company/;
	}
	#老师信息
	location /static/teacher/ {
		alias /Users/XinxingWang/Development/WebstormProjects/scEdu/static/teacher/;
	}
	#统计信息
	location /static/stat/ {
		alias /Users/XinxingWang/Development/WebstormProjects/scEdu/static/stat/;
	}
	location /course/detail/ {
		alias /Users/XinxingWang/Development/WebstormProjects/scEdu/static/course/detail/;
	}
    location /static/category/ {
        alias /Users/XinxingWang/Development/WebstormProjects/scEdu/static/category/;
    }

}

 }


    # another virtual host using mix of IP-, name-, and port-based configuration
    #
    #server {
    #    listen       8000;
    #    listen       somename:8080;
    #    server_name  somename  alias  another.alias;

    #    location / {
    #        root   html;
    #        index  index.html index.htm;
    #    }
    #}


    # HTTPS server
    #
    #server {
    #    listen       443 ssl;
    #    server_name  localhost;

    #    ssl_certificate      cert.pem;
    #    ssl_certificate_key  cert.key;

    #    ssl_session_cache    shared:SSL:1m;
    #    ssl_session_timeout  5m;

    #    ssl_ciphers  HIGH:!aNULL:!MD5;
    #    ssl_prefer_server_ciphers  on;

    #    location / {
    #        root   html;
    #        index  index.html index.htm;
    #    }
    #}
1.4.2 API方法
在学习中心对课程信息的查询属于基础常用功能,所以我们将课程查询的api方法定义在base模块下,如下图:
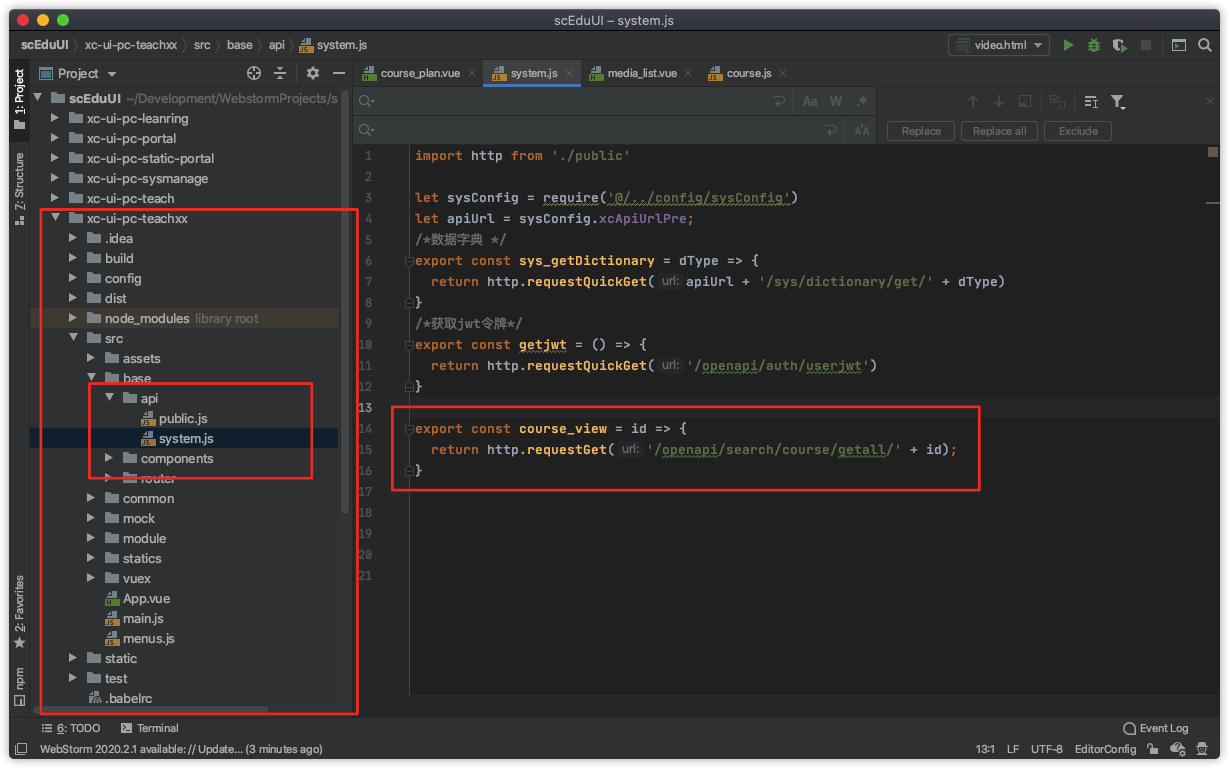
export const course_view = id => {
  return http.requestGet('/openapi/search/course/getall/' + id);
}
1.4.3 API调用
在learning_video.vue页面中调用课程信息查询接口,得到课程计划,将课程计划json串转成对象。
1、定义视图
a、课程计划
<div class="nav nav-stacked" v-for="(teachplan_first, index) in teachplanList">
                  <div class="tit nav-justified text-center"><i class="pull-left glyphicon glyphicon-th-list"></i>{{teachplan_first.pname}}<i class="pull-right"></i></div>
                  <li   v-if="teachplan_first.children!=null" v-for="(teachplan_second, index) in teachplan_first.children"><i class="glyphicon glyphicon-check"></i>
                    <a :href="url" @click="study(teachplan_second.id)">
                      {{teachplan_second.pname}}
                    </a>
                  </li>
b、课程名称
<div class="top text-center">
             {{coursename}}
            </div>
2、定义数据对象
data() {
      return {
        url:'',//当前url
        courseId:'',//课程id
        chapter:'',//章节Id
        coursename:'课程名称',//课程名称
        coursepic:'',//课程图片
        teachplanList:[],//课程计划
        playerOptions: {//播放参数
          autoplay: false,
          controls: true,
          sources: [{
            type: "application/x-mpegURL",
            src: ''
          }]
        },
3、在created钩子方法中获取课程信息
created() {
//当前请求的url
this.url = window.location
//课程id
this.courseId = this.$route.params.courseId
//章节id
this.chapter = this.$route.params.chapter
//取出课程Id
systemApi.course_view(this.courseId).then((view_course) => {
if (!view_course || !view_course[this.courseId]) {
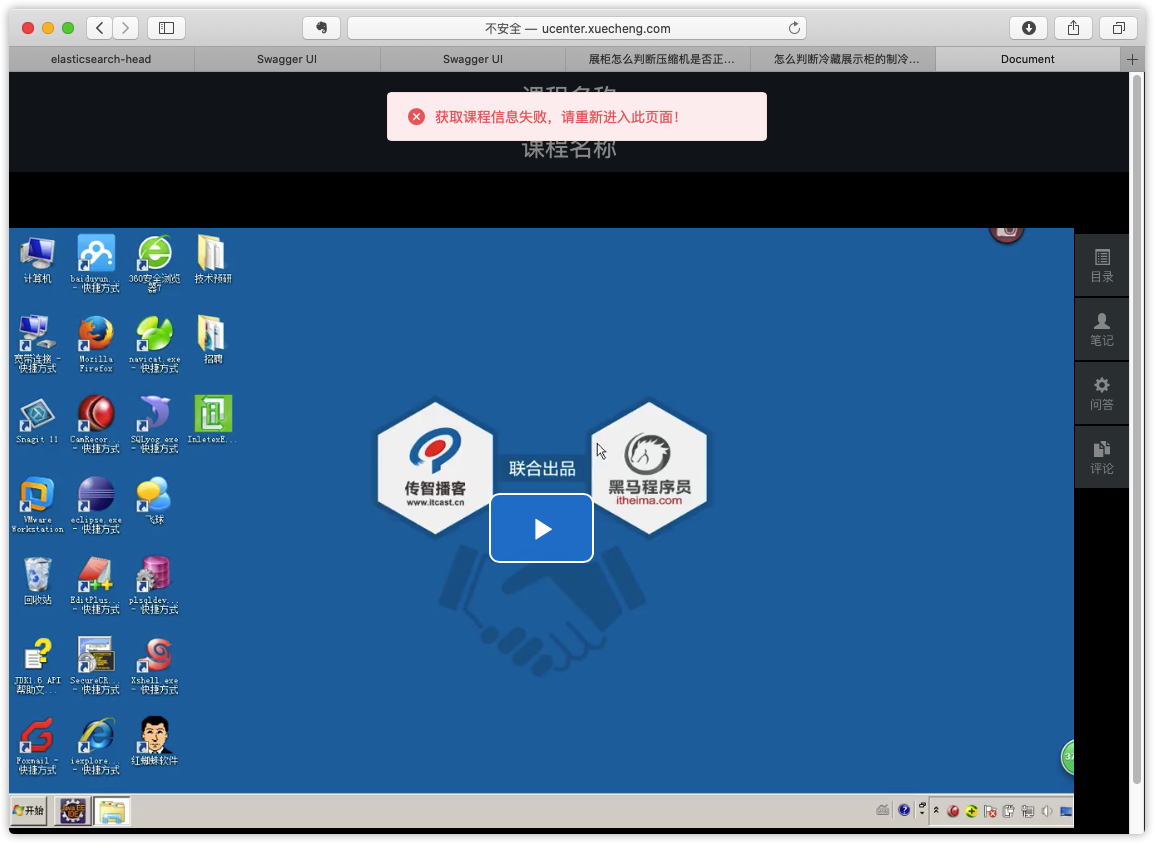
this.$message.error("获取课程信息失败,请重新进入此页面!")
return;
}
let courseInfo = view_course[this.courseId]
console.log(courseInfo)
this.coursename = courseInfo.name
if (courseInfo.teachplan) {
let teachplan = JSON.parse(courseInfo.teachplan);
this.teachplanList = teachplan.children;
}
})
},
1.4.4 测试
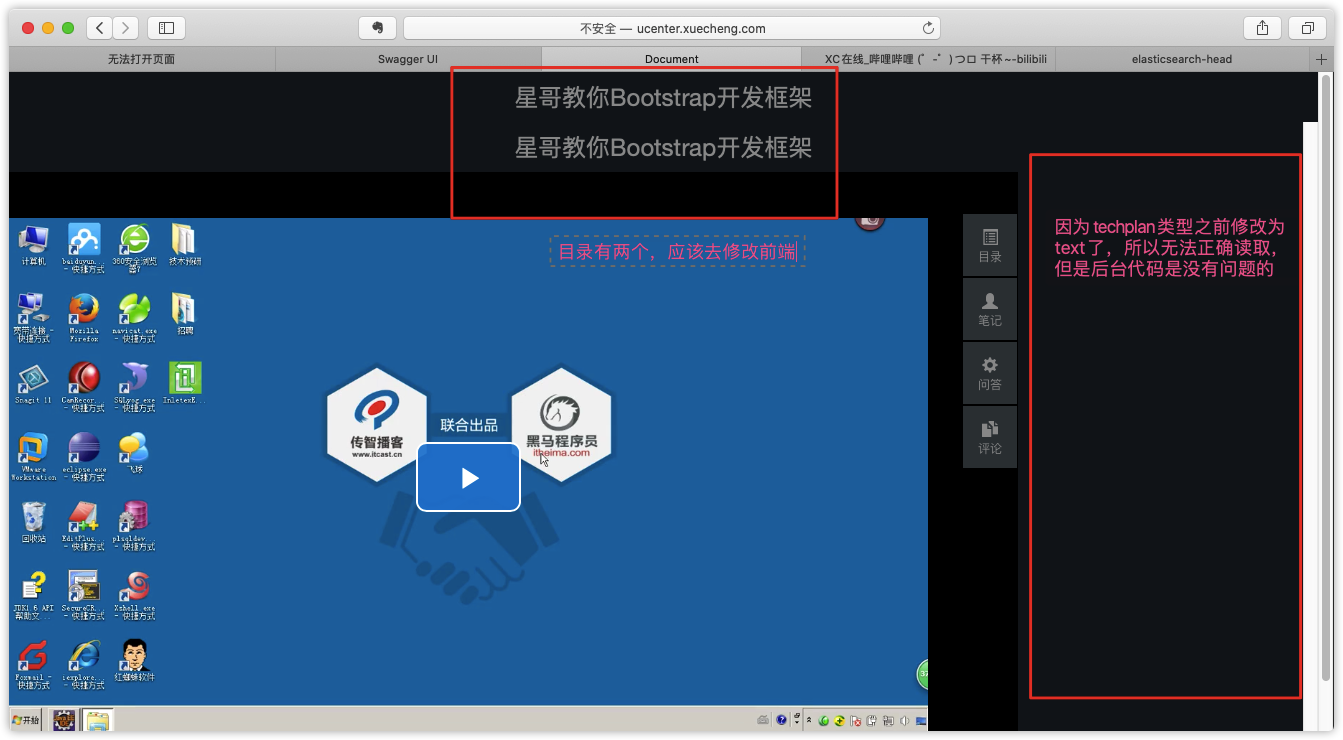
在浏览器请求:http://ucenter.xuecheng.com/#/learning/4028e581617f945f01617f9dabc40000/0
4028e581617f945f01617f9dabc40000:第一个参数为课程id,测试时从ES索引库查找的课程id
0:第二个参数为课程计划id,此参数用于点击课程计划播放视频
因为之前将mongodb的数据库中的teachplan类型改为了text,故索引中的数据为字符串格式,不是json格式,导致视频目录无法显示,但是如果修改数据库类型又会出错,所以后台代码应该是没有问题的。
2 学习页面获取视频播放地址
2.1 需求分析
用户进入在线学习页面,点击课程计划将播放该课程计划对应的教学视频。
业务流程如下:
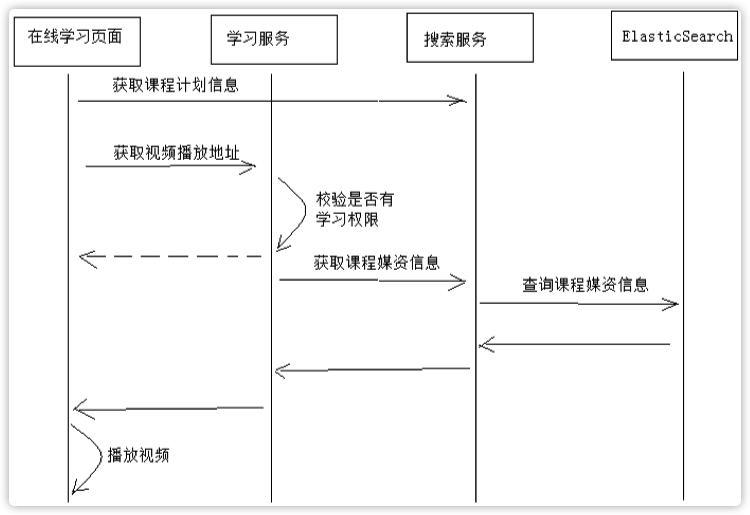
业务流程说明:
1、用户进入在线学习页面,页面请求搜索服务获取课程信息(包括课程计划信息)并且在页面展示。
2、在线学习请求学习服务获取视频播放地址。
3、学习服务校验当前用户是否有权限学习,如果没有权限学习则提示用户。
4、学习服务校验通过,请求搜索服务获取课程媒资信息。
5、搜索服务请求ElasticSearch获取课程媒资信息。
为什么要请求ElasticSearch查询课程媒资信息?
出于性能的考虑,公开查询课程信息从搜索服务查询。
什么时候将课程媒资信息存储到ElasticSearch中?
课程媒资信息是在课程发布的时候存入ElasticSearch,因为课程发布后课程信息将基本不再修改。
2.2 课程发布存储媒资信息
课程媒资信息是在课程发布的时候存入ElasticSearch索引库,因为课程发布后课程信息将基本不再修改,具体的 业务流程如下。
业务流程如下:
1、课程发布,向课程媒资信息表写入数据。
1)根据课程id删除teachplanMediaPub中的数据
2)根据课程id查询teachplanMedia数据
3)将查询到的teachplanMedia数据插入到teachplanMediaPub中
2、Logstash定时扫描课程媒资信息表,并将课程媒资信息写入索引库。
2.2.1 数据模型
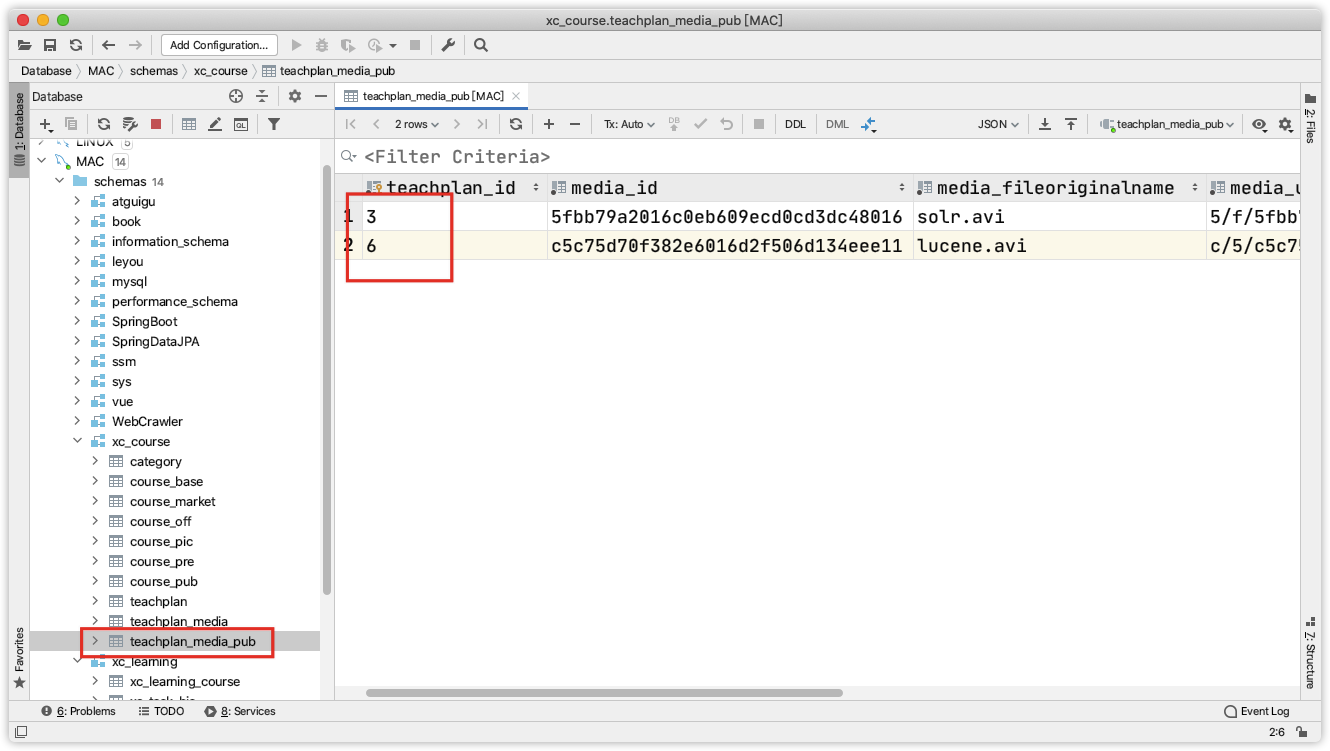
在xc_course数据库创建课程计划媒资发布表:
CREATE TABLE `teachplan_media_pub`
(
    `teachplan_id`           varchar(32)  NOT NULL COMMENT '课程计划id',
    `media_id`               varchar(32)  NOT NULL COMMENT '媒资文件id',
    `media_fileoriginalname` varchar(128) NOT NULL COMMENT '媒资文件的原始名称',
    `media_url`              varchar(256) NOT NULL COMMENT '媒资文件访问地址',
    `courseid`               varchar(32)  NOT NULL COMMENT '课程Id',
    `timestamp`              timestamp    NOT NULL DEFAULT CURRENT_TIMESTAMP ON UPDATE CURRENT_TIMESTAMP COMMENT 'logstash使用',
    PRIMARY KEY (`teachplan_id`)
) ENGINE = InnoDB
  DEFAULT CHARSET = utf8
数据模型类如下:
package com.xuecheng.framework.domain.course;
import lombok.Data;
import lombok.ToString;
import org.hibernate.annotations.GenericGenerator;
import javax.persistence.*;
import java.io.Serializable;
import java.util.Date;
/**
* Created by admin on 2018/2/7.
*/
@Data
@ToString
@Entity
@Table(name="teachplan_media_pub")
@GenericGenerator(name = "jpa-assigned", strategy = "assigned")
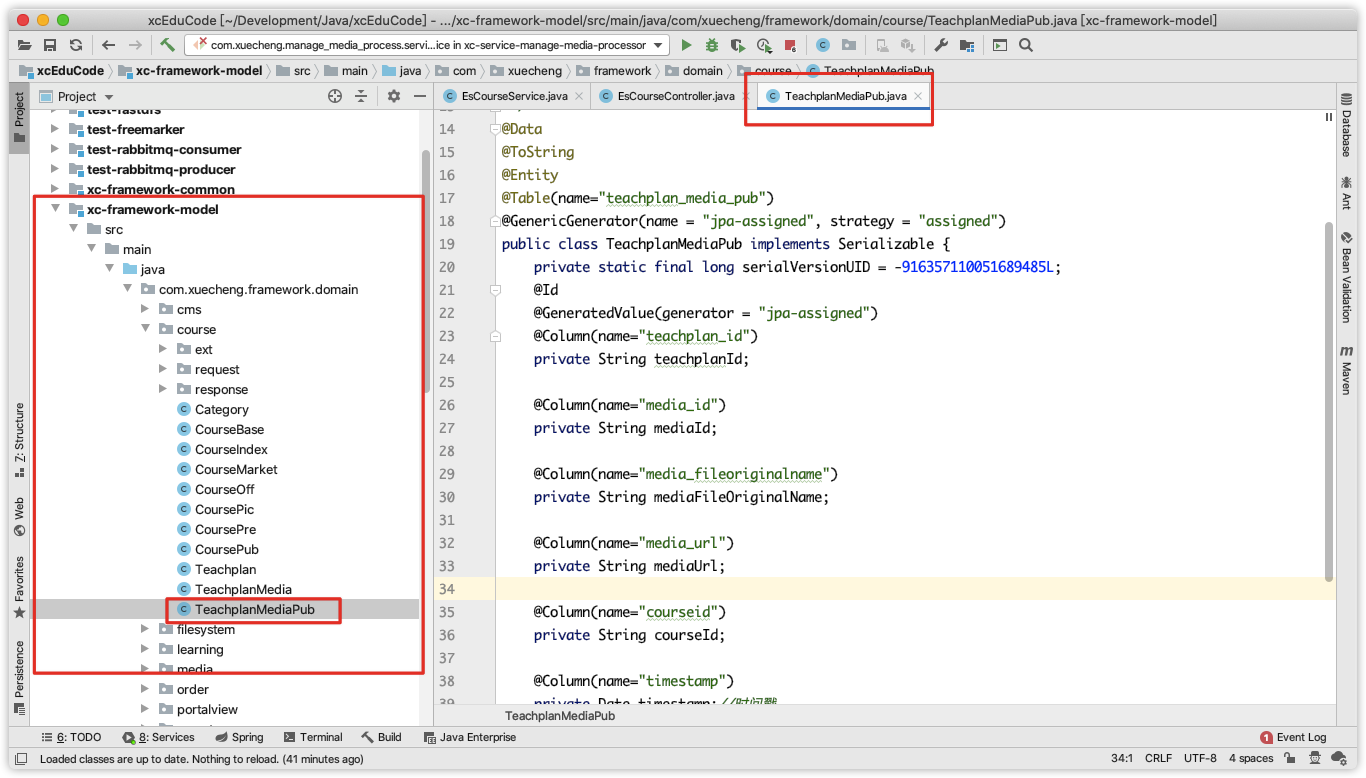
public class TeachplanMediaPub implements Serializable {
private static final long serialVersionUID = -916357110051689485L;
@Id
@GeneratedValue(generator = "jpa-assigned")
@Column(name="teachplan_id")
private String teachplanId;
@Column(name="media_id")
private String mediaId;
@Column(name="media_fileoriginalname")
private String mediaFileOriginalName;
@Column(name="media_url")
private String mediaUrl;
@Column(name="courseid")
private String courseId;
@Column(name="timestamp")
private Date timestamp;//时间戳
}
2.2.2 Dao
创建TeachplanMediaPub表的Dao,向TeachplanMediaPub存储信息采用先删除该课程的媒资信息,再添加该课 程的媒资信息,所以这里定义根据课程id删除课程计划媒资方法:
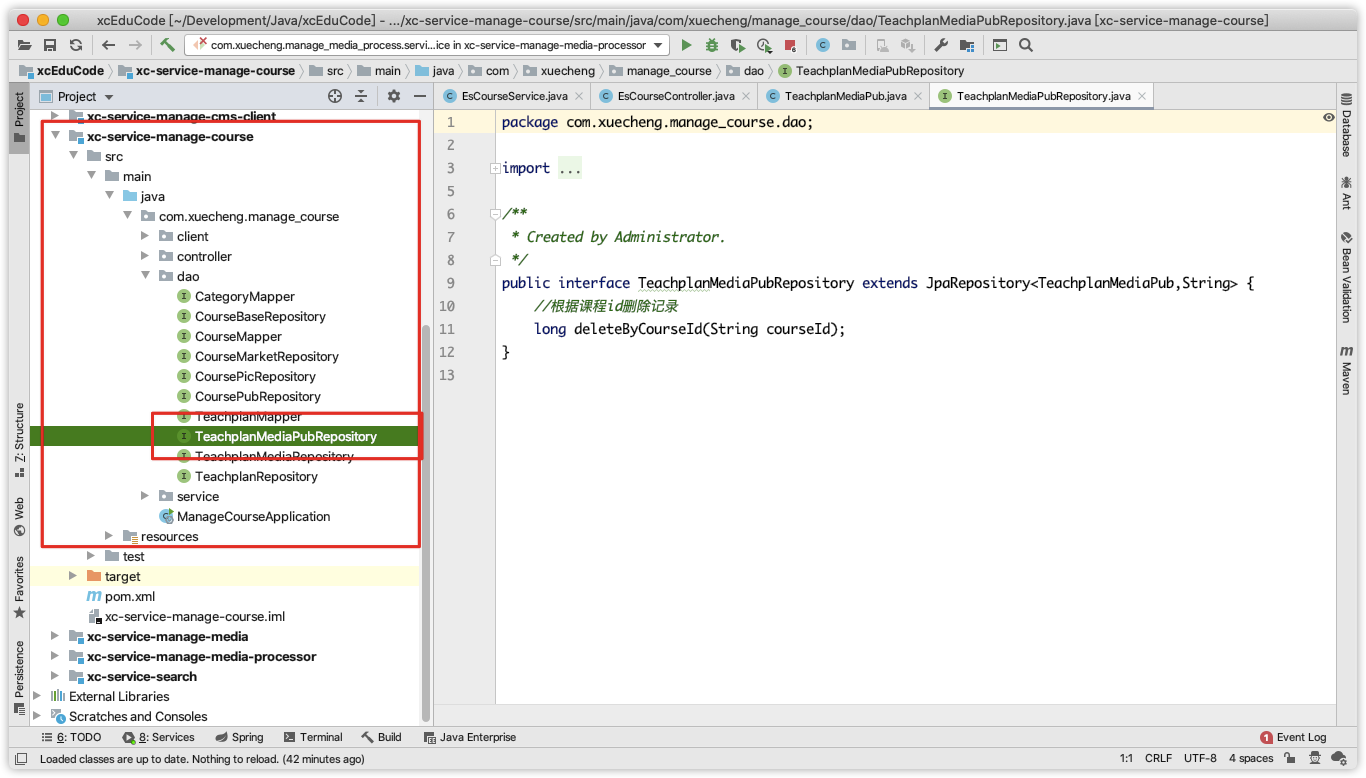
package com.xuecheng.manage_course.dao;

import com.xuecheng.framework.domain.course.TeachplanMediaPub;
import org.springframework.data.jpa.repository.JpaRepository;

/**
 * Created by Administrator.
 */
public interface TeachplanMediaPubRepository extends JpaRepository<TeachplanMediaPub,String> {
    //根据课程id删除记录
    long deleteByCourseId(String courseId);
}
package com.xuecheng.manage_course.dao;

import com.xuecheng.framework.domain.course.TeachplanMedia;
import org.springframework.data.jpa.repository.JpaRepository;

import java.util.List;

/**
 * @author HackerStar
 * @create 2020-08-31 11:34
 */
public interface TeachplanMediaRepository extends JpaRepository<TeachplanMedia, String> {
    List<TeachplanMedia> findByCourseId(String courseId);
}
2.2.3 Service
编写保存课程计划媒资信息方法,并在课程发布时调用此方法。
1、保存课程计划媒资信息方法
本方法采用先删除该课程的媒资信息,再添加该课程的媒资信息。
	  //保存课程计划媒资信息
    private void saveTeachplanMediaPub(String courseId) {
        //查询课程媒资信息
        List<TeachplanMedia> teachplanMediaList = teachplanMediaRepository.findByCourseId(courseId); //将课程计划媒资信息存储待索引表
        teachplanMediaPubRepository.deleteByCourseId(courseId);
        List<TeachplanMediaPub> teachplanMediaPubList = new ArrayList<>();
        for (TeachplanMedia teachplanMedia : teachplanMediaList) {
            TeachplanMediaPub teachplanMediaPub = new TeachplanMediaPub();
            BeanUtils.copyProperties(teachplanMedia, teachplanMediaPub);
            teachplanMediaPubList.add(teachplanMediaPub);
        }
        teachplanMediaPubRepository.saveAll(teachplanMediaPubList);
    }

2、课程发布时调用此方法
修改课程发布的service方法:
......
saveTeachplanMediaPub(id);
return new CoursePublishResult(CommonCode.SUCCESS,pageUrl);
......
3.2.4 测试
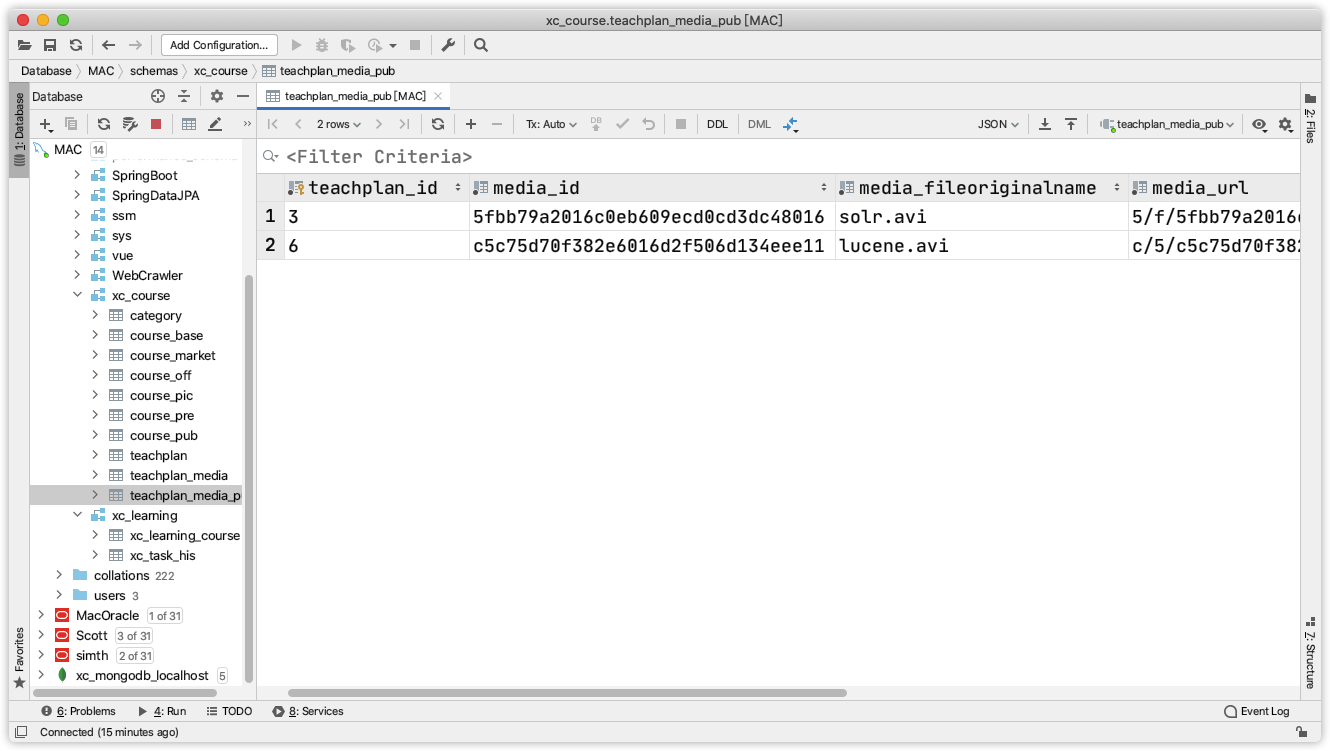
测试课程发布后是否成功将课程媒资信息存储到teachplan_media_pub中,测试流程如下:
1、指定一个课程
2、为课程计划添加课程媒资
3、执行课程发布
4、观察课程计划媒资信息是否存储至teachplan_media_pub中
注意:由于此测试仅用于测试发布课程计划媒资信息的功能,可暂时将cms页面发布的功能暂时屏蔽,提高测试效 率。
2.3 Logstash扫描课程计划媒资
Logstash定时扫描课程媒资信息表,并将课程媒资信息写入索引库。
2.3.1 创建索引
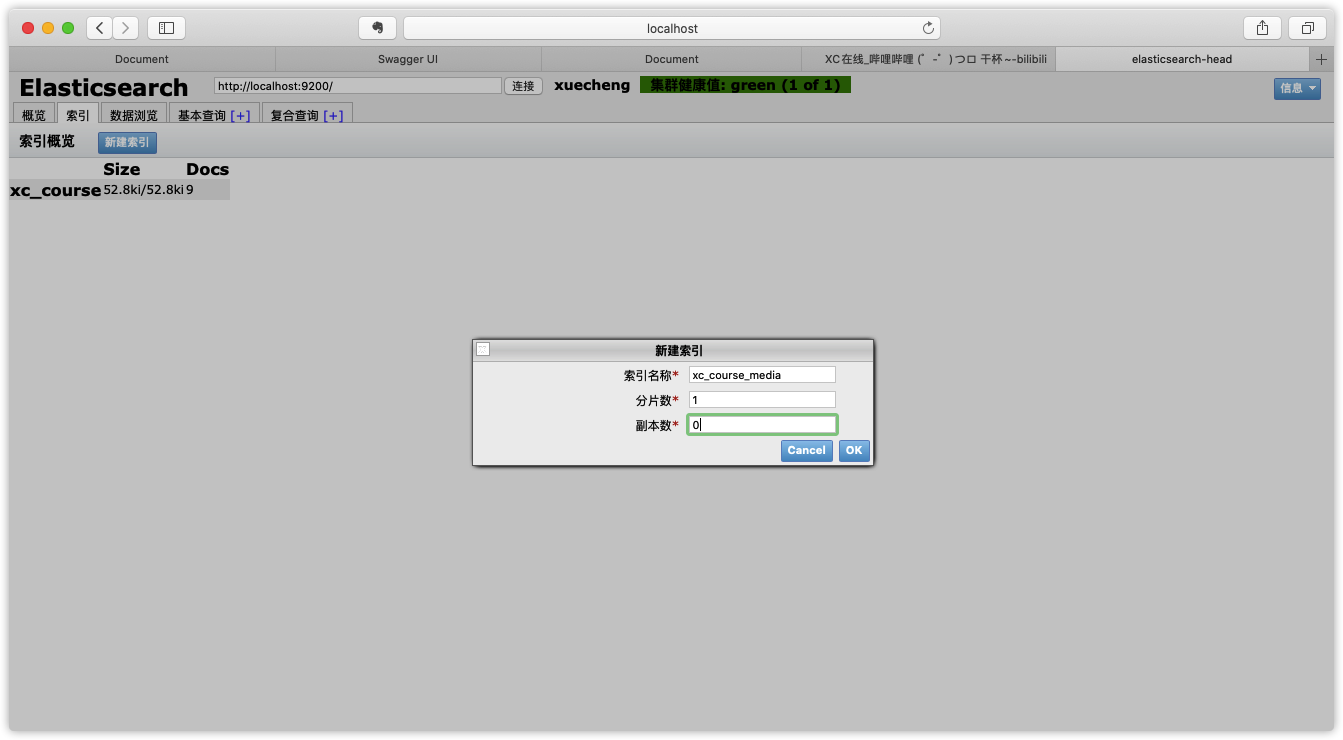
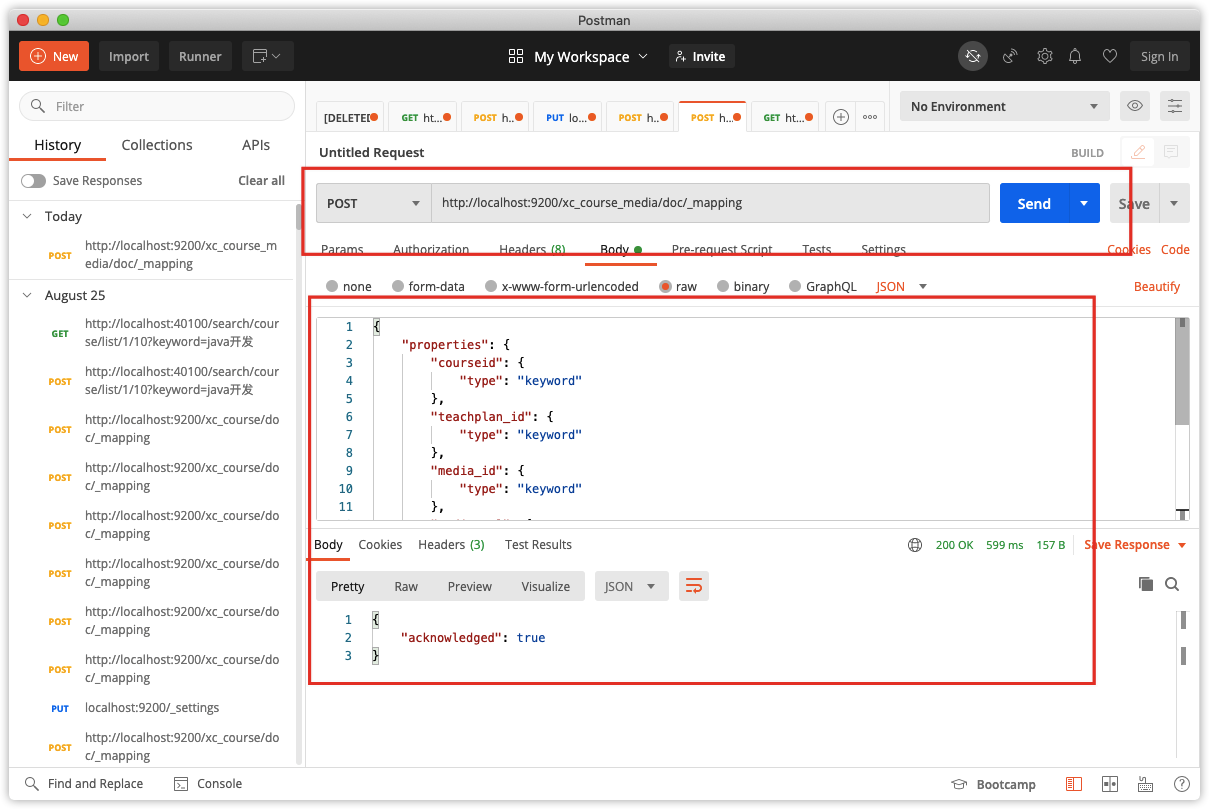
1、创建xc_course_media索引
2、并向此索引创建如下映射
POST http://localhost:9200/xc_course_media/doc/_mapping
{
    "properties": {
        "courseid": {
            "type": "keyword"
        },
        "teachplan_id": {
            "type": "keyword"
        },
        "media_id": {
            "type": "keyword"
        },
        "media_url": {
            "index": false,
            "type": "text"
        },
        "media_fileoriginalname": {
            "index": false,
            "type": "text"
        }
    }
}
2.3.2 创建Logstash模板文件
在logstach的config目录创建xc_course_media_template.json,内容如下:
{
    "properties": {
        "courseid": {
            "type": "keyword"
        },
        "teachplan_id": {
            "type": "keyword"
        },
        "media_id": {
            "type": "keyword"
        },
        "media_url": {
            "index": false,
            "type": "text"
        },
        "media_fileoriginalname": {
            "index": false,
            "type": "text"
        }
    }
}
2.3.3 配置mysql_course_media.conf
参考https://www.elastic.co/guide/en/logstash/current/plugins-inputs-jdbc.html
配置输入数据源和输出数据源。
input {
  stdin {
  }
  jdbc {
  jdbc_connection_string => "jdbc:mysql://localhost:3306/xc_course?useUnicode=true&characterEncoding=utf-8&useSSL=true&serverTimezone=UTC"
  # the user we wish to excute our statement as
  jdbc_user => "root"
  jdbc_password => "root"
  # the path to our downloaded jdbc driver
  jdbc_driver_library => "/Users/XinxingWang/Development/elasticsearchmac/logstash-6.2.1/vendor/mysql-connector-java-8.0.16.jar"
  # the name of the driver class for mysql
  jdbc_driver_class => "com.mysql.jdbc.Driver"
  jdbc_paging_enabled => "true"
  jdbc_page_size => "50000"
  #要执行的sql文件
  #statement_filepath => "/conf/course.sql"
  statement => "select * from teachplan_media_pub where timestamp > date_add(:sql_last_value,INTERVAL 8 HOUR)"
  #定时配置
  schedule => "* * * * *"
  record_last_run => true
  last_run_metadata_path => "/Users/XinxingWang/Development/elasticsearchmac/logstash-6.2.1/config/xc_course_media_metadata"
  }
}


output {
  elasticsearch {
  #ES的ip地址和端口
  hosts => "localhost:9200"
  #hosts => ["localhost:9200","localhost:9202","localhost:9203"]
  #ES索引库名称
  index => "xc_course_media"
  document_id => "%{teachplan_id}"
  document_type => "doc"
  template =>"/Users/XinxingWang/Development/elasticsearchmac/logstash-6.2.1/config/xc_course_media_template.json"
  template_name =>"xc_course_media"
  template_overwrite =>"true"
  }
  stdout {
 #日志输出
  codec => json_lines
  }
}
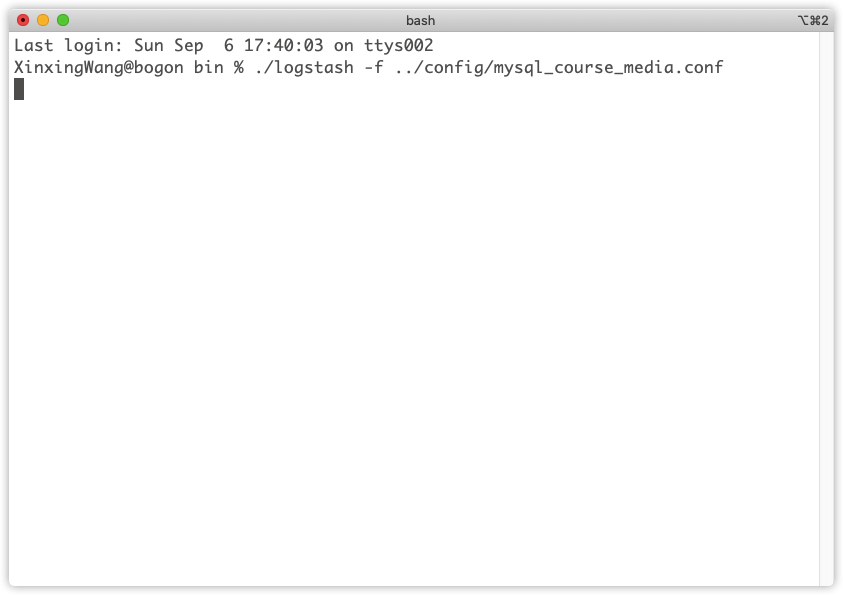
2.3.4 启动logstash
启动logstash采集teachplan_media_pub中的数据,向ES写入索引。
./logstash -f ../config/mysql_course_media.conf
2.4 搜索服务查询课程媒资接口
2.4.1 需求分析
搜索服务提供查询课程媒资接口,此接口供学习服务调用。
2.4.2 Api
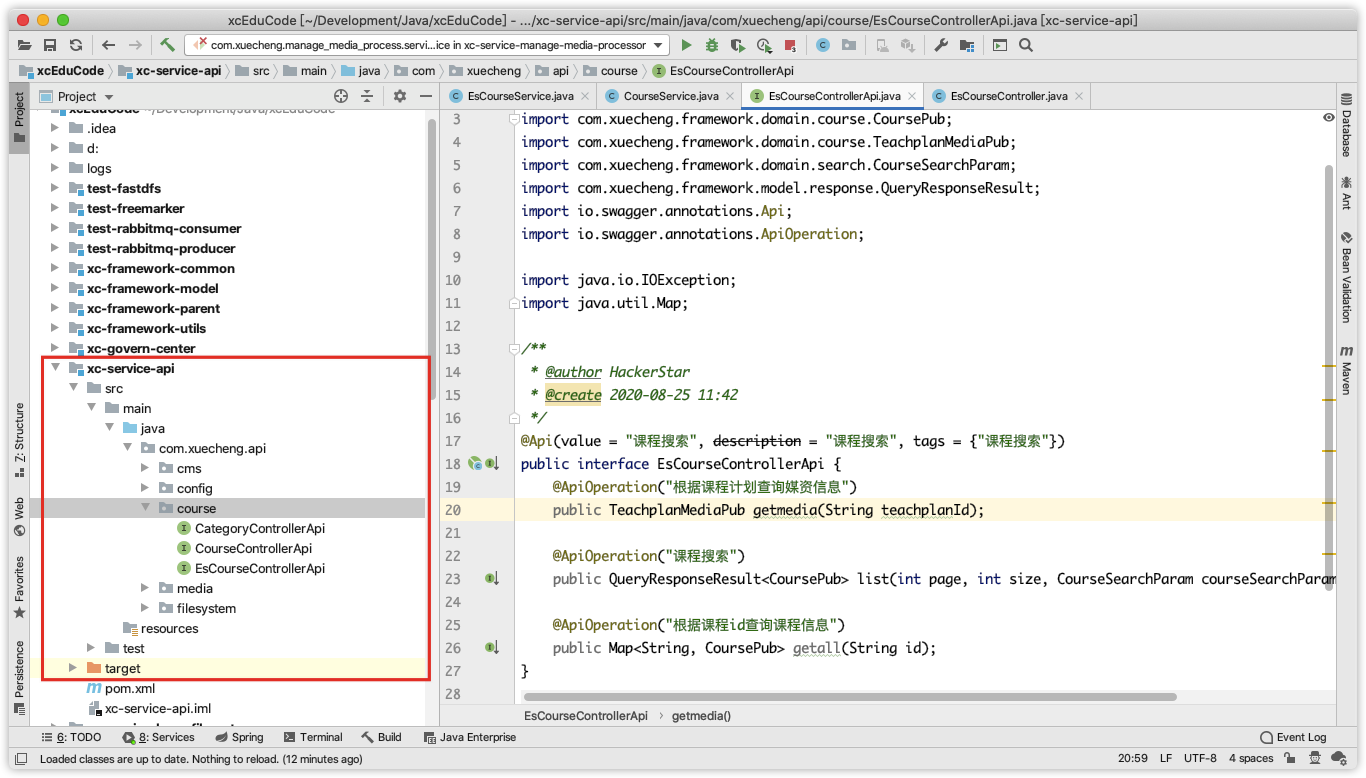
在课程搜索包下定义Api
@ApiOperation("根据课程计划查询媒资信息")
public TeachplanMediaPub getmedia(String teachplanId);
2.4.3 Service
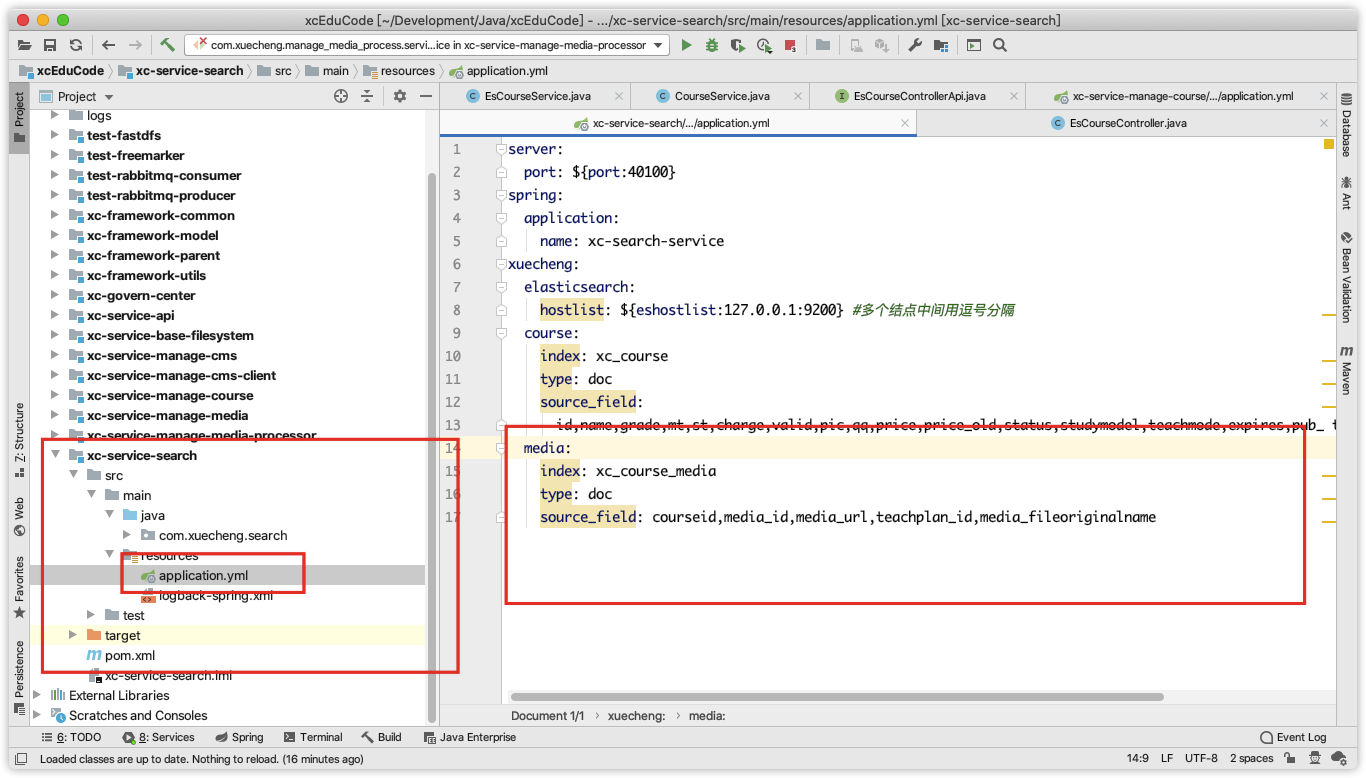
1、配置课程计划媒资索引库等信息
在application.yml中配置
xuecheng:
  elasticsearch:
    media:
      index: xc_course_media
      type: doc
      source_field: courseid,media_id,media_url,teachplan_id,media_fileoriginalname
2、service方法开发
在课程搜索服务中定义课程媒资查询接口,为了适应后续需求,service参数定义为数组,可一次查询多个课程计划的媒资信息。
		@Value("${xuecheng.media.index}")
    private String media_index;
    @Value("${xuecheng.media.type}")
    private String media_type;
    @Value("${xuecheng.media.source_field}")
    private String media_source_field;

		//根据多个课程计划查询课程媒资信息
    public QueryResponseResult<TeachplanMediaPub> getmedia(String[] teachplanIds) {
        //定义一个搜索请求对象
        SearchRequest searchRequest = new SearchRequest(media_index);
        //指定type
        searchRequest.types(media_type);

        //定义SearchSourceBuilder
        SearchSourceBuilder searchSourceBuilder = new SearchSourceBuilder();
        //设置使用termsQuery根据多个id 查询
        searchSourceBuilder.query(QueryBuilders.termsQuery("teachplan_id",teachplanIds));
        //过虑源字段
        String[] includes = media_source_field.split(",");
        searchSourceBuilder.fetchSource(includes,new String[]{});
        searchRequest.source(searchSourceBuilder);
        //使用es客户端进行搜索请求Es
        List<TeachplanMediaPub> teachplanMediaPubList = new ArrayList<>();
        long total = 0;
        try {
            //执行搜索
            SearchResponse search = restHighLevelClient.search(searchRequest);
            SearchHits hits = search.getHits();
            total = hits.totalHits;
            SearchHit[] searchHits = hits.getHits();
            for(SearchHit hit:searchHits){
                TeachplanMediaPub teachplanMediaPub= new TeachplanMediaPub();
                Map<String, Object> sourceAsMap = hit.getSourceAsMap();
                //取出课程计划媒资信息
                String courseid = (String) sourceAsMap.get("courseid");
                String media_id = (String) sourceAsMap.get("media_id");
                String media_url = (String) sourceAsMap.get("media_url");
                String teachplan_id = (String) sourceAsMap.get("teachplan_id");
                String media_fileoriginalname = (String) sourceAsMap.get("media_fileoriginalname");

                teachplanMediaPub.setCourseId(courseid);
                teachplanMediaPub.setMediaUrl(media_url);
                teachplanMediaPub.setMediaFileOriginalName(media_fileoriginalname);
                teachplanMediaPub.setMediaId(media_id);
                teachplanMediaPub.setTeachplanId(teachplan_id);
                teachplanMediaPubList.add(teachplanMediaPub);
            }

        } catch (IOException e) {
            e.printStackTrace();
        }
        //数据集合
        QueryResult<TeachplanMediaPub> queryResult = new QueryResult<>();
        queryResult.setList(teachplanMediaPubList);
        queryResult.setTotal(total);
        QueryResponseResult<TeachplanMediaPub> queryResponseResult = new QueryResponseResult<>(CommonCode.SUCCESS,queryResult);
        return queryResponseResult;
    }
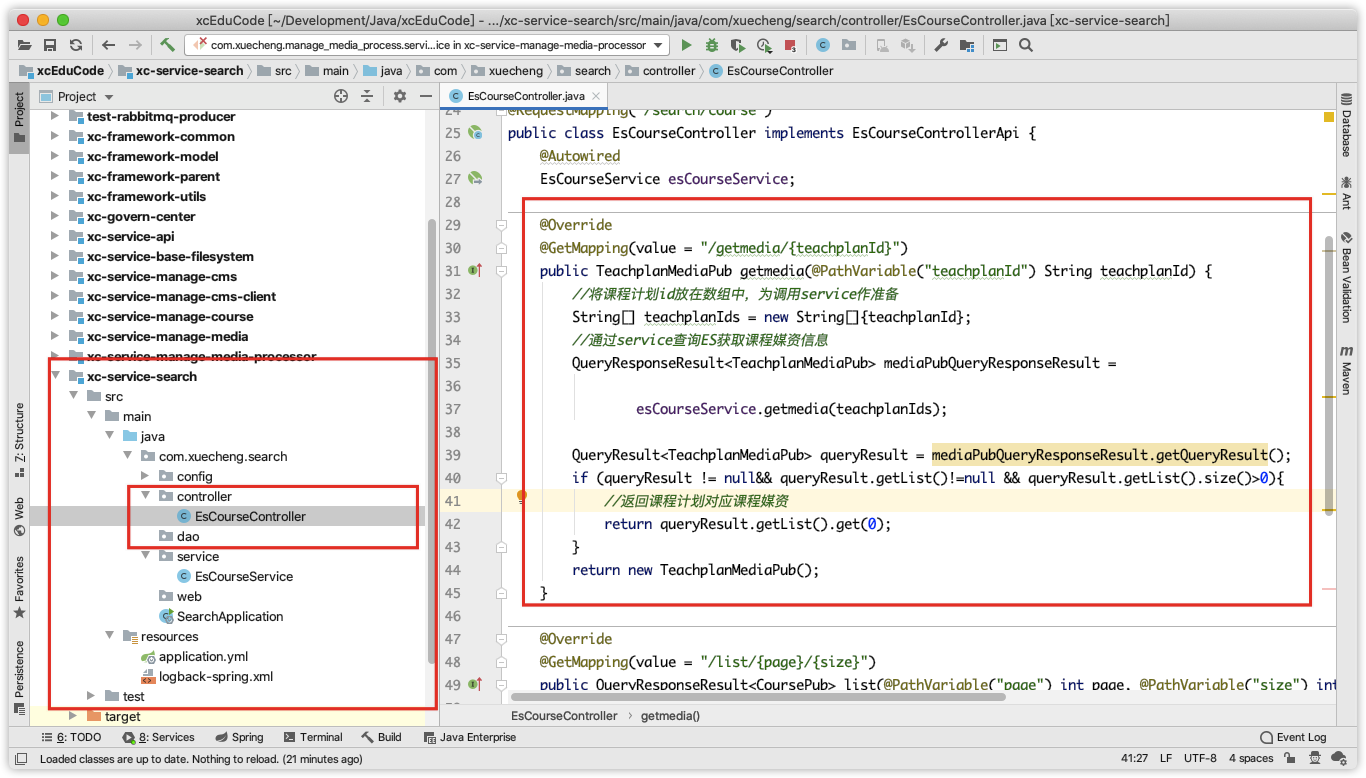
2.4.4 Controller
		@Override
    @GetMapping(value = "/getmedia/{teachplanId}")
    public TeachplanMediaPub getmedia(@PathVariable("teachplanId") String teachplanId) {
        //将课程计划id放在数组中,为调用service作准备
        String[] teachplanIds = new String[]{teachplanId};
        //通过service查询ES获取课程媒资信息
        QueryResponseResult<TeachplanMediaPub> mediaPubQueryResponseResult =

                esCourseService.getmedia(teachplanIds);

        QueryResult<TeachplanMediaPub> queryResult = mediaPubQueryResponseResult.getQueryResult();
        if (queryResult != null&& queryResult.getList()!=null && queryResult.getList().size()>0){
            //返回课程计划对应课程媒资
            return queryResult.getList().get(0);
        }
        return new TeachplanMediaPub();
    }
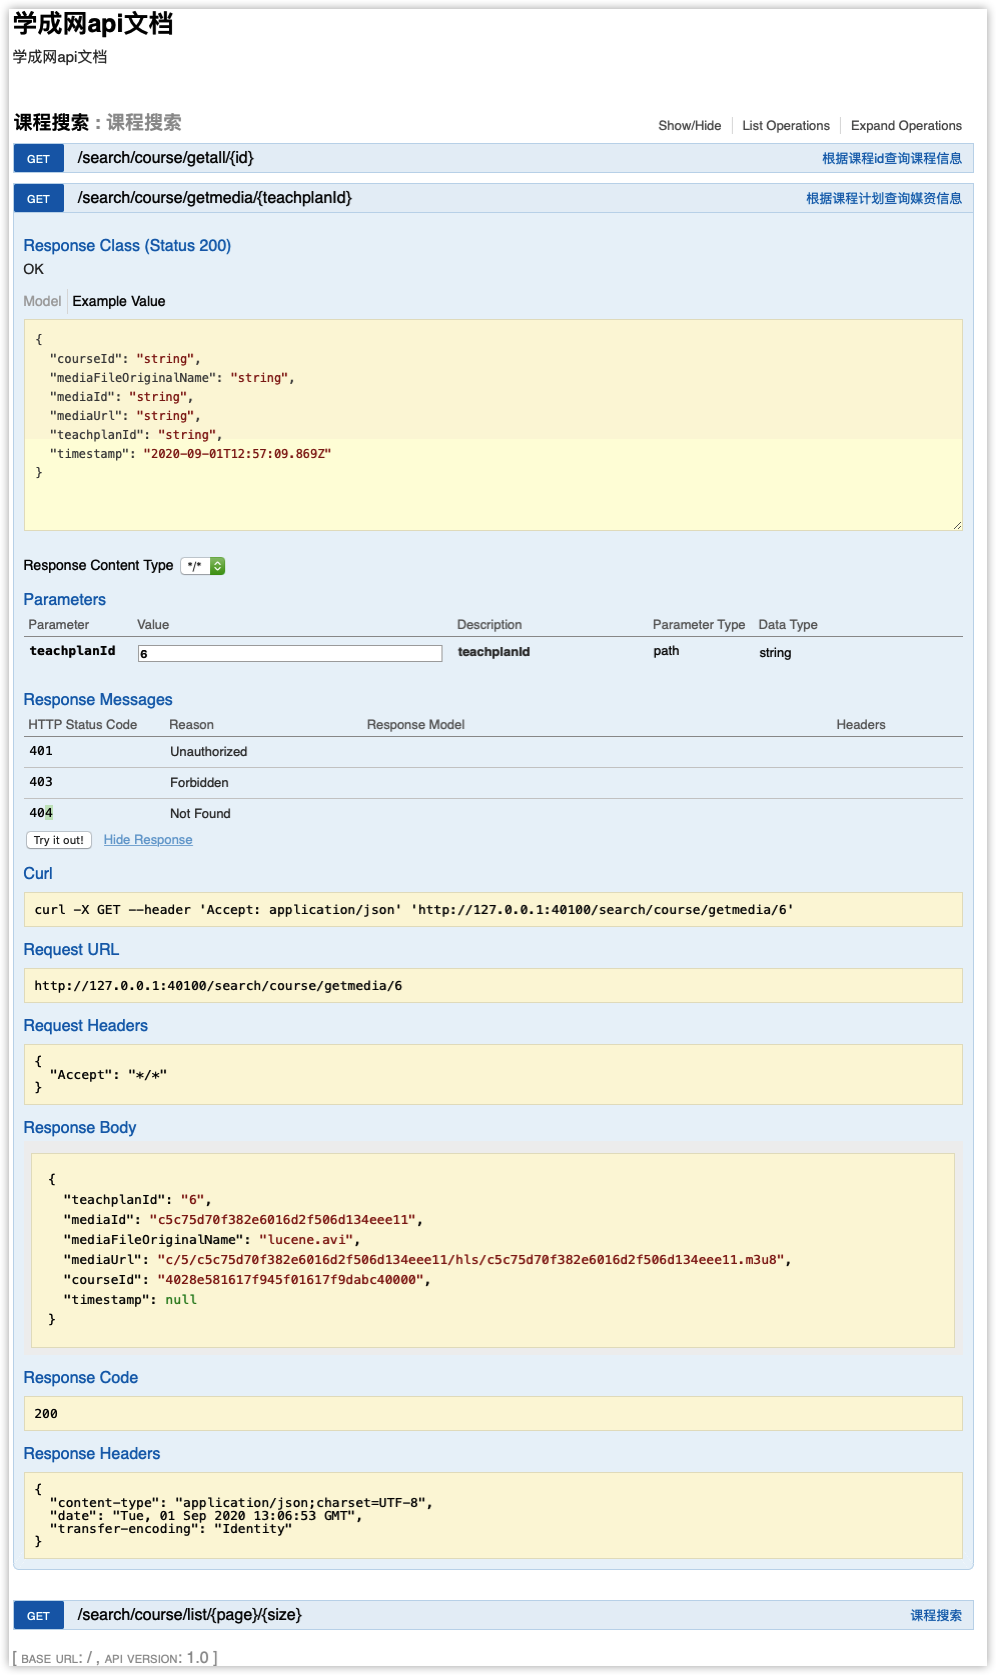
2.4.5 测试
使用swagger-ui和postman测试课程媒资查询接口。
3 在线学习接口
3.1 需求分析
根据下边的业务流程,本章节完成前端学习页面请求学习服务获取课程视频地址,并自动播放视频。

3.2 搭建开发环境
3.2.1 创建数据库
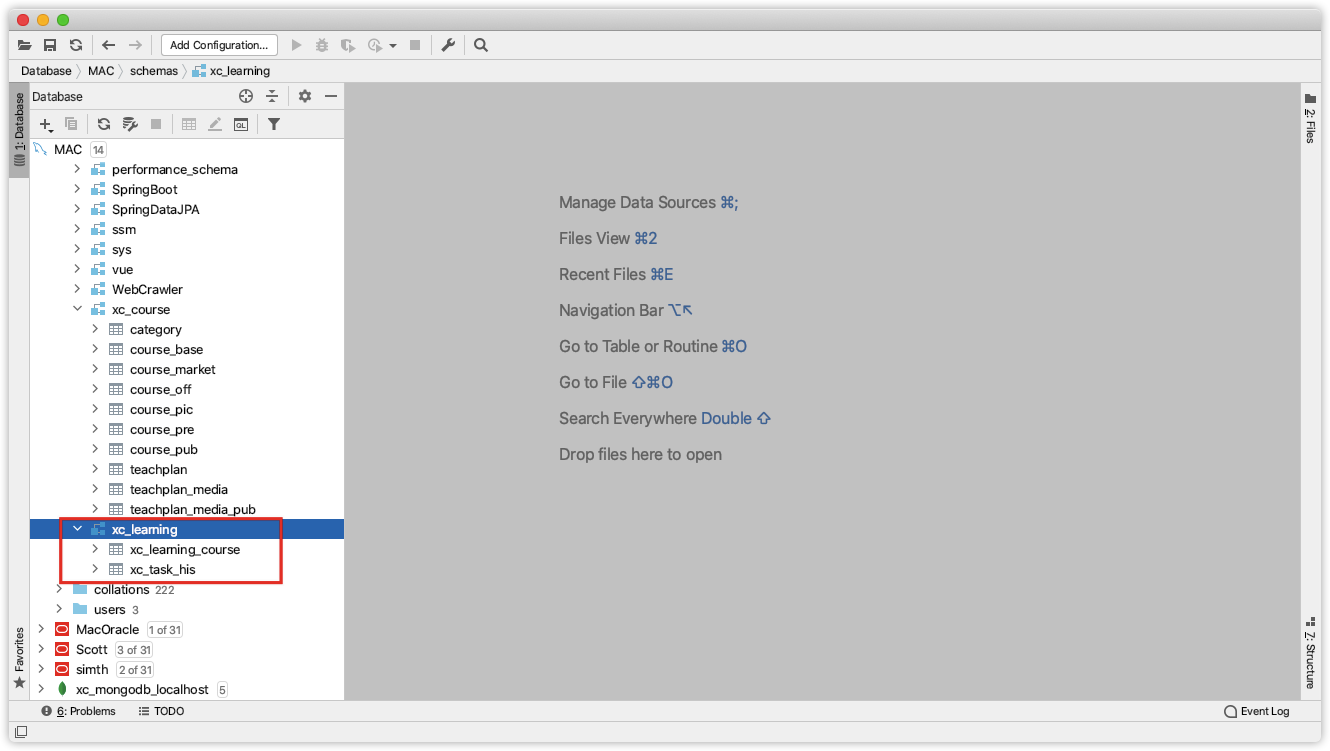
创建xc_learning数据库,学习数据库将记录学生的选课信息、学习信息。
导入:资料/xc_learning.sql
3.2.2 创建学习服务工程
参考课程管理服务工程结构,创建学习服务工程:

pom.xml
<?xml version="1.0" encoding="UTF-8"?>
<project xmlns="http://maven.apache.org/POM/4.0.0"
         xmlns:xsi="http://www.w3.org/2001/XMLSchema-instance"
         xsi:schemaLocation="http://maven.apache.org/POM/4.0.0 http://maven.apache.org/xsd/maven-4.0.0.xsd">
    <parent>
        <artifactId>xc-framework-parent</artifactId>
        <groupId>com.xuecheng</groupId>
        <version>1.0-SNAPSHOT</version>
        <relativePath>../xc-framework-parent/pom.xml</relativePath>
    </parent>
    <modelVersion>4.0.0</modelVersion>

    <artifactId>xc-service-search</artifactId>

    <dependencies>
        <dependency>
            <groupId>com.xuecheng</groupId>
            <artifactId>xc-framework-model</artifactId>
            <version>1.0-SNAPSHOT</version>
        </dependency>
        <dependency>
            <groupId>com.xuecheng</groupId>
            <artifactId>xc-framework-common</artifactId>
            <version>1.0-SNAPSHOT</version>
        </dependency>
        <dependency>
            <groupId>com.xuecheng</groupId>
            <artifactId>xc-service-api</artifactId>
            <version>1.0-SNAPSHOT</version>
        </dependency>
        <dependency>
            <groupId>org.springframework.boot</groupId>
            <artifactId>spring-boot-starter-web</artifactId>
        </dependency>
        <dependency>
            <groupId>org.elasticsearch.client</groupId>
            <artifactId>elasticsearch-rest-high-level-client</artifactId>
            <version>6.2.1</version>
        </dependency>
        <dependency>
            <groupId>org.elasticsearch</groupId>
            <artifactId>elasticsearch</artifactId>
            <version>6.2.1</version>
        </dependency>
        <dependency>
            <groupId>org.springframework.boot</groupId>
            <artifactId>spring-boot-starter-test</artifactId>
            <scope>test</scope>
        </dependency>
        <dependency>
            <groupId>com.alibaba</groupId>
            <artifactId>fastjson</artifactId>
        </dependency>
        <dependency>
            <groupId>org.apache.commons</groupId>
            <artifactId>commons-io</artifactId>
        </dependency>
        <dependency>
            <groupId>org.apache.commons</groupId>
            <artifactId>commons-lang3</artifactId>
        </dependency>
        <dependency>
            <groupId>com.github.andrewoma.dexx</groupId>
            <artifactId>dexx-collections</artifactId>
            <version>0.2</version>
            <scope>test</scope>
        </dependency>
    </dependencies>
</project>
server:
  port: ${PORT:40600}
spring:
  application:
    name: xc-service-learning
  datasource:
    druid:
      url: ${MYSQL_URL:jdbc:mysql://localhost:3306/xc_learning?characterEncoding=utf-8}
      username: root
      password: root
      driverClassName: com.mysql.jdbc.Driver
      initialSize: 5  #初始建立连接数量
      minIdle: 5  #最小连接数量
      maxActive: 20 #最大连接数量
      maxWait: 10000  #获取连接最大等待时间,毫秒
      testOnBorrow: true #申请连接时检测连接是否有效
      testOnReturn: false #归还连接时检测连接是否有效
      timeBetweenEvictionRunsMillis: 60000 #配置间隔检测连接是否有效的时间(单位是毫秒)
      minEvictableIdleTimeMillis: 300000  #连接在连接池的最小生存时间(毫秒)
#rabbitmq配置
  rabbitmq:
    host: 127.0.0.1
    port: 5672
    username: guest
    password: guest
    publisher-confirms: true
    virtual-host: /
eureka:
  client:
    registerWithEureka: true #服务注册开关
    fetchRegistry: true #服务发现开关
    serviceUrl: #Eureka客户端与Eureka服务端进行交互的地址,多个中间用逗号分隔
      defaultZone: ${EUREKA_SERVER:http://localhost:50101/eureka/,http://localhost:50102/eureka/}
  instance:
    prefer-ip-address:  true  #将自己的ip地址注册到Eureka服务中
    ip-address: ${IP_ADDRESS:127.0.0.1}
    instance-id: ${spring.application.name}:${server.port} #指定实例id
ribbon:
  MaxAutoRetries: 2 #最大重试次数,当Eureka中可以找到服务,但是服务连不上时将会重试,如果eureka中找不到服务则直接走断路器
  MaxAutoRetriesNextServer: 3 #切换实例的重试次数
  OkToRetryOnAllOperations: false  #对所有操作请求都进行重试,如果是get则可以,如果是post,put等操作没有实现幂等的情况下是很危险的,所以设置为false
  ConnectTimeout: 5000  #请求连接的超时时间
  ReadTimeout: 6000 #请求处理的超时时间
启动类:
package com.xuecheng.learning;

import org.springframework.boot.SpringApplication;
import org.springframework.boot.autoconfigure.SpringBootApplication;
import org.springframework.boot.autoconfigure.domain.EntityScan;
import org.springframework.cloud.client.discovery.EnableDiscoveryClient;
import org.springframework.cloud.client.loadbalancer.LoadBalanced;
import org.springframework.cloud.openfeign.EnableFeignClients;
import org.springframework.context.annotation.Bean;
import org.springframework.context.annotation.ComponentScan;
import org.springframework.http.client.OkHttp3ClientHttpRequestFactory;
import org.springframework.web.client.RestTemplate;

/**
 * @author Administrator
 * @version 1.0
 * @create 2018-07-14 11:11
 **/
@EnableFeignClients
@EnableDiscoveryClient
@SpringBootApplication
@EntityScan(value = {"com.xuecheng.framework.domain.learning","com.xuecheng.framework.domain.task"})//扫描实体类
@ComponentScan(basePackages={"com.xuecheng.api"})//扫描接口
@ComponentScan(basePackages={"com.xuecheng.learning"})//扫描接口
@ComponentScan(basePackages={"com.xuecheng.framework"})//扫描common下的所有类
public class LearningApplication {

    public static void main(String[] args) throws Exception {
        SpringApplication.run(LearningApplication.class, args);
    }

    @Bean
    @LoadBalanced
    public RestTemplate restTemplate() {
        return new RestTemplate(new OkHttp3ClientHttpRequestFactory());
    }

}
3.3 Api 接口
此api接口是课程学习页面请求学习服务获取课程学习地址。
定义返回值类型:
package com.xuecheng.framework.domain.learning.respones;
import com.xuecheng.framework.model.response.ResponseResult;
import com.xuecheng.framework.model.response.ResultCode;
import lombok.Data;
import lombok.NoArgsConstructor;
import lombok.ToString;
/**
* @author Administrator
* @version 1.0
**/
@Data
@ToString
@NoArgsConstructor
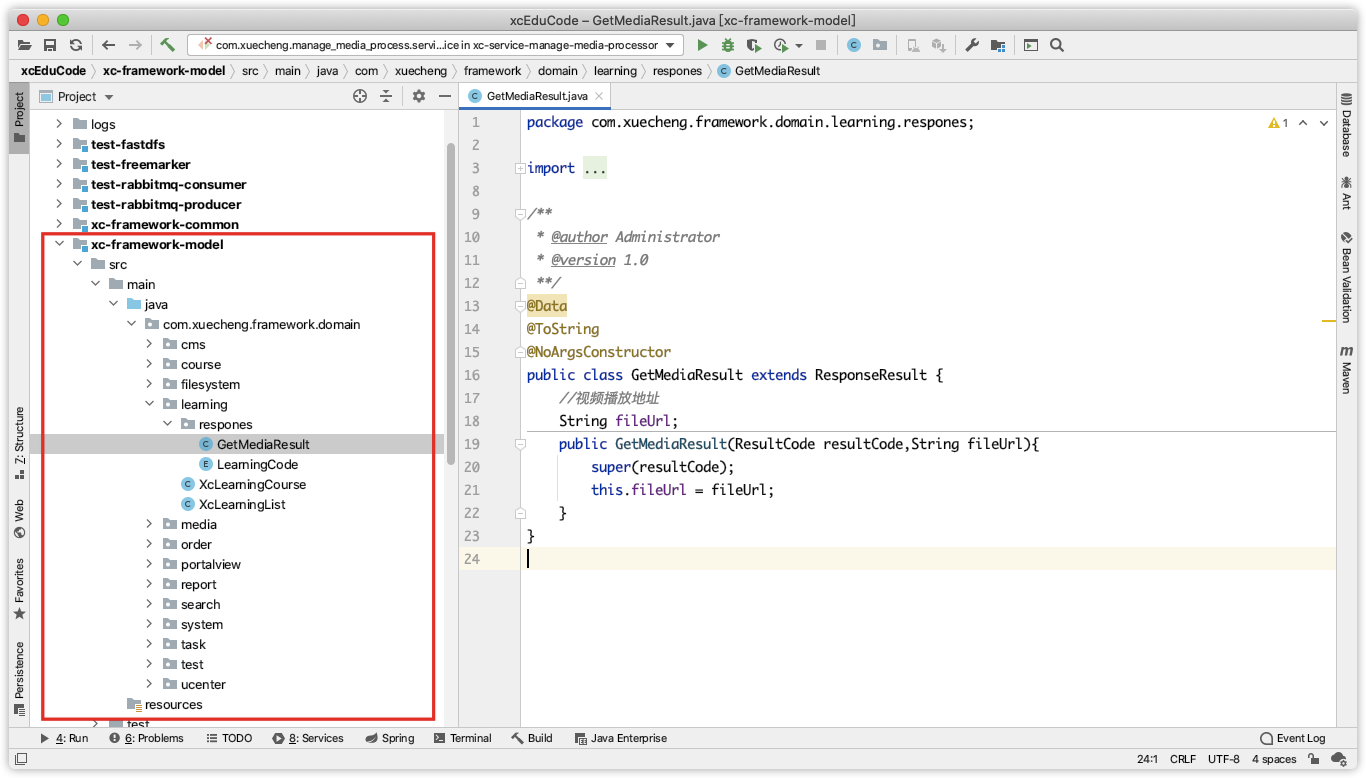
public class GetMediaResult extends ResponseResult {
//视频播放地址
String fileUrl;
public GetMediaResult(ResultCode resultCode,String fileUrl){
super(resultCode);
this.fileUrl = fileUrl;
}
}
定义接口,学习服务根据传入课程ID、章节Id(课程计划ID)来取学习地址。
package com.xuecheng.api.learning;

import com.xuecheng.framework.domain.learning.respones.GetMediaResult;
import io.swagger.annotations.Api;
import io.swagger.annotations.ApiOperation;

/**
 * Created by Administrator.
 */
@Api(value = "录播课程学习管理",description = "录播课程学习管理")
public interface CourseLearningControllerApi {

    @ApiOperation("获取课程学习地址")
    public GetMediaResult getmedia(String courseId,String teachplanId);
}

3.4 服务端开发
3.4.1 需求分析
学习服务根据传入课程ID、章节Id(课程计划ID)请求搜索服务获取学习地址。
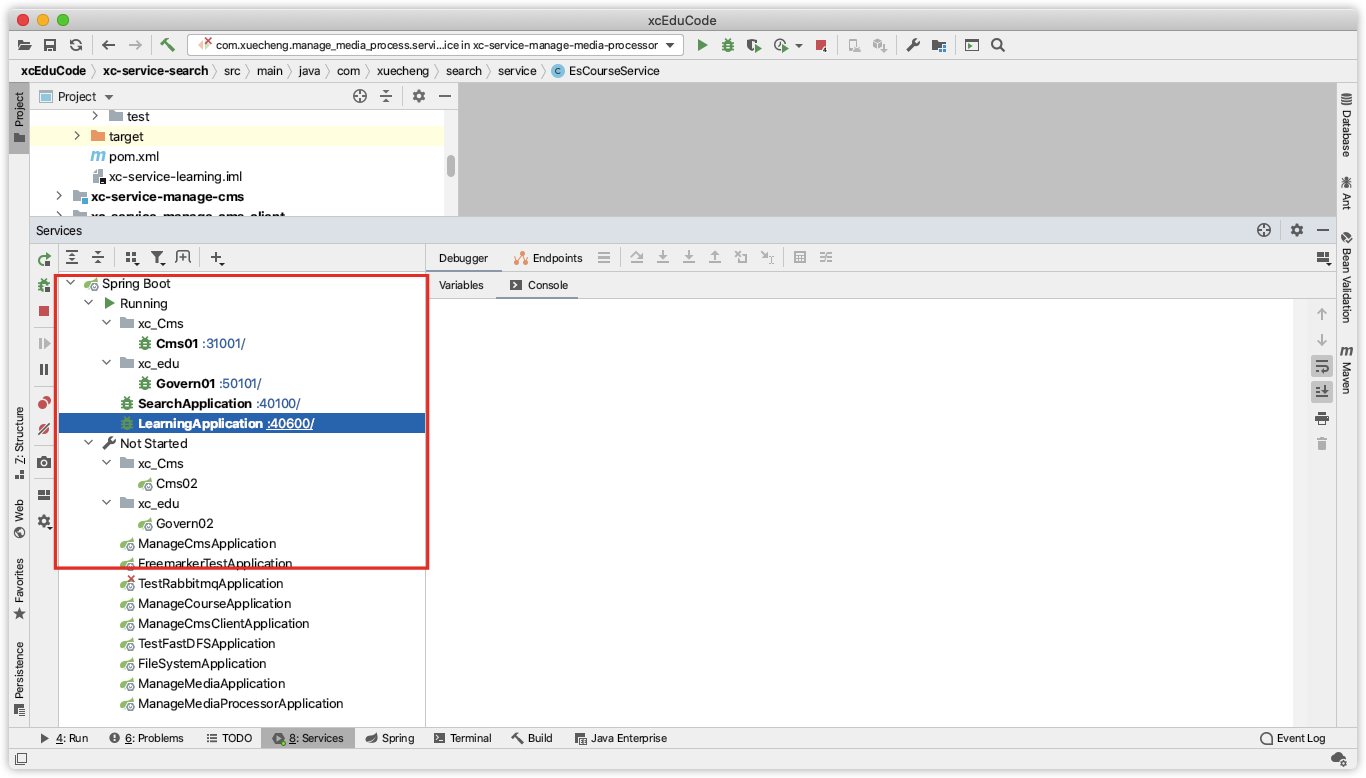
3.4.2 搜索服务注册Eureka
学习服务要调用搜索服务查询课程媒资信息,所以需要将搜索服务注册到eureka中。
1、查看服务名称是否为xc-service-search
注意修改application.xml中的服务名称:
spring:
	application:
		name: xc‐service‐search
2、配置搜索服务的配置文件application.yml,加入Eureka配置 如下:
eureka:
  client:
    registerWithEureka: true #服务注册开关
    fetchRegistry: true #服务发现开关
    serviceUrl: #Eureka客户端与Eureka服务端进行交互的地址,多个中间用逗号分隔
      defaultZone: ${EUREKA_SERVER:http://localhost:50101/eureka/}
  instance:
    prefer-ip-address:  true  #将自己的ip地址注册到Eureka服务中
    ip-address: ${IP_ADDRESS:127.0.0.1}
    instance-id: ${spring.application.name}:${server.port} #指定实例id
ribbon:
  MaxAutoRetries: 2 #最大重试次数,当Eureka中可以找到服务,但是服务连不上时将会重试,如果eureka中找不到服务则直接走断路器
  MaxAutoRetriesNextServer: 3 #切换实例的重试次数
  OkToRetryOnAllOperations: false  #对所有操作请求都进行重试,如果是get则可以,如果是post,put等操作没有实现幂等的情况下是很危险的,所以设置为false
  ConnectTimeout: 5000  #请求连接的超时时间
  ReadTimeout: 6000 #请求处理的超时时间
3、添加eureka依赖:
<dependency>
	<groupId>org.springframework.cloud</groupId>
	<artifactId>spring-cloud-starter-netflix-eureka-client</artifactId>
</dependency>
4、修改启动类,在class上添加如下注解:
@EnableDiscoveryClient
3.4.3 搜索服务客户端
在学习服务创建搜索服务的客户端接口,此接口会生成代理对象,调用搜索服务:
package com.xuecheng.learning.client;

import com.xuecheng.framework.client.XcServiceList;
import com.xuecheng.framework.domain.course.TeachplanMediaPub;
import org.springframework.cloud.openfeign.FeignClient;
import org.springframework.web.bind.annotation.GetMapping;
import org.springframework.web.bind.annotation.PathVariable;

/**
 * Created by Administrator.
 */
@FeignClient(value= XcServiceList.XC_SERVICE_SEARCH)
public interface CourseSearchClient {

    //根据课程计划id查询课程媒资
    @GetMapping("/search/course/getmedia/{teachplanId}")
    public TeachplanMediaPub getmedia(@PathVariable("teachplanId") String teachplanId);
}
3.4.4 Service
在学习服务中定义service方法,此方法远程请求课程管理服务、媒资管理服务获取课程学习地址。
package com.xuecheng.learning.service;

import com.xuecheng.framework.domain.course.TeachplanMediaPub;
import com.xuecheng.framework.domain.learning.respones.GetMediaResult;
import com.xuecheng.framework.domain.learning.respones.LearningCode;
import com.xuecheng.framework.exception.ExceptionCast;
import com.xuecheng.framework.model.response.CommonCode;
import com.xuecheng.learning.client.CourseSearchClient;
import org.apache.commons.lang3.StringUtils;
import org.springframework.beans.factory.annotation.Autowired;
import org.springframework.stereotype.Service;

/**
 * @author Administrator
 * @version 1.0
 **/
@Service
public class LearningService {

    @Autowired
    CourseSearchClient courseSearchClient;

    //获取课程学习地址(视频播放地址)
    public GetMediaResult getmedia(String courseId, String teachplanId) {
        //校验学生的学生权限...

        //远程调用搜索服务查询课程计划所对应的课程媒资信息
        TeachplanMediaPub teachplanMediaPub = courseSearchClient.getmedia(teachplanId);
        if(teachplanMediaPub == null || StringUtils.isEmpty(teachplanMediaPub.getMediaUrl())){
            //获取学习地址错误
            ExceptionCast.cast(LearningCode.LEARNING_GETMEDIA_ERROR);
        }
        return new GetMediaResult(CommonCode.SUCCESS,teachplanMediaPub.getMediaUrl());
    }
}

3.4.5 Controller
调用service根据课程计划id查询视频播放地址:
package com.xuecheng.learning.controller;

import com.xuecheng.api.learning.CourseLearningControllerApi;
import com.xuecheng.framework.domain.learning.respones.GetMediaResult;
import com.xuecheng.learning.service.LearningService;
import org.springframework.beans.factory.annotation.Autowired;
import org.springframework.web.bind.annotation.GetMapping;
import org.springframework.web.bind.annotation.PathVariable;
import org.springframework.web.bind.annotation.RequestMapping;
import org.springframework.web.bind.annotation.RestController;

/**
 * @author Administrator
 * @version 1.0
 **/
@RestController
@RequestMapping("/learning/course")
public class CourseLearningController implements CourseLearningControllerApi {

    @Autowired
    LearningService learningService;

    @Override
    @GetMapping("/getmedia/{courseId}/{teachplanId}")
    public GetMediaResult getmedia(@PathVariable("courseId") String courseId,
                                   @PathVariable("teachplanId")String teachplanId) {

        return learningService.getmedia(courseId,teachplanId);
    }
}
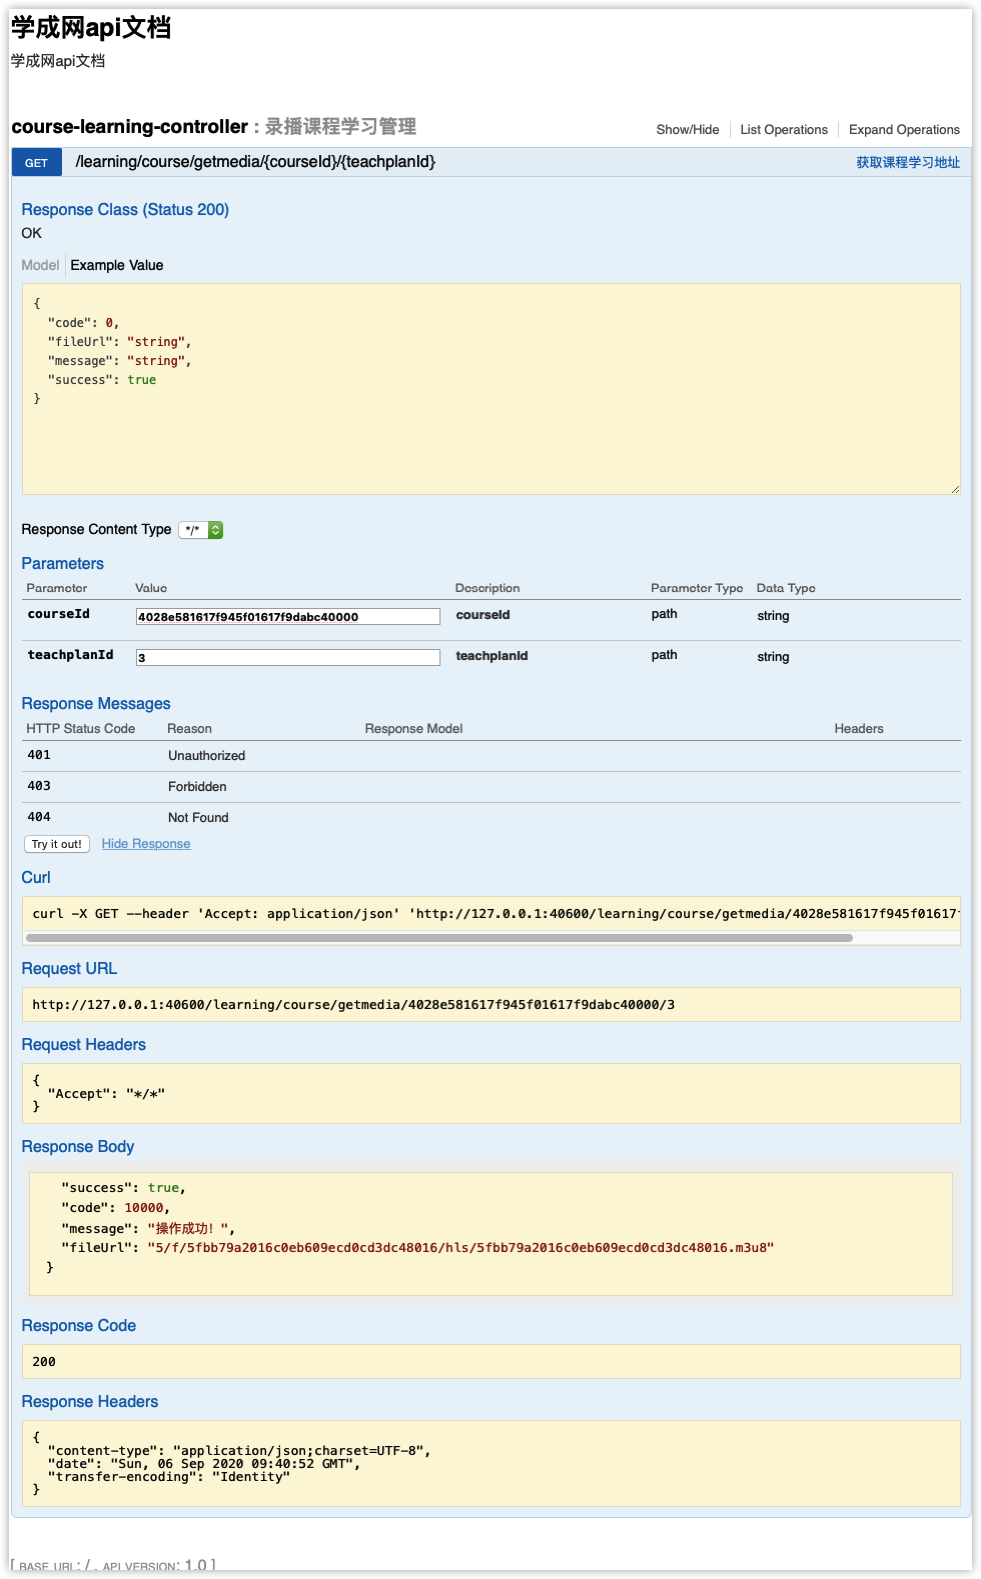
3.4.6 测试
使用swagger-ui或postman测试学习服务查询课程视频地址接口。

3.5 前端开发
3.5.1 需求分析
需要在学习中心前端页面需要完成如下功能:
1、进入课程学习页面需要带上课程Id参数及课程计划Id的参数,其中课程Id参数必带,课程计划Id可以为空。
2、进入页面根据课程Id取出该课程的课程计划显示在右侧。
3、进入页面后判断如果请求参数中有课程计划Id则播放该章节的视频。
4、进入页面后判断如果课程计划id为0则需要取出本课程第一个课程计划的Id,并播放第一个课程计划的视频。
3.5.2 api方法
let sysConfig = require('@/../config/sysConfig')
let apiUrl = sysConfig.xcApiUrlPre;
/*获取播放地址*/
export const get_media = (courseId,chapter) => {
	return http.requestGet(apiUrl+'/api/learning/course/getmedia/'+courseId+'/'+chapter);
}
3.5.3 配置代理
在Nginx中的ucenter.xuecheng.com虚拟主机中配置/api/learning/的路径转发,此url请转发到学习服务。
		#学习服务
    upstream learning_server_pool{
     server 127.0.0.1:40600 weight=10;
    }
    #学习服务
    location ^~ /api/learning/ {
     proxy_pass http://learning_server_pool/learning/;
    }
3.5.4 视频播放页面
1、如果传入的课程计划id为0则取出第一个课程计划id
在created钩子方法中完成
created() {
      //当前请求的url
      this.url = window.location
      //课程id
      this.courseId = this.$route.params.courseId
      //章节id
      this.chapter = this.$route.params.chapter
      //取出课程Id
      systemApi.course_view(this.courseId).then((view_course) => {
        if (!view_course || !view_course[this.courseId]) {
          this.$message.error("获取课程信息失败,请重新进入此页面!")
          return;
        }

        //根据课程id拿到课程信息
        let courseInfo = view_course[this.courseId];
        //取出teachplan的串
        let teachplanString = courseInfo.teachplan;
        //把串转成对象
        let teachplanObj = JSON.parse(teachplanString);

        //取到课程计划
        this.teachplanList = teachplanObj.children;
        console.log(this.teachplanList)
        //如果课程计划id不等于0,直接插入该课程计划对应的视频
        if(this.chapter != '0'){
          //获取该课程计划所对应的视频
          this.study(this.chapter)
        }else{
          //找到该课程的二级课程计划中的第一个课程计划id,取出该课程计划所对应的视频
          for(var i=0;i<this.teachplanList.length;i++){
            let firstTeachplan = this.teachplanList[i];
            if(firstTeachplan.children && firstTeachplan.children.length>0){
              //取出二级课程计划中第一个
              let secondTeachplan = firstTeachplan.children[0];
              //课程计划的id
              let teachplanId = secondTeachplan.id;
              //取出该课程计划所对应的视频
              // alert(teachplanId)
              this.study(teachplanId)
              return ;
            }
          }
        }

      })
    },
开始学习:
// 开始学习,获取课程计划所对应的视频地址
      study (chapter) {
          //get_media方法
        courseApi.get_media(this.courseId,chapter).then(res=>{
          if(res.success){
            //获取视频播放地址
            let fileUrl = res.fileUrl;//相对路径
            let videoUrl = sysConfig.videoUrl + fileUrl;//视频完整的播放路径
            //播放视频
            this.playvideo(videoUrl)
          }
        })

      },
2、点击右侧课程章节切换播放
在原有代码基础上添加click事件,点击调用开始学习方法(study)
<li   v-if="teachplan_first.children!=null" v-for="(teachplan_second, index) in teachplan_first.children"><i class="glyphicon glyphicon-check"></i>
                    <a :href="url" @click="study(teachplan_second.id)">
                      {{teachplan_second.pname}}
                    </a>
                  </li>
3.5.4 测试
访问在线学习页面:http://ucenter.xuecheng.com/#/learning/课程 id/课程计划id
通过url传入两个参数:课程id和课程计划id
如果没有课程计划则传入0
测试项目如下:
1、传入正确的课程id、课程计划id,自动播放本章节的视频
2、传入正确的课程id、课程计划id传入0,自动播放第一个视频
3、传入错误的课程id或课程计划id,提示错误信息
4、通过右侧章节目录切换章节及播放视频